Hybrid/Digital Scrapbooking : Brushes
One of the things I have loved since digital scrapbooking products began becoming available are brushes.
Brushes are essentially stamps.
I think of them like stamps when I am adding them to photos, cardstock (usually journaling bases stamps) or to digital layouts. Many digital brushes available online are also sold as stamps through scrapbook retailers for those of you not interested in venturing into the hybrid/digital arena.
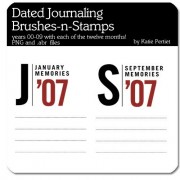
Date stamps have always been a favorite. Here are a couple I love designed by Katie Pertiet:
Dated Journaling Brushes-n-Stamps
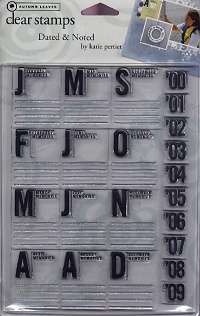
And here's the Autumn Leaves stamp version:
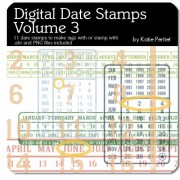
Digital Date Stamps Volume 3 - I think these were one of the first ones I purchased:
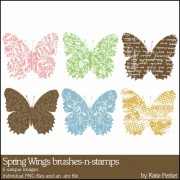
Brushes come in all shapes and sizes. There are lots of florals + natural stuff like these butterflies:
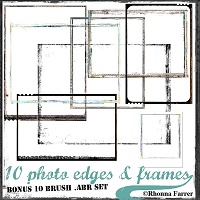
and cool photo edges + frames (place on your photo before printing):
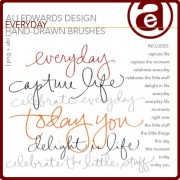
and handwritten brushes such as this Everyday set I designed:
One of the things you may notice is that I am more of a single item purchaser rather than looking for big kits. Digital kits come in all colors of the rainbows in more themes and styles than you could ever imagine. They come with a variety of elements all packaged together: papers, accents, embellishments, frames, etc. Since I am doing more hybrid projects rather than full digital layouts (more on those later this week) I find that picking up a couple things I am likely to use over and over again on my paper projects works just fine for me.
Just like so many other creative/crafty things, buying the products can become the "main" part of what you do with the hobby rather than actually creating anything. Before you go on a major buying spree think about the things you will really be using. For me I know that things related to date + time tend to be things I use more than something seasonally theme-based. Know yourself, but don't be afraid to go outside your comfort zone once in awhile too.
Working with Brushes:
Brushes are super easy to load and to use.
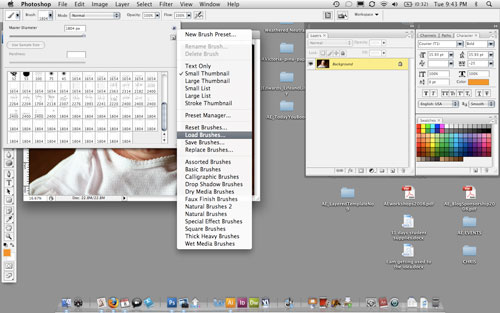
Download a set from a digital retailer. Brushes come bundled in a file with the extension .ABR (and many come with the .PNG files as well). The .ABR file is the one you want choose after you select Load Brushes:
If you want to always have access to those brushes when you open your brush palette then you will want to click "Save Brushes" before closing your project. Most of the time I just load them when I need them rather than having to scroll through way too many brush options (the ones that I use most often are saved in the brushes palette for easy access).
One of the key tips when working with brushes is to always create a new layer for each brush you use. Layers are your friend. Separating the layers allows you to make changes (I mess up all the time) without having to re-work the entire thing.
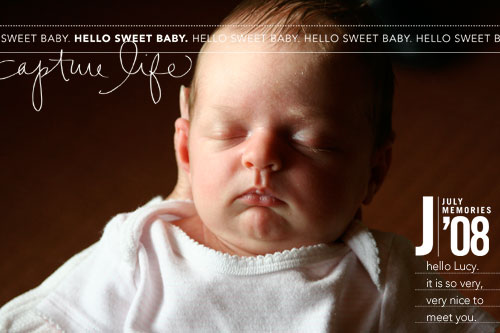
Here's that same photo of my new niece Lucy as you saw at the beginning of the post:
There are three digital elements on this photo: (1) capture life brush, (2) baby title + journal blocks (most of the brush is off the page, I ended up just using the bottom portion on this photo), and (3) and the dated journaling brushes-n-stamps.
Brushes can be any color you like. I tend to go with black or white or another color from my photo. To re-color a brush simply select the layer and go to Edit/Fill and then choose your color, select "preserve transparency" and hit ok.
To resize a brush I hit command T (this is on a mac...not sure what that "transform" shortcut is on a pc), select one of the corners and adjust it while holding down the shift key. Holding down the shift key is important to maintain the correct proportion of the brush (if you don't hold down the shift key things will look squished or spread out).
As you can tell from my samples over the last couple of days, words + photos are still my thing. Working with these digital elements, as well as simply adding text to a photo, are just another way for me to get our stories told.
For more information on hybrid and digital check out Getting Started With Digital Scrapbooking.




Can't thank you enough for sharing your knowledge and talents with us! I have just bought a new mac and the latest PE6...happy days now!
Thanks Ali
Diane in Australia
Sign in or sign up to comment.
I don't have Photoshop...can i still download the templates?
Sign in or sign up to comment.
Ali,
Love your ideas! So inspiring. I have purchased the 2 sets of photo overlays and am attempting my first photo. I am able to open the overlay in PSE. It is grey checkered as you indicated, however when I drag it over my photo, it turns opaque and I cannot see the photo underneath. I have tried everything I know to change it back to transparent, but no success. I am fairly new to PSE so my knowledge is limited. What am I doing wrong?
Sign in or sign up to comment.
I bought your Road Trip brushes for my first digital scrapbook and LOVED them. Thanks for the cool tips, tricks and tools!
Sign in or sign up to comment.
Hi Wendy - try it this way:
open your photo
open the overlay
select > all
edit > copy
and then go back to the photo
edit > paste
Sign in or sign up to comment.
I've had my Wacom tablet since December, and have barely touched it since. Thanks for the instructions, they are making hybrid/digital world a lot less daunting!
Sign in or sign up to comment.
That baby is so darn cute!!! I'm looking for something on your site and I keep passing her picture and I had to finally say something!
Sign in or sign up to comment.
Hey Ali!
Just wanted to let you know that I love your transparency overlays. I just used them to create a book journal and I love the results!
I can see myself using these often.
Thanks!
Sign in or sign up to comment.
This was very helpful.
Thank you! :)
Sign in or sign up to comment.