My 2008 Week in the Life Album: Album Creation Part Two

[ American Crafts Chestnut 8.5x11 D-Ring Corduroy Album; American Crafts Mumbo Jumbos Letter Stickers; vintage "E" ]
Super happy with how this week in the life project finally turned out, especially in the arena of keeping it simple. I ended up embellishing the patterned paper rectangles that fit into the baseball card page protectors and machine stitching on the second page of each day.
After placing all my photos into the page protectors I was able to take a look at how many rectangles needed embellishing. Go here for a look at what I had already done so far.
Here's a look at the second half of my creative process:

1. Gather up a bunch of things I think are pretty likely I will use for embellishing the patterned paper rectangles. Some of the things worked out and others I decided not to use. I really like having it all out on my table so I don't spend a ton of time looking for stuff to add.
2. Decide on how I want to embellish each group and then go for it.
Here's a look at each group and a close-up of an individual rectangle from within the album (and a quick how-to for each group):


[ Bazzill Swiss Dots Cardstock; Heidi Swapp Brown Felt Flowers; 7gypies Red Photo Turns; 7gypsies Fortunes Family Matters Rub Ons ]
HOW TO: Adhere felt flower with light adhesive. Run through sewing machine using red thread. Use a piercer to create a hole and attach the photo turn using a brad. Rub sentiment onto photo turn.


[ Basic Grey Elementary 12x12 Recess Paper; Creative Cafe Tickets; American Crafts Large Brads; Hero Arts Basic Uppercase Wood Mounted Stamps; American Crafts Precision Pen; Orange Staz On ]
HOW TO: Attach ticket with stapler. Press large brad through patterned paper and stamp on top using Staz On ink.


[ Creative Cafe Lucky Chocolate 12x12 Polka Dot Felt
; 7gypsies Keys; Maya Road Word Charms; Vintage Rulers from Random Arts; Papier Valise Bakers Twine (search for red + white twirling twine) ]
HOW TO: Adhere ruler to felt paper. Using the bakers twine, tie a knot and slip on the key and the charm. Tie another knot to hold the key and charm in place. Secure to back of felt paper with tape.

[ Hambly Brown on Kraft Brocade 12x12 Paper; Jenni Bowlin Studio Gold Felt Stars; Papier Valise Blue Border Labels; Ali Edwards Bits + Pieces for Technique Tuesday ]
HOW TO: Attach label. Stamp sentiment (use tape to mask beginning of sentiment). Lightly adhere felt star and machine stitch to complete.

[ Scenic Route Claudia Street 12x12 Sonoma Paper; Savvy Stamps Circle; Vintage Red Bingo Numbers (Papier Valise has some but I don't think you get the whole box so your numbers would not be guaranteed. Search her site for Red Bingo Markers under Misc. A google search will most likely located some as well.) ]
HOW TO: Each spread also includes an old bingo number that matches the date. Stamp on the patterned paper and slip into the pocket. The bingo number is adhered to the outside of the page protector.
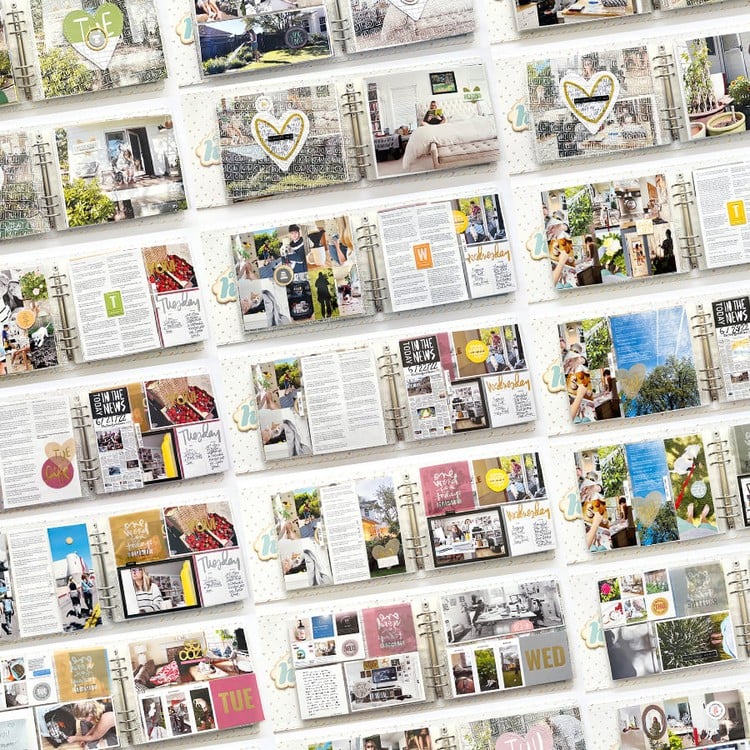
Here's a look at the entire album:

Monday (click the day-of-the-week link to read the journaling):


Machine stitching was added to the lines between photos on these photo pages (the right side).


Thursday also included one pocket that just holds a tea tag. I like the transparency of the rest of the pocket around the outside of the tag (held in place with a staple).


These Jenni Bowlin red mini bingo cards came in handy as they are just the right size for fitting into these pockets.


I included an additional page protector at the back to hold some newspapers and over-sized stuff from the week:

This was a project that I was excited to finish up and put on the shelf in the dining room. It is one that I will forget about for awhile and will pull it out in a few months and be so excited to look back at this specific time in our lives.
I want to send you a bunch of encouragement if you are anywhere in the process right now - from taking photos and documenting your days to figuring out how to pull it all together. You can do this. Keep at it, focus on what is most important to you, and get it done. Looking back you will be so happy that you took the time to create this very special look at your life and the lives of those you love.
I will definitely be doing this again next year (once a year is good enough for me).

A complete list of posts related to the week in the life project can be found here.


Ali! Your album came out great! I love how you used the bingo cards, and that you repeated the decorations on the embellished cards. I should have done that. I finished up my embellished cards this weekend, and by the end I was really reaching for ideas on what to do with the last few. And I was getting tired of it. I still have to finish up the back pages of each day. And then the front and back cover. I like the idea of just adding a pocket for the collected newspapers and stuff. I have the NY Post from the same day you do, with the same arrow down, and the same 777! Hopefully there will be a few arrows up in the newspaper this week!
Sign in or sign up to comment.
Love, love, love it! You've inspired me (as always) to get off my backside and get going on mine. Thanks so much for sharing. Do you use a full size sewing machine? Any special tips or tricks? I always seem to rip my paper. Thanks again!
Sign in or sign up to comment.
Still plugging away Ali. Pictures are now laid out in photoshop, need to upload the rest of the individual one. journalling is about 1/2 done and still need to find my album. Slow but sure. Thanks for your encouragement!!
Have a great monday
Sign in or sign up to comment.
Very cool. Thanks for sharing.
Sign in or sign up to comment.
I finished mine this weekend, too.
{vicki}
Sign in or sign up to comment.
You continue to amaze me!!! LOOOOVE your album! So cute to see the baby girl bump ;) Hope to pick up the new TT stamps. I want those before I start my album. Have a wonderful week!
Sign in or sign up to comment.
just so great, Ali! I love this project and can absolutely see the benefit of having this kind of life story. Thank you for sharing this.
Sign in or sign up to comment.
I have all my pics printed & organized. Now it's time to finish up the album. I tried this weekend, but between other projects, a 2 & 4 year old, painting a dresser & life in general ... didn't happen. Thanks for the inspiration, I will get er done!
Sign in or sign up to comment.
Thanks for sharing Ali, your album looks great. I am halfway through mine but I will finish it eventually!
I got your new book in the post today from the US, Amazon in the UK doesn't have it yet. I LOVE it. I know I will be spending tonight looking through it. Mini books is something I have not tried yet, but I am feeling inspired, thank you! Have a great day :)
Sign in or sign up to comment.
This is SIMPLY amazing ! thank you so much for the "how to make it" !!! You rock ! I hope you're fine ;-) Smooches from Belgium !
Sign in or sign up to comment.
So fabulous, Ali!
Thanks for the inspiration and the encouragement.
Due to a lack of time (imagine!) I've created an 'Everyday Life' book over at Shutterfly with my images from the week. Can't wait to have it printed and in our home to enjoy. Hope that's not cheating!!
Happy Monday!
A.
Sign in or sign up to comment.
beautiful!
Sign in or sign up to comment.
It looks wonderful! I love the simplicity of using the baseball card albums and the same type of inserts on each page. Love it.
Sign in or sign up to comment.
Once again, an amazing creation. Thanks for sharing. I love how you concentrate on the photos and the words.
Hugs.
Sign in or sign up to comment.
You album turned out fantastic, Ali! I got my album in the mail last week. I have most of my photos edited. I just have to decide on the embelishments and then I'm ready to put it all together! Thanks for sharing your creative process :)
Sign in or sign up to comment.
Wow! Your album is SO inspirational! And you've even got me excited about making pumpkin muffins! I'm English & we don't really eat pumpkins here like you do in America so I'm venturing into a new thing! My 3 boys are very excited that we are going to buy a pumpkin for the first time & make muffins with it!
Anyway, thanks for the inspiration! Emily :D
Sign in or sign up to comment.
so inspiring! THANK YOU FOR SHARING ALI!
Sign in or sign up to comment.
I am soooo excited!! I started my project yesterday after church. LOVE it so far. Just so much fun!! I'm doing 2-12x12 pages. Using kraft cardstock for my base then the new All Fall Line from Fancy pants for the pop of color and quotes. Also embellishing with tiny words, date stamps and buttons. I've decided I love this so much I'm gonna do them at least three times a year. Already planning a week in the life around the holidays!!
Ali, without your inspiration I never would have done this. Thanks so much!!
Love yours by the way!:)
Les
Sign in or sign up to comment.
2-12x12 sheets per day!! I forgot to mention that in the post above AND doing 2-12x12 pages at the end of the album for the leftover pics!!
Les
Sign in or sign up to comment.
This was a great project and one that I'm so happy I participated in. I did this last year and I love looking back over these to see how things change. What a great way to document the passage of time... in the changes in our routine and our days, whether large or small. I am going to post the digital pages to my blog tomorrow but I've run into a snag at my usual printers so I will let you know when I have everything assembled and will post that when I can. Costco's new site is not playing nice with my Mac so I'm having problems uploading my photos. I should just print these at home this week on my Epson. Okay... I'll add this to my evening list of things to do. LOL!
I love your little belly bump that you can see if one of your day's main photos. It's so adorable!! I hope you are feeling well as all of these changes are going on within you!
Sign in or sign up to comment.
It turned out AWESOME!! Thanks!
Sign in or sign up to comment.
Hey sugar!
I didn't participate this time, but did want to say that the one I do have is such a treasure and one of the albums that we look at the most. I think my son will really enjoy looking at it someday.
Simon in getting so grown up and handsome!
Love to you!!
Lisa
XXX
Sign in or sign up to comment.
Thanks for the inspiration. I have all 7 of my 12x12 digi intro "Story of Today" pages on the way from the printer, and for smaller daily pic pages, I'm done through Tuesday. Slowly but surely, but this time I am enjoying the process and using the stuff I love (including numerous variations of your 4x6 overlays all in black printed on transparencies and slipping over pics in the Antholgoie album---so easy and looks gorgeous! LOVE those 4x6 overlays!!!!) So fun! Thank you for sharing!!
(Love TT Bits&Pieces and sure do want it soon! Keep it up!)
Sign in or sign up to comment.
It looks fabulous!!! The baseball card pages are such a great idea...love it :)
Sign in or sign up to comment.
It looks awesome!! Thanks for the encouragement.......from one of the WITL stragglers! :)
Sign in or sign up to comment.