My 2008 Week in the Life Album: Album Creation Part Two

[ American Crafts Chestnut 8.5x11 D-Ring Corduroy Album; American Crafts Mumbo Jumbos Letter Stickers; vintage "E" ]
Super happy with how this week in the life project finally turned out, especially in the arena of keeping it simple. I ended up embellishing the patterned paper rectangles that fit into the baseball card page protectors and machine stitching on the second page of each day.
After placing all my photos into the page protectors I was able to take a look at how many rectangles needed embellishing. Go here for a look at what I had already done so far.
Here's a look at the second half of my creative process:

1. Gather up a bunch of things I think are pretty likely I will use for embellishing the patterned paper rectangles. Some of the things worked out and others I decided not to use. I really like having it all out on my table so I don't spend a ton of time looking for stuff to add.
2. Decide on how I want to embellish each group and then go for it.
Here's a look at each group and a close-up of an individual rectangle from within the album (and a quick how-to for each group):


[ Bazzill Swiss Dots Cardstock; Heidi Swapp Brown Felt Flowers; 7gypies Red Photo Turns; 7gypsies Fortunes Family Matters Rub Ons ]
HOW TO: Adhere felt flower with light adhesive. Run through sewing machine using red thread. Use a piercer to create a hole and attach the photo turn using a brad. Rub sentiment onto photo turn.


[ Basic Grey Elementary 12x12 Recess Paper; Creative Cafe Tickets; American Crafts Large Brads; Hero Arts Basic Uppercase Wood Mounted Stamps; American Crafts Precision Pen; Orange Staz On ]
HOW TO: Attach ticket with stapler. Press large brad through patterned paper and stamp on top using Staz On ink.


[ Creative Cafe Lucky Chocolate 12x12 Polka Dot Felt
; 7gypsies Keys; Maya Road Word Charms; Vintage Rulers from Random Arts; Papier Valise Bakers Twine (search for red + white twirling twine) ]
HOW TO: Adhere ruler to felt paper. Using the bakers twine, tie a knot and slip on the key and the charm. Tie another knot to hold the key and charm in place. Secure to back of felt paper with tape.

[ Hambly Brown on Kraft Brocade 12x12 Paper; Jenni Bowlin Studio Gold Felt Stars; Papier Valise Blue Border Labels; Ali Edwards Bits + Pieces for Technique Tuesday ]
HOW TO: Attach label. Stamp sentiment (use tape to mask beginning of sentiment). Lightly adhere felt star and machine stitch to complete.

[ Scenic Route Claudia Street 12x12 Sonoma Paper; Savvy Stamps Circle; Vintage Red Bingo Numbers (Papier Valise has some but I don't think you get the whole box so your numbers would not be guaranteed. Search her site for Red Bingo Markers under Misc. A google search will most likely located some as well.) ]
HOW TO: Each spread also includes an old bingo number that matches the date. Stamp on the patterned paper and slip into the pocket. The bingo number is adhered to the outside of the page protector.
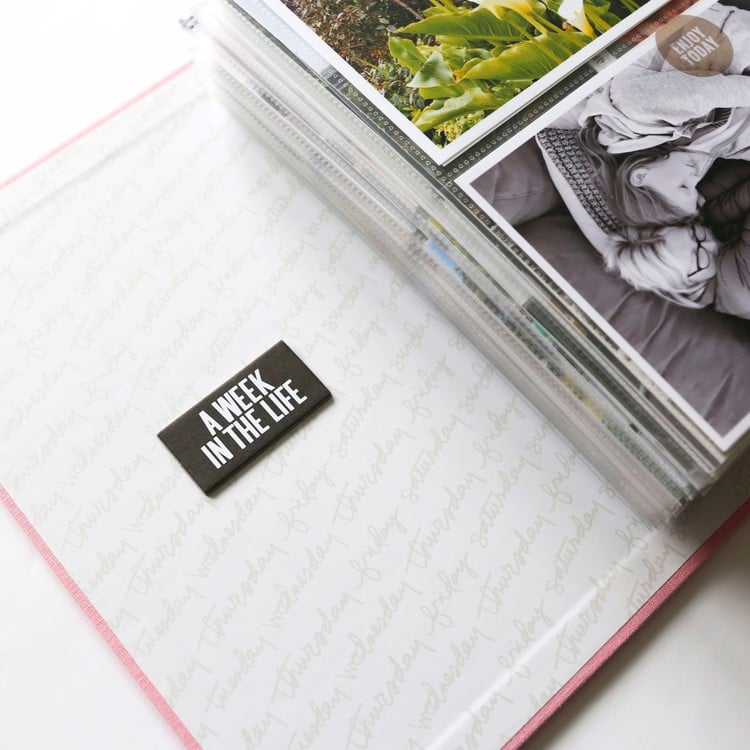
Here's a look at the entire album:

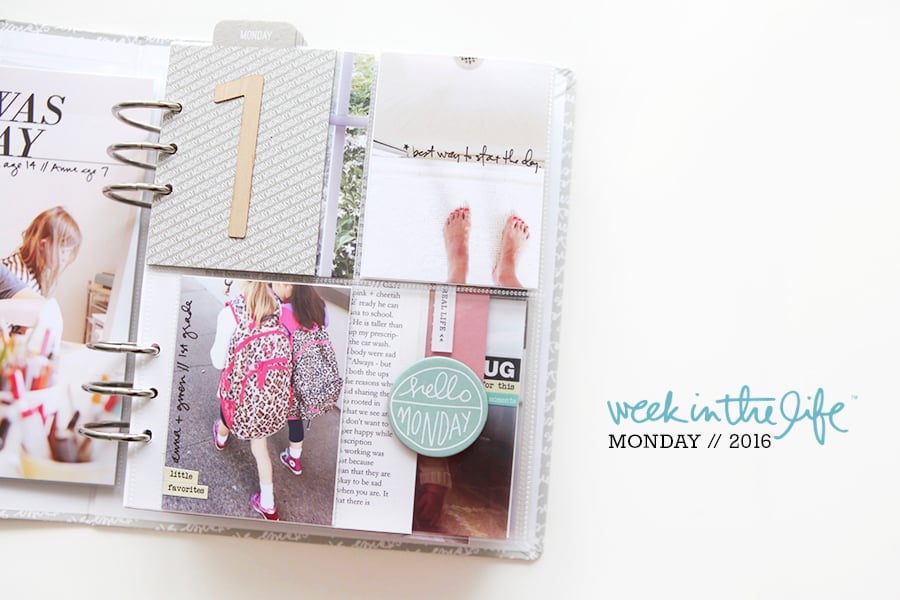
Monday (click the day-of-the-week link to read the journaling):


Machine stitching was added to the lines between photos on these photo pages (the right side).


Thursday also included one pocket that just holds a tea tag. I like the transparency of the rest of the pocket around the outside of the tag (held in place with a staple).


These Jenni Bowlin red mini bingo cards came in handy as they are just the right size for fitting into these pockets.


I included an additional page protector at the back to hold some newspapers and over-sized stuff from the week:

This was a project that I was excited to finish up and put on the shelf in the dining room. It is one that I will forget about for awhile and will pull it out in a few months and be so excited to look back at this specific time in our lives.
I want to send you a bunch of encouragement if you are anywhere in the process right now - from taking photos and documenting your days to figuring out how to pull it all together. You can do this. Keep at it, focus on what is most important to you, and get it done. Looking back you will be so happy that you took the time to create this very special look at your life and the lives of those you love.
I will definitely be doing this again next year (once a year is good enough for me).

A complete list of posts related to the week in the life project can be found here.


What an amazing album!
Sign in or sign up to comment.
Your belly is sooo cute!!!
Sign in or sign up to comment.
Wow!
I do need to get these photos off my computer...and into an album.
So happy for you, to have captured this time, as your family will soon change so much so quickly, it will be hard to imagine these days before the baby. Well done!
Sign in or sign up to comment.
hi ali! wow, your album is just SO inspiring and so darn impressive. my very favorite part is at the top of the pages where the newspaper peeks through and reads "don't forget about". its almost like a gentle reminder as you turn the pages whispering "all the details are here, don't forget about them". great job once again, you should be so proud of this album! -tara
Sign in or sign up to comment.
No surprise that your album looks amazing! :) I think I need a little encouragement getting close to the end. I have created each day's spread digitally in PE and am pretty happy with it, considering my photo-taking peetered off by the last day. I'm getting hung up on transferring my journaling (no surprise there) and keep going back and tweaking it, trying to add more where I was lean (if I can remember). I definitely think that I will do this again next year as I already know what I would do differently, etc. Question for you: did you have a minimum number of photos that you hoped to capture each day? I applied the same "formula" approach for consistency and was disappointed that day 1 had so many more photos than day 7 so I compromised and only added x number per day. Next year I think I will try to make a 'loose' plan first so that I will have enough photos to do something really nice...and also try to decide the level of detail for my journaling....all in all, good stuff! I just bought those same tickets on Saturday...they are cute! :)
Sign in or sign up to comment.
Consistently, without fail, you make me so very happy. I get joy out of watching you create. I'm so glad you share your gift with everyone. I think the world of you. Hope you're feeling well!!!
Sign in or sign up to comment.
man, as always your final creation looks incredible. i love the details that you added to it. and thanks for the push to finish this project up - i'm actually still waiting for photos/prints to arrive so i can get going!!! :)
Sign in or sign up to comment.
Super cute, Ali. Love this!
Sign in or sign up to comment.
Cannot thank you enough for sharing your amazing talents! I head of for a week holiday with my family in a few days and know exactly how i will be documenting it!
Again ... Thank you!
Sign in or sign up to comment.
Thanks for the inspiration, Ali! I love your album, & I definitely want to make one of my own some time:)
Sign in or sign up to comment.
Thanks of all the inspiration. I'm just now taking my week of photos. I was not convinced I wanted to do it and then it was just too many irregular weeks in a row. (Which is life I guess, but I really wanted to capture the ordinary week.)
Here's hoping I don't loose my momentum.
Your album is really cool, simple and wonderful!! I'm really going to push myself to keep it simple.
Sign in or sign up to comment.
Awesome! It was fun, such a great project!
Sign in or sign up to comment.
You truly inspire me. I am still in the process but I will get there...thanks Ali!!
Sign in or sign up to comment.
Ugh - I'm so dissapointed...I like ur book WAY more than mine - no surprise there...and then I totally forgot/neglected to take pictures on Sunday - the last day of the week...so frustrating.
Sign in or sign up to comment.
I'm loving your book.
Sign in or sign up to comment.
ali, this is FANTASTIC! thanks for all that you do and all that you did to help inspire me. hugs, rachel
Sign in or sign up to comment.
Ali,
I love your album. I'm still working on mine. I was trying to do each page as a template digitally, so I could easily create each day and be able to do the project again in a year or whenever. However, my digital skills are very beginner and I got frustrated with myself. I will get back to it, but maybe it won't be a digital template that I can reuse.
Sign in or sign up to comment.
Oh, boy. Your album is simply wonderful. Thank you for the inspiration, Ali, without it, I can't completed my album. Now that it's done, I feel blessed to have it. Really. Thank You.
Sign in or sign up to comment.
Love this. Well done you xx
Sign in or sign up to comment.
Love your album, so clever keeping it simple. Thanks for the inspiration, still need to start mine.
Sign in or sign up to comment.
Ali - if you have a moment, I would love to know the pattern paper you used for the cover of your album. it looks INCREDIBLE by the way! you work is always BEYOND amazing!!! :)
Sign in or sign up to comment.
Thanks for sharing your production strategy. I'm all about the assembly line process. It's so fun to see the step-by-step photos!
Sign in or sign up to comment.
That looks great! I wish I could look through it in person. I love the corduroy albums. I abandoned the bare ones a while back and switched to the corduroy and LOVE THEM!
I really like your embellished pattern papers. They look amazing. I have never thought to do it the way you did--to make multiples of the same ones in an assembly line manner and then spread them throughout. What a great time-saver that also adds continuity.
Sign in or sign up to comment.
Amazing...
Sign in or sign up to comment.
i love this one, ali!
Sign in or sign up to comment.