Week in the Life : Album Creation Part One
I definitely felt like something was missing yesterday. Having a camera attached for seven full days and then taking it away definitely made for a different sort of day.
One of the things I hoped for in doing this project again was to get back into the groove of taking daily photos. It has been awhile since I felt that desire or excitement related to using my camera daily. It definitely renewed my spark and appreciation for the everyday.
This past week I took 247 photos. That is quite a few less than when I have done this project in the past. Monday had the most photos with 83 and Sunday had the least with 14.
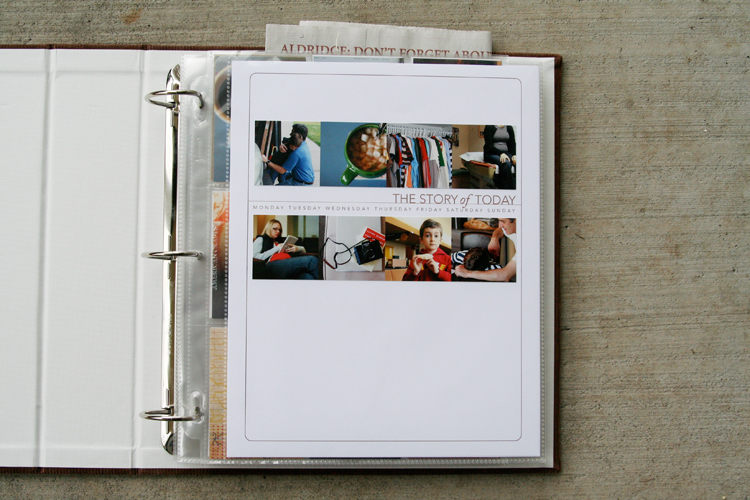
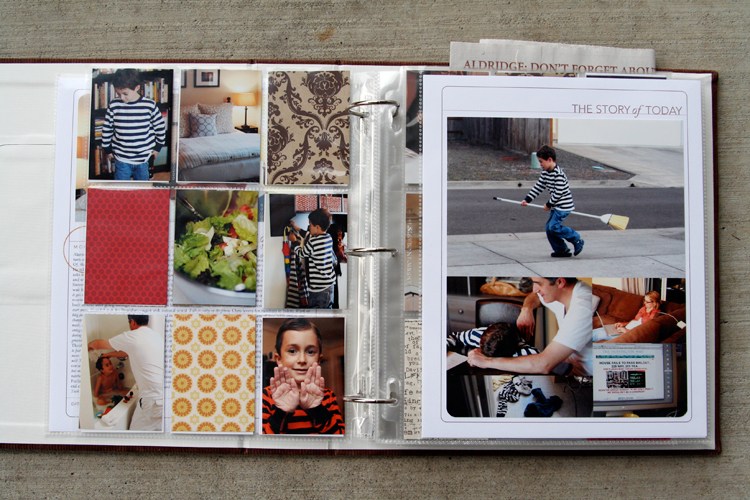
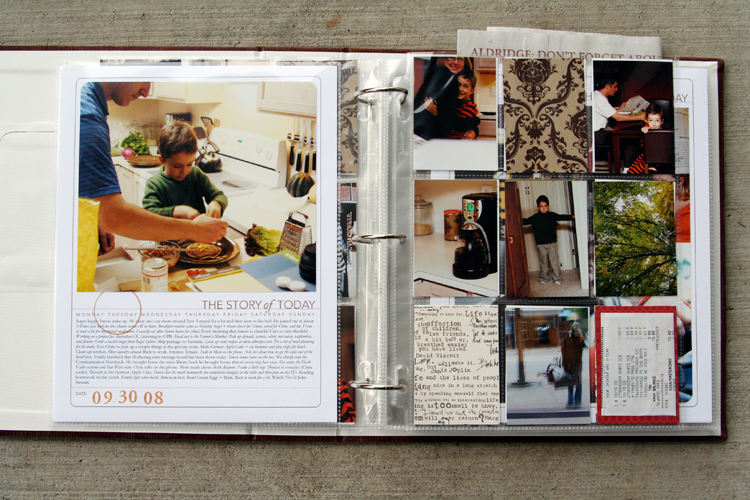
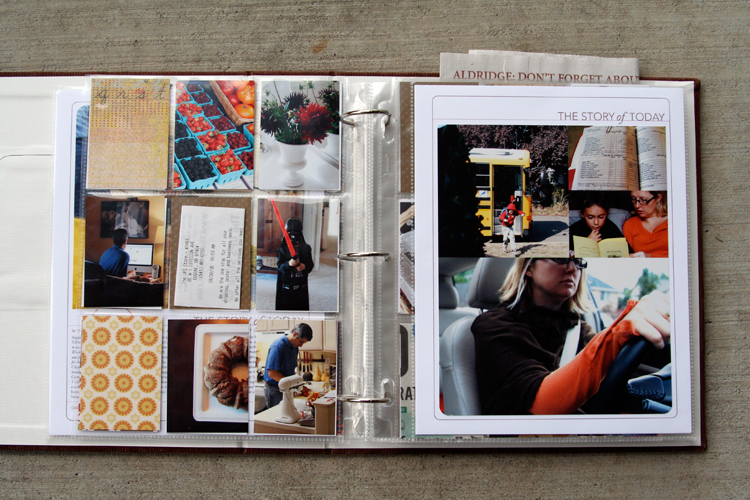
I spent most of my working day yesterday figuring out my formula for this album. Here's what I ended up with: two 8.5x11's (also called a spread) with one baseball card divided page protector sheet sandwiched in between. So far I have just completed the basics and plan to do a bit more embellishing (especially on the patterned paper rectangles as the week goes along) - process details to follow below:
NOTE: A lot of information follows. Take a deep breath, read through, and adopt the pieces (if you want) that make sense for how you want to put your album together. This is my album and the way I approach the process is what makes sense to me :) - everyone will be different.
Also, I work fast. Once I get going and decide on a formula I just go for it and don't spend a lot of time wondering if this is the "right" way or if I should be adding this or that. I want to get it done :). This approach is not hard, there are just steps to go through along the way.
MONDAY
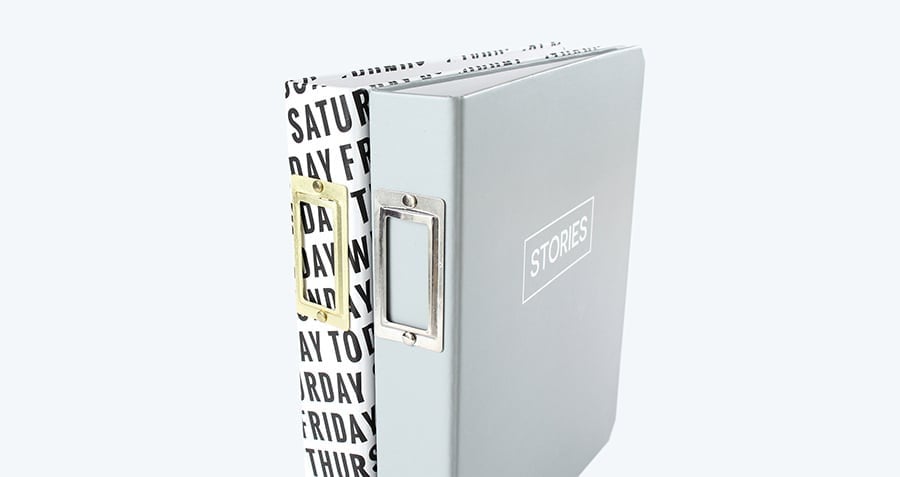
[ album: Corduroy American Crafts 8.5x11 (ended up with chestnut); page protectors: Avery Baseball Card Protectors; cardstock: Bazzill Lily White ]
TUESDAY
THE PROCESS
When attacking a project like this I prefer to do "like" things all at the same time. It's basically working in production-mode: doing things that are the same from one spread to the next all at the same time rather than finding yourself jumping back and forth.
Here's my process:
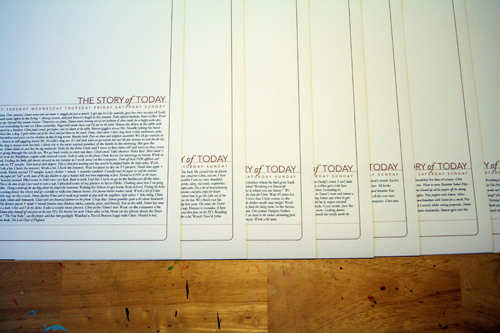
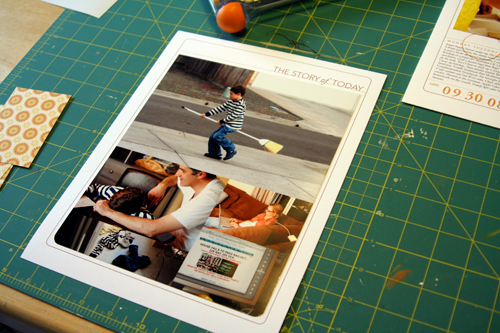
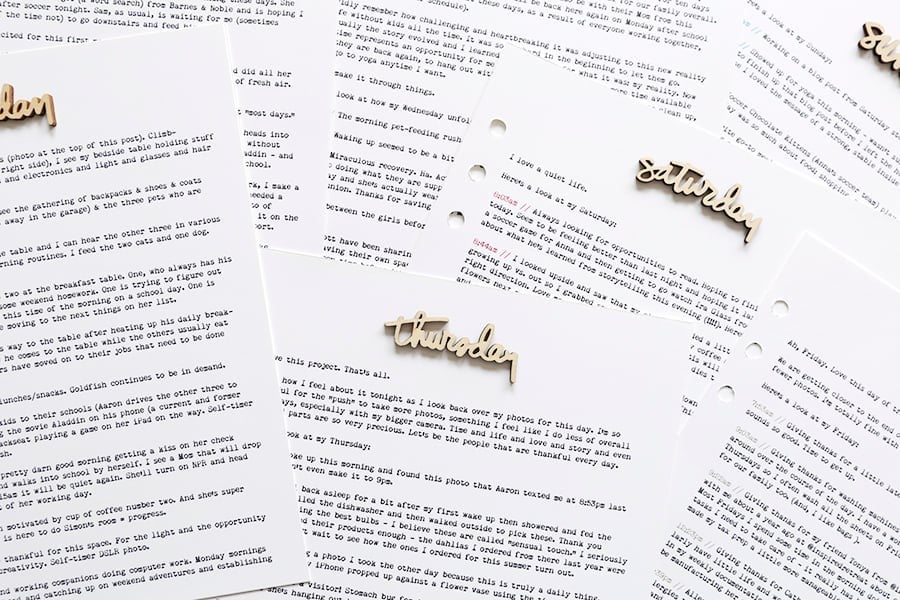
1. Print out all the daily templates (I am using the 8.5x11 Story of Today templates. A 12x12 version - that could be adjusted to 8x8 for printing at home - is also available). I added my journaling to my templates before printing them out. I simply copied and pasted from my Word document and adjusted the font/spacing/etc.
ADJUSTING THE TITLE TO MAKE ROOM FOR JOURNALING
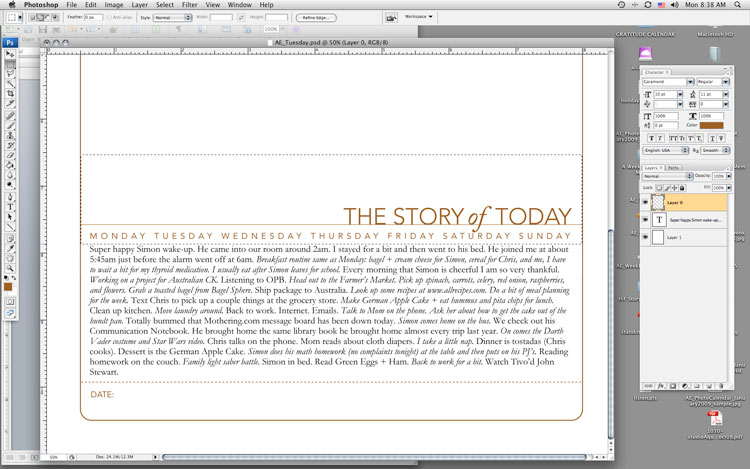
As you will see, some pages have much more words than others. For these pages I adjusted the height of the title on the Story of Today template to make room for the journaling (this means my photos on these pages will be smaller).
Here's a look at how to change the height of the title to adjust for your journaling (images are from Photoshop CS3):
1. Type or copy and paste your journaling on a new layer (on top of the template).
2. Select/activate the template layer. Using the rectangular marquee tool, draw a box around the title, line, and days of the week. Be careful not to cut into the border as you are selecting this area.

3. Switch to the Move Tool (the black arrow) and the selected area should just include the title, line, and days of the week. Use the up arrow key to move the entire piece farther up the page to accommodate your journaling.
4. Print.
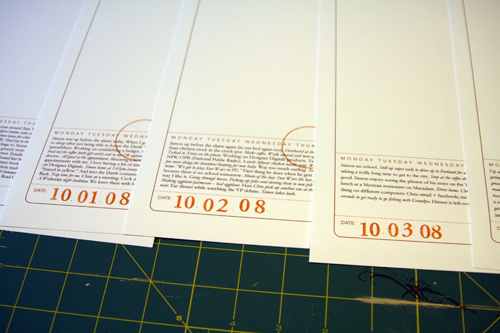
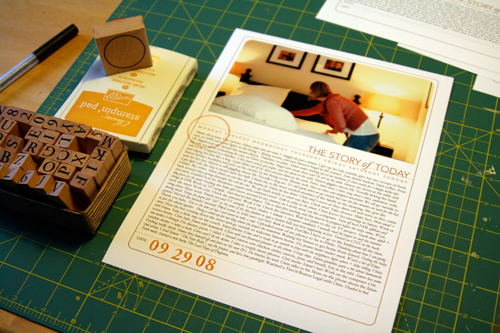
2. Add a stamped date and circle the day of the week on each of the
first page templates. Circle stamp from savvy stamps. Letter stamps are
unknown. Ink is from Stampin Up.
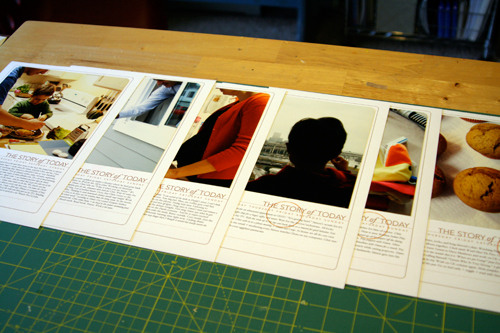
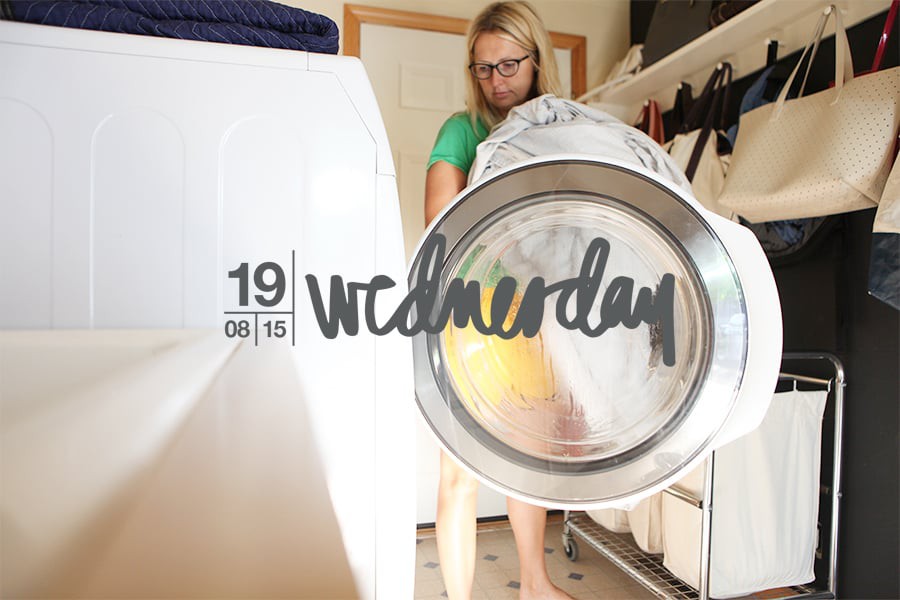
3. Order photos or print out at home. I ended up printing all mine at home today once I established my design formula. I printed photos for the opening page of each day. If you are using the 8.5x11 templates the width of my photos were 7.25 inches (the height varied by the amount of journaling - Monday had the most).
Before adhering I rounded the corners of the photos on the top to mimic the frame from the template.
There's seven pages finished (six are shown - the seventh is in the album already).
4. For the other full-page part of my spread I decided to do a gathering of photos that would fit into the same Story of Today template frame as the first page. Again, I followed the steps above to move the title to the top of the page (I removed the line and date at the bottom and the days of the week). I printed out seven of those onto white cardstock.
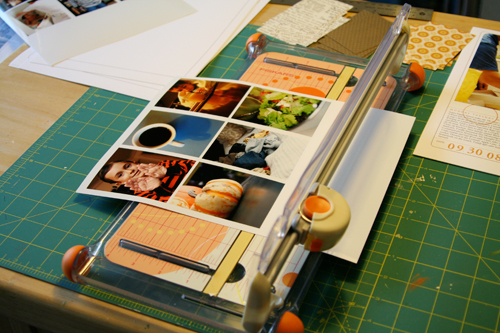
My photo gathering (created in Photoshop but could be easily done by cropping and arranging printed photos) is 7.25 inches wide by almost 9 inches tall. I varied the placement of the photos (large vs. small, etc) from one day to the next depending on the number of photos. Print, trim, corner round the bottom edge, and adhere to the white cardstock.
14 pages done and in page protectors (even though I plan to go back in and add a few embellishments - most likely word stickers, felt pieces, etc).
DIVIDED PAGE PROTECTOR PAGES
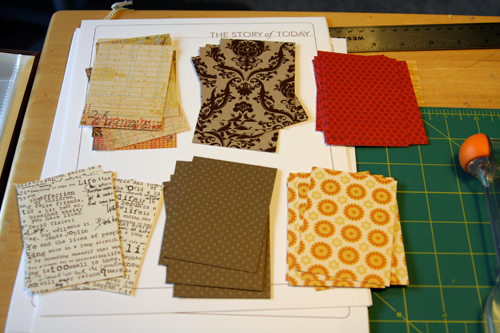
1. Print photos 2.5 inches wide x 3.5 inches tall. I chose to go with twelve of these size photos for each day - six for the front of the page protector and six for the back. The other pockets are filled with patterned paper (see below) or pieces of stuff cut to 2.5 inches x 3.5 inches.
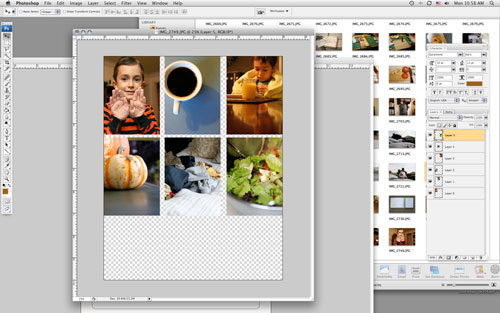
Here's a look at the canvas of photos in Photoshop:
To do this and any other sort of gathering I create a new canvas (usually something like 8 inches x 10 inches at 300 dpi) and then open photos I want to use. Each photo is re-sized before adding to the canvas: in this case to 2.5 inches x 3.5 inches (which requires portions of the image to be cropped). I usually set my photo to 3.5 inches tall first which gives me a width of over 5 inches (if you have the proportion lock checked).
From there I use the crop tool to crop the image to 2.5 inches wide. I get to keep a lot of the image that way. After sizing the image I drag and drop it onto the new canvas and print after filling it up.
2. Cut up patterned paper rectangles for the divided page protectors: 2.5 inches x 3.5 inches. I cut seven of each pattern. Here's what I went with (from top left: Basic Grey Recess, Hambly Studios, Scenic Route Claudia Street (this one has big numbers on the back), 7gypsies Life Creme, Bazzill Basics Dotted Swiss Cardstock, and Scenic Route Sonoma Napa Street. Any six papers you have at home will work.
3. Slip a combination of photos and patterned papers into the divided page protector pockets. If you have many more photos you could skip the patterns and go with all photos or if you have a lot of stuff cut up pieces of those things to 2.5 inches x 3.5 inches to fit. Consider adding more pages if you need more pockets.
Some days I had less than 9 photos to crop after doing the photo gathering for the second page. For those places I will be adding more stuff/patterned paper rectangles.
These patterned paper rectangles will be embellished over the next few days.
Make this project as simple as you can for yourself so you will actually DO IT! You have already done so much work in taking photos, gathering stuff, and documenting life. Give it a home.
The pumpkin muffin recipe can be found here at allrecipes.com.
A complete list of posts related to the week in the life project can be found here.





Ali, you are such a inspiration :)
I'll be tackling this kind of project some week in December, since it's my baby boy's first Christmas & the first Christmas I don't have to work!
Thank you so much for all your tips!
*Charisse
Sign in or sign up to comment.
Ali what binder are you using?
Sign in or sign up to comment.
Ali -- I'm hoping you can answer this question for me...I'm printing my pics 2x3 but I end up losing so much on some of the pics that they end up looking funny...any suggestions?
I'm doing 4 pics across on an 8.5x11 LO, 2 rows of pics w/journaling @ bottom like yours.
Thanks!!
Sign in or sign up to comment.
Krystyn - try resizing them first before cropping (not sure if you are doing this already). I resize to 3 inches tall first (I have it set to keep the proportions correct so it just gives me the other number). From there I select two inches of my image - sometimes from the middle, sometimes from the side, etc.
One thing to keep in mind when cropping like this is that part of what the photos do is show pieces of the whole story. It is ok to crop out some aspects and focus on others to help tell your story.
Hope that helps.
Sign in or sign up to comment.
Ali, I've loved hearing about this project. You've wet my appetite...definitely. I love seeing the photos you've taken. I've only had my Canon SLR since July and PSE6 since then too. I still feel "green" on the digital Photoshop stuff, but I really want to try this out. I like your 8.5x11 overlays. I'll certainly let you know when I complete my Stories of Today. Thanks for all your inspiration and all the step-by-steps you given to help people like me.
Sign in or sign up to comment.
Anna - I am using this one: http://store.scrapbook.com/ac-76153.html (American Crafts)
Sign in or sign up to comment.
Love what you have done so far.
I have finished my album, I used a smaller album because I want to do this again and again, that's how much I enjoyed the process. I tried to keep it simple since this is my first attempt.
Look forward to seeing what else you do with your album. You are such an inspiration. Thanks for sharing this project with all of us, it has really opened my eyes to so much more.
My completed project is posted on my blog, enjoy, http://scrapbookbungalow.blogspot.com
Sign in or sign up to comment.
oops, typed my blog incorrectly,
http://thescrapbookbungalow.blogspot.com
Sign in or sign up to comment.
You work super fast...very impressive and a true inspiration to me. Love how yours turned out. I think I'm going to use the same idea with the card protector idea for most of my pics...went over board I think with all the photos. Thank you again for this idea...I'm so excited, I'm picking up my photos tomorrow along with a few supplies I need. This will be my weekend project. Can't wait! This whole experience thus far has been fantastic...love it!!! Thanx Ali!
Sign in or sign up to comment.
Thanks for the suggestion and reply above. Another question - Am I correct that you're writing a story out from the bullets we saw throughout the week? I'm not sure how expository I'll be as conceptually I'm hoping to keep what I wrote at the time to capture the moment a bit more, but think it would be "cleaner" to read later if I polished it into stories rather than bullets. That said, I do have an expository bit I wrote each day on my blog that I might include and then have the bulleted items as well. I guess I'm just trying to keep a balance between the words and the pictures and struggling with how to do that a bit.
Sign in or sign up to comment.
Ali...
You are a fantastic teacher...thank you for sharing this. I've been waiting to see how you were planning to pull everything together; I love the card pages for the smaller photos and bits of things.
You mentioned that you took more than 200 photos - just a quick question - what size are the images that you shoot? Your photos are always so crisp and bright. I typically have my camera set on high resolution because you never know when you might want to blow up a photo, but I don't really want hundreds of everyday photos that are 4 meg cluttering up my IPhoto. Just curious about your process regarding this.
Thank you again for sharing this wonderful concept for documenting the everyday. I'm looking forward to trying this process throughout the coming year.
Sign in or sign up to comment.
You put it together so quickly! Awesome. I wish I had an ounce of your talent! I just love the simplicity and how it didn't need "excess" to tell the story. Also love how you used those card holders to place pics - - I can find those anywhere!
Sign in or sign up to comment.
I know those letter stamps! They are only the *most* awesome letter stamps ever created, they sold for super cheap, too, if I remeber. They are by PSX. I have every set they made. I don't think they are still around, but I love mine, too.
Love your album!
Sign in or sign up to comment.
Abbey - I went with bullet points for simplicity (super easy to just cut and paste). I do lots of different types of writing throughout my projects :).
Sign in or sign up to comment.
It's good to see a pic of your handsome pup here!
Love this idea! It may take me more than one week to get a week's worth of pictures-- sometimes I get involved in life and forget to photograph it! But the format for your album is awesome. I've never done an 8.5x11 album, but I have some of those baseball card holders here (I use them for small rubber/acrylic stamp storage), so I think I'll try this!
Sign in or sign up to comment.
Angela - I shoot at the highest resolution (but not raw). I use an external hard drive to hold my photos and digital elements.
Sign in or sign up to comment.
"Words and pictures are yin and yang. Married, they produce a progeny more interesting than either parent."
— Dr. Seuss
I love that quote - and thought you would too.
Sign in or sign up to comment.
Thank you for answering my question so quickly. I appreciate your personal assistance in as much as I know your readers appreciate your overall inspiration. A final thought...
I like to think that one of the ways a person can measure their contribution on this earth is in the number of lives they touch in some meaningful way. How wonderful for Simon and your precious baby girl that their momma has affected so many lives in such a positive and personal way. Thank you, again...may they grow to be so proud of you!
Sign in or sign up to comment.
That was really nice - thank you Angela :).
Sign in or sign up to comment.
Okay, LOVE the idea of using the card protector pages!! I just picked up a few packs of those to store my ATCs, so thanks for sharing this! Your book is just GORGEOUS!! Seriously, you could publish it! :)
Sign in or sign up to comment.
Hi Ali. I was wondering where I can purchase the Story of Today templates? The link in your post did not link to anything. Thank you! BTW, I really enjoy your blog and your work. Truly inspirational.
Sign in or sign up to comment.
Amy - here's a direct link: http://www.designerdigitals.com/ecom/product_info.php/products_id/5929
(not sure what is up with the links - they are going through for me?)
Sign in or sign up to comment.
Ali,
I have tried to stay away from the project because I am a LAZY BUM, but I had to give up because it just looked so much fun, so I started one week later but I have started!! I am only at day 2 and it is FUN!!!
Sign in or sign up to comment.
I totally love your album! I have posted a slide show of my pages. Once I get them printed off I'll just add the journaling and be done. Check it out at
http://emmaelizabethjohns.blogspot.com/
Thanks Ali for the inspiration! This was a great and fast project.
Sign in or sign up to comment.
Thanks Ali! Yep, I'm resizing, then cropping so I guess I have to get used to the images like that. Yours always look wonderful so I'm hoping mine will be OK. I can't wait to post them to the Flickr group. I'm loving this project!!
Sign in or sign up to comment.