Tuesday Tutorials : Heidi Swapp : Masking & Invisibles

This week Tuesday Tutorials welcomes Heidi Swapp. In the following tutorial Heidi walks you through some elements she created using masks & stamps & hybrid elements within an 8x8 album. In addition she includes a short tutorial on working with Invisibles chipboard. Welcome Heidi!
I am totally into getting reacquainted with some of my old rubber stamps lately (we were separated during my 18 months overseas). I love to create little collage elements for my pages and mini-books using masks and tons of stamps and a little distress ink. Let me show you how quick and fun they are to create! I did it a couple of times in this cute little book I made for my daughter’s baptism day. I like the way you can tie the whole book together by clustering stamps in different places.
Here's Heidi detailing her process:
Read on for more information, links and details:


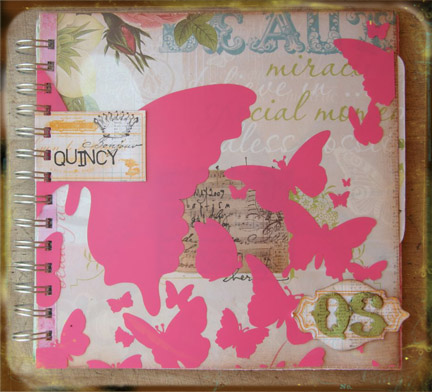
 To create the front cover of this book, i simply cut a Hambly Wings overlay to size (8x8), embellished it with some house of 3 printable tags, and added some stamps that will set the tone for this whole book!
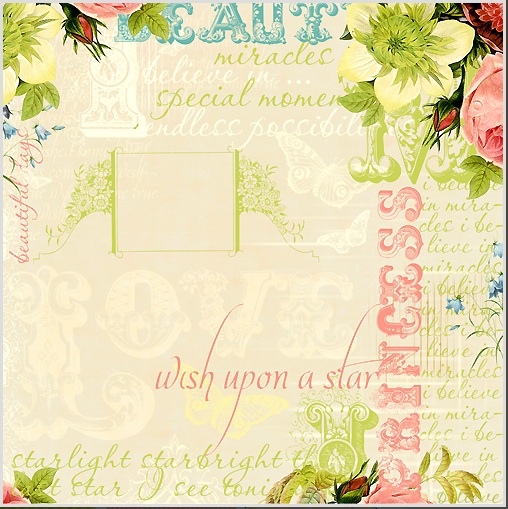
Just behind this fabulous Hambly Wings overlay is a really cool piece of Webster’s Pages paper (called Beauty). I love the collage quality of the paper and it totally lent itself to a
collage element in the middle. Here's a look at the paper before I cut
it down to 8x8 (above). It has this great open area inside the square just
calling for something.
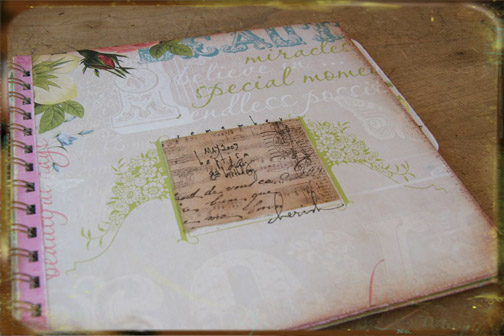
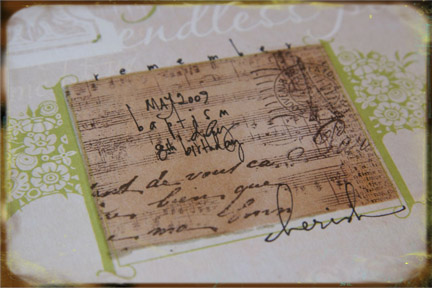
I cut a mask from paper that would be just the right size. I simply stamped inside the masked area with portions of the following stamps:
1. Tim Holtz Music stamp
2. Tim Holtz Text stamp
3. Cavallini Script stamp
4. Cavallini Postage stamp
I used some brown Ranger Archival ink for the stamping.
There is no rhyme or reason for the way I stamp - I just kinda go
for it. I like to use portions of the stamps and purposely position
them to be over the edge. Once I finished stamping, you’ll notice that
I added some hand writing above, below and inside the masked area. I
used a Zig Pen Sets Millennium .05 Pen Set
(my favorite pens).
Using a Tim Holtz ink blending tool, I added some vintage photo distress ink to blend it all together.
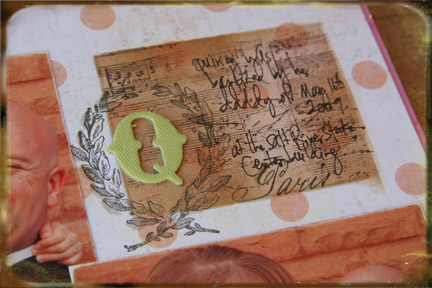

I used the same hand cut mask that I used on the inside cover for this
page element. In this case, I added a music stamp, and a paris stamp
inside the masked area and then removed the mask. With the mask gone, I
added the leafy stamp – so you can see the entire image. Again, I added
more distress ink and journaling over the stamping. The Q is a fabric
Thicker monogram from American Crafts.
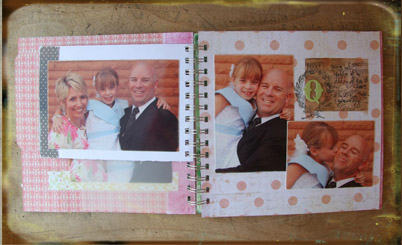
And a look at that element within the larger album (above).
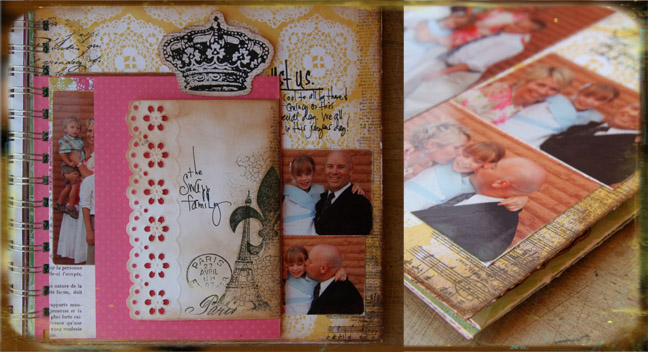
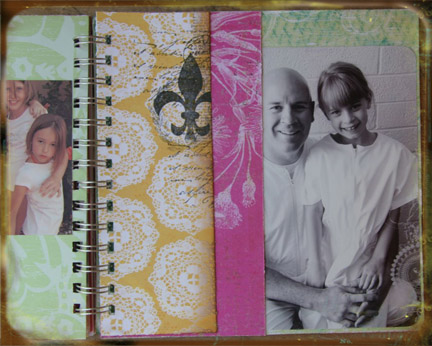
 Next I used stamping in clusters and layers to create distressed edges. Notice
along the right edge of the yellow house of 3 paper I added a long
strip of the journal stamp, and also added some music stamping. I used this cool eyelet card as an interactive element on the flap. To
add to the look and motif of the book, I simply layered the same series
of stamps that I had been using to carry the theme through the book. I
even used the same Tim Holtz text stamp in the background of the die
cut crown along with distress inking all the edges.
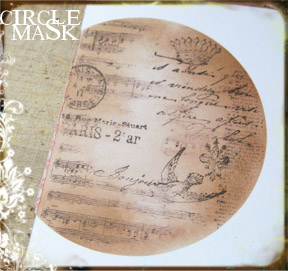

This is just a repeat of the same thing I did on the previous 2 masked
sections, but this time I used the Heidi Swapp circle mega mask instead
of a hand cut paper mask (as seen in the video above).
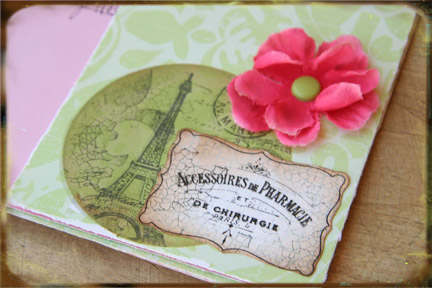
 For this element, I still used the same stamps for the masked area, but switched to a green (peeled paint distress) ink. I then added some additional collage pieces to the masked area: silk flower and a printed House of 3 ooh la la printable tag that I inked and stamped to match the other inked areas.

I added in some of the excess of the papers as individual pages bound
into the book (love the mixed-up widths). To make them more consistent with the other pages, I repeated the
collaged and layered stamping on the edge of the house of 3 yellow lace paper.
PLAYING WITH INVISIBLES
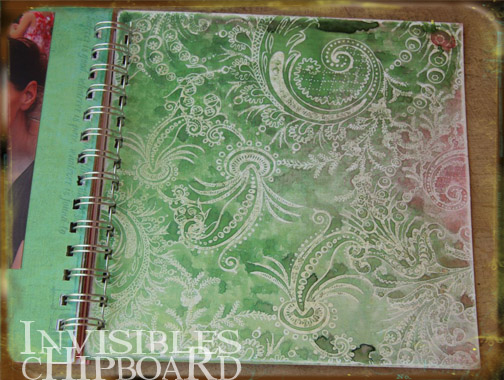
In my most recent Heidi Swapp release, I created a variety of products that have been manufactured with a pre-resist quality to them. In the line you will find 12x12 papers, chipboard frames and images, as well as 12x12 chipboard suitable for making book covers. I used the Invisible chipboard, which starts out totally white, to create the back inside cover. (I think that the back inside cover should be totally a statement…it’s usually overlooked!). To get this beautiful - almost watercolor - looking result, after I cut it to size (8x8), I generously sprayed the entire surface with Glimmer Mist (Tattered Angels).
Here are a few quick tips:
- Lay the chipboard on a non-stick craft mat.
- Choose a couple colors that will look good together (shake them up good before you use so there is lots of glimmer).
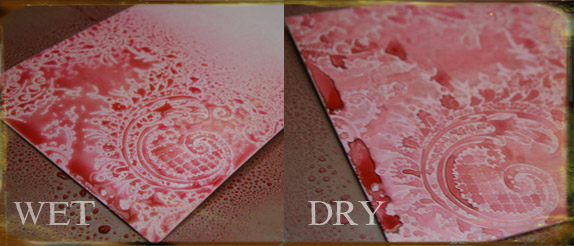
- Apply spray ink generously so that it basically pools on your project.
- Allow to air dry while you work on something else. I love the very watercolor result of this technique, so I wanted there to be dark spots that result from puddles of ink.
- If your chipboard warps a little, simply bend it back flat again or tuck under something heavy for a little while after it’s all dry!
Here is a peek at what the mist process looks like (I used green on the actual project, and a mix of pinks on this demo).
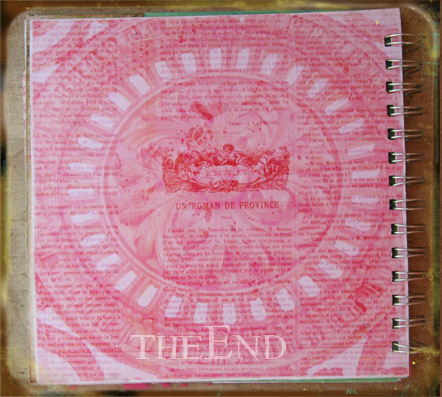
The very back of the album is covered with another House of 3 downloadable pdf file
that I chose to print on glossy photo paper. It totally pops for the
back of this mini-book.
Finally, I used the Bind It All to bind this book and I LOVE how it turned out!
A NOTE ABOUT HOUSE of 3
Did you know that House of 3 is more than just a digi scrapbook site? Almost everything we offer in digital files, we also offer in PDF files that are designed to simply download and PRINT onto ANY paper or medium to then create hands on! House of 3 has all kinds of cool projects, backgrounds, cards, and even some removable vinyl wall stickers with built in bling! The 'ooh la la' stuff created by Rhonna Farrer is GORGEOUS - i actually just put the files on a jump drive and had them printed for me at Office Max! turned out perfect. 

 Long before Heidi Swapp was awarded the high honor of CK Hall of Fame in 2000, her scrapbooking career has been her passion and creative outlet. She has taken part in creating idea books, teaching classes, designing products for Making Memories as well as her own product line heidi swapp for ADVANTUS. Through it all, she has documented every twist and turn, up and down through her scrapbooks, mini-books, home décor projects as well as her blog.
If you ask Heidi what’s next? she’ll tell you that it’s time to combine where she has come from with where things are going! She has created a new series of classes called inspiration sessions that she will be sharing in independent stores around the country. As Heidi looks to the future, she is excited and amazed by the possibilities afforded by the digital world and the internet. She has recently joined forces with 2 awesome and unique artists: Rhonna Farrer and Janet Hopkins to create House of 3 - a digital and hybrid combination of fabulousness that is destined to be completely uncategorized (and break all the rules)! Heidi is ever inspired by her husband Eric Swapp of 14 years and their 5 kids, and SO thankful for the crazy journey they are on together.
Keep track of her on her blog heidiswapp.typepad.com and follow her on TWITTER http://twitter.com/heidiswapp
 Tuesday Tutorials is a weekly feature showcasing inspiring how-to projects related to scrapbooking, storytelling, and photography. Do you have a step by step project or creative tutorial you would like to see featured here?
To
be considered email your completed project, including the how-to text,
to ali at aliedwardsdesign dot com. If your project is chosen you will
be paid for your creative time & effort. Please include Tuesday Tutorials in the subject line.


I have nothing to say exept for WOW!!!
Sign in or sign up to comment.
That was so cool! Very inspiring!Love the tutorial. Love the series. Thank you, Heidi - Thank you, Ali! Off the find some invisible chipboard.
Sign in or sign up to comment.
Ali, I love how this series can highlight artists whose styles are so different from yours! Heidi, your collage-y artsy style is beautiful...the book is amazing!
Sign in or sign up to comment.
I love the techniques and "free" style ~ thanks for sharing!
Sign in or sign up to comment.
What a FABULOUS tutorial!! I just LOVE Heidi and I actually had the chance to see this beautiful album hands on when I attended her course in Edmonton, AB a few weeks back (AMAZING). This was so neat to see how she came up with the overall album/design. Thank you so much Ali & Heidi!
Sign in or sign up to comment.
So many great ideas! Love this project!
Sign in or sign up to comment.
That was truely a wonderful tutorial! Loved seeing how Heidi actually made the collage portion!! I have soo many stamps that I rarely use-- I can't wait to pull them out now and try this...
Funny how we collect all the bits and pieces (stamps, distress ink, overlays) but never know exactly what to do with them!! I love that I don't have to go buy anything TODAY to try this out.
Sign in or sign up to comment.
I love Heidi! I got to see this album is real life last weekend and it's soooo beautiful. Love this series, Ali!
Sign in or sign up to comment.
I was blessed enough to meet Heidi last Monday and take her class teaching these exact techniques. All I can say is WOW!vBest class I ever took, I got so much out of it!
Sign in or sign up to comment.
I love Glimmer Mist! It's so pretty IRL. Heidi's pretty cool, too. It's been a while since I picked up a stamp, and she's inspiring.
Sign in or sign up to comment.
WOW - love this project. Using rubber stamps for collage is one of the things I want to learn, so this is VERY helpful. THank you so much for sharing.
Sign in or sign up to comment.
This was awesome! Thanks! I just bought some of the masks, so this help me alot!
Sign in or sign up to comment.
LOVE Tuesday Tutorials! Thanks Ali, Thanks Heidi!
Sign in or sign up to comment.
This is a wonderful, creative, and very useful tutorial. Thanks so much Ali.
Susan
Sign in or sign up to comment.
Love the masking, but that invisable chipboard is to die for! Great tutorial. Thanks for sharing.
Sign in or sign up to comment.
awesome project...great techniques...wish i had time to play today!
thanks ali and hks...
kiss kiss
m
Sign in or sign up to comment.
Just AMAZING! Thank you!
Sign in or sign up to comment.
I have seen her site, but never realized she had PDF files. I love those invisible papers, can't wait unitl they have them at a store here!
Thanks Heidi!
Sign in or sign up to comment.
Love your new series--too fun. Hope you will show us some of your talents, Ali:)
Sign in or sign up to comment.
Absolutely - I am going to keep Tuesdays for guests for awhile but plan to show my take on some of their ideas when I can. Look for a post on Thursday that shows my take on some of Heidi's ideas.
Sign in or sign up to comment.
That was awesome and inspiring! I took Heidi's BPS class and I really miss having tutorials from her super creative point of view. Thanks Heidi and Ali!
Sign in or sign up to comment.
GORGEOUS! Thanks for sharing this!!!!!
Sign in or sign up to comment.
Ali I am LOVING your Tuesday series!!!! Heidi you rock!!!
Sign in or sign up to comment.
This is awful. I really don't like the direction your blog is taking. Quotes for product left and right. Next you will add the price or a direct link to the online store, where you can buy/download the stuff recommended on here. This blog just crossed the fine line of being a personal account of life to a giant marketing plattform for promoting the latest (sometimes ridiculously unnecessary) scrapbooking releases and picking up the fallen stars, who want to get back into the game. The unfortunate thing is, that your blog looses its essence, which is capture+create+document+celebrate and becomes a blatantly obvious cash machine. I can only wonder how much you make each month from promoting certain product you happen to have used on your layouts and the advertisers lined up. I am sure it wasn't mere chance, that Heidi Swapp sought your help in getting herself and her "new" line promoted. Happy cashing in!
Sign in or sign up to comment.
I am loving the Tuesday tutorials. Thank you!
Sign in or sign up to comment.