My Week In The Life Design Plan & Product Suggestions

Next week for me is all about the documentation. I am getting so excited. I love this project.
Each day (starting on Monday night or Tuesday morning) I will be posting and sharing photos and words from my day and cheering you on as you go through the process.
The following week I'll put my actual album together and show you more about my process: cropping photos, adding embellishments, a tutorial on working with the digital template album, bringing all the pieces together.
That said, I did spend time this past week coming up with a simple plan for the design of my album.
Here's a look at where I'll be headed once I have my content and the supplies I will be using:
 sample pages created using random photos : click to view larger
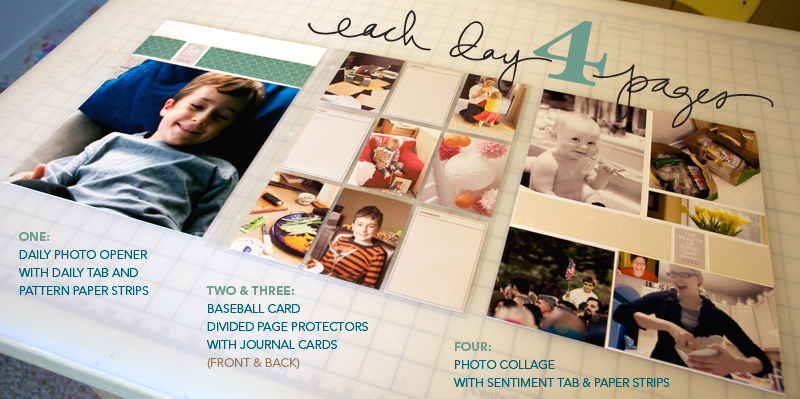
Just like in 2008 I'll be using an 8.5x11, 3-ring album and each day of the week will have four pages.Yes, four per day.
Here's a look at what each page per day will include:
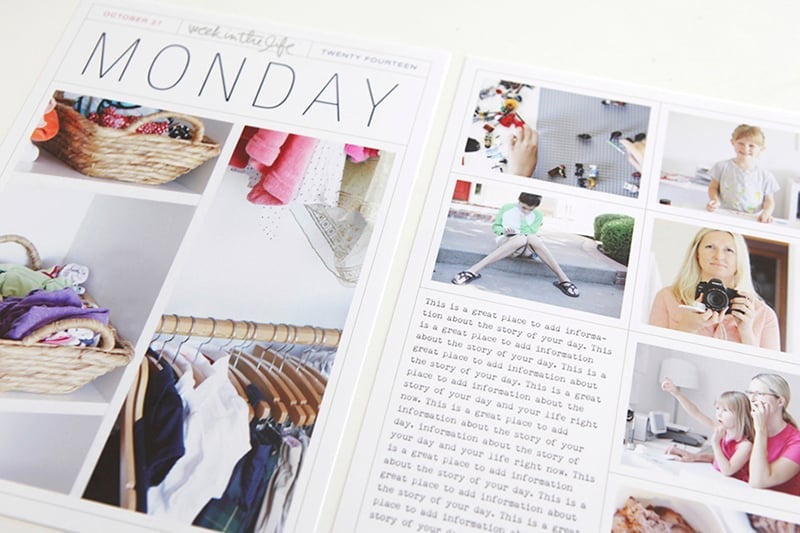
ONE : The first page I call my daily opener. It includes an enlarged photo (8.5 inches x 8 inches tall), a pattern paper strip, and a daily tab (more info below).
TWO & THREE : Pages two and three are a single baseball card page protector (using the front and the back). Inside these pockets I will be slipping photos, journal cards for the categories I am documenting, and other ephemera I collect throughout the week.
FOUR : The last page of each day is a photo collage (photos can always be replaced with paper stuff collected over the course of the week or more journaling), another paper strip, and a sentiment tab.
As you can see from the image above I really am keeping it simple with a pretty strict focus on the words + photos. If you are interested in adding more creative twists, such as embellishing cards for the baseball card pages check out my 2008 album. This link shows a bunch of different ideas for creating fun mini-canvases that lend a nice consistency throughout the album.
SUPPLIES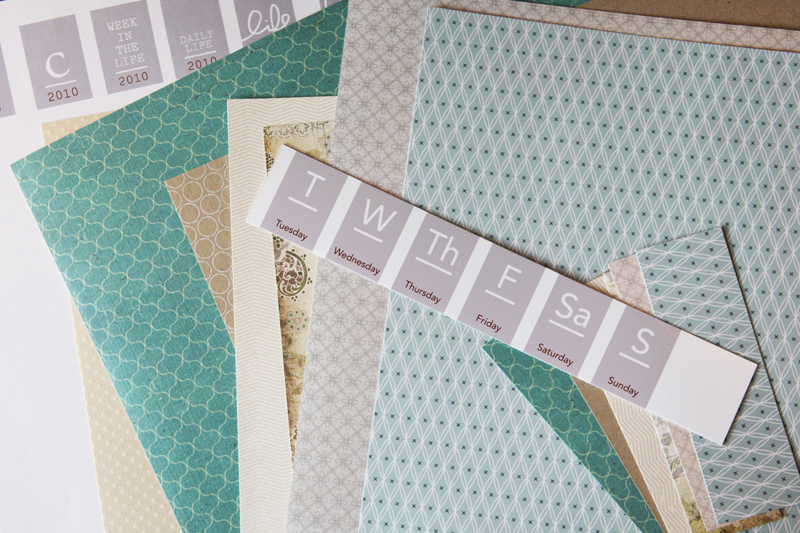
PATTERN PAPER & CARDSTOCK
• 15 sheets of white 8.5x11 cardstock with more for printing the journaling
cards
• Seven sheets of pattern paper:
- American Crafts I Do Hyacinth (35051)
- SEI Noisette 8-1906 (using the grey pattern on the back)
- Basic Grey Cappella Bellini (cap-2393)
- Basic Grey Boxer Commando (box-1178)
- Hambly Little Circles (silver on kraft) (451)
- Crate Paper Brook Collection Ripple (#BK727)
- Bazzil Swiss Dot Cardstock
For my pattern paper selection I went through my stash and grabbed seven sheets that felt like they matched the look I'm going for as the basis for the album. I was looking for blues, greys, and kraft/beige that would be a nice complement to the gray of the accents I am using.
From these pattern papers I'm cutting strips that are 1.5 inches tall x 5.25 inches wide and 1.5 inches tall x 2 inches wide - this leaves just the right amount of room to add the sentiment, daily, or initial tabs (see below).
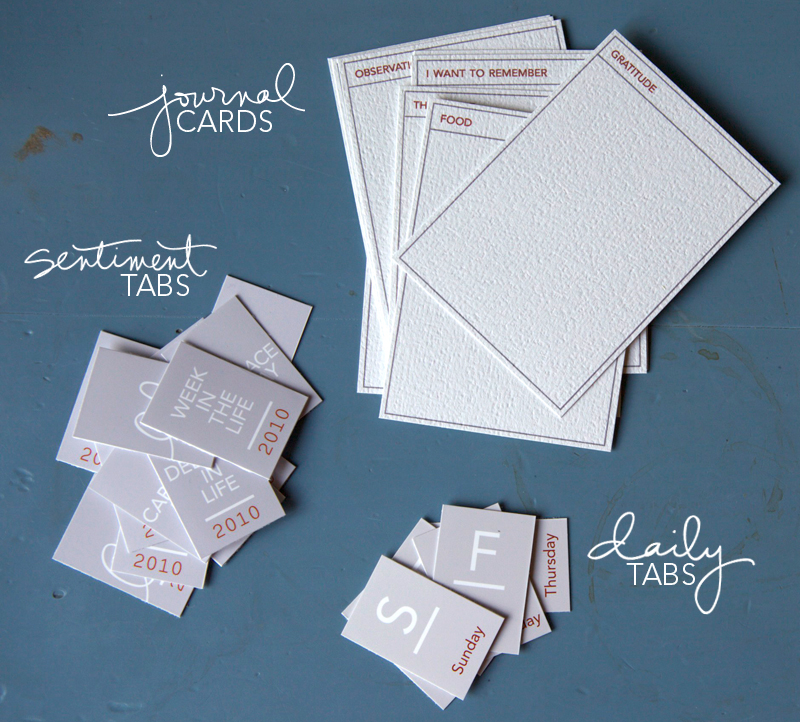
JOURNAL CARDS, SENTIMENT TABS, & DAILY TABS
My journaling this year is going to go on these small cards I designed that fit inside the baseball card page protectors. I printed them out yesterday and plan to hand-write my documentation each day. My journal cards are printed on this cardstock from Bazzill.
Other years I have just jotted things down in a notebook or on a worksheet and then transferred the words to my album during the process of putting it all together. I'm going to try this card approach for a change of pace in 2010. If I'm out and about I'm planning to bring along the cards and document in the moment on the go. That's a lot different than trying to remember things at the end of the day.
If you don't want to hand-write your journaling you can add your text directly onto these cards in Photoshop or in Word.
Remember that you don't have to necessarily do the same journaling categories each day. I am printed out a bunch of the cards and will choose the ones for each day that make the most sense for the stories I want to tell.
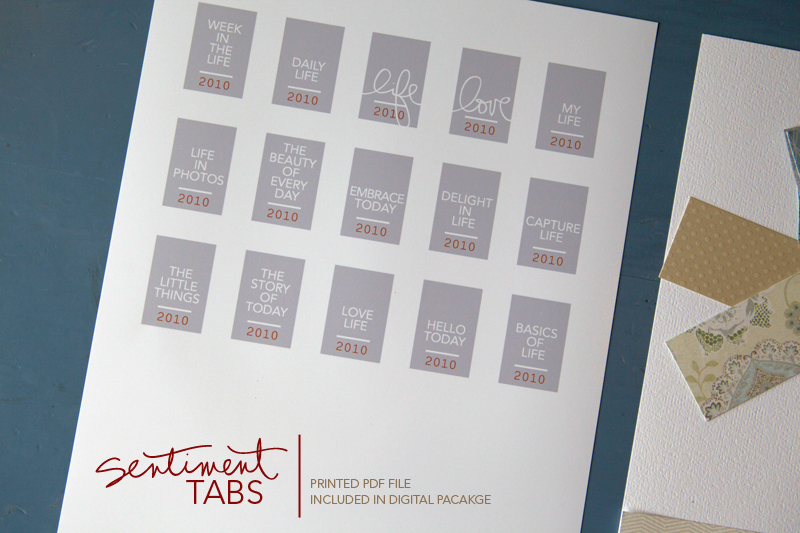
In addition to the journal cards I created Daily Tabs and Sentiment Tabs that are used throughout the album (there will also be a set of Initial Tabs available). I chose to print these on photo paper. Each digital package includes a PDF file for easy printing (they also include individual PNG files, outline files, and PSD files for customization).
WEEK IN THE LIFE LAYERED TEMPLATE DIGITAL ALBUM
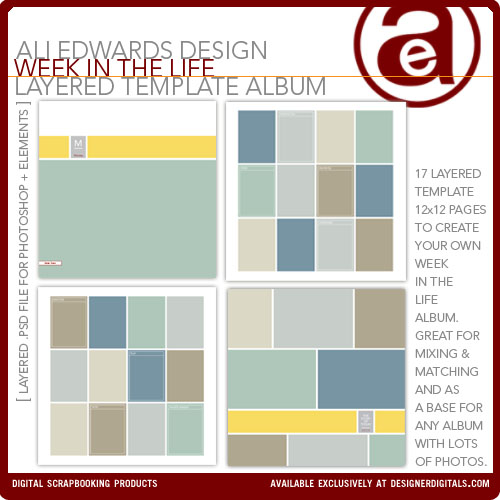
For those of you who want to do a completely digital album for a photobook (or want to create the pages digitally and print them out and slip them into an album at home) I have a new Week In The Life Layered Template album package. A 12x12 version (Shutterfly ready) and an 8.5x11 version are available.
Both these albums follow the same format that I'm creating with paper and hybrid elements.
OTHER EVERYDAY LIFE PRODUCTS
Documenting everyday life and celebrating the small moments are a big part of my memory keeping passion. Because of that I've designed lots of products for Designer Digitals and for Technique Tuesday that support that theme.
My digital products at Designer Digitals are not just for completely digital scrapbooking. I often print them out and add them to my pages just like you see above.

If you are interested in adding elements on top of your photos I have quite a few photo overlays and word art that can be added in a photo-editing program (and even in Word). For more information on how to do this check out my video tutorial that will walk you through the process in Elements.


I have photo overlays (that also work great for journal blocks) for the month of April and a package that includes every day of the year. I also have photo overlays for the days of the week & months.


I have word art that celebrates the ordinary-ness of everyday life and hand-drawn sentiments that celebrate your life right now.
I hope you have a wonderful weekend. Charge up your camera batteries and make sure you have some way to jot down the things you want to capture in words. The process of taking photos of the basic, mundane, everyday pieces of your existence is really an awesome experience.
It's work, but it is so worth the effort.

A complete list of posts related to WEEK IN THE LIFE
from both 2008 & 2010 can be found here.


help! i am not a digi-scrapper.. but i bought the journaling cards and tabs.. and i cannot figure out how to get the journaling cards into microsoft word to let me edit/type on them????
ali- i cannot open png files in word.. i can get them over there by inserting a pic, but i cannot type on them?
Sign in or sign up to comment.
Ali: I love the page protectors that you are using for your collage pages. Where did you find them? All I can find are ones that have 3 or 4 4x6 photos and there is not much room for variation.
Sign in or sign up to comment.
Hi Amy - just seeing your comment now - they are actually gray (meant to go with the other gray elements).
Sign in or sign up to comment.
Hi - scrapbookpictures.com prints 8.5x11.
Sign in or sign up to comment.
Hi Andrea - just seeing your comment now. Inserting as a picture is the way I do it and then you need to create a new text box on top of that png. You will need to go under the section called "Wrapping" in the formatting palette to make it so you can add text to the top.
Sign in or sign up to comment.
Hi Shelly - you can find these sort of baseball card page protectors at office supply stores. I found these ones at Toys R Us of all places :).
Sign in or sign up to comment.
Actually, I apologize...the collage pages are not in divided page protectors. For those pages I cropped photos to create the grid.
Sign in or sign up to comment.
Ali, Are you doing this every week? I like the idea just don't think I can pull off this much. Recently I had been thinking of starting with something simpler, like a basic photo a day, I got a few CZ templates and your days & months overlays to use with that idea. Then today I saw CZ's posts on Bits&Pieces about this project so I came to check it out. Looks great!
Sign in or sign up to comment.
Hi - NO WAY! This is a once a year or once every couple years sort of project. One week is definitely enough to cover this much detail :).
Sign in or sign up to comment.
Good, that makes me feel better. Since I only have one kid, around the age of your daughter, not 2 and a very PT job I was thinking...how can she do that. Seems like a much better project now. Something I think I'll give a try. Gonna wait for a week I'm working though (or maybe I should do one of each since the 2 vary a lot).
Sign in or sign up to comment.
I just love this project.
Are you goning to do a vacayion/travel album al well?
I am desperate searching for idea's for such an album and I just love your work.
Sign in or sign up to comment.
This is an amazing project Ali...Im accepting the challenging to start doing it this Sunday :)
Tks for inspiring us, always XX
Sign in or sign up to comment.
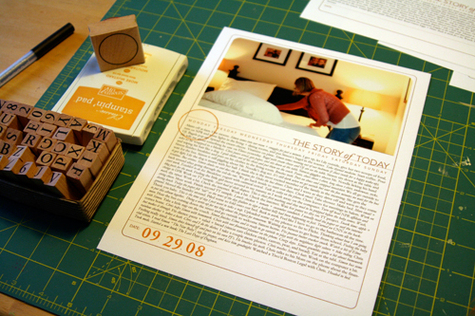
Ali-in one of the above photographs, you have a set of stamps that are letters and numbers. I'd love to have this set. Can you tell me where you got them, name of manufacturer and any other details that may help me on the hunt? thanks
Hi Kelly - unfortunately that's not a set I have anymore. I'm pretty sure I got them while visiting Tokyo back in 2006 - they were not an American manufacturer. You might want to check Hero Arts for something along the same lines (small wood block alpha/number stamps).
Sign in or sign up to comment.