Weekend Creative : Creating Room To Write With Photos
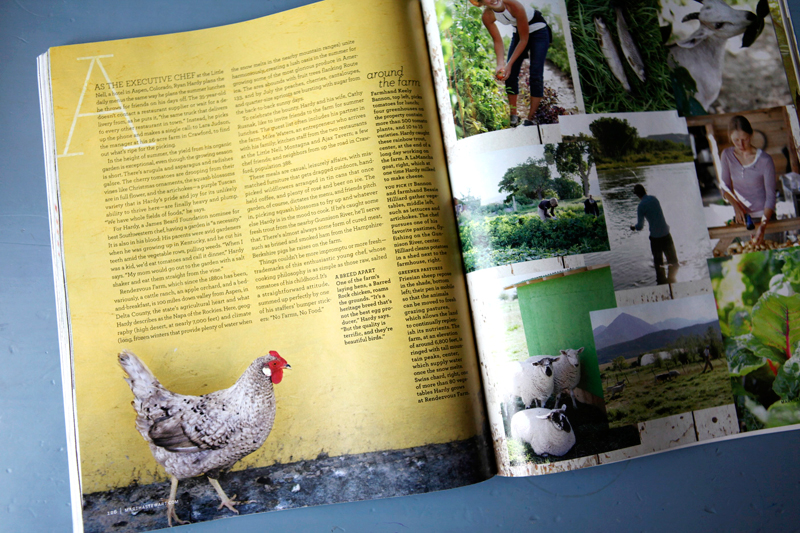
Last week I was browsing through Martha Stewart's Living magazine and was looking specifically at the way their designers use full-page photos to their advantage when designing the spreads for feature articles.
I love how they use "blank" areas on photos to create homes for the text of the article. I especially loved the example above with the chicken and the cool yellow wall. The wall is a perfect home for the story to be told. This is something that's super easy to do in scrapbooking and is the topic for this week's weekend creative.
This weekend's prompt is to take some photos that include specific space for telling your story. You're invited you to share the photos you take in the weekend creative group at Flickr. I'm totally looking forward to seeing your photos.
Here's a few things to keep in mind:
TAKE PHOTOS WITH INTENT : When you are looking through the lens of your camera, become aware of opportunities to take photos that will give you room to write/type your story. Walls, floors, the sky, looking down on a table, etc - these are all usually really great open spaces for text.
Walls tend to work well for this technique as they don't usually have many additional elements that will interfere with your text (too much interference makes it tougher to read). You could simply take a photo of a bare wall and use that photo as a part of your layout to hold text. Keep in mind that walls by themselves are nice, but add in a person (or a chicken as you see above) or part of a person (like shoes or hands or half of a face like below) and your results will tell an even more meaningful story.
SURVEY THE SCENE : Keep your eyes open when you are capturing someone or something for the chance to place your subject to the far left, far right, very top, or very bottom of the frame. By simply moving the focal point away from the center of the frame you are creating room for text to be added.
Here's an example: let's say I am outside taking photos of Simon on his bike. In addition to the regular shots of him zooming around, I will also include a couple where he is placed near the top of the frame where you might only see the wheels and his shoes. In this case the middle and bottom of the frame would be filled with cement - a nice open space for placing the words of my story.
This same affect can also sometimes be achieved after-the-fact by cropping your photo in a photo-editing program. See below for an example.
TELL A STORY: After capturing your image, journal directly onto your photo either with a pen on a printed photo or by using the type tool (T) in Photoshop.
Here's a recent photo of mine that had a nice space for my text. What you see below is what came out of the camera:
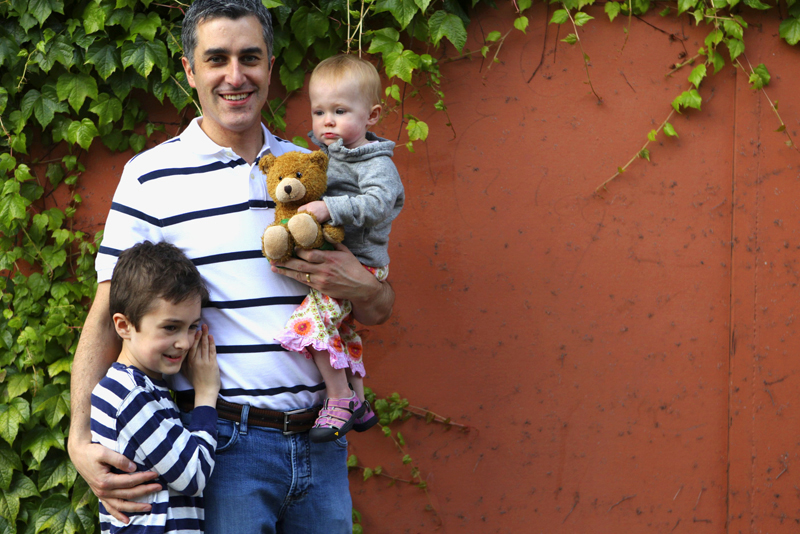
I actually love the proportion above but ended up cropping in tighter to make a 12x12 photo page.
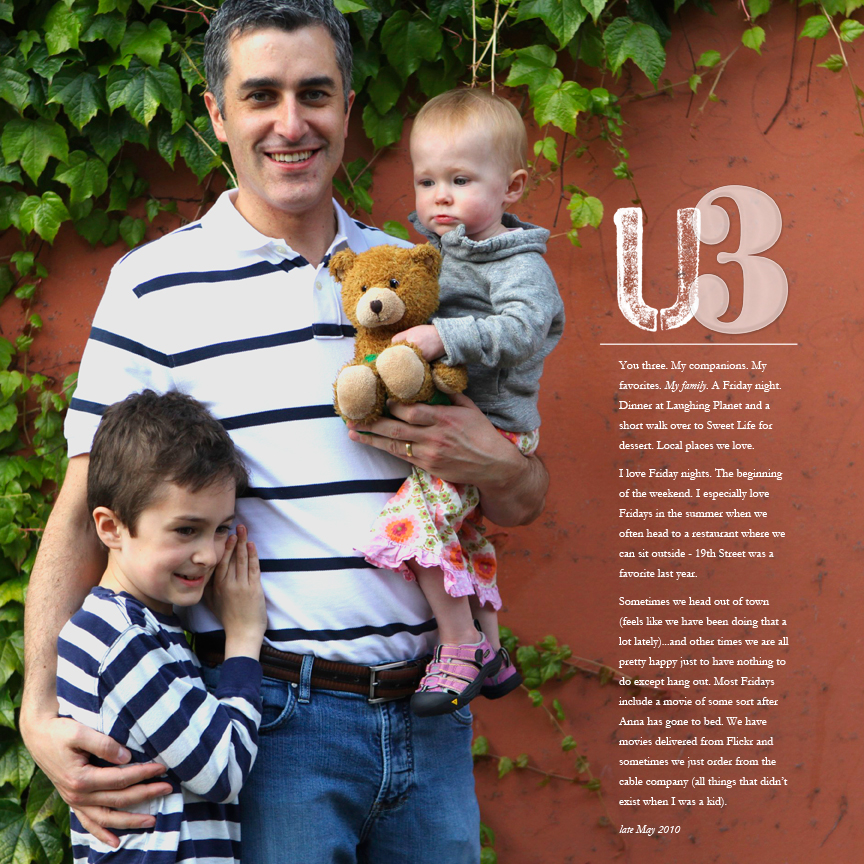
I'm thinking that I will add a second page of collaged images of the three of them to create a spread.
CROPPING AFTER: Another thing you might want to do is take a look at the photos you already have and see if any can be cropped to achieve this same effect. Here's a photo I found that's one of those shots that comes from taking a bunch
in one sitting at our table:
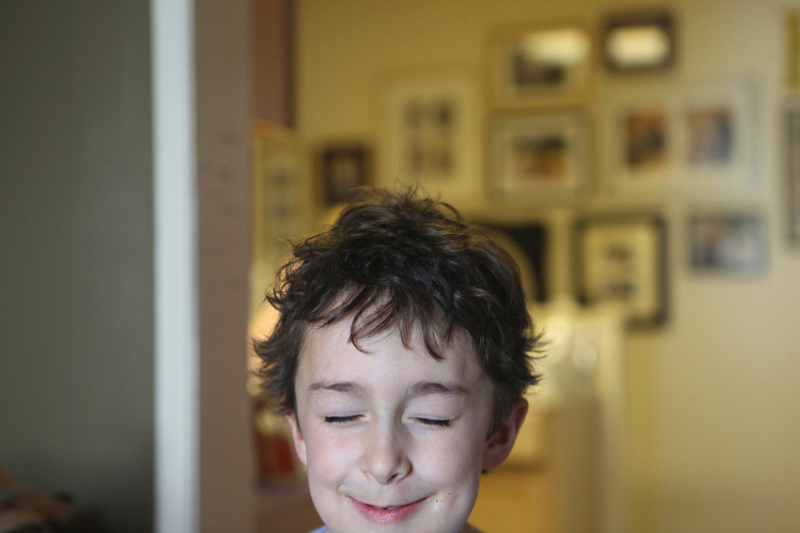
It's a funny, random of shot of Simon in the middle of repeating one of his current favorite movie scenes.
My goal with the crop below was to create a specific space for telling the story and move him drastically to the left side of the photo.
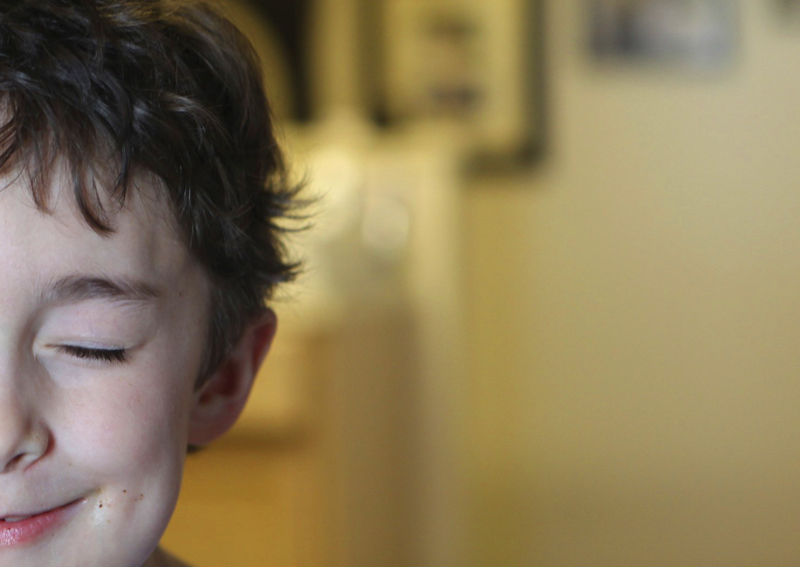
I love this.
Here it is with text added. The text is in progress so I just copied and pasted to give an idea of what the text will look like:

You could do something like this (sized to about 12 inches x 8 inches), print it out, adhere it to cardstock, and embellish with traditional products. I think that's what I will do once I complete the journaling.
Have fun creating room to write on your photos and enjoy your weekend!
[ Past weekend creative projects can be found here. ]

I wanted to take a minute and say a really heartfelt thank you for all the comments on the One Little Word post the other day. I've been holding that part of my story in for awhile, waiting for the right time to release it out into the world. It's so inspiring to me to read the comments and stories and words of support. Thank you.


What a great approach to journaling space. It's pouring out so I don't think I'll go looking for walls today... then again I may run around with an umbrella for a prop and see what my camera can find!
Thank again! You're onderful!!
Joni
Sign in or sign up to comment.
so, i did mine already:
http://lintusininen2010.blogspot.com/2010/06/left-ovary-story.html
yes, i can laugh at myself. :)
Sign in or sign up to comment.
holy cow - now that is a story
Sign in or sign up to comment.
after reading your post this morning-
i immediately started searching for the
perfect photo for this.
i wasn't able to get into the flickr group to share but
did post it on my blog if you want to see what i came up with.
http://melaniebritt.blogspot.com/2010/06/captured-moment.html
thanks for the inspiration.
Sign in or sign up to comment.
Thank you. I am loving the inspiration.
Sign in or sign up to comment.
I LOVE weekend creative! Great idea! I am definitely going to do this :)
Thanks!
Sign in or sign up to comment.
Loved what you did with the photo of Simon--I would hve never thought to do that!
Sign in or sign up to comment.
I love these types of ideas that you throw out to us. I never think of putting that my text over my photo but it looks great. Thanks for the inspiration! You are my hero (or heroine)!
Sign in or sign up to comment.
What a great idea! I have a girls trip coming up next weekend that I'm planning on making a little keepsake book out of and will definitely be taking some pictures with this in mind. Thanks for sharing! :)
Sign in or sign up to comment.
I find this is very helpful when doing my Project Life photos because I often just write on the photo itself -it is quicker and easier - keeps me putting things into my pockets! Your examples are really great because I do get frustrated if I want to write on a photo and how I set it up is by something too dark...always words of wisdom Ali!! Keeps me thinking ahead of how I am going to use that image and tell that story! have a great weekend!
Sign in or sign up to comment.
OHHHHHH - so love that you showed the cropping and adding text afterward part. I love how you do this but don't regulary think to take pix that way. Now I CAN!
thanks! :)
Sign in or sign up to comment.
This is awesome, Ali! Never thought about taking photos with journaling in mind. Love what you have done here!
Sign in or sign up to comment.
ali, you are seriously giving your blog readers not only a lesson for scrapbooking, but for graphic design and art direction! you're a great instructor.
Sign in or sign up to comment.
No Ali, THANK YOU for reminding me about my one word. I couldn't even remember what it was but I knew it was important for me to work on. I looked it up and started back on the path. Thanks so much (and part of my word is to help me bring back my athletic/fitness self that I haven't seen since my 3 painful shoulder surgeries). You rock!!!! Good luck with the Tri. I am north of Seattle if you want someone down there to take pictures of you! :) See you at BLISS next weekend...I can't wait!
Sign in or sign up to comment.
I've got a bunch of photos from a day at the beach which I haven't gotten around to scrap booking. I'll be trying your technique with those; this weekend. Thanks for the great ideas Ali.
Sign in or sign up to comment.
Another, "Duh, why couldn't I think of that?". Thanks for the idea...now to figure out how to put it in a prominent spot so I remember it!
Sign in or sign up to comment.
I love photographing things off center - and now see there's another use for that "white space" I've created! Thanks for the terrific examples - really LOVE how you cropped Simon :). Off to upload some pics to Flickr :)
Sign in or sign up to comment.
Such a great idea! I have some great photos from our last weekend that have that 'white space'. I would love to try this but get intimidated by the writing. Thanks for your examples - they look great.
Sign in or sign up to comment.
I've missed your weekend creative prompts...so it makes me especially happy to see this one. Love this idea! I've been very inspired by magazine layouts as well and have one in mind for my summer photos album.
Such a cute photo of Simon:)
Sign in or sign up to comment.
I love this idea...and it's time perfectly! I just got my first large format prints (8.5x11 and 12x12) from scrapbook pictures today. The photos (from our engagement shoot) had wonderful "blank" space that I think will be perfect for some form of journaling. Totally inspired by some of your previous pages and today's post!
Sign in or sign up to comment.
In almost every Ali Edwards post there is an "ah hah" moment for me. I have been taking pictures with "space" for writing for awhile now. They are perfect when I sent online cards to friends. Using Photoshop, add some words, and voila, a wonderful way to let someone know you are thinking of them (especially when you were really late making the card.) BUT my "ah hah" moment came when I realized that some of your amazing shots came about as a result of cropping in to get just the piece of the image that you really want. I was blown away by the wonderful pictures you took for your Shutterfly rejoice book. The closeness of Simon and Anna. How their smiles just blossomed on the pages. The great shots you showed today of what I call the "Simon look" you seem to capture so well. It really helped me to know that after you took a picture you found the picture within the picture that would tell the story you were trying to share. THANKS so much for that!
Sign in or sign up to comment.
another amazing inspiration ali.
ps
enjoyed listening to you on paperclipping roundtable!
Sign in or sign up to comment.
Ali, thank you for this! Brilliant inspiration! I love the way you remind us to see differently and to shoot with a fresh purpose. I'm so trying this over the weekend!
Sign in or sign up to comment.
Thanks so much for the inspiration Ali! This is such a great idea. Usually I take the photos, and sometimes just by chance I have a bit of space on the side for journaling or a title. I've never thought it out before to actually take the photo with this idea in mind. Love it!!
Sign in or sign up to comment.
so great to see weekend creative again. this is a great post. eager to play as well as see what others do too.
thanks, ali!
~j
Sign in or sign up to comment.