December Daily™ 2011 | Day Three
Welcome to December Daily™ 2011 | Day Three.
Remember back on my Hello December post I suggested not getting hung up on exactly what day something happened? Here's an example of that for me today. These photos are from the last couple of days. That's good enough for me!
Today it's all about the twinkle.
Let's take a closer look:
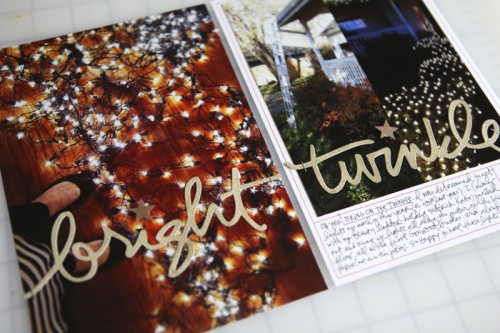
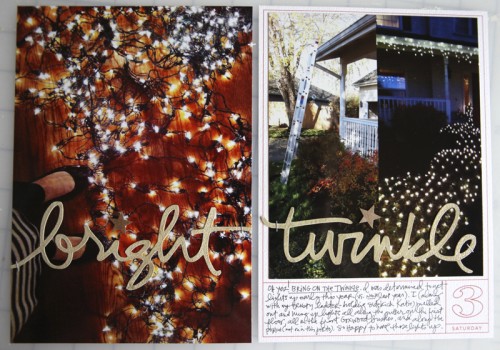
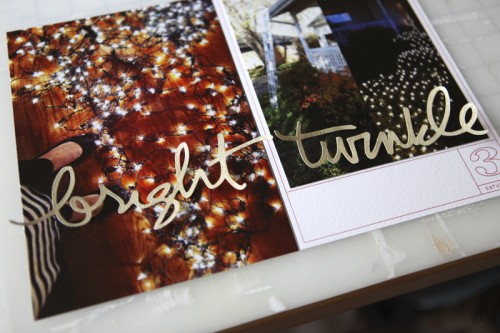
My Day Three ended up being a full page photo on the left and a photo and journaling on the right. All the photos I used to tell today's story were taken with my iPhone.
One of the biggest things I did for this spread was play with my Silhouette Cameo. Both the words above (bright and twinkle) were cut out using the Cameo which is an electronic die-cutting machine. It hooks up with your computer, you open some software, open a design (that you either create on your own or from their store or from a digital product), load some paper, and then click a button (essentially) that tells the machine to cut your design from cardstock (and other materials like vinyl).
That's a rough explanation, but you get the idea.
I've been wanting to play around with this more and I had some time to devote to it today and was super happy with how things turned out.
I ended up recording a video that shows how I opened up one of my digital word art files (from my new Christmas Preparations set) in the Silhouette software, traced it (so easy - click a button), and was then able to cut it out to use on my page.
My cut settings were this:
- Media: Cardstock (I was using White Bazzil Orange Peel)
- Speed: 3
- Thickness: 33
- Double Cut
NOTE : When I opened and traced the word "twinkle" I did need to clean it up a bit by removing two little areas. To do that I selected the word, went to Object/Release Compound Path. That allowed me to delete a couple extra shapes that appeared after the trace. When I was done deleting those two little areas I selected the word again and went to Object/Make Compound Path to connect it all together again.
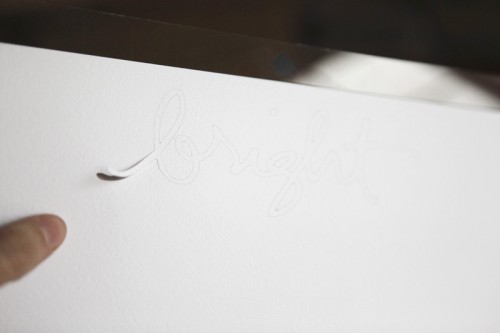
When it comes out of the machine it looks like this. You can see where I started to peel up the word.
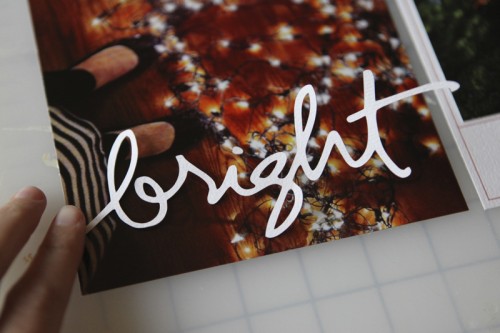
And here's what it looks like when it was completely removed from the backing:
I was really excited at this point.
I decided to do another word (twinkle) to add to the other image.
I could have easily just left these two words alone and stuck them down but I decided to play a bit more.
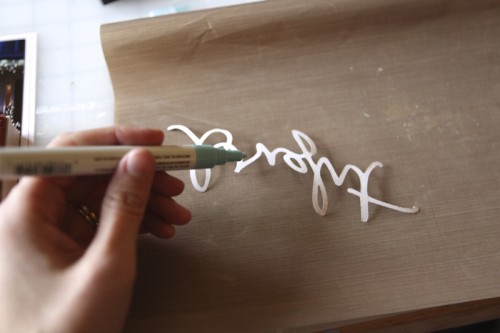
I laid each word down on a craft sheet, added Versamark embossing ink, poured on some Zing Brown Sugar embossing powder and then set it with a heat gun.
Awesome.
To adhere the words onto my photo I used a Martha Stewart Glue Pen.
You could also use a Xyron to add adhesive to the back (the Creatopia would be great for larger words). After I stuck the word down I put something a bit heavier, like a block stamp, on top to hold it down. And nope, I'm not left-handed - just wanted to show a photo holding the glue pen and was holding the camera in my right hand.
One thing I didn't want to deal with embossing was the dot for each of the "i" letters. Actually I tried and it just wasn't happening.
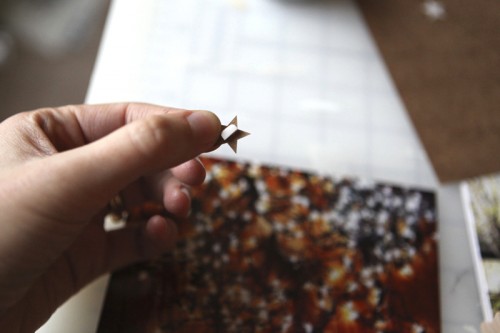
Instead I used two Studio Calico Crafty Cardstock Stickers. They are self-adhesive but I decided to pop them up a bit with 1/2 of a foam tab.
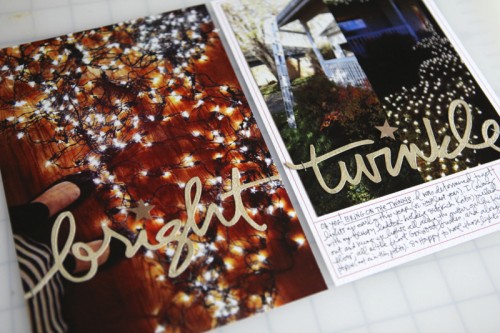
I added my journaling in the box below the image on the second page (writing directly onto the cardstock). That second page image is two photos that I brought together in photoshop that shows a before and after shot of the lights.
Here's a look at it in the album:
Bring on the twinkle!
I also wanted to let you know that I have four new products available at Designer Digitals this weekend (two are shown above): Outline Christmas, Christmas Preparations, Faithful Christmas, and Celebration Of Life (which was created to help people honor and tell stories of those who have passed). All new products are always on sale the weekend they debut.
Don't forget that Designer Digitals is also doing a Days Of December sale where a selection of a couple hundred random products are on sale each day. Check out what's on sale here.
SUPPLIES | DAY THREE
Click on the images to link to the products.

TODAY'S POST SPONSORED BY | Online Card Classes
Join Kristina Werner and Jennifer McGuire for stamping and cardmaking technique classes at onlinecardclasses.com. Each class includes lifetime access to materials including numerous how-to videos and PDF downloads. Get the most out of product you already have on hand by adding new techniques to your crafting arsenal!
SHARE A LINK TO YOUR DAY THREE
You’re invited to include a link to your DAY THREE page here. Please link directly to your post vs. your general blog link.





[...] On my work table this week were a couple things I’d tried with my Silhouette recently too – the one above is a Merry banner. I included a video tutorial on working with my digital files for the Silhouette in a December Daily post here. [...]
Sign in or sign up to comment.
[...] I added words cut with the Silhouette. Tis the Season is from my Messy Little Christmas package (go here to see a video tutorial on how to trace my PNG files with the Silhouette). Hello Joy will be [...]
Sign in or sign up to comment.
Oh Ali! Thank you SO much for sharing this tutorial on how to make your amazing brushes into cut files for my Silhouette! I am going to be very busy tracing the next few days!
Sign in or sign up to comment.
[...] And this piece, cut with my Silhouette, is available here. It’s part of a package called Hello Life Boxes and also includes days of the week. They work great as PNG files (just print and add your journaling – or add your journaling before you print) or can be cut with the Silhouette (just open the PNG file inside the Studio Software and trace – video tutorial available here). [...]
Sign in or sign up to comment.
Hi Ali,
I love that your digital files can be cut with the silhouette. I tried to cut a banner and it cut the letters inside another oval that also cut out from the banner so I ended up with no words in the banner, just an oval. I followed along in the video - traced the shape with the "trace". Is there another step or am I doing something wrong? Thanks for the help - and thanks for making such awesome products and showing us how to use them!
Thanks Ali...I must have missed that part. I'll give that a try.
Hi Erin - yes - you should always do a little clean up (there was a note under the video). Here's the steps/what I noted in that post: When I opened and traced the word “twinkle” I did need to clean it up a bit by removing two little areas. To do that I selected the word, went to Object/Release Compound Path. That allowed me to delete a couple extra shapes that appeared after the trace. When I was done deleting those two little areas I selected the word again and went to Object/Make Compound Path to connect it all together again.
Sign in or sign up to comment.
[...] You can see a tutorial where I walk through the basics of tracing my text files here. [...]
Sign in or sign up to comment.
[...] First up: Hello Life Boxes Vol.3. This is a companion to Hello Life Boxes (days of the week + sentiments) and Hello Life Boxes Vol.2 (months). Works great as a digital file or can be used with the Silhouette as a die cut. A tutorial on how to open and cut PNG files in Silhouette Studio can be found here. [...]
Sign in or sign up to comment.
[...] Absolutely. I’ve got a tutorial right here to help you with that. Make sure to read the note in that post which will also teach you how to [...]
Sign in or sign up to comment.
[...] You can watch a simple video about tracing PNG files with Silhouette Studio here. [...]
Sign in or sign up to comment.
[...] Next up I used my Silhouette to cut out a couple Memory Circles. For information on how to use PNG files with the Silhouette I’ve got a tutorial here. [...]
Sign in or sign up to comment.
[...] I used the Silhouette Cameo to cut a Summer Sentiment 4×6 Box using yellow cardstock and added a Basic Grey Cottage Pennant Flag. Learn how to cut my digital files with your Silhouette here. [...]
Sign in or sign up to comment.
[...] The “Hello Life 2013″ design is available here and was cut with the Silhouette. Learn how to trace my digital PNG files in the Silhouette Studio software here. [...]
Sign in or sign up to comment.
[...] The “one day at a time” is from the Hello Life Vol. 4 digital set – cut with the Silhouette. Tutorial on how to trace my PNG files with the Silhouette can be found here. [...]
Sign in or sign up to comment.
[...] Using PNG files with Silhouette Studio® Software [...]
Sign in or sign up to comment.
Can you please tell me the font you used for the word 'bright'?
That's my handwriting.
Sign in or sign up to comment.
[...] Using PNG files with Silhouette Studio® Software [...]
Sign in or sign up to comment.
Thanks Ali, this looks like such fun and I'd love to be able to do this! I recently purchased a Silhouette and was so looking forward to learning how to do things like this on it, but unfortunately, my machine refuses to "talk" to my computer! I've contacted the company and they tried to get it to work, but nothing they tried worked and they gave up on it and so I have a machine I can't use. So sad and disappointed in the Silhouette people!
Sign in or sign up to comment.
[…] Using PNG files with Silhouette Studio® Software […]
Sign in or sign up to comment.
[…] Using PNG files with Silhouette Studio® Software […]
Sign in or sign up to comment.
[…] Using PNG files with Silhouette Studio® Software […]
Sign in or sign up to comment.
[…] Using PNG files with Silhouette Studio® Software […]
Sign in or sign up to comment.
[…] Using PNG files with Silhouette Studio® Software […]
Sign in or sign up to comment.
[…] Using PNG files with Silhouette Studio® Software […]
Sign in or sign up to comment.