Persnickety Prints Guest Post | Adding the 4x6 Overlay To A Photo For Printing

Cheri from Persnickety Prints sent me an email the other day and asked if she could put together a post about how to add the December Daily™ 4x6 overlays to your photos before uploading for printing.
I thought that was a fabulous idea!
Here's their suggestions for working with the overlays (you can view this same post on their blog):
1) Open the image in your software program (such as Photoshop Elements).

2) Resize the image first to 4x6 at 300 dpi (1800x1200 pixels).

3) Ali has created her December Daily™ 4x6 overlays to perfectly drop on top of your pre-sized 4x6 photo. No adjustments needed! TO MOVE THE OVERLAY ONTO THE PHOTO use the black arrow move tool in Photoshop Elements/Photoshop to move the PNG file onto the 4x6 photo. I have a tutorial for adding elements to photos here.

4) Flatten. Save as full resolution .jpeg. Upload and order.

Your borders will be cut off if they are placed too close to the edge of the image.

This bleed explanation pertains to all photographic printing.
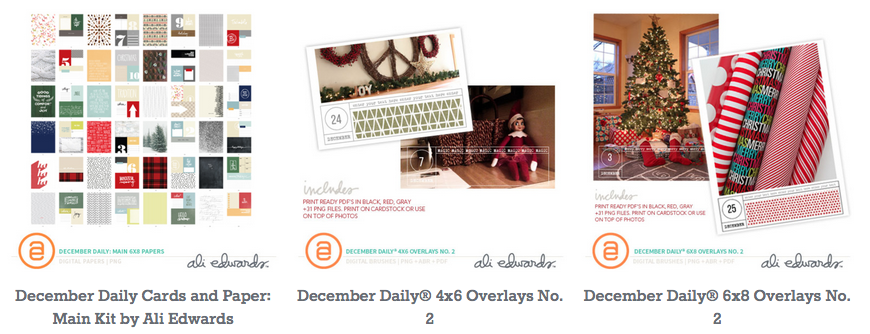
Designer Digitals Quarterly Sale continues this week with all products 30% off. Here's two more new products from me that became available last Saturday:


First up is a set of 4x6 layered templates for easily adding and printing more than one photo on a 4x6 canvas.

And a set of Happy Christmas 12x12 text overlays. These come as black PNG files, can be easily recolored and are great for printing on transparencies.


Thanks PP and Ali for the tutorial. I can always use a reminder on how to use my digital products. Looking forward to my new AE designs in my December daily.
Ali, I'm also loving your new Happy Christmas text overlays. Do you have a tutorial on Vimeo for using these? Thanks!!
Sign in or sign up to comment.
Thanks for the tutorial! I always have trouble with bleed (although I didn't know what to call it); getting the print to come out correctly is always a difficulty for me. Even after doing what is suggested, however, I still have some bleed and therefore I usually have to make the overlay a bit smaller to compensate. Any other suggestions? Is there an adjustment in the printer settings I should use?
Cindy, I'm still shrinking my overlays. I generally need to resize it anywhere from 1/8 to 1/4 smaller and it's hit and miss. Sigh.
Who do you use for printing?
I print my own photos with my Epson Artison 1430.
Jennifer - I am having the same trouble with bleed on my new Epson Picturemate Charm. Did you ever figure out how to solve it? Or are you just shrinking the overlay every time?
Hi Jennifer, I figured out how to solve the 'bleed' problem on my Epson Picturemate Charm. I have to print the photos directly from my computer. I open my photo in Windows Live Photo Gallery. Select Print. At the bottom right is a "Options" button. In Options I select "Printer Properties." Under "Main" in the Layout section there are 2 options: Borderless and Borders. Select "Borderless" and adjust the 'Expansion' to Min (all the way to the left). Click "OK" and print. Doing this I had no more trouble with 'bleed'. I know you have a different printer, so not sure if this will work for you. Hope it helps though!
Sign in or sign up to comment.
any 12x12 december daily digital templates for 2012 comin' our way?
I hope so - trying to work on them!
Sign in or sign up to comment.
can i use the 12x12 overlays if i don't have a 12x12 printer? (sorry, prob a dumb question ! )
thanks!
Sure - I use them on 8.5x11 (or smaller).
Thanks!
Donna, thanks for asking that question, b/c I was wondering the same thing! Thanks Ali, I love the idea of making my own transparencies
Sign in or sign up to comment.
This doesn't explain HOW to add the overlay to the photo.
Misty - use the black arrow move tool in Photoshop Elements/Photoshop to move the PNG file onto the 4x6 photo. I have a tutorial for adding elements to photos here: http://aliedwards.com/2010/01/scrapbooking-with-your-computer-opening-recoloring-adding-to-a-photo-loading-brushes.html
Sign in or sign up to comment.
Is there a difference between cropping to 4x6 and resizing the image to 4x6?
Evalyn- just make sure when you are resizing the image to 4x6, you are also changing the dpi to 300. (photoshop default is 72)
Images straight out of camera are not a true 4x6, so there will always be some cropping.
You can set your cropping tool to create a 4x6 at 300 dpi - the result would be the same.
Sign in or sign up to comment.
Thank you so much for the tutorial. This is my first year with the December Daily and this really helped. I'm even more excited now and I didn't think that was possible! Thank you!
Sign in or sign up to comment.
Love the Designer Digital sale - I bought way too much - I hope I can remember to use it all. Thanks for all the great things!
Sign in or sign up to comment.
I ordered the 12x12 overlays I'am planning to resize to 6x6 since I was unable to find a 4x6 album that I thought would work. I would also like to change the color of the text can you tell me how to do this? also when you print your journaling cards are you able to more than 1 on a page? I'am new to photoshop.
A tutorial for recoloring can be found here: http://aliedwards.com/2010/01/scrapbooking-with-your-computer-opening-recoloring-adding-to-a-photo-loading-brushes.html. For the journaling cards you can either print the PDF (some of the sets include a printable PDF file that has 4 on a page) or you can create a new canvas in Photoshop (say 8.5x11 at 300 dpi resolution) and drag and drop the cards onto the new canvas for printing.
Thank You! I watch the vidoe and learned several things. Hoping to premake some pages this weekend. I did this project a couple years ago love it! Hoping these templates will make it easier to keep up with.
Sign in or sign up to comment.
I have taken class after class on using PSE. If I don't use it on a daily basis (and I rarely use it), I forget everything. Thanks for the tutorial and the links. I do love your digital products. When I become "Empress of PSE", I will have a "flatten button" and an "overlay button"!
Sign in or sign up to comment.
Ali--I bought some of the sentiment boxes on Designer Digitals--the ones that say you can use with the Silhouette but there are no Silhouette files in there--how do I get those?
Hi Candy - here's a tutorial for working with my PNG files and Silhouette Studio (essentially you open and trace): http://aliedwards.com/2011/12/december-daily-2011-day-three.html
Sign in or sign up to comment.
I'm new to digital scrapbooking. Do you have to use Photoshop to use the PNG files? I'm using the studio calico december daily kit. I don't have photoshop, but I was thinking of purchasing Aperture instead. Would this work?
I'm not as familiar with Aperture, however .png format is quite versatile. (.png keeps the background transparent)
Most photo imaging programs are compatible with .png. Check with Aperture to see if it reads .png
It's the .psd that's photoshop only.
Sign in or sign up to comment.
hey there and thank you for your info – I've certainly picked up something new from right
here. I did however expertise some technical issues using
this web site, as I experienced to reload the web
site many times previous to I could get it to load properly.
I had been wondering if your web host is OK?
Not that I'm complaining, but sluggish loading instances times will very frequently affect your placement in google and can damage your quality score if ads
and marketing with Adwords. Anyway I'm adding this RSS to my email and
could look out for a lot more of your respective intriguing content.
Make sure you update this again soon.
Feel free to surf to my site :: Check This Out
Sign in or sign up to comment.
[…] Persnickety Prints – Adding Overlays to Photos […]
Sign in or sign up to comment.
There's certainly a lot to learn about this issue.
I really like all of the points you have made.
Feel free to surf to my site Bee Exterminator Mission Viejo
Sign in or sign up to comment.
This website was... how do I say it? Relevant!!
Finally I have found something which helped me.
Thanks a lot!
Feel free to surf to my webpage; attic rodent removal
Sign in or sign up to comment.
What a information of un-ambiguity and preserveness of valuable know-how concerning
unexpected emotions.
Here is my web blog; search engine
Sign in or sign up to comment.
Thanks for finally writing about > Persnickety Prints Guest Post | Adding the 4
Sign in or sign up to comment.
Heya i'm for the first time here. I came across this board and I find It really useful &
it helped me out much. I hope to give something back and aid others like you aided me.
Here is my web site :: best deals on lawn tractors
Sign in or sign up to comment.
I have to thank you for the efforts you have put
in penning this site. I really hope to check out the same
high-grade blog posts from you later on as well.
In fact, your creative writing abilities has inspired me to
get my very own website now ;)
my homepage health insurance quote Missoula Montana
Sign in or sign up to comment.
Hello! I'm aat work surfing around your bblog from my nnew iphoone 4!
Juust wanted to say I love reading your blog and look fofward
to all your posts! Carry on the superb work!
Sign in or sign up to comment.
Genuinely when someone doesn't know then its up to other
viewers that they will help, so here it occurs.
Also visit my webpage ... Wellness Program Orchard Homes MT
Sign in or sign up to comment.
It's going to be end of mine day, however before finish I am reading this great paragraph to improve my know-how.
Look into my web page :: stamped concrete driveway Manhattan area
Sign in or sign up to comment.
Stomach chemicals are crucial in connection with this. Consequently, a decreased quantity of acid sent up to the esophagus ought to
bring about less injury or irritation. Still, Prilosec OTC is a safe and
effective treatment against heartburn even without the doctor's prescription.
Sign in or sign up to comment.
What's up, after reading this awesome piece of writing i am too cheerful to share
my knowledge here with mates.
Also visit my weblog :: coffee beans wholesale richardson tx
Sign in or sign up to comment.