Three Things : For the Love of Yellow + A Layout
It's usually about this time of year that I start longing for some some lovely spots of yellow both in my house and in my work. I've definitely been into pink lately, but as soon as I start seeing yellow tulips and daffodils in the store I start getting excited about the crisp, fresh nature of spring. There are definitely not any tulips or daffodils blooming locally, but they are starting to push up through the dirt in the pots outside my front door. Ah, possibility and growth. I love the cycles of the seasons.
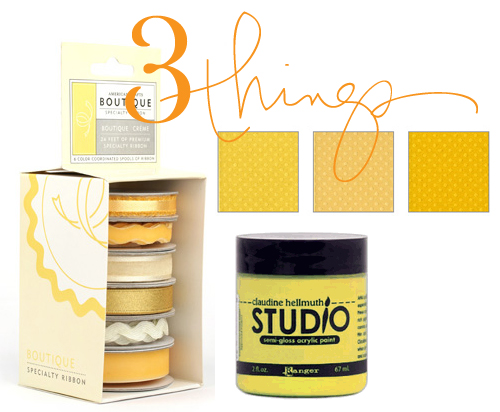
Today here's three yellow things to celebrate the newness of the next season and a layout inspired by all this yellow goodness.
Studio by Claudine Hellmuth for Ranger : Semi Gloss Pastel Yellow Acrylic Paint : See the layout below for use of this paint. Love the consistency.
American Crafts Specialty Ribbon Creme & Yellow : I always like to have a small collection of ribbon on hand for a variety of different crafting tasks. This set is a nice combination of yellows + cream.
Bazzill Basics Dotted Swiss 12x12 Cardstock Pack Honey Trio : my favorite textured cardstock.
[ Three Things is a weekly product series : check out the archives here. ]

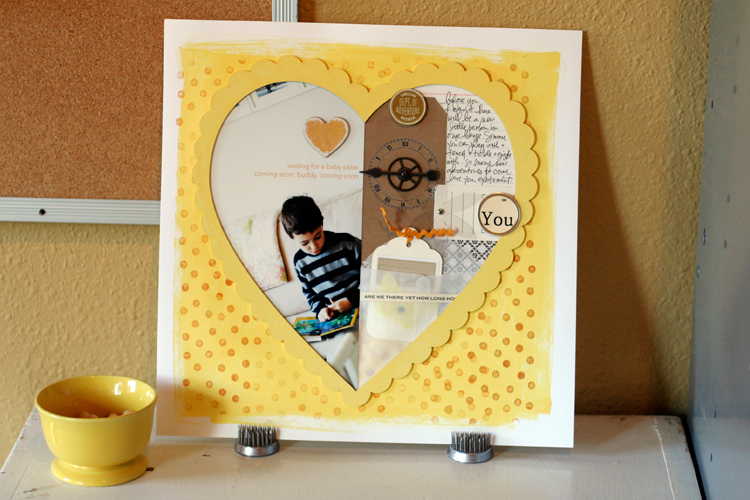
This is a fun, fairly simple layout that is a great way to use up some of your stash at home.
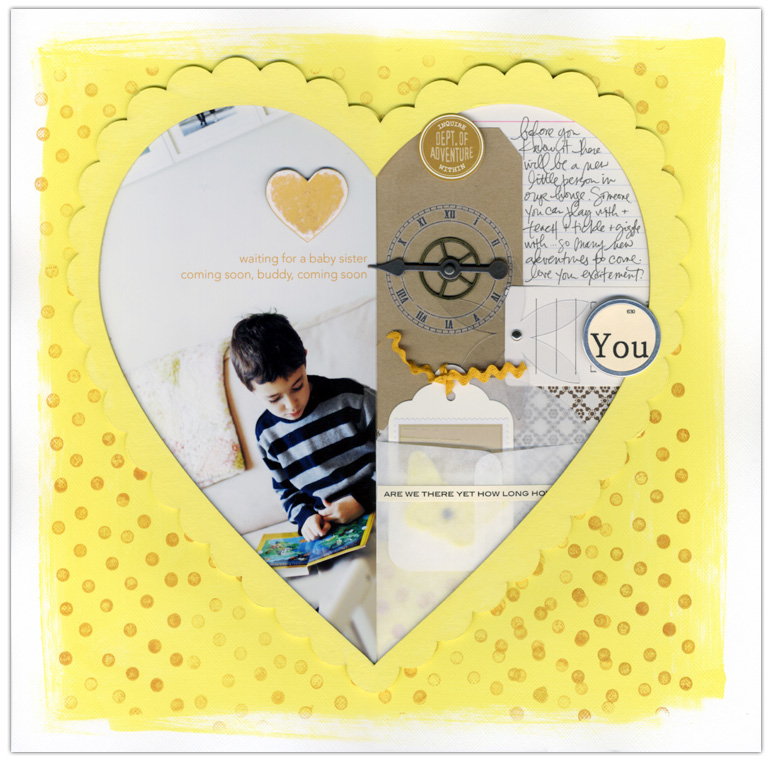
Supplies: Cardstock: Bazzill Textured White; Paint: Claudine Hellmuth Pastel Yellow Acrylic; Rolling Stamp + Ink: Stampin Up; Chipboard Heart: American Crafts Friends House Chipboard Teen; Metal Spinner Pieces: Tim Holtz Game Spinners and Sprocket Gears; Clock Rub On: Little Yellow Bicycle; "You" Circle Accent: Jenni Bowlin Studio Kit; Sticker Strip & Circle Sticker: 7gypsies; Clear Plastic Flower: Heidi Swapp; Large Scallop Heart: Technique Tuesday; Tags: Misc.
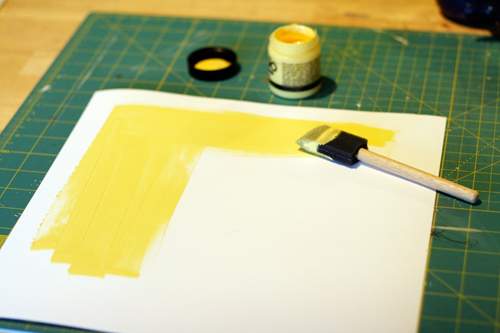
1. Start with a 12x12 sheet of textured cardstock. Paint a large square right onto the cardstock leaving a white border around the edge. Let dry.
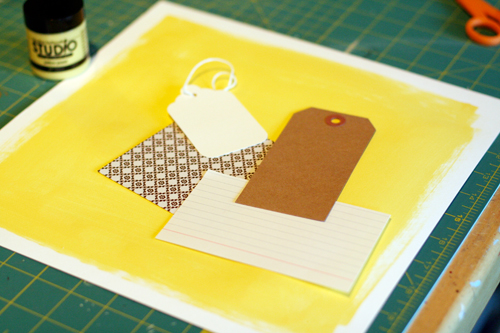
2. Collect a few tags, patterned papers, and/or small envelopes to use as the elements on one side of your heart. The idea is going to be to collage them together under the scalloped heart alongside a photo.

3. Create a pattern on your painted background. For this I used a rolling stamp from Stampin Up and More than Mustard ink. Here's the result after the ink has been rolled on to the cardstock:
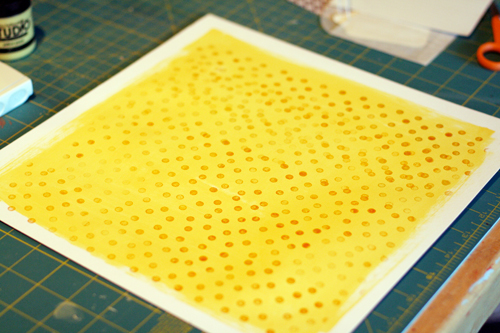
'
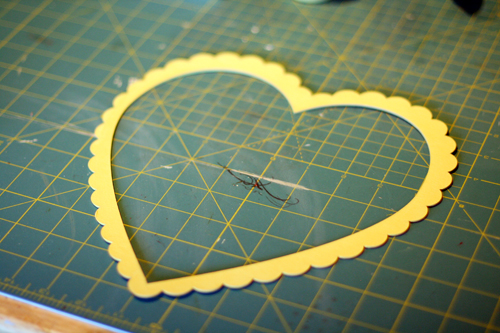
4. Paint a chipboard frame the same color as your background. This is a new heart-shaped chipboard element from Technique Tuesday. Other large decorative chipboard frames can be found here and here.

5. Lay the heart down and begin arranging your paper elements.
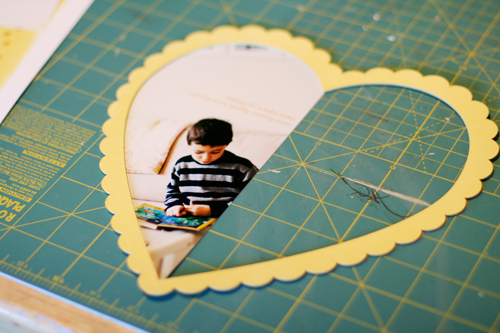
6. Measure the size of your frame and print out a photo. In this case I printed my photo 4.5 inches x 9.5 inches wide. Trim around the outside to fit behind your frame. You could easily have more than one photo in place of the single photo as well. I added a bit of text to my photo in Photoshop before printing.
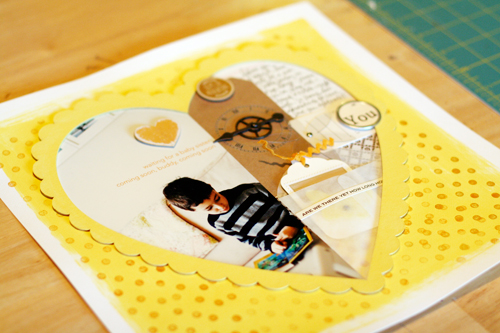
7. Trim the paper elements to fit behind photo and adhere to background cardstock. Add additional elements to complete your layout and adhere chipboard frame.
Here's a look at some of the elements I used up close:
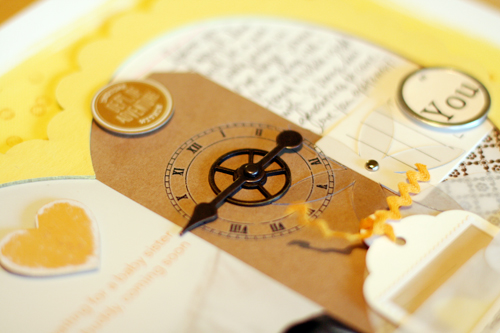
I love these metal spinner elements from Tim Holtz (a game spinner on top of a sprocket gear). I find them pretty versatile and can be added to pages that tell a variety of different stories. The metal elements are layered on top of a rub on from Little Yellow Bicycle. Cute little heart (I sanded the edges) is from American Crafts Friends House Chipboard Teen collection.
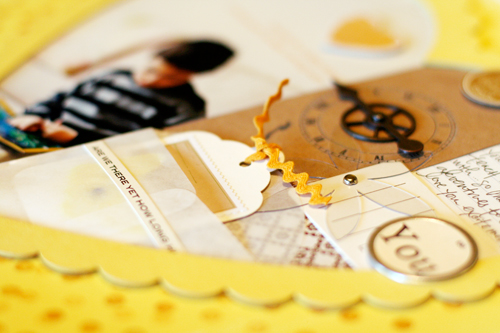
Large clear plastic flower from Heidi Swapp. Lots of little bits of this and that - a really great way to use up some of those things you have stashed away.
Coming tomorrow: A Superhero giveaway.


Love it! Thanks for sharing your steps. I love how you broke it down. Thanks!
Amber
Sign in or sign up to comment.
Ali, I LOVE your layout!!! I love the yellow and how you used the heart frame and all the little extra goodies along side your photo. Brilliant!
Sign in or sign up to comment.
yellow is definately my favorite color outside.... maybe because it's snowing outside and i long for sunshine-y days. either way... great layout!
Sign in or sign up to comment.
I love this LO and the bright sunny yellow!! (perfect lift for a snow,rainy day in VA) Thanks for sharing the how-tos.
Sign in or sign up to comment.
wow, ali. what a clever page. i like the yellow on yellow. thanks for the step-by-step. fun to see it come together...
Sign in or sign up to comment.
Hi Ali! Such a bright and fun lo! I wish I would think to use paint more often...you make it look so easy! Don't know if you get to all these comments each day, but I had to tell you that I found the 'printer trays' (thingies?) that you have on your wall with pics. I am so excited and can't wait to fill them. Thanks so much for sharing that wonderful idea and always giving me new inspiration! Enjoy your day!
Rhonda :)
Sign in or sign up to comment.
I fully agree with others---INSPIRING. Thanks, Ali! =) This is why I frequent your blog!
Sign in or sign up to comment.
I love that layout, Ali!! Yellow is my fave color. Just so HAPPEEEEE!
Sign in or sign up to comment.
hi Ali! i have a QUESTION for you...whenever i try paint my pages with a lot of paint, as you've done with the yellow, my pages always seem warped and waveie (not sure of that word), and even when i try to flatten it out again, it never seems to end up completely flat. is there a way to fix this, or is this normal?
Thanks!
Sign in or sign up to comment.
Beautiful! Yellow always makes me smile too. What a wonderful reminder that spring is just around the corner. Thanks for sharing, as always.
Sign in or sign up to comment.
That would make a fabulous Valentine!!! I'll eb linking to this in my next Valentine's Day Roundup. I think it's going to have to go on my list as well!
Sign in or sign up to comment.
That would make a fabulous Valentine!!! I'll eb linking to this in my next Valentine's Day Roundup. I think it's going to have to go on my list as well!
Sign in or sign up to comment.
Love, love, love this! And thank you for posting the how to. I am definitly going to try this for myself.
Sign in or sign up to comment.
I love the layout, its simple but sweet, which is just how I like mine. Thanks for all the hard work you do to keep us inspired.
Sign in or sign up to comment.
Ooohhh! Love this layout, and especially appreciate that you shared your process. Hope you're getting a chance to put your feet up in the midst of all this nesting and sharing:)
Sign in or sign up to comment.
i love this layout; fun to see a heart done in yellow! makes me happy!!
Sign in or sign up to comment.
superbe comme a chaque fois !
Wahoo ! so nice, so beautifull page !
Sign in or sign up to comment.
Oooh the yellows are so fun and pretty. I'm so ready for spring! Your layout is adorable. Thanks for sharing the steps. :)
Can't wait for the Superhero giveaway! I've been wanting one.
Sign in or sign up to comment.
Yellow is my favorite.... especially in the doldrums of winter! Love that SU wheel also. Thanks for the inspiration!
Sign in or sign up to comment.
Hi Ali,
Can I ask what you have used to stand the layout up in the first photo - I often struggle how to display my layouts and it looks like you've used brushes?
Sign in or sign up to comment.
You should check out the fun yellow and gold designs in the Bella blvd collections.
My favorites are the Sugar Cone paper (item #030) in the Sweet Celebration line and the Roundabout paper (item #011) in the Pack Your Bags collection!
Sooo cute!
www.bellablvd.net
Sign in or sign up to comment.
I love yellow! Thanks!
Sign in or sign up to comment.
I love this layout, makes me think of Valentine's day without all the pinks and reds! Great idea, I like how you used only one photo on the one side. Loving the bright yet soft yellow paint!
Sign in or sign up to comment.
You make it look sooooooooo easy! I love yellow...it's so sunny and cheerful! :)
Sign in or sign up to comment.
Love that layout Ali! You are so inspiring!
Sign in or sign up to comment.