Week In The Life : Bringing It All Together • The Photos
Seven little days in a life. There it went.
I always feel a little strange on Monday morning when I wake up and don't start taking photos right away (and a little bit of relief as well). This is an intense, in-depth project. It's a whole lot of work but one of the coolest projects I have created since I started scrapbooking.
Each time I tackle the "putting together" phase of Week In The Life I do things a little different. Today I want to share with you my process for going through my photos
and how I chose which ones to place where, which to enlarge, which
to crop, etc. Some of it will be done after printing, but for the most
part I am going to make a plan before uploading.
This year I'm having Scrapbookpictures.com print my photos vs. printing them here at home. I definitely considered printing at home, since that's what I normally do, but with this many at one time I think it was easier for me to upload. And as you will see later on in this post, I'm pretty sure it was less expensive as well.
Remember this?
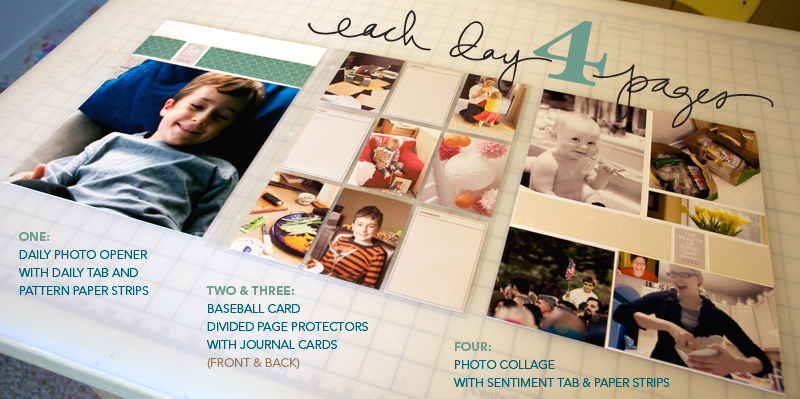
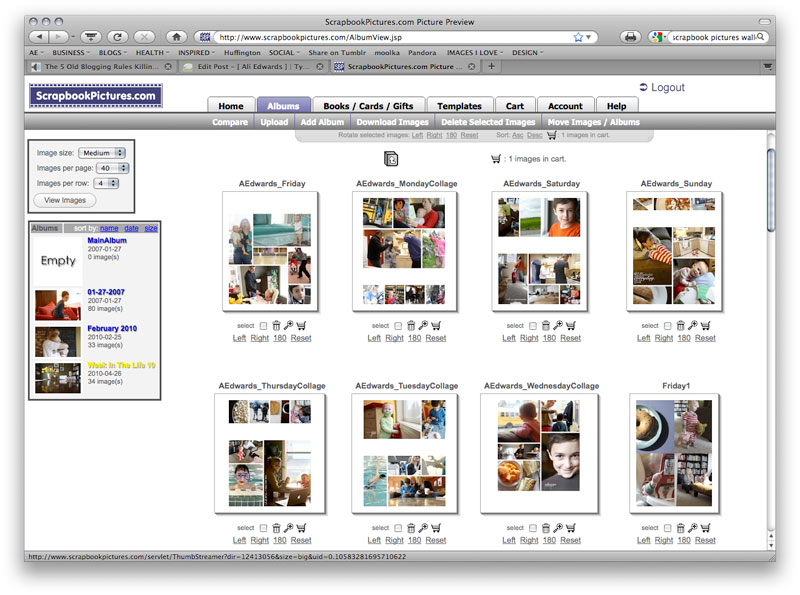
I'm still definitely following my design plan for this album. For each day I have a Daily Opener, a baseball card divided page protector (front & back), and a photo collage page.
HELLO PHOTOS
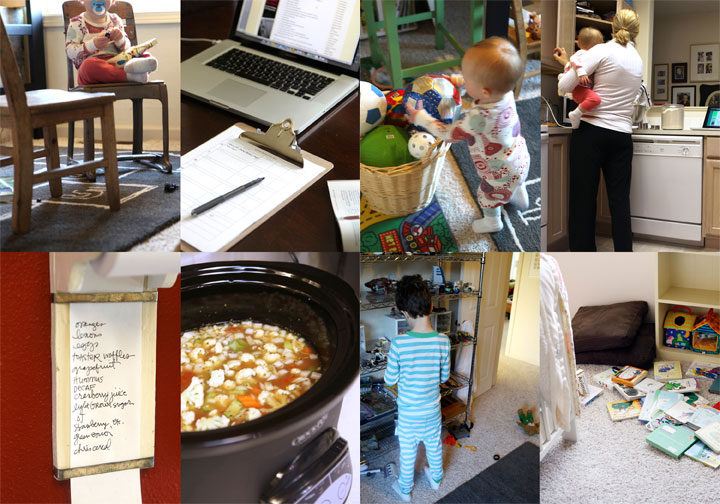
Each night during this past week I uploaded my photos to my computer.
At that time I went through and did a quick delete of any photos that
were obviously not going to be used (triplicates, seriously blurred, mistakes, etc). Since I was taking over 100 photos
per day (and I knew there was no way I would use them all) I was pretty ruthless about which ones I deleted.
NOW HERE'S THE DEAL : I did take around, or over, 100 photos each day of my week. In my experience, 100 photos doesn't really mean "100 photos that I want to frame and hang in my house" or "100 photos that must be crammed into this album no matter what." 100 photos usually means about 20 of Simon & Anna chasing each other and wrestling in the living room...one of which I will use in this project. It means 5 shots of my lunch...one of which I will use. It means 5 shots of Simon and I in the mirror...one of which I will use. You get the point.
Out of 100 photos I average about 30 or less that I really want to use per day. This is the reason that I always encourage people to take more than you think you will use. It's this point in the process that having more is really a benefit because you have more choice when it comes to telling the story of your life at this point in time.
Yesterday I went through all the photos again and got serious. I created canvases, pages, etc (read below) to be uploaded. It took me most of the day to organize, edit, crop, etc. Even though it was a really long day, it is really fulfilling and eye-opening and cool to see a whole week in photos all together in one place.
I encourage you to make a plan for yourself to get this album done. Set aside some time each night to address your photos. One night for deleting. One night for selecting and uploading your daily openers and collage pages. One night for working on your divided page protector pages, etc.
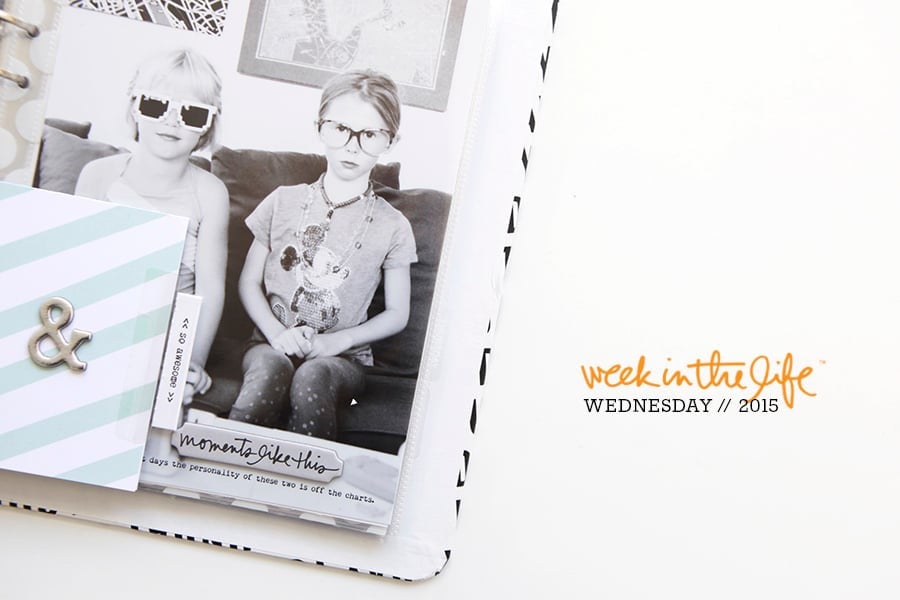
DAILY OPENER PHOTO
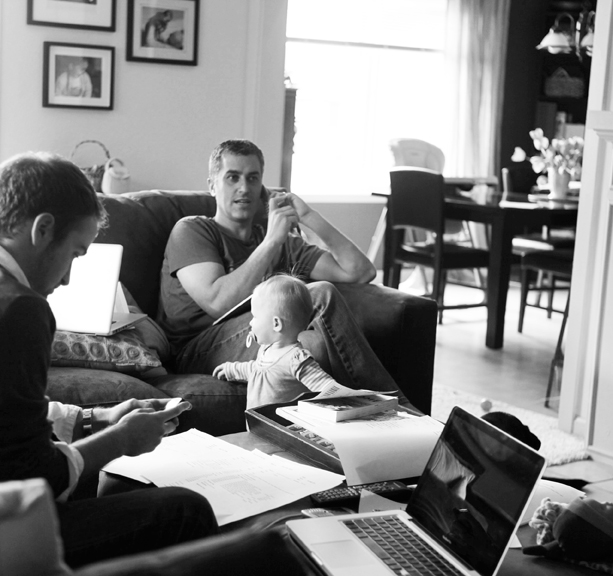
As I looked through all my photos to select which ones would be my main image for each day there were definite favorites. Through this process I realized that what I wanted for these intro pages was variety - each one showing a little something different about life right now (the black and white image above will be the opening photo for Wednesday).
I ordered 8, 8x10's that I will crop to 8x8.5 when they arrive (one for each day of the week and one for the intro page).
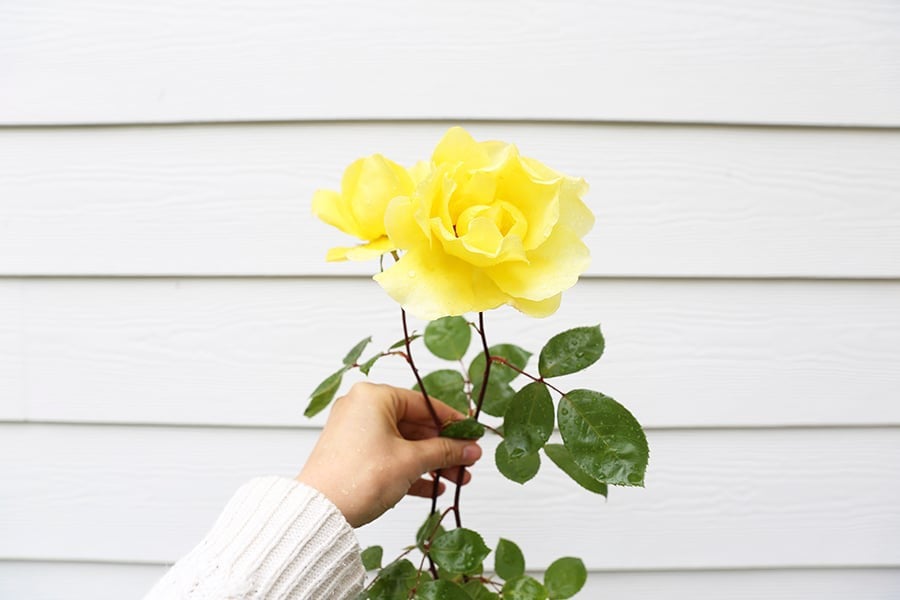
In years past I have used only photos of myself as the main photo. This year I'm branching out and including a photo of Simon, a couple of Anna, a couple of me, one of food, the one of Chris above, and one with all of us.
There's no right or wrong in choosing an opening photo. If you have a ton of photos you really want to include you might consider creating a collage in the daily opener photo space. For me, I love the enlargements contrasted with all the smaller photos throughout each day.
JUST A NOTE: EMBRACE THE PHOTOS YOU HAVE. This project takes longenough without going through and adjusting every single photo trying to
get it just perfect. Embrace those photos that aren't perfect -
what a great reflection of real, everyday life.
COLLAGE PAGES
Next I attacked the collage pages. I decided to tackle these second, before the baseball card page protector pages, because of the variety of size and orientation and ability to pick just which photos I wanted to be highlighted.
To create my collage pages I used the 8.5x11 digital templates I created for Designer Digitals. The package includes seven different layered templates. My process for this part was simple: open the template, drag photos into Photoshop, mask them into the spaces on the template, save as a jpg and upload to the developer.
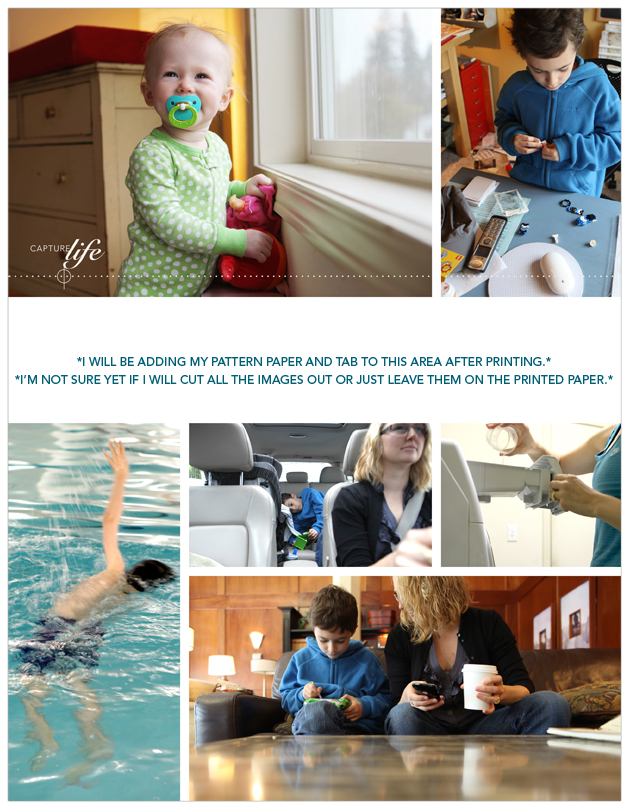
So how did I choose which photos to use on the collage pages? The collage pages are really a collection of my favorites photos and/or ones that fit the designed spaces (like the really vertical shot of Simon swimming above). Again I look to create variety and include different times, places, people, colors, etc.
As some of you noticed throughout the week, when I take photos I take almost exclusively horizontal shots. This is just my personal preference. I know coming into this project that I will be cropping many of them. I also know, from expereince, that part of what I love about this project is seeing the "pieces of life/pieces of the whole" that show through the cropped shots.
BASEBALL
CARD PAGE-PROTECTOR PHOTOS
After selecting the photos for the daily openers and the photos for the collage pages I worked on rounding out each day with photos for the baseball card page-protectors.
For uploading to scrapbookpictures.com and for printing I decided to create canvases in Photoshop that were 5 inches x 7 inches. On each 5 inch x 7 inch canvas I was able to fit 4, 2.5 inch x 3.5 inch photos.
For most days I ended up with about 12 (there's 18 pockets available) photos which will leave room for the journaling cards and other "stuff" I collected throughout the week.
I tend to follow a pretty simple cropping and saving procedure in Photoshop. Here's a video tutorial that walks you through that process (click to view larger on Vimeo):
Ali Edwards Week In The Life : Photo Crop Tutorial from Ali Edwards on Vimeo.
Here's the written how-to for Photoshop Elements:
- Open your photo.
- Go to Image/Resize/Image Size.
- Change the Resolution to 300dpi and adjust the height to 3.5 inches. This should automatically adjust the width to 5.25 inches.
- Using the crop tool, drag a crop box that is 2.5 inches wide (and 3.5 inches tall). I eyeball this. I like that I can move the crop box around on my photo to find my favorite crop. Don't worry that you are removing some of the photo and remember that some photos will lend themselves better to this vertical crop than others - keep that in mind as you are selecting which photos go where in your album.
- Go to Image/Resize/Canvas Size and change the size to 5 inches x 7 inches. This will become your new canvas. On here you can fit 4, 2.5 inch x 3.5 inch photos. I decided to go about it this way when I saw that I would need to order 2 wallets (I don't need doubles of all these shots.
Here's a look at a couple of those 5 inch x 7 inch canvases:


I love these 2.5 inch x 3.5 inch photos. They really do round out the album in terms of filling out the rest of each of the days. Again, think pieces of the whole.
PRINTING COST
One of the questions I am often asked is related to printing at home vs. uploading to a developer.
After uploading my completed photo pages to Scrapbookpictures.com the total cost was $30.85 (including $3.99 for the shipping option I selected). This cost included the following:
- 9, 8x10's (I added one additional photo that I want to frame)
- 18, 5x7's (photos for the baseball card page protectors - 4 to a page for a total of 72 images after trimming)
- 7, 8.5x11 (the collage pages)
I know that is significantly less expensive than purchasing new ink cartridges for my printer. I'm looking forward to seeing how the pages all turn out and hoping that the sizing is all correct. I'll give you an update on that in a couple of days.
In the meantime, while I wait for my photos to come home, I'll be putting other pieces of the album together. Tomorrow's post will cover that process.

Click
here for a complete list of Week In The Life posts.


Hey Ali, regarding WITL notes, editing, journaling -- the writerly side of me wants to "clean up" my notes, and in that I'm getting wrapped up in the tone, voice, phrasing of my thoughts. I don't want to overthink this, and almost think I want to maintain some of those raw, punctuated thoughts.
How much editing do you apply? And am I overthinking this? please be brutally candid. I need it.
Sign in or sign up to comment.
Seriously...this gives me goosebumps! I have enjoyed every aspect of WITL and seeing it all come together makes it even more special. I can't wait to really get started with mine!
Sign in or sign up to comment.
I might use the poems...will decided once I see how much other journaling I have (want that to come first). Every once in awhile she pulls off the books from the bookshelf, but for the most part she leaves them alone. She has a toy basket on the bottom shelf and a basket of books across the room - so far she's been more likely to go for those. I have childcare (in our home & at a friend's house) 5 days a week - usually about 8:30am to 4pm.
Sign in or sign up to comment.
Morning Molly - I am working on this part today and will have a full report tomorrow. In general I lean towards less editing and more just getting it in the album...I am definitely considering just adding in my notes as-is. There is something very "real life" about those jotted thoughts. I think you can bring that all together by highlighting a few things...maybe a thought or a quote (from you or a family member) as a type-accent.
My guess is if you think you are overthinking you probably are...but there's nothing wrong with thinking it through so that you ensure that the story is told that really reflects you and your life.
Sign in or sign up to comment.
I think the tradition part makes it even more special :).
Sign in or sign up to comment.
I love the process of capturing our everyday life. It makes me slow down and see the little things that I tend to rush past. With small children everyday life (schedules) changes so quickly; from babyhood to preschool to elementary school….One day there is naps and play dates, and then next thing you know they have moved onto soccer practices and homework. So I love having this album to look back to remember what life was like at the different stages of my childrens lives and my life as a mom. Which brings me to a question. This past week, not unlike what you experienced, our baby sitter was unable to come a couple of days and my three year old got strep throat. So our regular routine was completely off. I realize that is just part of life and I want to keep that. But I would like to add a snap shot or a look at what our usual routine is like so that I have a record of that. As I mentioned before, I like being reminded of naps, nursing schedules, daily school drop offs and pick up times because these change. I also cannot imagine not having pictures of our babysitter included in this, she is such a big part of our everyday life. We consider her a part of our family.
I was thinking of adding, in addition to this past week, a more typical Monday and Tuesday to the album. (Monday, Wednesday, and Friday are one schedule and Tuesday and Thursday are another.) Do you have any suggestions or thoughts on this idea?
Sign in or sign up to comment.
I think that would be totally cool Christina.
I am also toying with the idea of just including that information either on a journaling card or as an add-in (maybe another page protector with overall "thoughts from the week"). There's nothing wrong with adding more to give a more complete "picture" of your life right now.
Sign in or sign up to comment.
Ali-- quick question... I don't see the option for a 8.5 x 11 printed page from Scrapbook pictures. Do you use the 11 x 14 & cut it down? I love your templates, but I do have problems printing that size on my computer or developing them elsewhere. Ideas?
Sign in or sign up to comment.
I love this project and you make it so doable by posting your progress as well! Thank you so much for the inspiration, tips, and the detailed posts about your overall process! I can't wait to put my album together!
Sign in or sign up to comment.
I don't have Photoshop. I do have other photo editing software. Is anyone else not using Photoshop AND trying do the 2.5 by 3.5 size on a 5x7 "sheet" that is the "canvas" in Photoshop? I have loads of other free programs (Picasa, Microsoft Photo, Ulead, Kodak, etc.) on our desktop.
I love how Ali teaches us while maintaining her personal perspective on her own album. I love working alongside someone with such heart and great design skills!
Sign in or sign up to comment.
Thanks so much for posting your editing process. Very helpful. I love this project.
Sign in or sign up to comment.
For any Picasa Users, it is very easy to create the 4 photos on a 5x7 image using the 'Collage' option.
Select 4 photos, and choose 'Collage', then the Grid option and a '5x7 page format' and create the collage - it will create a new image file with all 4 photos on it.
Sign in or sign up to comment.
Oh cool Bev!
Sign in or sign up to comment.
Actually printing the photos, and knowing what size I want, is the hardest part for me (at least the place where I most often freeze), so thank you for this!
I'm excited to get my WITL photos from over a year ago in an album ---and plan to add this year's to the same album and do it again every couple years...do you think the WRMK 8x11 albums could hold twice what your doing? Or do you think separate albums is a better way to go?
Also a question---love the big statement of the black frames on your wall (as seen in the photo of your husband above). Would you share what size the photos are? 8x10 always seem a little small on walls to me...curious if these are 8x10 or bigger. Thanks!
Sign in or sign up to comment.
Hey Terri - just read below that Picasa is a great choice for this. According to Bev (see comment below) you use the "collage" option, then the "grid" option and a "5x7 page format."
Sign in or sign up to comment.
You might need to scroll down a bit when selecting the page size. It came up for me yesterday for my images that were 8.5x11 (when editing from your shopping cart).
Sign in or sign up to comment.
Ali, I read this excerpt of a speech by Orson Scott Card (author of Ender's Game, among others) which he gave this past weekend in DC and it made me reflect even deeper on the concept of story-telling and the power of the story and your wonderful encouragement to tell our stories. After taking your Yesterday/Today class I'm seeing "stories" in a very new way. Reading this speech helped me realize that our little personal stories really are part of a bigger, global picture. I thought he had some interesting thoughts, surely worth pondering and discussing. http://www.meridianmagazine.com/ideas/100426dismantlingprint.html
Sign in or sign up to comment.
Ali,
First, your pictures look great! I am so glad you will be explaining Photoshop in detail, I as well as some of the others are unclear on how to use it, & get frustrated.
Next, I would love some advice. The last two days of my WITL, I hardly took any photos, (maybe 3 each day) They are not even anything great.I don't have a reason why I just didn't. What do you think I could add or do? Because of this I feel like maybe I should not complete it, because it won't be as good as the beginning of the book... I really do not want this to becoming "another unfinished project" I would love any advice you might have.
Lastly, if you don't mind me asking, I would love to know where you found your bedding, I LOVE IT!!
Sign in or sign up to comment.
Hi Ali, I am really enjoying this project! I am concerned that I won't be able to finish it this week, and that it will end up an abandoned project. That said, I am willing to try whatever I can to make it easier. Do the templates that you have at designer digitals really make it as simple as you describe. Just drag and drop? I just want to go for it, but at $24.99, I'm hesitating. I know there was a sale at DD very recently, last week or so, but is there a chance these will be discounted again soon?
Sign in or sign up to comment.
This was a great post. I am always torn on printing at home versus ordering and I like how you broke it all down with what you did. It really helps a lot...with future projects too ;)
Sign in or sign up to comment.
Give yourself permission to not have to finish it this week...and permission to spread it out...with a COMMITMENT to finish it soon :). How about that LOL? I do think the templates make it easier if you have some working knowledge of Photoshop or Elements. I am working on a video tutorial so you can actually see the process today. Maybe wait to watch it before deciding about the templates?
Sign in or sign up to comment.
i love reading about your process ali! thanks for sharing all this with us. it was a ridiculously hard project for me personally (and emotionally, which wasn't something i expected)...but i just know that years from now i'll be so thankful i did it.
Sign in or sign up to comment.
Why not just do 5 days instead of 7? Nothing wrong with that at all :). Take what you have and make something with that!
And thanks about the bedding - it's from Pottery Barn. They have really great sales in the store that I stalk :).
Sign in or sign up to comment.
Hi Deirdre - those photos on the wall are all 8x10. You know, the album might hold two years worth...it all depends on if you add things that are bumpy or if you are keeping things really flat. The more flat your pages, the more you can fit into one album.
Sign in or sign up to comment.
My birthday happened to fall during this week, so I can tell you it's a pretty cool way to document your birthday. I almost choose to do this during a different week, fearing that the specialness of a birthday would skew the ordinary week I was trying to capture, but it's just the opposite. I ended up with a super ordinary birthday - one of the nicest ever! I love your idea to make it a tradition!!
Sign in or sign up to comment.