Week In The Life : Bringing It All Together • The Photos
Seven little days in a life. There it went.
I always feel a little strange on Monday morning when I wake up and don't start taking photos right away (and a little bit of relief as well). This is an intense, in-depth project. It's a whole lot of work but one of the coolest projects I have created since I started scrapbooking.
Each time I tackle the "putting together" phase of Week In The Life I do things a little different. Today I want to share with you my process for going through my photos
and how I chose which ones to place where, which to enlarge, which
to crop, etc. Some of it will be done after printing, but for the most
part I am going to make a plan before uploading.
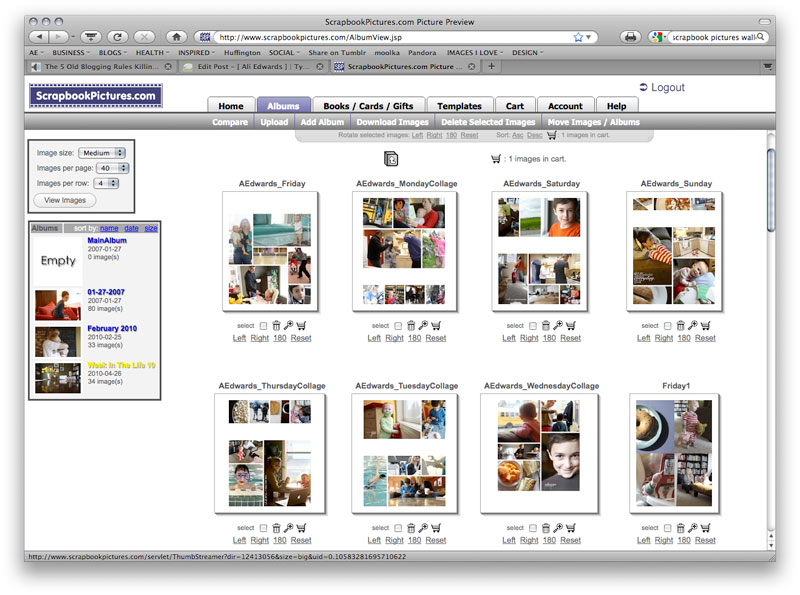
This year I'm having Scrapbookpictures.com print my photos vs. printing them here at home. I definitely considered printing at home, since that's what I normally do, but with this many at one time I think it was easier for me to upload. And as you will see later on in this post, I'm pretty sure it was less expensive as well.
Remember this?
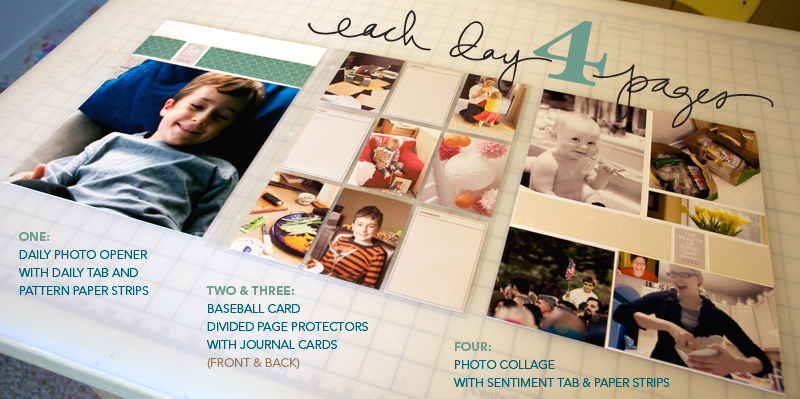
I'm still definitely following my design plan for this album. For each day I have a Daily Opener, a baseball card divided page protector (front & back), and a photo collage page.
HELLO PHOTOS
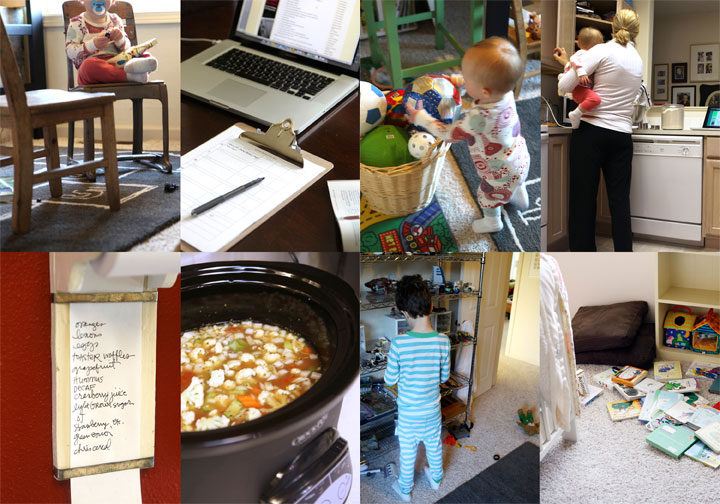
Each night during this past week I uploaded my photos to my computer.
At that time I went through and did a quick delete of any photos that
were obviously not going to be used (triplicates, seriously blurred, mistakes, etc). Since I was taking over 100 photos
per day (and I knew there was no way I would use them all) I was pretty ruthless about which ones I deleted.
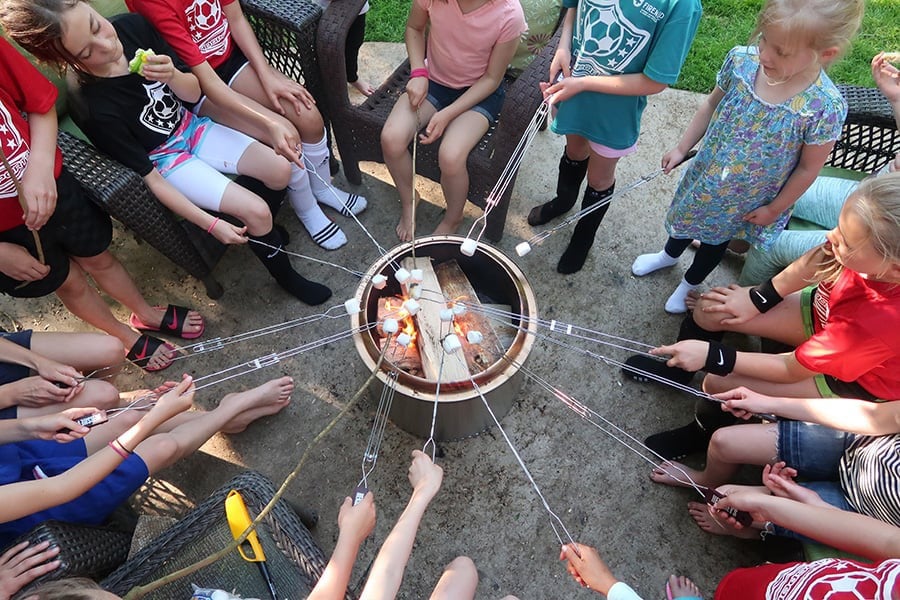
NOW HERE'S THE DEAL : I did take around, or over, 100 photos each day of my week. In my experience, 100 photos doesn't really mean "100 photos that I want to frame and hang in my house" or "100 photos that must be crammed into this album no matter what." 100 photos usually means about 20 of Simon & Anna chasing each other and wrestling in the living room...one of which I will use in this project. It means 5 shots of my lunch...one of which I will use. It means 5 shots of Simon and I in the mirror...one of which I will use. You get the point.
Out of 100 photos I average about 30 or less that I really want to use per day. This is the reason that I always encourage people to take more than you think you will use. It's this point in the process that having more is really a benefit because you have more choice when it comes to telling the story of your life at this point in time.
Yesterday I went through all the photos again and got serious. I created canvases, pages, etc (read below) to be uploaded. It took me most of the day to organize, edit, crop, etc. Even though it was a really long day, it is really fulfilling and eye-opening and cool to see a whole week in photos all together in one place.
I encourage you to make a plan for yourself to get this album done. Set aside some time each night to address your photos. One night for deleting. One night for selecting and uploading your daily openers and collage pages. One night for working on your divided page protector pages, etc.
DAILY OPENER PHOTO
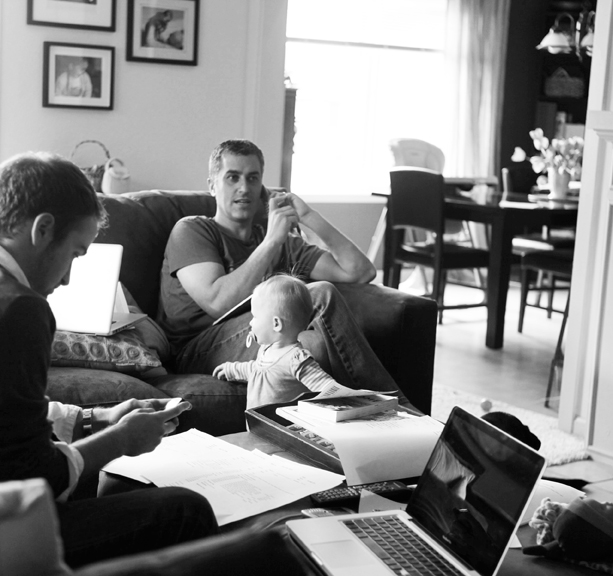
As I looked through all my photos to select which ones would be my main image for each day there were definite favorites. Through this process I realized that what I wanted for these intro pages was variety - each one showing a little something different about life right now (the black and white image above will be the opening photo for Wednesday).
I ordered 8, 8x10's that I will crop to 8x8.5 when they arrive (one for each day of the week and one for the intro page).
In years past I have used only photos of myself as the main photo. This year I'm branching out and including a photo of Simon, a couple of Anna, a couple of me, one of food, the one of Chris above, and one with all of us.
There's no right or wrong in choosing an opening photo. If you have a ton of photos you really want to include you might consider creating a collage in the daily opener photo space. For me, I love the enlargements contrasted with all the smaller photos throughout each day.
JUST A NOTE: EMBRACE THE PHOTOS YOU HAVE. This project takes longenough without going through and adjusting every single photo trying to
get it just perfect. Embrace those photos that aren't perfect -
what a great reflection of real, everyday life.
COLLAGE PAGES
Next I attacked the collage pages. I decided to tackle these second, before the baseball card page protector pages, because of the variety of size and orientation and ability to pick just which photos I wanted to be highlighted.
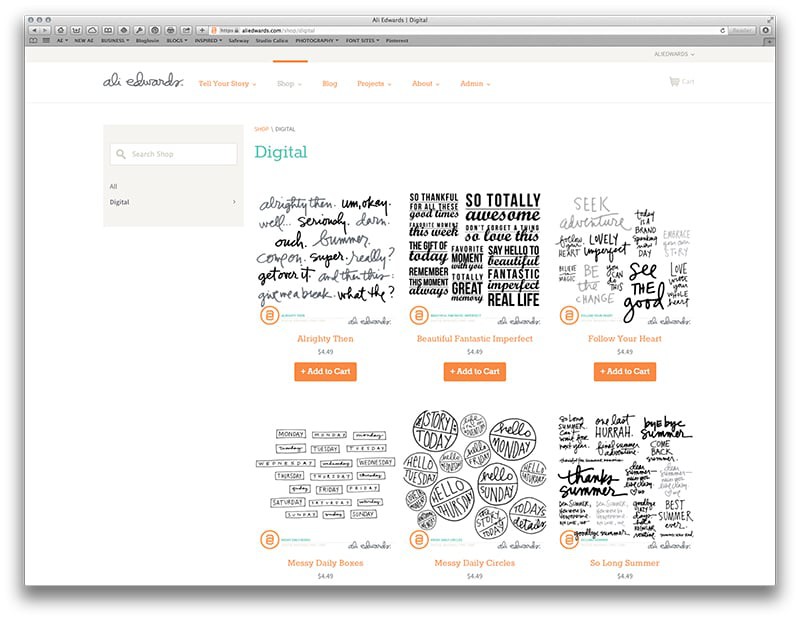
To create my collage pages I used the 8.5x11 digital templates I created for Designer Digitals. The package includes seven different layered templates. My process for this part was simple: open the template, drag photos into Photoshop, mask them into the spaces on the template, save as a jpg and upload to the developer.
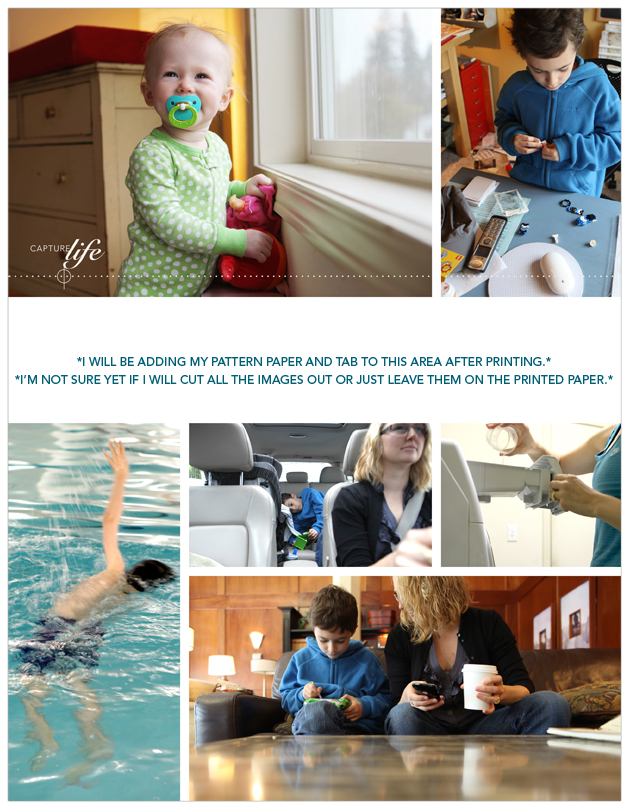
So how did I choose which photos to use on the collage pages? The collage pages are really a collection of my favorites photos and/or ones that fit the designed spaces (like the really vertical shot of Simon swimming above). Again I look to create variety and include different times, places, people, colors, etc.
As some of you noticed throughout the week, when I take photos I take almost exclusively horizontal shots. This is just my personal preference. I know coming into this project that I will be cropping many of them. I also know, from expereince, that part of what I love about this project is seeing the "pieces of life/pieces of the whole" that show through the cropped shots.
BASEBALL
CARD PAGE-PROTECTOR PHOTOS
After selecting the photos for the daily openers and the photos for the collage pages I worked on rounding out each day with photos for the baseball card page-protectors.
For uploading to scrapbookpictures.com and for printing I decided to create canvases in Photoshop that were 5 inches x 7 inches. On each 5 inch x 7 inch canvas I was able to fit 4, 2.5 inch x 3.5 inch photos.
For most days I ended up with about 12 (there's 18 pockets available) photos which will leave room for the journaling cards and other "stuff" I collected throughout the week.
I tend to follow a pretty simple cropping and saving procedure in Photoshop. Here's a video tutorial that walks you through that process (click to view larger on Vimeo):
Ali Edwards Week In The Life : Photo Crop Tutorial from Ali Edwards on Vimeo.
Here's the written how-to for Photoshop Elements:
- Open your photo.
- Go to Image/Resize/Image Size.
- Change the Resolution to 300dpi and adjust the height to 3.5 inches. This should automatically adjust the width to 5.25 inches.
- Using the crop tool, drag a crop box that is 2.5 inches wide (and 3.5 inches tall). I eyeball this. I like that I can move the crop box around on my photo to find my favorite crop. Don't worry that you are removing some of the photo and remember that some photos will lend themselves better to this vertical crop than others - keep that in mind as you are selecting which photos go where in your album.
- Go to Image/Resize/Canvas Size and change the size to 5 inches x 7 inches. This will become your new canvas. On here you can fit 4, 2.5 inch x 3.5 inch photos. I decided to go about it this way when I saw that I would need to order 2 wallets (I don't need doubles of all these shots.
Here's a look at a couple of those 5 inch x 7 inch canvases:


I love these 2.5 inch x 3.5 inch photos. They really do round out the album in terms of filling out the rest of each of the days. Again, think pieces of the whole.
PRINTING COST
One of the questions I am often asked is related to printing at home vs. uploading to a developer.
After uploading my completed photo pages to Scrapbookpictures.com the total cost was $30.85 (including $3.99 for the shipping option I selected). This cost included the following:
- 9, 8x10's (I added one additional photo that I want to frame)
- 18, 5x7's (photos for the baseball card page protectors - 4 to a page for a total of 72 images after trimming)
- 7, 8.5x11 (the collage pages)
I know that is significantly less expensive than purchasing new ink cartridges for my printer. I'm looking forward to seeing how the pages all turn out and hoping that the sizing is all correct. I'll give you an update on that in a couple of days.
In the meantime, while I wait for my photos to come home, I'll be putting other pieces of the album together. Tomorrow's post will cover that process.

Click
here for a complete list of Week In The Life posts.


I have done one!!! woooh hoooo!! My laptop is sooo sllooww, it took forever - but I got there - thank you Ali!!!
Sign in or sign up to comment.
Emily: I teach, too, and I documented my week last week. It was an amazing week, really. We all received ActivBoards the weekend before while we were out and my kids really wanted to use them so I did take photos of them using the AB. I also took photos of a project I had going on in the hallway. As well, our school was participating in National Youth Service Day by collecting gently used or new stuffed animals and the club sponsors and members were setting up the display as I walked past the cafeteria so I shot some photos there. I included the photos in my week because it was part of my week.
We send home a form at the beginning of the year that asks parents to sign if they will allow their child/children to be in photos, videos, etc., throughout the year. It's a middle school so we have clubs, music performances, athletics, etc., where a lot of photos are taken or video is shot. Almost all sign it but some do not. I make sure I have the non-signers' names on file and I made sure their kids were not in any of my photos. That said, I was not going to publish or give out any photos to anyone so I'm not even sure I had to be careful of that but I was going to upload the photos for printing so I erred on the side of caution. Maybe you could get permission from the parents of the kids if you explain what you are doing and how it is for your personal use only. Can you print from home? That way, non-school personnel would not even see those photos. I did this project last year without my job and it isn't as broad a look as this year's will be. Also, my times were missing 7:45-3:20 and it felt untrue. At the very least, you could journal what happened and snap some photos of your room, the chairs, the stuff the kids used, etc. One thing that I noticed from the December Daily photos on Flikr was a layout that was all about "If I had had my camera, I would have taken these photos" and she had listed them with words. I liked that idea because we don't always have our cameras with us.
I hope I helped and didn't just blab on and on. People who teach understand how important your kids are to you. And progress is so critical for your kids. I hope something can work out.
Sign in or sign up to comment.
Thanks Ali for putting this into motion. I'm doing my best to keep up each day and today is day 4. I've had a lot of fun doing this, so thanks so much!!
Sign in or sign up to comment.
Check out Simply Autumn's blog. It looks like she is a teacher. You might get some ideas there.
Sign in or sign up to comment.
Such a helpful post - thank you! I love the printing details. That's the sort of thing I get wrapped up in. I first did this project in October - the week I got married! Planning on doing it for the 1st anniv. week too. LOVE it.
Sign in or sign up to comment.
Help...anyone....I am new at this and I am trying to figure out on my 12 x 12 digital templates..how I can download them to scrapbookingpictures.com for printing..the PSD file is not compatible..what preferences do I need to change in PSE?
Sign in or sign up to comment.
ali, i just ordered and downloaded the digital templates. i'm not super familiar with using these. is there somewhere i might find some info about using them? thank you!!
Sign in or sign up to comment.
When you are done with the layout you need to save it as a JPG before uploading it. This will flatten all the layers.
Sign in or sign up to comment.
Hi Susan - hoping to have a tutorial for these specific templates up tomorrow. I do have another video tutorial on working with layered templates here (and a free template to try it out): http://www.aliedwards.com/2010/01/scrapbooking-with-your-computer-creating-layouts-with-layered-templates-.html
Sign in or sign up to comment.
Shauna, thanks for the link. On to more good stories.
Sign in or sign up to comment.
Thank you so much for the tutorial!! I have Elements 7 and have been trying to figure things out as far as photo editing (using Scott Kelby's book). I'm getting there...a lot of practice. I've been wanting to know how to do all this cool stuff for scrapbooking so thank you, thank you, thank you!!! You explain it all so well!!
Sign in or sign up to comment.
Oh also...one question. What kind of laptop do you use? Or what kind would you suggest for photo editing/scrapbooking? Thanks!!
Sign in or sign up to comment.
Picassa is a cool, free tool for people who don't have Photoshop. You can make collages in different sizes that can be uploaded to printing services or printed from home. You can also used this to make the 5x7 with 4 baseball card sized photos. Definitely not as cool as Photoshop, but it's pretty useful if you're scrapping on a budget!
Thanks for the inspiration Ali!
Sign in or sign up to comment.
Thaks Ali for sharing this part of your process with us. I am definately feeling overwhelmed by the volume of photos I have (not nearly as much as you!) and wasn't sure about the printing side: home v printing outlet. After seeing what you have done I think I am going to have my photos printed (will ultimately make it easier I think) - especially using the 5x7 collage technique for the smaller photos. Overall I have really enjoyed the process of WITL this year - I attempted it for the first time in 2008 but it is still unfinished (didn't help I was 36 weeks pregnant at the time). Perhaps I'll try to just pull something together very quickly once I've finished this year as I'd like to keep all WITL projects in 1 album together so one day we can look back at them all together.
Sign in or sign up to comment.
Hmmm...what version are you working in? Elements or full Photoshop?
Ali Edwards
blog : http://www.aliedwards.com
email : ali@aliedwardsdesign.com
twitter : http://twitter.com/aliedwards
Sign in or sign up to comment.
I've enjoyed reading the day-by-day process of this project...and particularly want to thank you for writing about the details. These types of projects are typically a little overwhelming for me. Reading your posts and seeing your pics makes it look like it's so easy for you to complete these projects...but because you share your process it shows that it is no easier for you to get it finished! We all get the same 24 hours a day :-)
I always come back to your blog...there's something about the simplicity of your photos/site that is almost calming. Love seeing the pics of you in your home. My word for 2010 has been 'unclutter'. Trying to simplify my life, my home. Your pics and projects inspire that.
Your digital products are simple and have helped me branch out into hybrid scrapbooks...and I'm loving the idea.
Thanks Ali :)
Sign in or sign up to comment.
Thank you for sharing your process. Last year I really fussed about which photos should go where, etc. and at times it drove me crazy! This year, I didn't let that bog me down. I figured that if I chose a particular photo to put in a small space of the template and later wished that I would have done it larger, I will simply reuse that photo on a layout of its own and make it whatever size I feel like! I also needed more space to do some additional journaling and ended up creating a single journaling page that I added to the 4 template pages that you had designed. You can see my pages at http://seriousplay.typepad.com/cinback/2010/04/witl-tuesday.html. Thanks for this project, Ali. I really love it!
Sign in or sign up to comment.
Sorry, that link didn't work. Try this... http://seriousplay.typepad.com/cinback/2010/04/witl-tuesday.html
Sign in or sign up to comment.
Ali - Thanks so much for sharing how you are moving forward w/ your photos from WITL & your original LO plan for your album. I tried to look at my photos yesterday but started crying like 7 photos in. SERIOUSLY?!?!? I can't imagine having more than 2 precious boys because after my 2nd, I cry at the drop of a hat. It's crazy :) :) And ends up in hilarity. I can't wait to see how I start to pull this together this week. I've successfully sorted & deleted some photos for the first 2 days this evening (and haven't had to stop for crying yet!). I had no idea this would be such an emotional process for me. I thought I normally took a lot of "everyday" photos. Heidi
Sign in or sign up to comment.
So Ali, I had a go at putting together one full day of photos last week (this week is for preparing for a 3rd birthday party on saturday) and I loved using the templates it worked well. I was just a little unsure of my collage page. I loved all the photos I used, I am not sure if it is just because they don't all tone together that I don't like. What is your thought. Were you drawn to similar colours or just favourite photos? Thanks so much it really was a blast, even though my family had had enough at the end of the week. My best friend asked where my camera was on Monday, and she shaid I thought you would be taking photos, I replied the week is over. :)
Sign in or sign up to comment.
Thanks for this video tutorial, Ali, it was really helpful! I have one quick question: which paper trimmer do you use? I find mine not as precise as I'd hope to cut side by side pictures (like you did with the four 3.5x2.5 on the 5x7 canvas).
Thanks so much!
Sign in or sign up to comment.
Thanks so much Terri, I really appreciate it!
Sign in or sign up to comment.
Thanks so much Juanita, I really loved looking back over her blog, and yes she is a teacher. Got some great ideas! Thanks again!
Sign in or sign up to comment.
Hi There
I have never done a week in the live and am not sure whether I really want to. But if I do, I have one really big problem with this. I am a full time mom who is out of the house from 8-5:30. My family are not the photo taking type. So if it was up to me to record our lives it would be breakfast, dinner and bed time for 5 of the 7 days. In between really fun things happen, like tennis lessons, home work, coming home from school, laundry (yes 70% of laundry happens in my absence). How do people go about documenting the everyday if the documenter is not at home. Or is this just the type of project that is only done by stay at home mums?
Sign in or sign up to comment.
Thanks! That opens up some design possibilities!
-S
Sign in or sign up to comment.