Remember This | Scrapbook Layout

Yesterday I felt like making a layout.
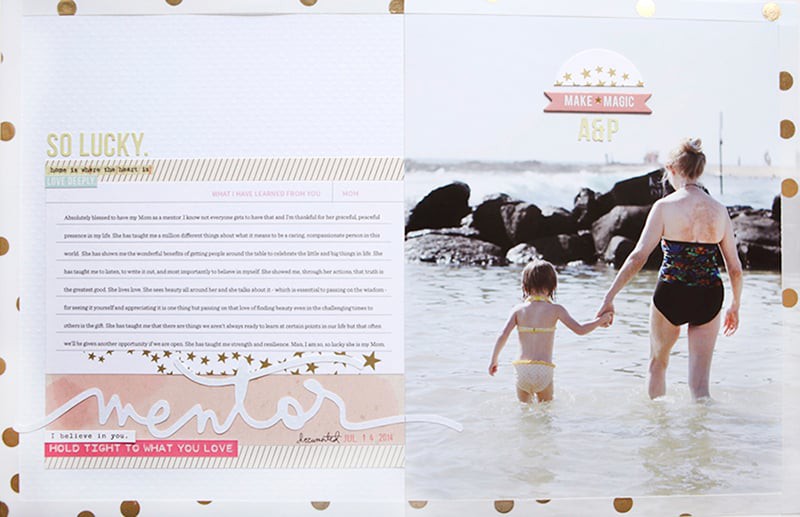
An 8.5 inch x 11 inch layout that included a bit of digital, an enlarged photo, pattern paper, ink + stamp, handwriting, emboidery floss, and machine stitching.
And guess what? No white cardstock - actually no cardstock on this one.
Here's where I ended up:

I started with the photo in Photoshop and added "remember this" from my Outline Moments Brushes & Stamps.
One of my favorite ways to recolor word art is by selecting a color from a photo. Here's a short video tutorial that walks you through those simple steps:
Ali Edwards | Grab A Color From Clothing For Recoloring Word Art from Ali Edwards on Vimeo.

After printing the photo here at home, I grabbed some pattern papers (October Afternoon's Sleeping Bag and Sassafras Lass' Polka Dot).

I also grabbed one of my new Technique Tuesday stamps from a set called Ordinary Days.

Here's a look at the full set:
![]()
If you're digital you can download a similar set from Designer Digitals: This Is The Day Word Art Vol.2

That days of the week stamp went onto a small shipping tag using Tim Holtz Crushed Olive Distress Ink.

Next I started playing with some yellow floss and a needle.

I stitched the stamped tag onto the bottom right corner.

I decided to hand-stitch an arrow right above the title of the photo. To make this process simple I drew an arrow very lightly with a pencil and then pre-poked the holes with the needle before using the floss.

Fun. Love that yellow floss.

Under the arrow and the title I added some new printed chipboard letters/numbers from Studio Calico and wrote my journaling onto Sassafras Lass' Count Me In Collection Elementary pattern paper.

Along the bottom I layered Hambly's Garden Party white overlay.
Here's a look at the whole page:

I used my sewing machine to stitch around the entire page and along the seams where the pattern papers meet.
JOURNALING | You are two. You are totally into doing everything all on your own. "Anna do it!" is your loud mantra. I love seeing you wanting to do everything. I love seeing how you watch and then take on whatever the new task is at hand. Brushing your teeth is big right now - especially with Simon. I help you most of the time but also make sure you have lots of cleaning opportunities.

SUPPLIES:
Ink | Tim Holtz Crushed Olive Distress Ink
Papers | Sassafras Lass Count Me In Collection Elementary and Polka Dot; October Afternoon's Sleeping Bag; Hambly's Garden Party white overlay
Stamp | Technique Tuesday Ordinary Days
Digital Word Art | AE Outline Moments Brushes & Stamps
Chipboard Alphabet | Studio Calico
Other | Yellow Embroidery Floss, Needle, Machine Stitching, Scotch Rolling Adhesive, Black Pen, Shipping Tag


Such a cute layout, Ali! I love seeing your process when you create.
Sign in or sign up to comment.
Hi Ali! I love the layout! After reading through the comments I have this question:
When you leave Mozy do you know where you are headed next in terms of online photo storage?
I haven't done any online photo storage as yet, and I can get myself kind of nervous if I start thinking of all the things that could happen if I'm not fully protecting my photos.
Thanks. ~Jen
Either to Crashplan or Backblaze. Both have been recommended to me and both can back-up my external drives (included in the low cost per month).
Sign in or sign up to comment.
Thanks for showing how you did this page. It is so helpful to me to see how others make decisions about product!
Sign in or sign up to comment.
Love it! My baby girl used to say "Me do it me-selfy!" I should do a page about that.
I love that - you should totally do a page about it.
Sign in or sign up to comment.
Love the layout Ali. I know (and like) your style so well now that I can usually recognize your layouts in magazines before I see your name. I call you style "real". There's just something about it I find comforting.
I have a question... do you own a large format printer? If yes, would you recommend it?
Thanks Mary - and yes, I do. It's a HP Photosmart B8550 and I've been really happy with it.
Sign in or sign up to comment.
Ali, thanks for your very detailed explanation of this layout. Sometimes when I decide to make a new layout do more complicated than it is and I end up being hard to start. You explanation makes me see things more easily, as if a fresh breeze entrer my study, helping me to relativize things.
Thanks.
Sign in or sign up to comment.
I have one of those do it myself 2 year olds, too! So cute! Really love your page and the fact that you kept yourself in the picture.
Sign in or sign up to comment.
"Anna do it" totally reminded me of my own youngest boy's mantra around the same age "do it self". I've scrapped a page capturing that mantra too - of the time he made himself a nutella sandwich for lunch because he wanted it right then and now and couldn't wait for mum to finish whatever task it was. He did a pretty decent job of it too :)
Sign in or sign up to comment.
Lovely layout!!
Sign in or sign up to comment.
I am so photoshop elements dense and had no idea what the dropper tool was used for until watching your tutorial. Thank you for sharing (and for the enlightenment:)!!
Sign in or sign up to comment.
fabulous tutorial and fabulous layout!
Sign in or sign up to comment.
STUNNING. LOVE this, Ali!
Sign in or sign up to comment.
I love the stitched arrow!! It really adds something!
Sign in or sign up to comment.
So darned cute! I love how you added things from so many sources.
Sign in or sign up to comment.
So very cute. Aren't you took the time?
Sign in or sign up to comment.
[...] via Ali’s blog [...]
Sign in or sign up to comment.