December Daily™ 2011 | The Album Cover
And here we go again!
I'm excited to be getting my December Daily™ album underway for 2011. It's been fun getting messy and playing with my holiday supplies as I begin the process of putting my cover and foundation pages together. As many of you know, what I try to do each year is get the basics of my album all put together before December so that I minimize the amount of time I'm actually working on it during that busy time of year. To read a ton more about this project and see past examples check out my December Daily™ compilation page.
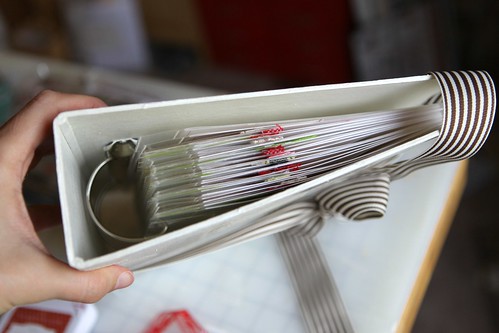
Today I'm going to just share the exterior and interior of the album itself. The actual daily interior pages will be coming most likely on Monday as I'm waiting for a couple more supplies to come in the mail (you can see how it's currently progressing in the image above - it's already pretty thick).
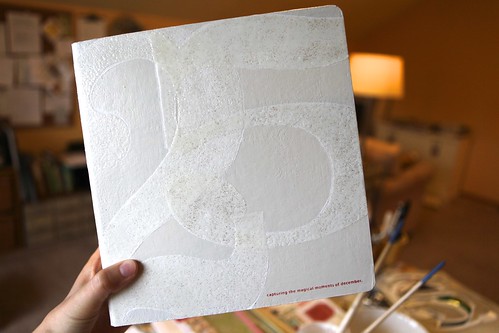
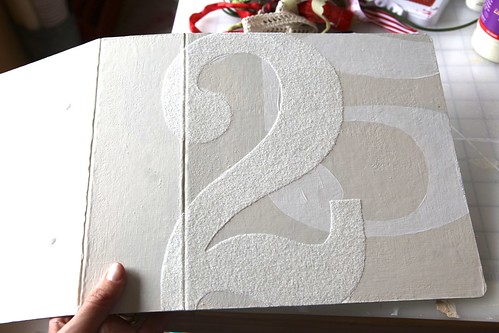
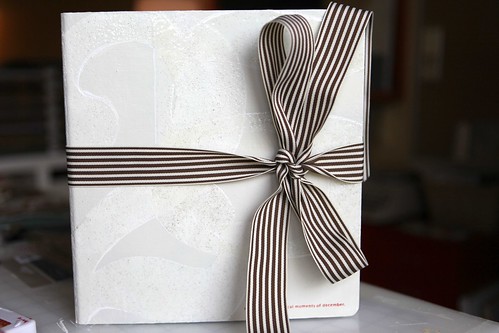
For my cover this year I decided to go with white/cream (love the softness of it) and two really enlarged numbers. Last year I also ended up with white. What can I say, I like it. Because it's basically white on white it's a bit of a challenge to photograph, but you'll get the idea. The chipboard album I'm using is available as part of a December Daily™ kit through Studio Calico. Kits go on sale October 27th/28th.
In addition to the white/cream I also wanted to add some sparkle/gloss and one of my favorite ways to do that is to use UTEE. My full process is listed below.
HOW TO
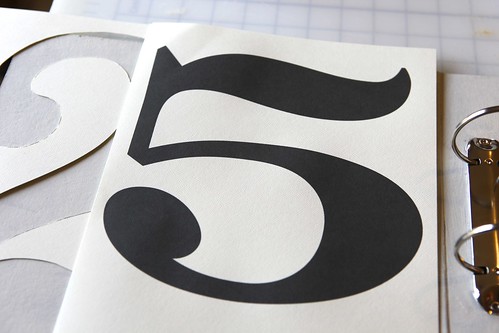
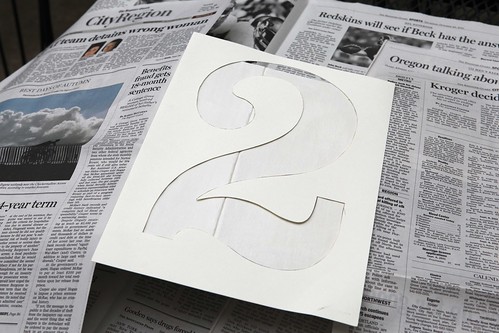
1. Print and cut out a "2" and the "5" to make your own stencils (you can do this in any program like Word or Photoshop). I printed these numbers on cardstock so that they would be sturdy enough to use as a stencil. I used a craft knife to cut out the numbers from cardstock. Depending on the size of your album you'll want to adjust the size of the numbers accordingly. I made my #2 larger than my album so it would go off the top and the bottom edge. My #5 is not as tall as the album but it's nice and wide. I used the font Numbers Depot for my #5 and Rosewood for the #2.
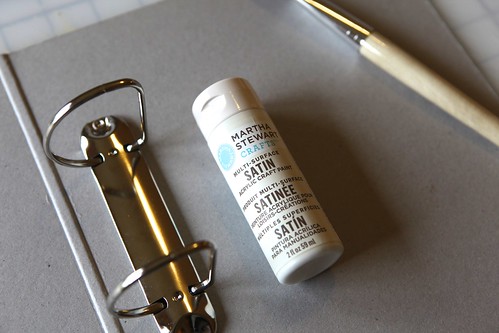
2. Paint two base coats with gesso (essentially white paint) inside and out. After the gesso dried I did two coats of the cream paint from Martha Stewart.
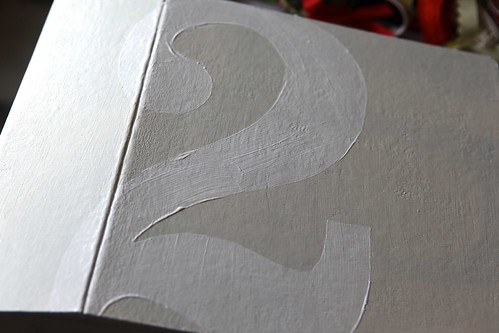
3. Lay the #2 stencil down on the cover. Open your album flat so you can have the #2 wrap around the spine. Using the stencil, paint the #2 with gesso. I did this as a base under my embossing. You could just emboss right onto the painted cover as well. Let Dry.
4. Follow the same steps for the #5. I chose to position the #5 to the top right of the album. Let dry.
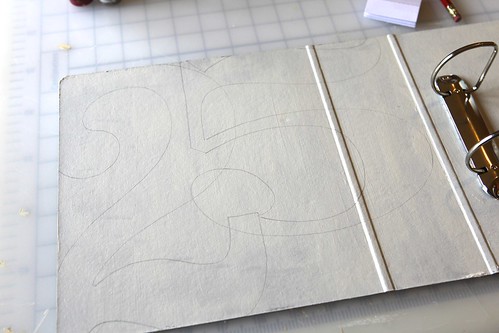
5. Using the stencils and a pencil, create a line drawing of the number 25 on the back cover and on the inside front cover. I chose to use a pencil because i wanted a fairly faint line drawing. You could use a colored pen, pencil, etc or paint inside the stencils rather than tracing. Lots of options.
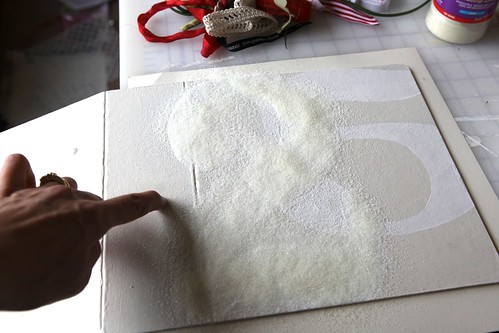
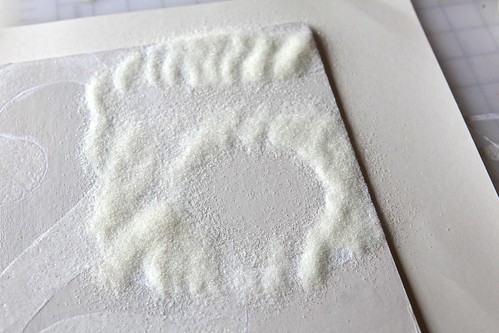
6. Using the #2 stencil (lay it right on top of the painted #2), turn your embossing inkpad (I use Versamark) upside down and stamp (using the whole pad) all over the stencil. Lift up the stencil and pour UTEE over top. Use a heat gun to set the embossing ink. The above image is what it looks like before melting the UTEE with the heat gun.
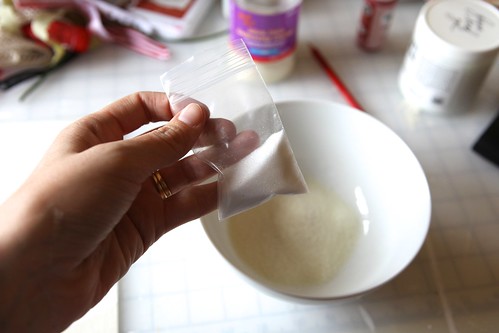
NOTE: I tried something a little different with the UTEE for the #2 - I poured some glitter into my powder before putting it on top of the embossing ink (the glitter was in a little bag - I think it came from a past Jenni Bowlin kit). The end result was to make the #2 have a different texture than the #5 (which was just UTEE). It's rougher and not as smooth. This whole idea came about when I noticed that my UTEE had pretty much already been contaminated with some glitter somewhere along the line. Anything I emboss with that bottle of UTEE ends up with some bits of sparkle.
7. Repeat the same process for embossing the #5.
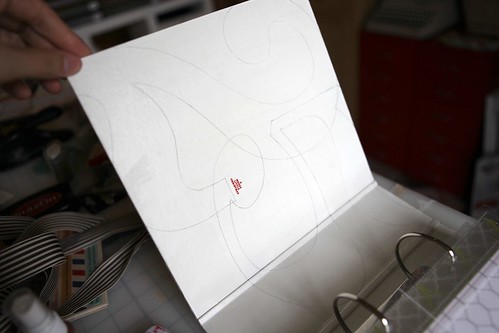
8. Choose a couple of holiday sentiment stamps for the front and inside cover. I used two stamps from my November 2011 Studio AE set (will be available for purchase on November 1). Stamp using Staz On ink (Cherry) to avoid smudging.
9. After stamping the sentiments I covered/sealed the entire album with Mod Podge. I left the embossed part alone and just painted the Mod Podge around it.
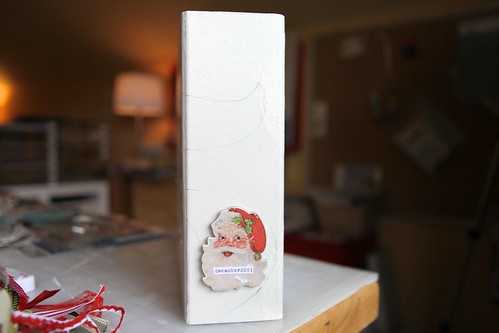
10. For the spine I used the Santa from this Echo Park chipboard package (included in the Studio Calico kit). I covered the Santa with Glossy Accents to give it a nice finish on top of the chipboard and to keep the small typed piece (December 2011) in place.
OUT-TAKES | WHAT I TRIED FIRST
My first attempt at getting the numbers on my album involved silver spray paint.

I took the album (painted with the gesso + cream paint) outside and laid down some newspaper.
Laid the stencil on top.
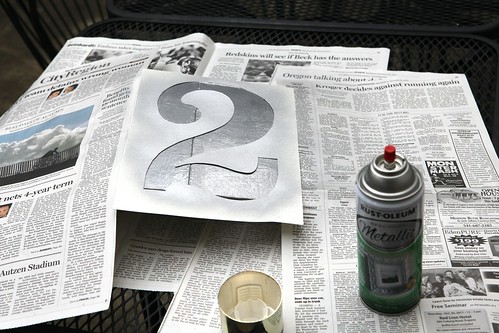
With silver metallic spray paint I used the stencils to spray on the #2 and #5.
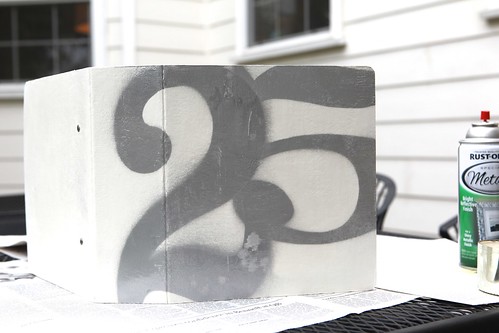
I think I need to practice a bit more with the spray paint. I ended up painting over the top of the silver spray paint as it wasn't really the overall look I wanted. It's a nice reminder that you can always paint over the top (just wait until it dries completely).
I'm so excited to see all the different covers and album interiors that I'm sure will be popping up over the next few weeks! It's always so cool to see the results. I've created a Flickr group for anyone interested in sharing their album along the way: December Daily™ 2011 Flickr Group.
SUPPLIES
PAINT | Martha Stewart Craft Paint Satin - Summer Linen, Gesso
ALBUM | Studio Calico December Daily™ Kit
EMBOSSING POWDER | UTEE
INK | StazOn Cherry, Versamark (for embossing)
SEALER/ADHESIVE | Mod Podge, Glossy Accents
STAMP | Studio AE November 2011 (will be available on November 1) - you don't have to be a member to purchase
HEAT GUN | Ranger
SANTA | Echo Park Chipboard
|
|
|
|
|
|
|
|
|
|
|
|

TODAY'S POST SPONSORED BY | Chic Tags
Chic Tags, formerly known as Shabby Chic Crafts, has delightful vintage inspired paper tags to fit all your crafting needs! If you plan on working on a December daily Album too, you don’t want to miss out on their NEW December Daily Album Kit III. Please don’t forget to check out the CT blog for tips and ideas!


Love it! This will be my 3rd year participating in this and I so look forward to seeing your posts. Can't wait to see the inside! I think my DD will be so much easier this year now that I'm in the habit for Project Life of taking more pictures (mostly iphone, but that doesn't bother me). Thanks!
@Audra
There are also a few apps that allow you to upload directly from your phone to a printing company. I've used PostalPix in the past. The paper they use was a little thinner than Ritz or Costco, but not horrible.
@Audra, You can just download the photos from your iphone to your computer and print as you would with any other digital photo. Just use your file explorer to access the iphone as a drive, then you'll be able to navigate to the folder where photos you've taken with the phone are stored. I'm sure there are apps to but I haven't gotten that far myself yet! :-)
I'm NEW to my iphone - I know a bit behind - but I'm enjoying taking photos with it. It's SO nice to know I have it with me if I don't have my point & shoot or SLR. However, any suggestions how to print the pics from it? I have not yet attempted this. It might be a big help with my DD. Any suggestions on how to print, I'd appreciate. Thanks!
iphone photos are awesome
Sign in or sign up to comment.
Looks great!!! What is the size of your album? Thanks!
The binder measures 9 inches wide x 9.5 inches tall and has a 3-inch spine. Inside the album you’ll find 25 page protectors that hold 8.5 x 6 inch pages.
Sign in or sign up to comment.
Hello Ali,
so happy to see your cover.You always make stuff look so easy. thanks for that.
I was wondering if you could design the 2 and 5 for easy printing,it will make life easy for poeple like me :)
Thanks, I hope it's not too much to ask
Hi moi - unfortunately because of font copyright issues (at least my understanding) I can't re-distribute the numbers.
Sign in or sign up to comment.
I was wondering what size your album is.
You can't buy the album by itself....but you can get a 3" d ring chipboard binder from Offic Max or Office Depot on-line and either use it as th 8.5x11 as is or trim the cover to a smaller size using an exacto knife.
The binders are under $10...but shipping is high. Order mutltiples or add other office needs to get it to $50 and shipping is free
Where can we find the album by its self.
The album measures 9 inches wide x 9.5 inches tall and has a 3-inch spine. Inside the album you’ll find 25 page protectors that hold 8.5 x 6 inch pages.
Sign in or sign up to comment.
Wow! Amazing, as always! Am soooooo excited to see the foundation pages!
Sign in or sign up to comment.
Ali, have I mentioned that you are amazing!
Sign in or sign up to comment.
So excited to see your progress, I also started on the outside of my album this weekend and I am looking forward to seeing everyone's designs!
Sign in or sign up to comment.
Your Dec daily project are one of my favorite Christmas celebrations. I love and adore it and cannot WAIT to jump in. : ) I love the album... so going to get that kit.
love you Ali!
w
xoxox
Sign in or sign up to comment.
Looks great! Love the big, thick, glittery 2.
Sign in or sign up to comment.
Love the idea of the stencils and UTEE. What a great way to embellish a chipboard album!
Sign in or sign up to comment.
Hello Ali.
Too bad you can't re-distributed the numbers,but how about designig with the '25' font you used for the cover page of 2010 decdaily.They look similar.
thanks
Sign in or sign up to comment.
So stoked to see this! I started my foundation pages last weekend because last year I thought I'd just make a page a day as I went along. FYI, finally finished in the spring. It is my first completed album in more than a decade of scrapbooking. I usually give them away, This one I tucked in my holiday bin and can't wait to display the growing collection of albums. I so appreciate you inspiring this project and all the time you spend encouraging, sharing your process and building this community for us as well.
Sign in or sign up to comment.
What a wonderful idea!! Love it! Thanks for the inspiration Ali! It's my first in December Daily and I am very excited about.
Sign in or sign up to comment.
Fabulous! Can not wait to see what's inside!!! Soooo excited to start this project. I LOVE project life and really hope that I'll beable to use what I've learnt in my DD too! Looking forward to MOnday...xx
Sign in or sign up to comment.
Oh heart be still. I'm SO excited!! It will be my 2nd DD and I'm hoping it will be easier, knowing what I'm getting myself into :)
Sign in or sign up to comment.
Hi Ali!
Hee heeeee! So excited to do year number two of DD and now I have a blog to post to as well...at least that will kick start it... Ordering my kit tomorrow and going to dig out some Christmas Toile fabric I have packed in a box somewhere for the cover! Thanks for showing your process!!
Sign in or sign up to comment.
This will be my second DD and I'm looking forward to it. Now that I've done one and have a feel for the process, I'm going to enjoy this year and not stress out so much. My daughters love last years album!
If I don't get the kit, where would I be able to get the chip board album? I have the pages and am excited to print them and prepare my album!
I love the Cover idea. I can't wait to get started!
Thanks,
Barb
ok - Thanks! I see that I should stay up until midnight to order so I don't miss out. I like the three ring binder!
Hi Barbara - the album is only available with the kit (designed specifically for the kit).
Sign in or sign up to comment.
As always, love your approach...also love that you made one attempt and when it failed, redid it. Happens to me all the time.
Sign in or sign up to comment.
So lovely! I can't wait to start on mine!
Sign in or sign up to comment.
I love the ribbon with the cover. So pretty!
Sign in or sign up to comment.
So pretty great look! thanks
sharon
Sign in or sign up to comment.
Love the cover. I was introduced to paint and mod podge from creating your Scrapbook-on-the-Road album. So I am ready to dive in with the paint. I like the embossing so I will attempt this for the first time. I think I will use my Cricut to cut out some numbers for this project. Look forward to what other people are creating for inspiation. This will be my second Dec. Daily.
Thanks Ali for sharing with us!
Sign in or sign up to comment.
Ali, very excited to be doing this again for 2011....you are always such an inspiration and look forward to your December Daily posts.
Sign in or sign up to comment.
Hi Ali, I have absolutely NO time to be on the computer today but I just had to check to see if you updated!! Love your album cover. It's so very you. Love that you can embrace white/cream covers year after year too. Like you said - do what works.
Sign in or sign up to comment.
Hi Ali,
Did you paint the whole album or leave it with just the color of the chipboard showing? It is hard to tell whether the background is painted (adide from the #2 and #5). Thanks!
It's all painted. No chipboard showing.
Sign in or sign up to comment.