December Daily 2011 | The Foundation Pages, Part One
Welcome to December Daily 2011!
Today I'll be sharing some of my foundation pages (the base pages that I set up in advance to simplify the process of documenting in December). I'm still waiting on a couple items from the Studio Calico kit - namely the letterpress number coasters and the American Crafts letter stickers. As soon as I get those into my album I'll share the second set of pages.
You can see the exterior and interior of my album cover here.
A couple things to note as we begin this year:
ONE | If this is your first time embarking on a December Daily project I highly recommend checking out my compilation page that has links to all my previous albums and posts.
TWO | There's no right or wrong way to approach this project. Find a groove for yourself and go with it. I liked my general design approach in 2010 (see below) so I'm repeating a lot of those elements again:

THREE | I loved the size last year which is why I'm repeating it again this year - well almost - this year my foundation pages are 6x8.5 inches. In looking back at my album from 2010 I felt like this size was really great for both the photos and the words. I definitely might be ready for a change up again in 2012. You can view all my pages from 2010 in my Flickr Gallery here.
FOUR | This project is always a great opportunity to use what you have at home. As in year's past, there is a kit available - this year it's through Studio Calico. As you'll see below I'm using a combination of things that I have on hand and pieces from the kit.
FIVE | This is a daily project. My approach is to highlight one story per day. Some days it's a holiday related story and other days it's something entirely not related to Christmas. For me it's about documenting our lives during the season. Maybe you want to approach it this year as a gratitude album - pick one thing you're thankful for each day and highlight that. Or maybe you just want to highlight specific special stories as they come up vs. daily documentation. Again, it's completely up to you. My hope is to simply encourage you to get some of these special moments and stories of the season recorded.
SIX | I'm planning to continue Project Life right on through December. For December Daily I usually choose just one story per day. Since there are definitely more than one story each day I know I'll be able to find some good bits of life to continue adding to Project Life over the course of the month.
SEVEN | Sometimes people see my foundation pages and say, "there's not a lot there." And you're right. There's not a lot. But what I've done is set myself up with a solid foundation to build upon during December. By having at least some of the work done in advance I'm not trying to do everything (printing pages, choosing products, etc) during December. I know from past experience that setting myself up in this way has lead to a much better chance of success in getting my stories told.

In thinking about my own album this year here's some things that were top of mind for me in terms of design:
- Calm. Whites, creams, silver with a little bit of red and green.
- Stitching. I love the look of both machine and hand-stitching on paper. This is the machine I use: Brother XL2600I. It was recommended by Mary Ann Moss who runs an awesome class called Remains Of The Day among other cool creative adventures.
- Glitter/sparkle. I'm going to argue that glitter can still be calm. Think twinkle lights vs. Times Square.
- Stars. I found as I was looking through my stash of holiday supplies that I had a bunch of star stuff I've been accumulating. It started to become a theme I was excited about and I'm going with it.
- Photo & Story-centric. Just like last year I plan to include quite a few full page photos again. Looking back through my 2010 album it's one of my favorite parts.
2011 DECEMBER DAILY FOUNDATION PAGES | PART ONE
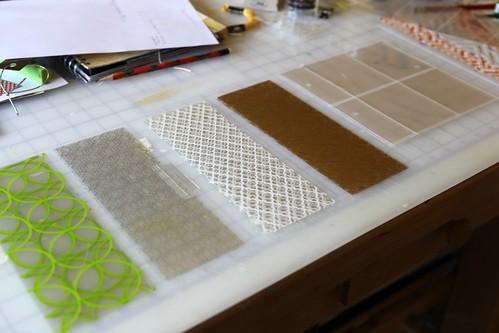
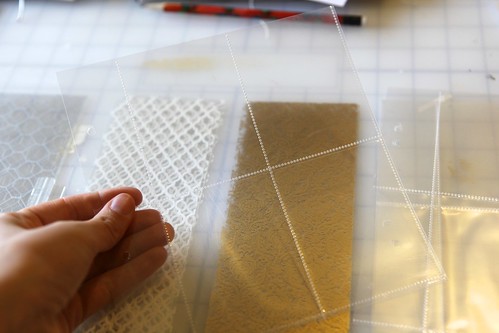
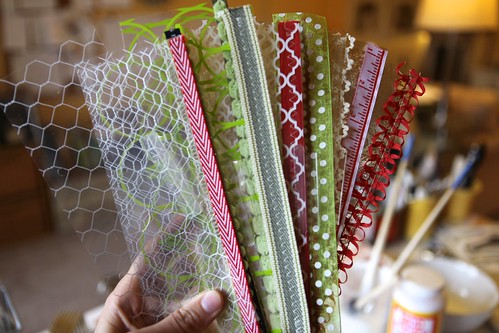
One of the things I really liked in last year's design was having a transparent page in the middle of each daily spread. I allocate two pages (a spread) for each day, with the exception of Day One. This year I made them about 1/3 the size and used a total of 4 Hambly transparent 12x12 sheets (I used Hambly White Lattice, Gold Mini Brocade, Chicken Coop Silver and Chic Green Circles). Hambly has added a page to their site to make choosing some transparencies for December Daily easy - click here to view their selection.

From each 12x12 transparent sheet I cut 5, 3 x 8.5 inch pieces.
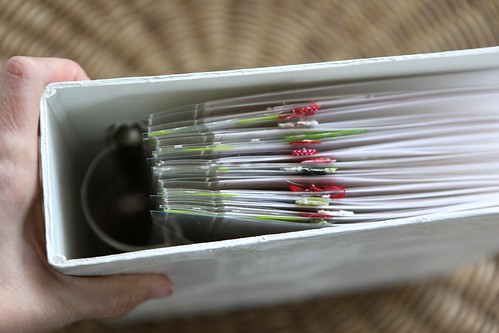
In addition to the transparent sheets I added in six We Are Memory Keepers 8.5x11 Page Protectors that I cut down to fit in the album. I cut each one so that I ended up with four pockets.
Basically I wanted 26 inserts.
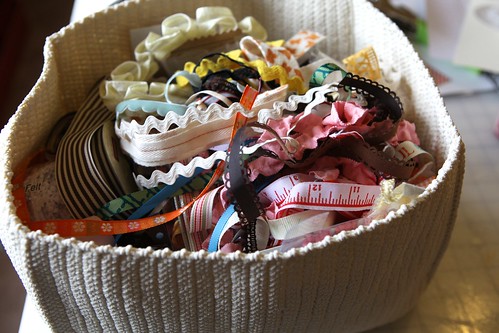
Along the edges of each of the Hambly pages I added some ribbons/twill/lace from my stash or an Avery 2-inch plastic tab.
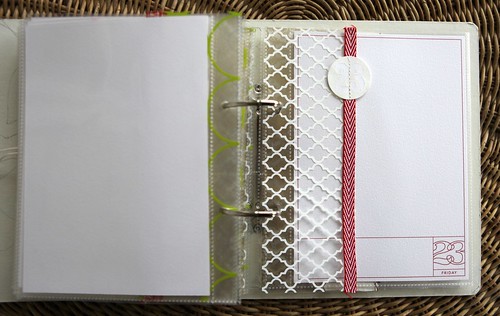
They ended up looking something like this.
I put them in order, starting with a 4-pocket page followed by one of each of the Hambly transparent designs. I repeated that throughout the album.
Here's a look at how the pages came together. Remember, today I'm just sharing some of the pages - the rest will come later this week when I get some additional items from the Studio Calico kit.
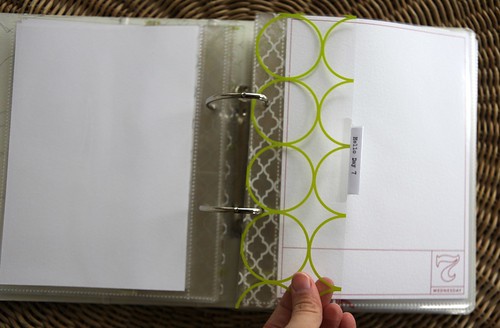
DAY ONE
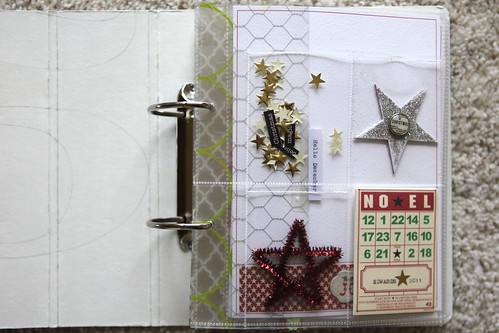
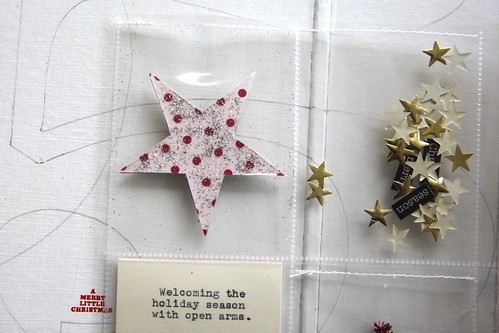
My album begins with a 4-pocket page with a variety of star-focused embellishments.
I was inspired by this image found on Pinterest (confetti pockets) and wanted to do something similar with a few small gold stars (and also keep it in mind for things to add later in the month). After sticking the little goodies inside I stitched the pocket closed with my sewing machine.
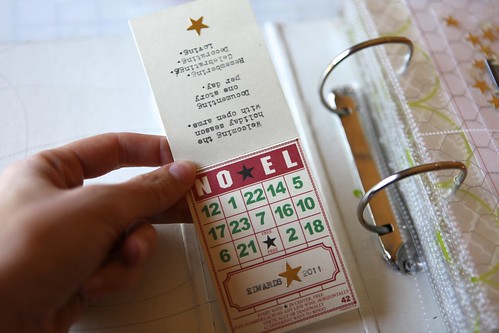
Inside the bottom left pocket I included a Bingo Place Card from Jenni Bowlin. On the front I typed "Edwards 2011" and on the back I typed the following:
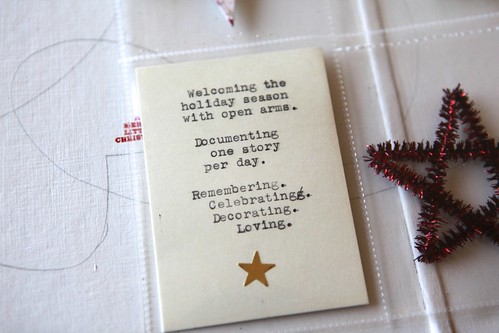
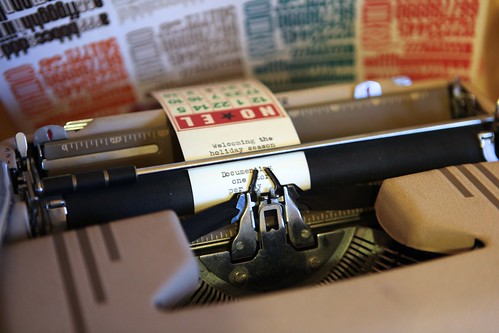
And yes, I literally ran it through my typewriter.
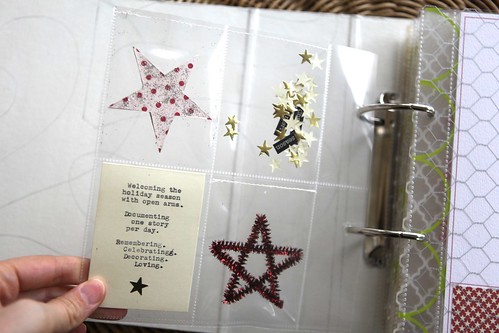
The Bingo Place Card isn't stitched in but the rest of the embellishments have a line of stitching about 1/8-1/4 inch from the top.

Since this is Day One I ended up with the 4-pocket page plus a Hambly insert. All other spreads have just one insert in between the pages (as you'll see below).
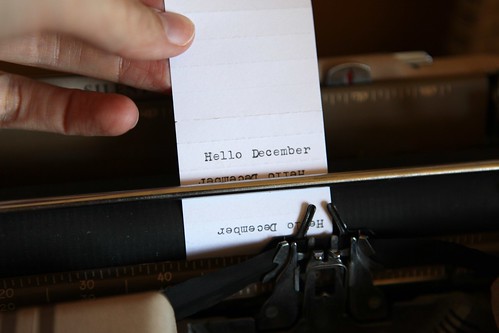
I ran the paper from the Avery 2-inch plastic tab through my typewriter. It's an old one I picked up at an estate sale - super fun to play with for projects like this.
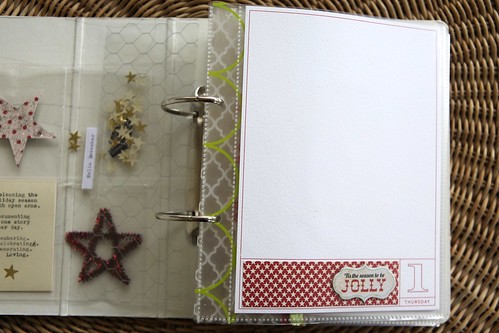
For most of the days throughout the month I'll be adding pattern paper along the bottom in the space designated on the 2011 December Daily Overlay Package. I liked doing that during the month last year rather than in advance. Each of my days from 1 through 25 has a printed piece of cardstock ready to go. I'll add photos, ephemera and stories directly onto this cardstock throughout the month.


The 2011 December Daily Overlay Package includes 31 individual PNG files (dates and days of the week are customized for 2011), and print-ready PDF files in both black and red. As you can see above I'm using the red file this year. The PDF files include crop marks to show you right where to trim after printing. I printed my pages on Bazzill White 8.5x11 cardstock. These pages are 6 inches x 8.5 inches tall - sized to fit the album included with the kit from Studio Calico. I did a video tutorial on working with these overlays last year - the same steps still apply: Working With The December Daily Printable Overlays
Again, it's essentially the same format as last year - just a little taller and with the red option included in the package (and the days/dates correct for 2011). My plan is to also use the 6x8.5 December Daily Layered Templates as the companion page to these overlays. This is very similar to what I did last year.
DAY THREE
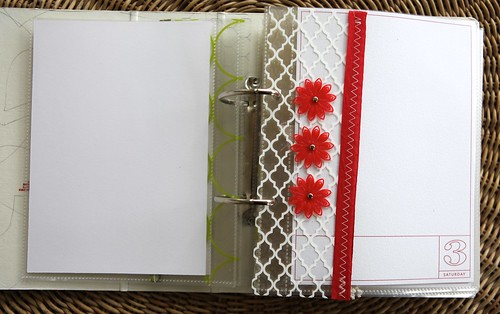
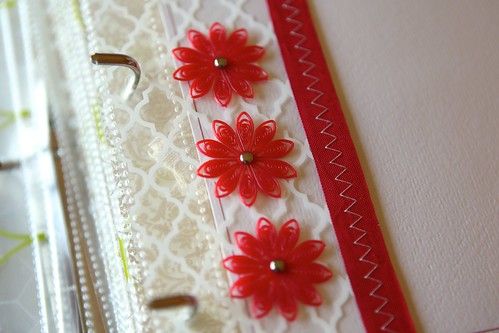
Sometimes instead of an actual number I'm showing a certain number of something. In this case, three of the Jenni Bowlin Red Doily Flowers. This tends to be easier to do in the smaller numbers.
DAY FOUR

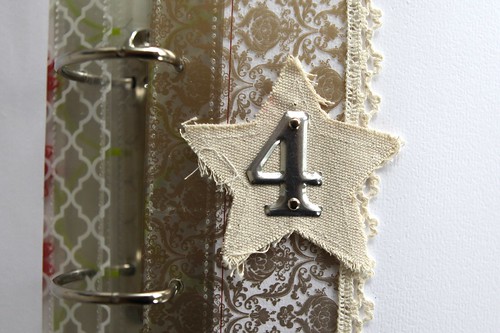
Canvas Corp Mini Canvas Star + Tim Holtz Metal Number.
DAY SEVEN
DAY EIGHT
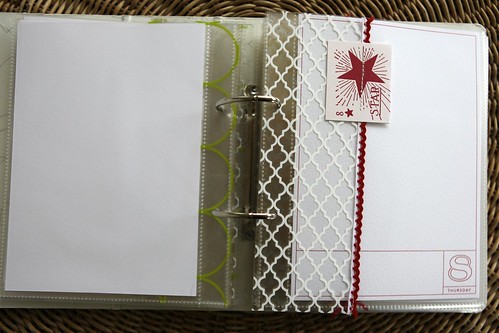

I cut out the number 8 star card from the Jenni Bowlin Christmas Accessory Sheet, folded it over and stitched it onto the Hambly transparency.
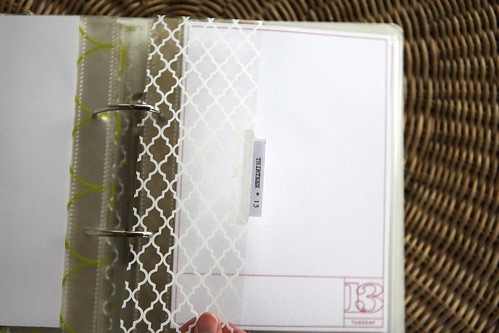
DAY THIRTEEN
DAY FOURTEEN
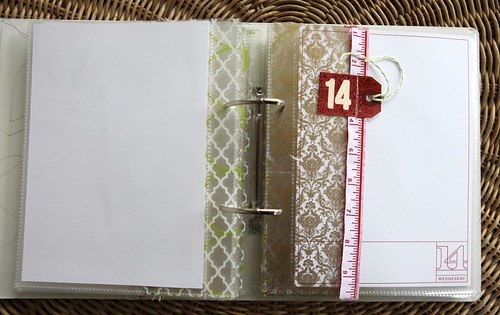
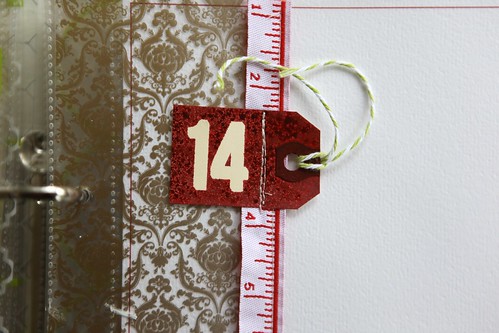
For Day Fourteen I grabbed a small manila tag, adhered a couple of the Jenni Bowlin Red And Black alphabet stickers and used a Studio Calico Mister Huey (exclusive to the kit) to spray on top. After the ink dried I pull off the number stickers and stitched the tag onto the ribbon/transparency combo.
DAY SIXTEEN

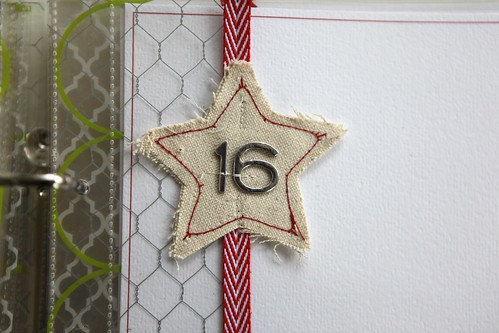
Canvas Corp Mini Canvas Star + American Crafts Hardcover Silver. I stitched around the edge of this one with red stitching. I also stitched the numbers in place with cream - a little more guarantee that those chipboard letters will stay in place.
DAY EIGHTEEN
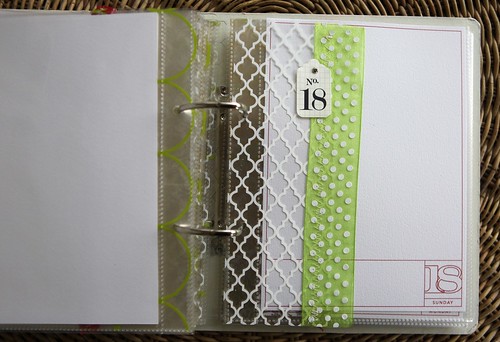
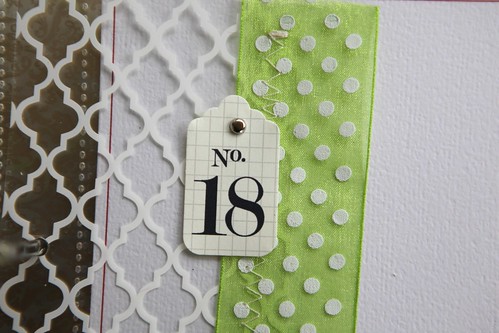
Number tags from Bananafish Studio.
DAY NINETEEN

DAY TWENTY-ONE

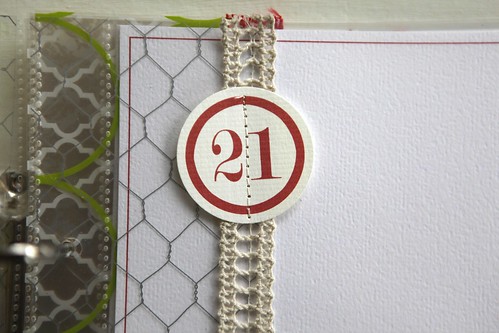
Red number tags from Every Jot And Tittle. I think I've used these circle numbers in almost every one of my December Daily albums. Love that I've been able to use them from year to year (different numbers in different years).
DAY TWENTY-THREE
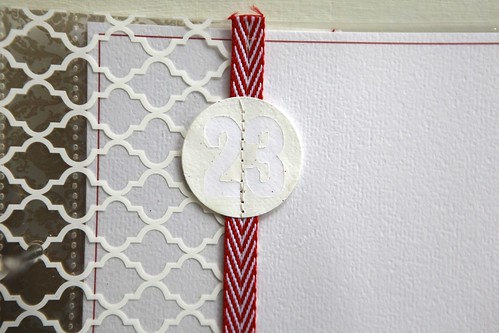
For this one I punched a 1.5 inch circle from white cardstock.
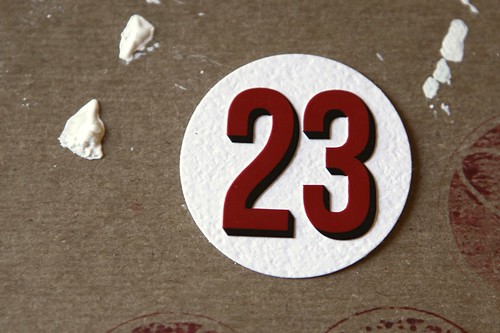
I placed the Jenni Bowlin Red And Black alphabet stickers numbers onto the circle.
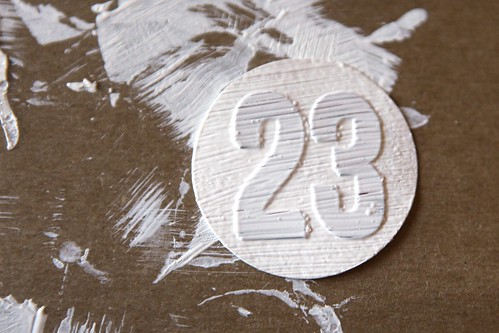
Covered it with gesso/white paint. Let dry.
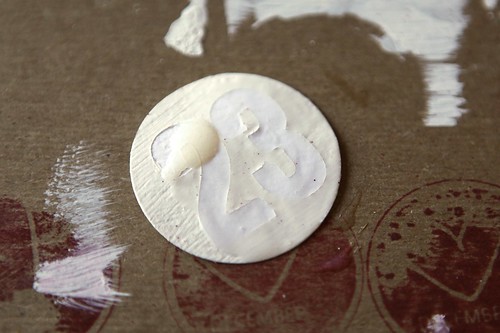
Peel off the number stickers and cover with Glossy Accents.
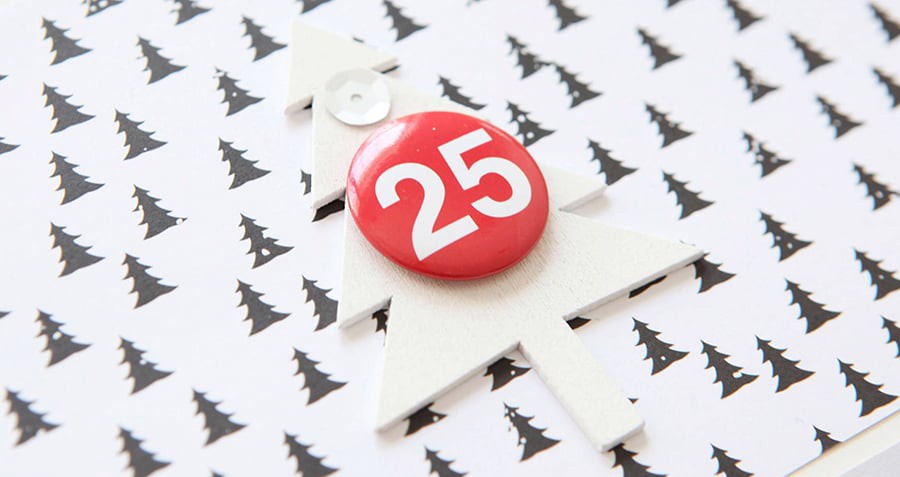
DAY TWENTY-FIVE
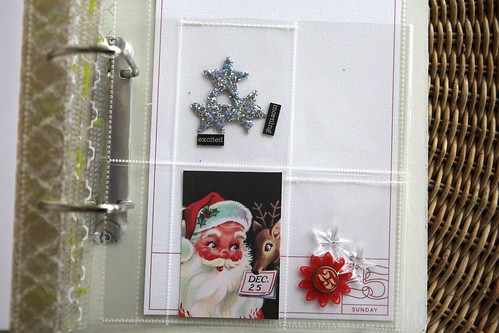

Maya Road Trinket Pin Stars (pulled the pin portion off the bottom of the star before placing inside the pocket), Jenni Bowlin Christmas Accessory Sheet, Jenni Bowlin Red Doily Flowers, silver stars from Prima, Authentique Wonder Diction Word Stickers.
SUPPLIES
DECEMBER DAILY KIT | Studio Calico
PRINTABLE OVERLAYS | Ali Edwards for Designer Digitals 2011 December Daily Printable Overlays
STAMPS | AE Holiday Boxes, November 2011 Studio AE Technique Tuesday Stamp Set (available November 1)
BINGO PLACE CARD | Jenni Bowlin Christmas Bingo Place Cards
DIVIDED PAGE PROTECTORS | We Are Memory Keepers 8.5x11 Page Protectors
CARDSTOCK | Bazzill Basics White Orange Peel Texture 8.5 x 11
STAR PUNCH | Fiskars Extra Large Twinkle Twinkle
CANVAS STAR | Canvas Corp Minis
GOLD STARS | Gold Foil Star Stickers
INDEX TABS | Avery 2-inch
TRANSPARENCIES | Hambly White Lattice, Gold Mini Brocade, Chicken Coop Silver, Chic Green Circles (click here to view a selection of recommendations from Hambly)
LETTER STICKERS | American Crafts Hardcover Silver
CLEAR STARS | Maya Road Trinket Pins
|
|
|
|
|
|
|
|
|
|
|
|
|
|
|
|
|
|
|
|
|
|
|
|
DECEMBER DAILY SPONSORSHIPS
A limited number of December Daily business sponsor spots are available for 2011 - both for giveaways and daily sponsorship. Please email me sponsors@aliedwards.com for more information.

TODAY’S POST SPONSORED BY | Elle's Studio
Elle’s Studio has some great items for your upcoming holiday scrapbooking - their numbers and journaling tags also work great with your December Daily projects! Use coupon code ALIHOLIDAY on any order over $45 and your order ships for free, today and tomorrow only! Also, today only, you’ll receive a free Halloween Tidbit, with any order, for their October special and some of their last call Halloween items are 30% off!


Okay, this year's album blows me away! I woke up early and checked out your post. I love the use of the transparencies (I liked last year's but this new size is fantastic). I guess I will be pulling out my sewing machine in a few days. The thing I love about you is teaching us new techniques and supporting us as we step out of the "box" to create things. Because of you I have been using paint, mod podge, stamping, PSE, stamping,lots of jounaling, and embossing in my scrapbooking. Now I will add sewing to this list. My whole appproach to scrapbooking has shifted and I think more creatively then ever before because of your teaching. Thanks for all you do for us. :)
Thanks for those really nice comments Christine!
Sign in or sign up to comment.
Ali -
Was there any practical reason, (price or bulk or ?) or just design choice to make the transparancies narrower this year, as opposed to in previous years where it looks like they were closer to the size of the other pages?
I'm thinking of using divided protectors between each of my spreads and trying to decide if I should cut them smaller or leave full size, so that both they and the regular pages would be 8.5x11. Definitely something I could wait and decide when I see how much extra "stuff" I end up with - and I'd be ok if they didn't end up all the same.
Also would love any other ideas for clever ways of using the individual mini pockets, though I have a great list from perusing your archives already.
Excited to get started on this!
Hi Miriam - the decision was really more just doing something a little different (but not too different). So many different ways to approach it.
Sign in or sign up to comment.
amazingly lovely book so far, Ali! can't wait to see what else you've got planned for this year's DD album. thanks for sharing some crafty little bits that i'll for sure be picking up to add to my album too.
happy halloween!
Sign in or sign up to comment.
Hey Ali,
LOVE LOVE LOVE..... This is my first year to do December Daily and I am soooooooo excited. I love planning and sketching out how my album will look. I have bought my own album to cover and most of the add ons but may look into the kit. Though I think I have enough.
You are so inspirational. I love that this is something that I can do every year to look back on to see what we did when. As our Decembers are usually pretty hot over here in Australia I'm really looking forward to capturing a lot of stuff from an Australia summer.
You Rock!
Sign in or sign up to comment.
I've tried 4 times to order the Calico kit and it just cycles through the billing and won't complete the order. Is anyone else having this problem? What gives?
Hi Trary - not sure what's up with that. Were you able to complete the transaction? Let me know and I'll send April an email.
Sign in or sign up to comment.
While I am sitting here handing out the treats to the kiddos, I just purchased the overlays, etc. How exciting!
Late to the party last year, I think I started the process a day or two before December...this year, I am taking your smart advice and getting everything set up ahead of the game. I like the similarities and at the same time, I'm excited at the changes! Now I just can't wait for my SC kit (lots of ideas for my cover)!
Just one question in advance...given the page change to 6x8 to 6x8.5, can you offer any printing suggestions? I used Black's last year, but I don't believe 6x8.5 is a standard size. I'd really like to do my album along the way, but even if I set up my photos and print them even perhaps a week at a time, I don't mind going online. I know you always have the absolute best advice for printers...how about this year's best places?
Thanks in advance Ali and I can't wait for the snow to fall. I almost want to break out my Christmas music!
Hi Steph - thanks for the comment. I don't have a specific suggestion (mainly because I print here at home). One thing, depending on price, might be to print 8x10's (especially if you can find a special) and then crop the photo down to fit. In general I've always had good luck with printing via Scrapbookpictures.com.
Sign in or sign up to comment.
Wow Ali! Everything looks awesome! Can't wait to see the rest! You rock!
Sign in or sign up to comment.
love this... I love that you are getting more use out of the transpancies.. now I just need to go find some?? love the ribbon details.. everything looks amazing..
just a question? will they be selling just the album alone somewhere..??
Can't wait to see the rest of what you are doing!!
Hi Angie - the album is an exclusive for this particular kit this year.
Sign in or sign up to comment.
Hi Ali
I drool every year at your December Daily albums but never seem to get around to doing it for myself- who knows maybe this year is the time to start!!! Just one question- the plastic protectors that you have your printed cardstock in- all the ones I have seen online are for the 3 ring binders and I see you are using a 2 ring binder this year- have you used a special protector or do you just punch the holes in seperately to acomodate the difference??Thank you so much for the time you take to photgraph each page for us and explain your foundation pages. Just LOVE your way of telling the stories of life xx
Hi Sue - these page protectors were made specifically for the album (and the album was made specifically for Studio Calico).
Sign in or sign up to comment.
Another awesome start...bound to become a beautiful album. Thanks for sharing and inspiring us!
Sign in or sign up to comment.
Hi - I have Microsoft Digital Image 2006 Standard. Do you think the overlays would work with this program? TY
Hi Liz - I don't know anything specifically about that program but if it can open a PNG file you are good to go (this would be if you wanted more editing capabilities). You can also simply open the PDF file and print using Adobe Readers (that you probably already have on your computer).
Sign in or sign up to comment.
oh wow! this is great. i have started preparing my december daily materials while waiting for yours and it is so amazing that because i have so much leftovers from last year that i chose to use strips of papers where to attach the numbers/days. and my album will look similar to yours. i love it ali. :)
Sign in or sign up to comment.
Ali,
I am so excited about your DD album... it this is my first year participating and I can't wait!
Will you be putting out a blinkie for the December Daily like you did for a Week in the Life?
Thanks,
Diana
Hi Diana - yes I will - working on that today :).
Sign in or sign up to comment.
Hi Ali, while stitching the ribbon on to the transparencies, my needle is getting really sticky and the upper thread keeps on breaking. I heard there's a teflon needle??? What are your thoughts?
hi ali, i wanted to let you know i think my problem was due having a little adhesive on the ribbon. i just had to keep rethreading and cleaning the needle with Undo.
i guess there is a tephlon needle that is suppose to help reduce friction. maybe i'll try it next year!!
i didn't have any problems sewing the page protectors. :)
thanks for the inspiration to finally attempt this project. it's my first time!! :)
Hi Janice - I wish I knew more about it - every once in awhile mine gets sticky (usually if there's some adhesive I'm sewing through). I didn't adhere the ribbons before stitching them - just held it in place and prayed :). You might not have used adhesive...I'd love to hear about it if you try the other needle.
Sign in or sign up to comment.
I'm in love with your album! I've decided to do a DD album this year but will be using up my scraps from last year. I should have my new camera to play with so this should be a good way to get me to use it and try out the different features.
Sign in or sign up to comment.
Just got in, from buying a local version of supplies! DD vol 4 for our family, a cherished tradition.
This size fits beautifully with the A5,(metric) stationery system. looking forward to blog members links. Ta again Ali!
Sign in or sign up to comment.
Thanks for all the inspiration and a peek into your process. I feel behind already!
Don't let that stop you - you've got time.
Sign in or sign up to comment.
Ali thank you for showing us your pages and helping motivate us for the preparation! I'm so excited because my Mom and I are going to each make albums again! (this will be our second year).
I create the foundation pages for both our albums, then we each take photos and write. Over Christmas week, we get together and put our albums together. It's a treat!
Thank again for this wonderful project.
Sign in or sign up to comment.
Wow! I feel in line with your thoughts! I loved the transparencies from last year. I really wanted the album, but couldn't find the kit price in the budget, so I ordered a different 8x8 album to modify. I ordered a bunch of transparencies, but I couldn't afford 25 of them to fit each page, so I planned to cut them to half size just like you did! I love the ribbons stitched on the edges, so I will lift that idea. This is one of my favorite projects ever, and I look forward to every year. Thank you so much!
Christine
Sign in or sign up to comment.
Hi Ali,
I don't use Photoshop and don't have a color printer, so I brought the PDF of the red overlays to the local print place and when I just trimmed them, they measure 6 1/2 by 9 3/8? (Measurement is using the red outline, not the crop lines.) Did the print shop do something wrong?
Thanks. I love this project. You rock!
The measurement of the cut page should be 6 inches x 8.5 inches (that includes a border around the red line). My guess is that the print shop did not set it to set the "page scaling" to none. Sounds like they choose "fit to printable area" which enlarges the actual image on the page.
Sign in or sign up to comment.
[...] The Foundation Pages | Part One [...]
Sign in or sign up to comment.
Hi Ali! I wrote you on instagram as well. The album is coming along beautifully. I'm having a lot of fun making my foundation pages. I'd love to share my work. Where's the best place to post? Here on your blog, flickr, or Facebook?
Hi Mallory - sorry I missed that on Instagram (I saw it but your stream was protected and I couldn't click through to see exactly what you were talking about). Right now the Flickr gallery is a great place: http://www.flickr.com/groups/decemberdaily2011/. In a couple days when I post the second half of my pages I'll include a place to include links to your foundation pages.
Awesome! Thanks for the reply.
Sign in or sign up to comment.
Hi Ali-
I am looking at a bunch of your designer digitals product and my question is, I really only will use them to print out and use or maybe to overlay a photo (if I cam figure it out!). Can all the products be printed out or can some only be used digitally?
Thanks,
Gretchen
Hi Gretchen - everything I offer can be printed eventually :). The one's that take a little more of a learning curve (but not much) are the layered templates - those are the ones that look like layouts with simple colored blocks where the photos go. In general all my word art and overlays can be printed using photoshop or word. Check out my Getting Started With Digital Scrapbooking page for more details/tutorials and some free downloads to get you started: http://aliedwards.com/2010/01/getting-started-digital-scrapbooking.html
Sign in or sign up to comment.
Oh my Ali- you've outdone yourself. I love your album already. I'm looking forward to joining in the DD festivities this year. Looks like I have a little shopping to do. Thanks as always for the inspiration and fun excuse to get out my paint and art supplies. Maybe I should ask Santa to bring me a typewriter early this year...
It's such a fun tool to add to your arsenal Jenny :).
Sign in or sign up to comment.
Hi Ali,
Love Love Love your album already..
I had a questions about the page protectors, I don't know if it's because it's late at night or I just didnt read it properly, are you cutting the 8.5x11 page protectors downto go in between each of your pages or only the 4 pocket pages at the front & pack & then normal page protectors cut for the foundation page or a photo or something? I'm a tad confused..
Jess
Hi Jessica - the only page protectors I'm cutting are the pocket pages (they are 8.5x11 9-pocket pages that are cut down to 4-pockets). The other page protectors came with the album.
Sign in or sign up to comment.