December Daily™ 2011 | Day Five (+ Layered Template Video Tutorial)

Welcome to December Daily™ 2011 | Day Five.
One of my favorite themes for December Daily™ is an "Around The House" spread with photos of decorations. It would be fun to see just this page compared with past years to see what's changed and what's remained the same.

For my story today I used one of the templates in my December Daily™ Layered Template 6x8.5 package paired with an enlarged photo and journaling on the second page.
(Sorry about the color quality of these images - it's challenging to get the colors correct when I photograph them in the evenings.)
Here's a look at the page created using one of the layered templates:

I put together a quick (12 minute) tutorial about my process for working with these layered templates (specifically this set but the information can be used for working with any layered templates).
December Daily™ Layered Template Tutorial 2011 from Ali Edwards on Vimeo.
Here's what the first page looked like before printing:

The white digital cardstock I used in the background is from this set: Michaela Solids.
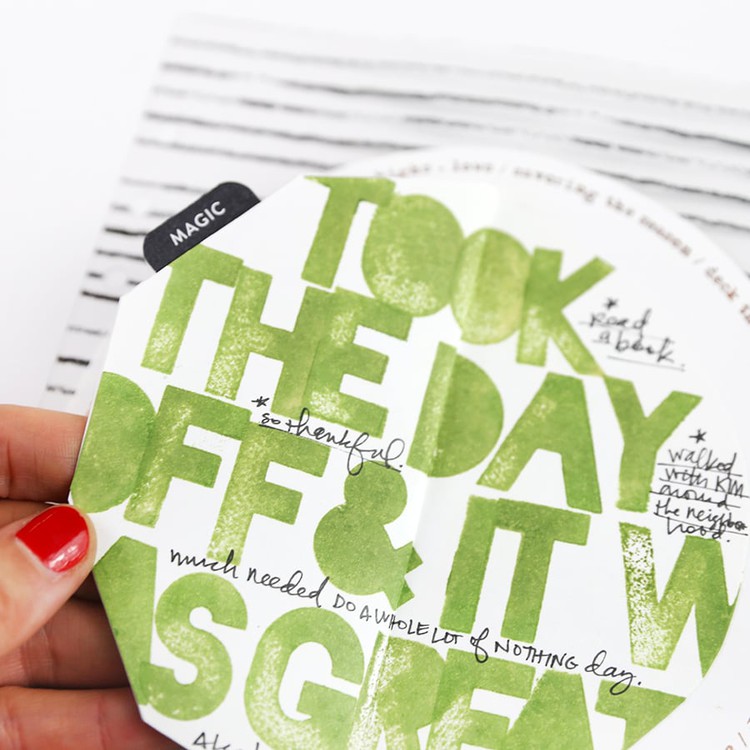
After printing out the layered template I added the letters for JOY using American Crafts Hollyday Elf Thickers. The little black stars are some older Jenni Bowlin rub ons (came in a package that had arrows with words on the inside and the stars were between the arrow + word combos).
Here's a look at at the second page:

That "peace" tag was from my Christmas stash. I'm thinking it was from Ormolu?
Pattern paper strip along the bottom is American Crafts Hollyday Red Suit with Glitter Accents.
Between these two pages is a divided page protector insert.

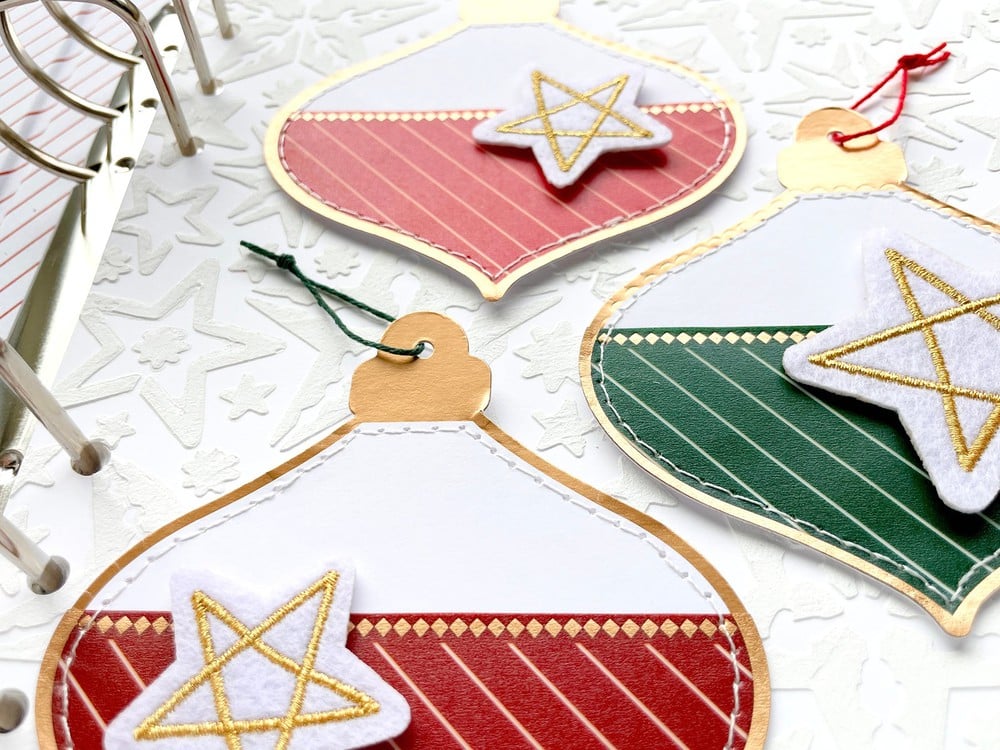
In the top two pockets I added a piece of transparency with a Jenni Bowlin arrow rub on and a button from Evalicious.
The outline stars (found in my Silhouette library - thinking they came with it?) were cut with the Silhouette.
I chose not to do anything on the back of the pieces in this divided page protector.
Here's a look at the pages inside the album:


SUPPLIES | DAY FIVE
Click on the images to link to the products.
|
|
|
|
|
|
|
|
|
|
|
|
|
|

TODAY'S POST SPONSORED BY | Hero Arts
The Hero Arts 2012 Catalog arrives in January, filled with clear, cling, and wood stamp designs, dies, embossing folders and more -- over 200 new products in all! Pre-release Catalog Debut Parties kick off at a store near you December 10th and run until the catalog is released on January 5th. Visit heroarts.com to join the Catalog Debut festivities with sneak peeks, videos, a blog hop, and more!
SHARE A LINK TO YOUR DAY FIVE
You’re invited to include a link to your DAY FIVE page here. Please link directly to your post vs. your general blog link.


so, so pretty!
Sign in or sign up to comment.
great -- love it
Sign in or sign up to comment.
So inspired by the idea of cutting out the stars with the silhouette. I've been looking for more stars and things that work well in double sided situations and this is a perfect inexpensive fit (that gets me to hook up my old SD again). Thanks!
Sign in or sign up to comment.
My "Around the House" page will have to come later as I haven't even put up a tree yet...
Sign in or sign up to comment.
Ali, I love this idea and these pages. So fun to see our favorites that come out every year and then the one or two new items we find each year. Thanks for the tutorial as well.
Sign in or sign up to comment.
Ali, I look forward to your posts every day. Thank you for making the holidays even brighter! Wonderfully creative ideas ~
Sign in or sign up to comment.
HELP!! This is my first time doing DD. I am loving it so far.
I am sending my completed pics to Walgreens for printing. If I
am using the 6x8.5 templates, would I have my pics printed out
on a 8x10 photo?? And how do I keep them the 6x8.5 size? I hope
this is making sense.
Hi Mary - I recommend putting yout 6 x 8.5 image onto an 8x10 canvas (File/New - 8x10 at 300dpi for the resolution), saving as a JPG and then uploading to a developer. Once it's printed you will cut off the excess.
Sign in or sign up to comment.
Thank you for taking the time to show us the way. I have made my whole process more simple this year with one 7x7 photo and some storytelling journaling. Happy!
Sign in or sign up to comment.
Loving your designs today and I NEED to use my die-cutting machines a bit more!
Sign in or sign up to comment.
This is so cute, I love the collage look! Gonna have to do that with mine but in 8x8 of course. ;)
Sign in or sign up to comment.
Great idea. Think I need to add this to mine.
Sign in or sign up to comment.
Thanks for the tutorial Ali! It helps so much. I've had Photoshop for a few years now but only know how to do basic basic things. I can make collages for my scrapbooks! :) I'm def going to purchase those templates in the new year. I've set a goal for myself in 2012. In addition to participating in Project Life, I want to learn more things in photoshop and do more hybrid scrapbooking. The picture is a bit blurry, so can you tell me which tabs/palettes are open in your elements. I did something, and now when I open it there's nothing on the screen, I have to go looking through the toolbar, and I have no idea how to fix it. :/
Would greatly appreciate your help, and as always, great page today!
Hi Mallory - you can select which windows you want to view by going to the "Window" menu and picking which ones you want. To me the important ones are usually Layers and Tools.
Sign in or sign up to comment.
Wonderful...gorgeous love it Ali!!!
Sign in or sign up to comment.
Love it! It is unique to see through the years what Christmas things decorate the house and what things stay for only that year. Love the star garland! Did you make it?
Hi Amy - I didn't make it but bought it from an etsy seller: http://www.etsy.com/shop/thePathLessTraveled?ref=seller_info
Sign in or sign up to comment.
that tutorial was SO helpful--thank you! Thanks for inspiring the December Daily, my kids had my two previous years out and were enjoying them! :)
Sign in or sign up to comment.
Hi Ali,
Thanks for another great post!I like the idea of using the devided page protectors. And thanks so much for the tutorial! Very Helpful!
Sign in or sign up to comment.
Always love the around the house photos.
What font did you use in the layed template.
Helvetica Neue.
Sign in or sign up to comment.
Hi Ali,
Long time follower first time leaving a comment. As I don't have photoshop I wish I could pay you to do this for me send you my and you do the layputs..Love your work and I will admire from afar..Merry Christmas
Janine
so sorry about bad spelling and sentence structure....:( it should say 'send you my photos to then put in nice layouts as you have done;..x
Sign in or sign up to comment.
I love this layout! Thank you for the tutorial. I'm not really familiar with using these templates, so it's a big help. Every day has been just wonderful. :)
Sign in or sign up to comment.
You are simply AMAZING and I just LOVE you. Did I leave anything out? :)
Sign in or sign up to comment.
[...] used Ali’s template which can be purchased here. But make sure to see her post from today in which she has an amazing video tutorial. I removed the words from the template and wrote a [...]
Sign in or sign up to comment.
This is so happy! I'll be doing this for sure once everything is done.
Sign in or sign up to comment.
Just a little note to thank you for all your inspirational ideas and tutorials. I admire your business sense and enjoy how you roll out your ideas and products. I thank you for your giving spirit. Blessings to you and yours.
Sign in or sign up to comment.
Ali - I love all your pages - but especially your twinkle pages. I am struggling with my own dec daily - live in New Zealand and feel like I am lacking in subject material, and that whole 'twinkly, snowy' christmas inspiration. Any ideas ro suggestions. Thanks so much ...
Jayne, I live in New Jersey. I'm missing that crisp cold air, winter twinkle thing too. It's DECEMBER 7th, 2am. And it's over 60F outside. Not right!
Sign in or sign up to comment.
LOL! I have pulled together photos from the past five or so Christmases. I change things around normally, but last year was the first without a 6' wide by ~1' deep top shelf on our entertainment center! Darn those flat TVs. I was frustrated enough that I left almost all my Snowbabies in their boxes. A first. I'm still trying to figure out where to put them. sigh.
Sign in or sign up to comment.