Week In The Life™ 2014 | Working On The Album + Video Overview

Before you jump into seeing the photos or watching the video I want to remind you that there's no right or wrong way to approach bringing all this together into an album. Tell the stories that matter to you in a way that's enjoyable to you. That might mean you use a ton more product or a lot more handwriting or a lot less photos or no words right on your photos and a whole lot more pattern paper. Take my ideas as a jumping off point but make the process work for you and your family and what makes you happy.
Here's what was rattling around in my brain as I began the process of putting this together this past:
What is the story I want to tell? How do I want to communicate that? Let the story take the lead.
My basic process is this:
- Choose photos. For me this includes looking back at my blog posts for the week. I figured that I put effort into those posts (choosing photos + writing words) so why not use that as the jumping off point for my album. I'm doing it one day at a time because each day had it's own feel and I like focusing on one day at a time.
- Resize photos in Photoshop and add words directly to the photos using the Type tool. Again, my words are coming directly from my blog posts with a few additions here and there.
- Print photos. I print at home using either an Epson PictureMate Show for 4x6 and smaller or an Epson R2000 for enlargements.
- Add embellishments. This includes stamping on the photos.
Getting one day done really helped solidify my process for the rest of the days and I think it will go quicker as I move forward. I'll continue the pattern of dealing with the photos and the words first and then add embellishments.
Most of the products I'm using came with the Week In The Life™ kit. I've added a supply list at the bottom of this post for any additional things I used.
As you will see, I like repetition and I like keeping things simple. Here's a look at what I've put together so far:

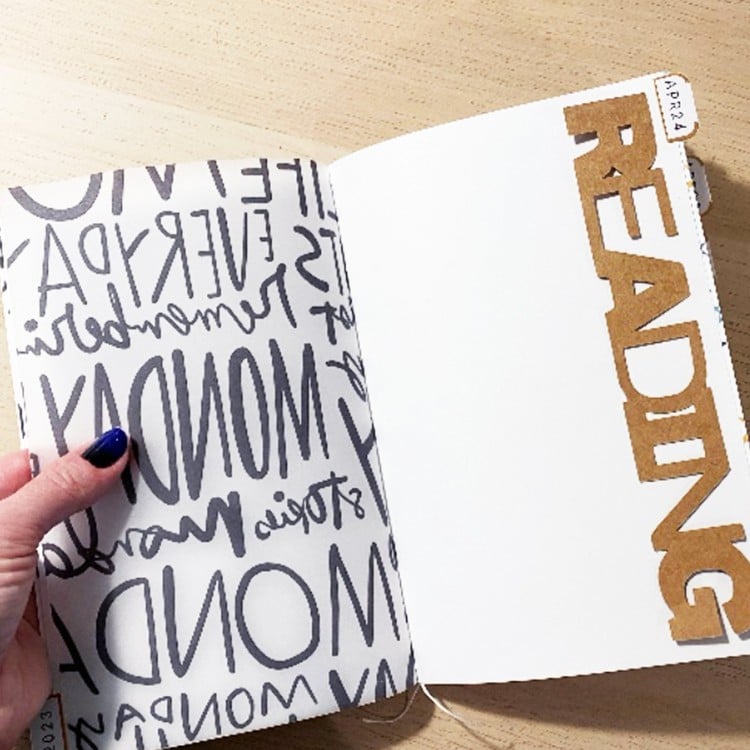
If you are following along with my design plan for 2014 and using the album/kit option you should have one or two extra page protectors. I decided to start my album with one of the 3x4 pocket pages that I cut in half (making sure to maintain the pockets by cutting on the outside of the seam) because I like to vary the size of the page protectors I include in my album.
Adding this pocket page gave me the chance to introduce this album and include "my reason why" and "who we are right now."
TOP POCKET | Week In The Life™ patch adhered to the star transparency.
WOOD VENEER DAYS OF THE WEEK | Along the edge of the pockets I adhered the wood veneer days of the week using 1/8 inch red line tape. You can paint this or emboss it or cut it up or just leave it plain and attach or adhere. I decided to simply adhere it along the edge of the cut page protector. Whenever I include a cut page protector (or another insert that is smaller) I like to add something to the edge. The red line tape seems to be holding it in place just fine and it's totally transparent from the other side.
BOTTOM POCKET | Begin with your "reason why." I took one of the cards from the kit and stapled the "my reason why" (you can find this on the perforated phrase/word sheet) on top of the other word that was there originally. For the title of the card I stamped and embossed (with the Gold Glitter Zing) "stories of life" which is part of the stamp set that came with the kit.

To print directly onto a journal card I simply set up a 3x4 inch canvas in Photoshop, measure the space I have for my text, and then print a test print on regular printer paper. After that I temporarily adhere the actual journal card onto the printer paper and run the card through the printer again - out comes the journal card with my words right where I want them on the card.
Here's a look at the back of the first pocket page:

Behind the Week In The Life™ patch I used the circle stamp + the "this is our life" stamp from the kit + Gold Glitter Zing. A 1.5 inch circle punch is just the right size for that stamp.
MAKE A "WHO YOU/WE ARE" CARD | Another thing I wanted to include at the beginning of the album (and part of the reason I added this title page) was a simple journal card that included our ages and just a few things we are each into right now. The big "E" is from this set of Pebbles Gold Foil Letter Stickers. I use them a couple more times on other photos this day.
As you will see throughout Monday I'm using the perforated phrases/words on just about every photo (seen above under the "E"). I love those things.

For my title photo I went with a full page 6x8 + digital word art from my What Today Looked Like set.
I adhered the blue star above the title using some red line tape.
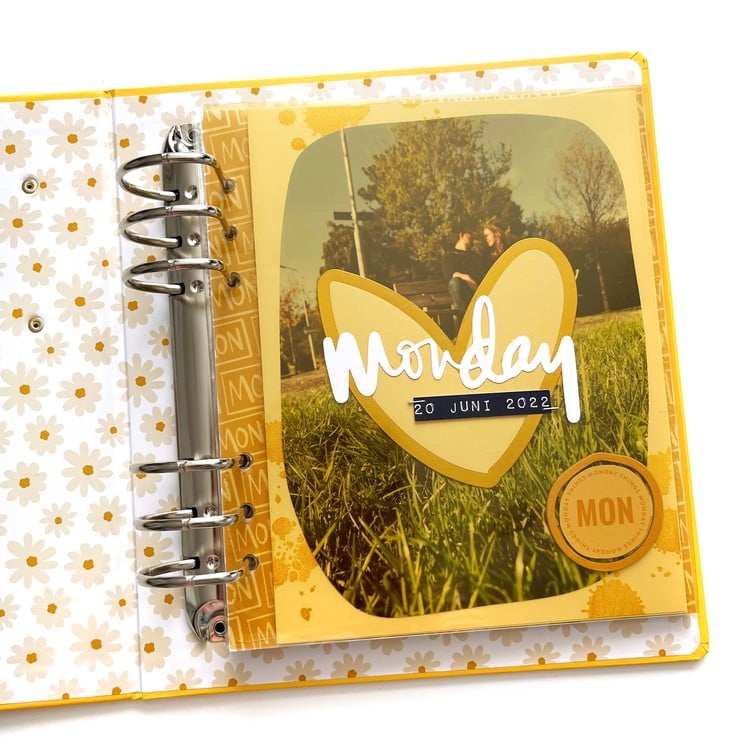
And then we move into the first day of the week:

In the video tutorial last week I walked you through the process of working with the Week In The Life™ Layered Templates.
One of the things I mention in that video is the ability to remove (turn off the layer or erase it completely) to customize it to what you want. For Monday I decided to remove the lines - one click hid all the lines, another click hid the logo and the third click hid the year - and add some of my journaling right to this main page.

All the journaling throughout this first day came directly from my blog post sharing my words and photos for Monday. On the perforated strips there are days 01 thorough 07 so I'm planning to add those to each day of the week on the first page.

A simple and easy way to add more photos to your album is to adhere them back to back. I printed out these two photos, adhered them together with rolling adhesive and then used a Crop-A-Dile to punch holes that match the rings in the album. I do that by simply laying a page protector on top of the photos and using those holes as a guide.
Next I cut the chipboard "AM" and added it right above the journaling.

I really like the look of the printed journaling directly on the photos + a physical embellishment on top. I'll be repeating this simple concept throughout the album.

In general I like to add photos chronologically, starting at the beginning of the day and moving throughout the day towards the evening.
It's not a hard and fast rule for me though, as you'll see as I share the rest of Monday.
You might choose to group yours in totally different ways - such as by time of day, theme, etc.

Next up in my album is the 3x8 page protector. Which I love. Which I can't wait to have more of in the shop. I'm a big fan of inserting these kinds of pages in Project Life® (pages that are shorter widths than the rest) and was excited to include these in the album/kit option.
Also included in the kit were these 3x8 timeline cards. For Monday I decided to print small photos and add them right onto the timeline card vs. journaling. It's likely that I will write or print on these on other days, but it's nice to show a different way of approaching them.
On top of each photo I added 1/2 of a label along with a couple words about the photo itself. Cutting those labels in half will give me more options as I move forward with the week.
The last thing I added to the 3x8 page protector was a small index tab (also included in the kit). Instead of using what's printed on there I stamped on the inside using ">> stories" ("remember" would also fit) in red ink. I stapled that in place using the Tiny Attacher.

On the back I went for a full page 3x8 photo. I cropped this image in Photoshop (3x8 at 300dpi), added the text and then printed it here at home.
I might not do this same thing each day because this is a great space to be able to add more words, but it works awesome for when you have a lot of photos. We'll see as I tackle the other days what makes the most sense for each individual day.

I cropped my photo in Photoshop and then printed on 8.5x11 photo paper and cut it out.
For future days I'll likely do two 3x8 photos on one 8.5x11 inch piece of photo paper just to save some paper.

Next up is a 4-3x4 pocket page.
I'm including a chipboard number for each day of the week and using the Gold Glitter Zing on the front and back before stapling them into a pocket. I love keeping some things see-through.
On the photo of Anna in the bottom left pocket I stamped "love this" from my Photos Stamp Set and added "be fearless" from this awesome Tim Holtz rub on sheet. To stamp on the photo I used Black Cherry StazOn ink.
On the To-Do list journal card I just added a few simple things I knew were on my list that day.

On the back side of the 4-3x4 page protector I included the "Monday" card and two more photos.
I stamped "this is my life" from the kit stamp set using Black Cherry StazOn ink on the top photo.

As I looked through my photos from Monday there were two more that I really wanted to enlarge. They didn't fit into my original design plan (hello, be flexible) so I simply enlarged them using the actual size of the page protectors as a starting point (so larger than 6x8) and decided to make the width just a bit smaller. The images ended up being 5 inches wide x 8.25 inches tall. I printed both out, adhered them back to back and used the Crop-A-Dile again to punch the holes. I did take into account where the holes would be when I was placing my type on my photos.
There have been many mini-albums where I've done this sort of thing in the past. I'm remembering how much I like to have some other kinds of pages mixed in with the page protectors (I'll be doing this same thing in December Daily® again next month).
In addition to the journaling I added a gold letter sticker + a perforated phase to each photo.

You'll notice that I also added a larger index tab + stamped "this photo has my heart" from my Photos Stamp Set.

Photos + words people. Sigh. I just love it.
Next up is a 2-4x6 pocket page protector. I went super simple and just added four 4x6 photos with journaling + the perforated phrases.
In the coming days in this album I'll add more of the labels, the chipboard pieces (like I did for "AM" above), and the longer label stickers.

Another thing I did a little different is rather than use one of the 6x8 Layered Templates for the last page of my Monday, I decided to do another full-page 6x8 and add a list of my gratitudes for the day. These came right off my Daily Sheet. It's likely that I'll use one of the photo collages on another day, but this felt right for Monday.

I also love how this page turned out - being able to add both these images next to each other makes me really happy. It's such a standard routine in our house at bedtime - a treasured part of the day for all of us.

"Filled with gratitude" comes from my Just Thankful Word Art set.
One thing I didn't add, as you might notice, are the times of day. I usually add those in some way and to be honest, I forgot because I was simply copying and pasting my text from my blog posts. I will be adding my daily sheets in the pocket behind the last 6x8 photo so they can be accessed in the future.
Remember, make this project work for you!
VIDEO OVERVIEW
Here's a 22-minute video that walks you through some of my choices and talks about my process:
SUPPLIES
In addition to the supplies in the Week In The Life™ kit I'm using:
- Pebbles Gold Foil Letter Stickers
- Gold Glitter Zing (available in my shop)
- Versamark Embossing Ink
- Memento Luxe Love Letter Stamping Ink (available in my shop)
- Tiny Attacher Stapler
- Crop-A-Dile
- 1.5 inch Circle Punch
- 1/8 inch Red Line Tape
- Black Cherry StazOn Ink (great for on top of photos)
- Photos Stamp Set (available in my shop)
- Tim Holtz Remnant Words Rub Ons (these are awesome)
- 2-inch Index Tabs
Digital Supplies
- 6x8 Week In The Life™ Layered Templates
- What Today Looked Like
- Just Thankful Word Art
- Font used for journaling is Remington Noiseless
THANK YOU
Thanks again for playing along again this year! I'll share more from my album as I complete the additional days.
Want to check out past Week In The Life™ posts? Check out my archives here. You can also see examples of past albums under the Week In The Life™ Projects Tab.


Thank you so much for the inspiration, I have set aside a few hours this afternoon to get stuck into mine (have only done monday), can't wait.
Sign in or sign up to comment.
Love this Ali! I was wondering what I was going to do with those week wood veneer - using as a page turner - genius. And I'm so going to copy that :). Our WITL is this week and I don't think I've got enough photos. I've 'think' I've got enough stories but my I'm worried about the photos. Do you ever include photos that weren't taken in that particular week - eg, last night I totally forgot to take photos at my son's basketball training, but I could easily get some at his session next week?
Sign in or sign up to comment.
Thanks Ali, looks great, do you print on matte or gloss paper, do you find the prints not in page protectors get finger prints on them? Thanks :)
I generally use Gloss photo paper - this is the one I order: Epson Premium Photo Paper Glossy
Thanks Ali :)
Sign in or sign up to comment.
LOVE this! Just love it - all the little details & touches - so inspiring. Thanks for sharing!
Sign in or sign up to comment.
Love your photos + words Ali! I embossed the numbers with gold zing too! Looking forward to seeing how the rest of your week unfolds. TFS. :)
Sign in or sign up to comment.
Will you be adding the index tabs to your shop? I have looked in all kinds of stores locally and I cannot find them. I figured I had a few more things to get from your shop so if you are getting those I purchase them with it.
Thanks.
I hope to! It's on the list but I don't have a specific timeline right now.
Sign in or sign up to comment.
Thank you! This was incredibly helpful. I was stuck on how to get the photos in that I didn't want to crop--I forgot about the option of just printing them and putting them in without page protectors. Also love how you got the journaling in on top of the photos throughout.
Sign in or sign up to comment.
Ali, your book is so inspiring! Thanks so much for sharing.
Sign in or sign up to comment.
Looks awesome! Giving me some oomph to get going on mine :) I attempted tonight to print on one of the cards like your opening card, I've spent about 2 hours (oyyy) trying to figure out making a 3x4 template to temp stick the card too for running through my printer. Finally have that, now I can't get a text box made for so,e reason. I am using Elements 10, can you only type onto a blank canvas in Photoshop? Maybe you already have a quick link where you've explained this process before? :) I would so appreciate you pointing me in the right direction :-) thanks Ali!!
Sign in or sign up to comment.
Ali, will you be posting more of your pages from WITL here? This is my first year to do WITL and I was hoping to see how you did your album before tackling the job! I got the kit, but I have no idea how to use it, LOL, I'm a digital scrapper and haven't done much with hybrid. Thanks!
Absolutely - it's in progress! Hoping to share more soon.
Thanks Ali!!
Sign in or sign up to comment.
This may not be the best place for this question, but I was wondering where I could order more of the 6x8 pages like the ones included in the kit? I would like to have some more pages/options for my album but can't seem to find the same pages? Do the Becky Higgins Project Life 6x8 pages fit in these albums with the 6 rings? Do you just have to punch extra holes? I choose to document a different week and I'm just getting started planning out my pages. Thanks for the help!
Sign in or sign up to comment.
Hi Ali, when are we going to see the rest, and I would love to know which font you used for "my reason why" and the size of the font please.
Sign in or sign up to comment.
would love to know where to get the ring binders you use. I love them!
Sign in or sign up to comment.
Dear Simon....you look AWESOME in your new glasses!!!!
Ali....thank you for sharing your life. Thank you for not pretending it's not all sunshine and roses (ha! I KNOW it's not sunshine in Eugene!!! :0) I love your style and can't wait to get started with your kits!!
Merry Christmas!
Sign in or sign up to comment.
I love the photography, but then it got me to wondering - do you use the self-timer function on your camera? Or is someone else taking the pictures you are in? (Like the ones of bedtime routines and while you're out shopping.)
Yes - the majority of these are self-timer shots. I'm the only adult in my house most of the time :).
I've only used the self timer for group photos at holidays, so seeing your post (and knowing you used the self-timer) has opened up some new ideas. It also occurs to me that this sort of thing is a good opportunity to put my camera remote to good use...when I figure out what "safe" place I put it in! Thank you for responding. :)
Ali, I'm curious of your process for taking the photos of you shopping. I can't see how I could do that kind of shot alone. Where did you set your camera down to keep it safe out and about like that? I'm so curious! Thanks!
Hi - I simply set my camera on the ground in the aisle and set the timer and then walked back to grab something off the shelf. It was early in the morning and not busy at all :).
Sign in or sign up to comment.