Mentor Mom | Traditional Scrapbook Layout
Tags: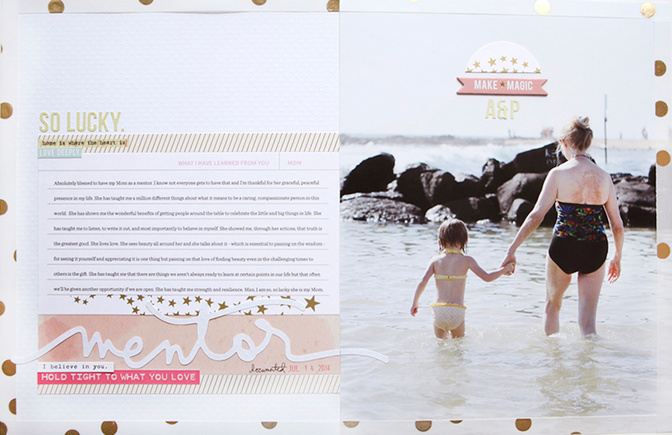
For the last year or so I've been writing an article for each issue of Scrapbook & Cards Today magazine.
Today I'm sharing a layout which was included in the Fall issue which you can download/view for free here or have a hard copy delivered to your home.
I really enjoy working with the SCT team - they are very professional, dedicated and willing to let me share my own personal take on this crazy memory keeping adventure.
In this issue I wrote about scrapbooking the mentors in your life and shared three layouts. You can download bonus items from this article (including the journal card and "mentor" cut file I used on all three of the layouts) here.
The layout I'm sharing today is a 2-page, 8.5x11 spread that documents the ways my Mom has mentored me through the years.
I seem to have a common theme lately of these enlarged full page photos + journaling on the second page (or in this case on the first page). It's not really a new thing, just something I'm personally really loving right now.
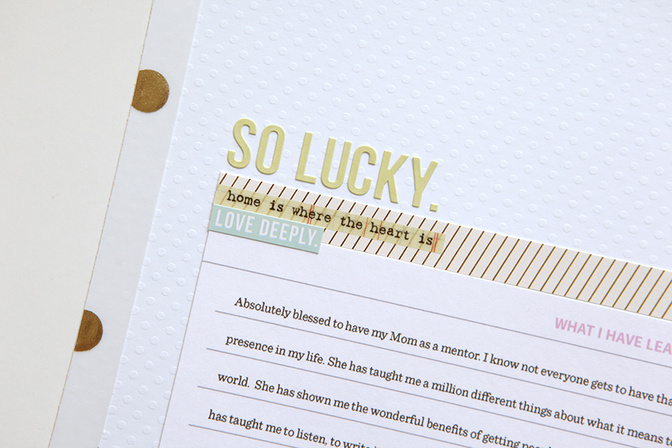
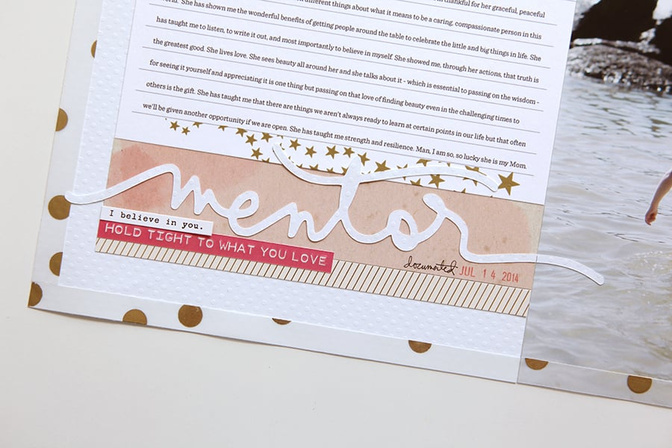
In addition to the journal card (I added my text in Photoshop and printed on white cardstock) and die-cut "mentor" title cut with the Silhouette, I added some letter stickers, a couple strips of pattern paper, and sticker phrases.
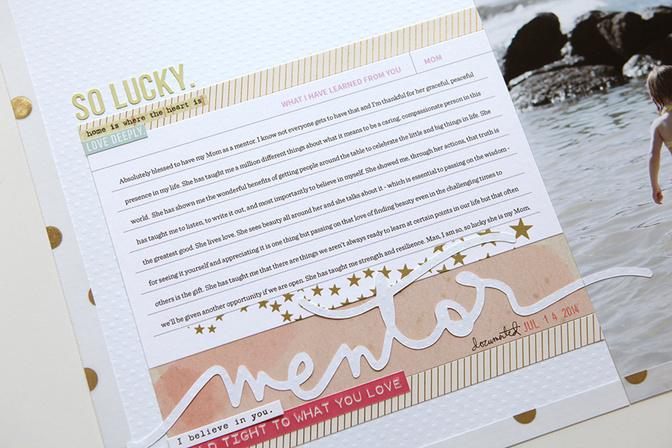
The gold stars are rub ons are from Jenni Bowlin and they are awesome.
I just rubbed a portion of them onto the bottom of the journal card after printing it out on white cardstock.
I still love rub ons.
Around the outer edge of both pages I added strips of gold polka-dot vellum from My Mind's Eye.
It's a really easy way to bring two pages together.
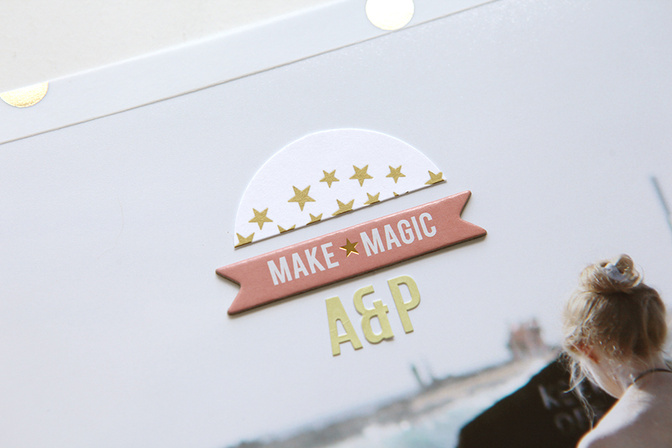
The gold rub-ons were repeated on a punched half-circle and paired with a chipboard "make magic" banner and Anna and my Mom's initials.
IDEAS & INSPIRATION
Cut strips of pattern vellum (or pattern paper) to create a border around the outside edges of a 2-page spread.
Focus on the story first. Who is one of your personal mentors? Write the story of that relationship and then find a photo to go along with it. If you don't have a "perfect" photo to support the story, take a new one of something that represents the relationship or just create a no-photo layout.
Line things up. Look back up at the full 2-page spread. I intentionally lined up the top of the pattern paper strip on the first page with the horizon line on the photo. The horizon line in the photo gave me a good starting place to start that grouping of pattern paper strips, journal card and title.
Check out my article about scrapbooking your mentors in the Fall issue of Scrapbook & Cards Today for more ideas and inspiration.
SUPPLIES
Click on the images below to link to the products used in this project.


Comments
Sign in or sign up to comment.
4 comments
When I first read the article, I thought it didn't apply to me. I don't have any mentors, I don't consider my mom a mentor, and I'm not in a big career. But as I re-read the article, I began to think out of the box, remembering a couple people who taught me so much, a long time ago. Thanks, Ali, for giving me the idea to think outside the box. I've been lucky to discover your blog during my journey. I appreciate that.
Your layout is so beautiful. Very touching. Michelle t
Replies to mtercha
Sign in or sign up to reply.
I, too, am so lucky to still have my Mom in my life. She's a survivor of so many obstacles yet she never gives up. She has taught me so much and I am so thankful to have her as part of my life every day. Thank you for reminding us to honor those people who tirelessly show us what good can bring in so many ways. Love your blog Ali and all the personal stories you share with us, your readers through this craft! Carolyn W (formerly HP;)
Replies to chp97
Sign in or sign up to reply.
So beautiful!
Replies to ScrappinMyHeartOut
Sign in or sign up to reply.
Your words, seriously!
Love the line it up tip.
Replies to brooke1
Sign in or sign up to reply.