December Daily® 2020 | Story Two
Tags: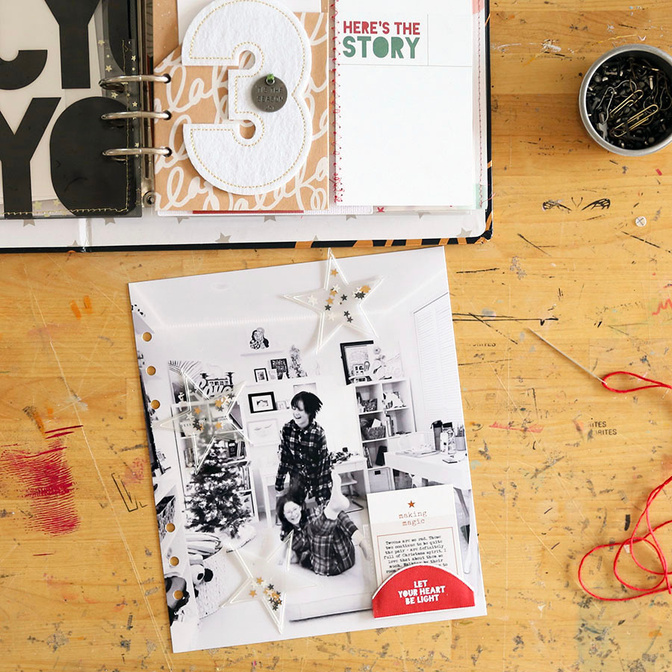
Welcome to December Daily® 2020 | Story 2.
Today's story was inspired by a photo I took of the girls yesterday afternoon when they were playing around in their room in their new Christmas PJ's filming videos + laughing.
Full page photos in this album (and many of my other projects) make me so happy. I also love photos that showcase people interacting in their own environment. I love seeing the "stuff" of their lives - in this case the stuff of two tween girls who share a room and so much more.
Here's a process video showing my start to finish:
Let's take a closer look via images:
My photo foundation is sized to the outside of dimensions of the page protector: 7 inches wide x 8.25 inches tall. I print images like this on 8.5x11 Epson photo paper using my Epson XP 15000 printer.
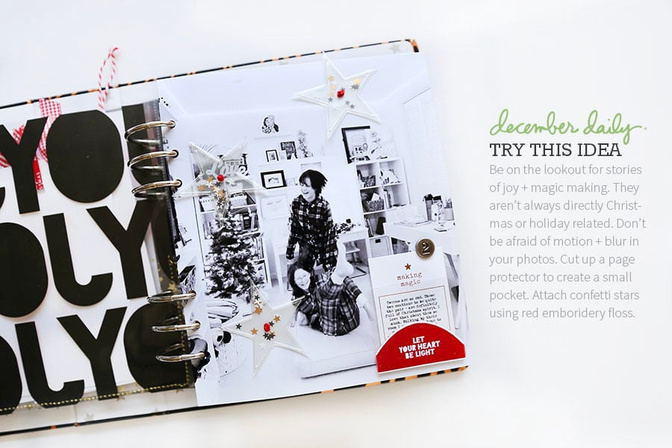
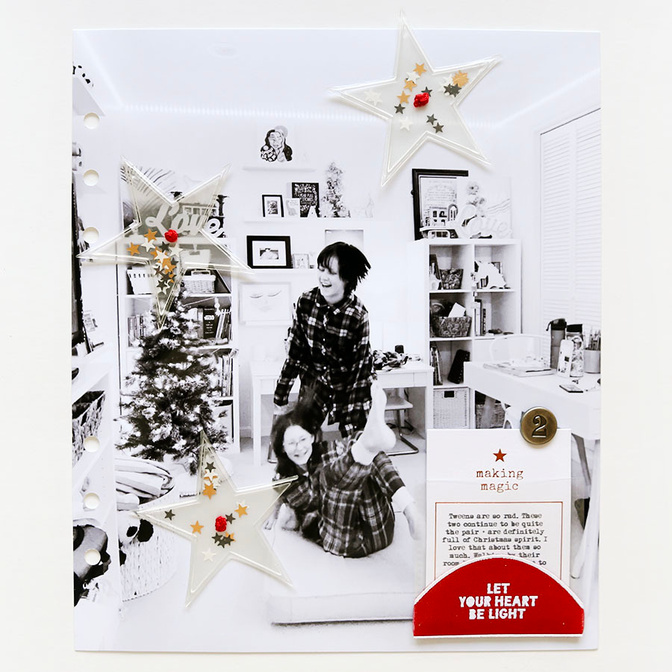
This page has two main elements in addition to the full page photo: the shaker stars from the December Daily® Star Mini Kit and the 2x2 pocket holding my tiny journaling card.
Let's talk about the journaling card + pocket first.
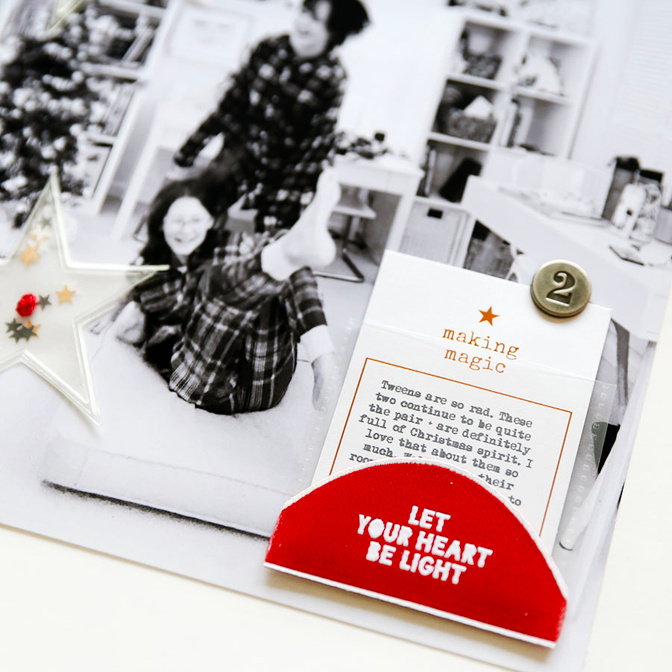
To create this pocket I cut out a 2x2 piece from one of these page protectors and adhered it to my photo using red line tape. Inside the pocket I added the "making magic" foil piece from the December Daily® Die Cut Variety Bundle and added a Tim Holtz Countdown Brad on top. On top of the outside of the pocket I added one of the December Daily® Half-Circle Fabric pieces.
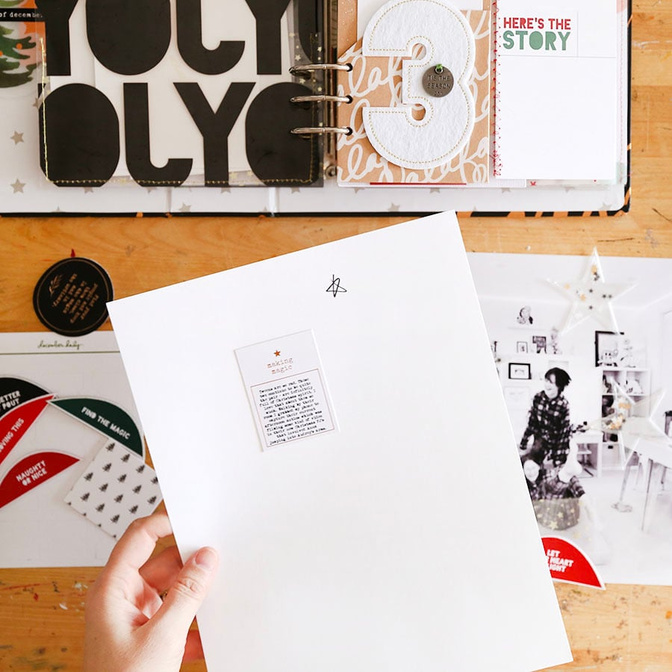
At first I planned to just print out my journaling on a 1.5 x 1.5 inch square and add it on top of the small journal card but I ended up running the actual card through the printer. It's risky but when it works it's pretty great. Mine is a little off within the square but not bad enough to start over. Really, no one around here will ever care.
To do this I use Photoshop or Illustrator and create a box to whatever size I want and then type my journaling within the box. I print this out on a plain piece of paper so I know where it's going to be on the page and then I temporarily adhere the journal card on top (trying to line it up as best as I can - sometimes I hold it up to a window as that often helps to see through a bit better). I run the temporarily adhered journal card through the printer to add my journaling. With some journal cards you can do this on a typewriter if you have one but this one felt too small + I wanted my type to be pretty tiny too.
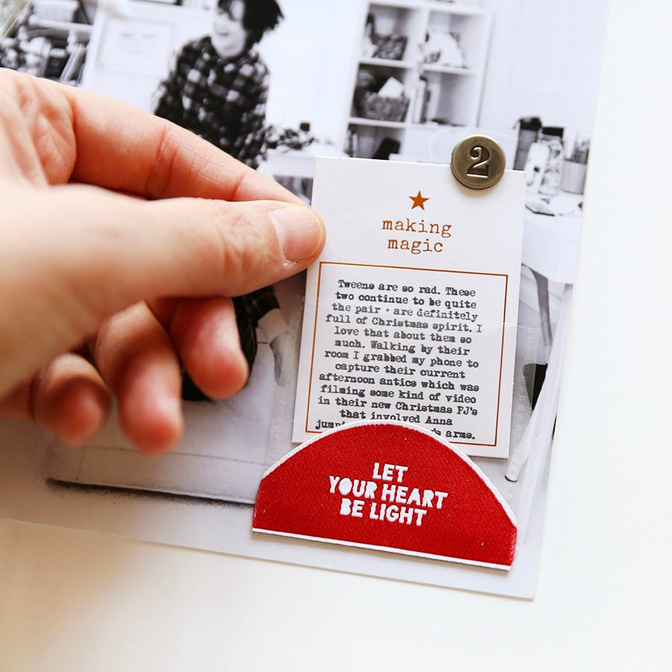
I ended up adding the Tim Holtz Countdown Brad on top by folding down the feet of the brad and then adding a piece of pattern cardstock to the back side that hides the feet and keeps it in place. I loved this solution (I talk through a few different ideas in the video).
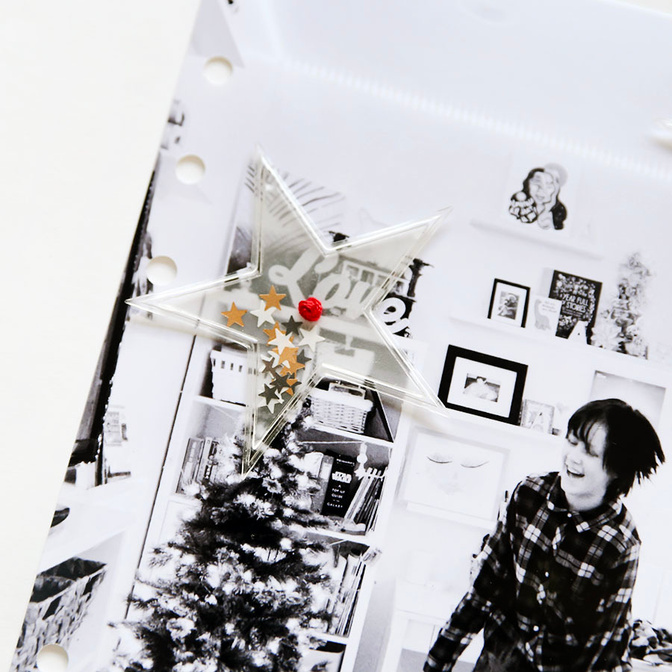
The other elements I added to the background photo were the three shaker stars from our Star Mini Kit. These were one of my favorites this year and I was excited to get them added into my album early in the month. As I worked on this page (and changed my mind a few times) I decided that I wanted to have some little pops of red to go along with the fabric half circle. I ended up using red embroidery thread to attach the stars and I love the pop of red! You can find the French knot embroidery tutorial here.
SUPPLIES
December Daily® Star Mini Kit
2x2 Page Protector (the DD albums include two of this style)
December Daily Main Kit Pattern Paper
SHARE YOUR STORY #2
You are invited to leave a link in the comment section if you'd like to share your daily pages. As usual, please include a direct link to your blog post sharing your Day 2 vs. a general blog address link.


Comments
Sign in or sign up to comment.
12 comments
Yay! When I saw you put a pocket like this on pages in the Travel Class earlier in the year all I could think was 'December Daily', and it has happened!
Replies to geordie281
Me too!
Sign in or sign up to reply.
Day 2 - Christmas decorations
https://marie-pierresavard.blogspot.com/2020/12/dd-2020-2-decembre-decorations.html
Replies to Pepierre
Sign in or sign up to reply.
Love that little pocket idea
Replies to asackr01
Sign in or sign up to reply.
http://scrapbookingmommy-mallory.blogspot.com/2020/12/december-daily-2020-day-two.html
Replies to Mpasquini12
Sign in or sign up to reply.
Loving your cheery layout!
Replies to ScrappinMyHeartOut
Sign in or sign up to reply.
So far so good with keeping current...
http://oopsadaisygirl.blogspot.com/2020/12/december-daily-2020-day-2.html
Replies to ctmm4
Sign in or sign up to reply.
Sharing my Day 2 video! https://youtu.be/cEkmPEhkvHU
Replies to adawson816
Sign in or sign up to reply.
Love this pic of Anna and Audrey! Here's my day 2 : https://www.instagram.com/p/CIaPt8VglDC/
Replies to virginiegoujon
Sign in or sign up to reply.
December Daily 2020 | Story 2 is about my daily routine during this first week of December: https://www.amandazampelli.com/blog/decdaily2020/day02
Replies to AmandatheMemoryKeeper
Sign in or sign up to reply.
I love this joyful B&W photo :D
Here's my Day 2 https://digitalscrapbookinghq.com/december-down-under-day-2-trimming-the-tree/
Replies to mshanhun
Sign in or sign up to reply.
I love the large felt numbers! I missed out on the main kit and cannot find anything comparable to these ones. They look great!
Replies to Deevonna
Sign in or sign up to reply.