December Daily® 2021 | Foundation Pages

December Daily® 2021 is quickly approaching and I'm super excited to share a closer look at what I've done in my album to get ready for my stories.
I shared a look at my starting place last month and have added a few more things to my album. The purpose of today's post is to share images and a video walk-through so you can see where I'm starting and what's waiting for my stories in December.
I'm really excited about the new album size this year (10x8) and can't wait to add in some full page photos. As you'll see below I don't have a foundation page for every story I'll be telling in December - I generally like to have a good idea of at least a handful of stories I'll tell and then from there I'll create as I go and will be sharing here + on YouTube each day during December as I have in the past.
In case you are just joining us for this annual project know that you are invited to:
- Subscribe to my YouTube Channel (videos for DD will be posted here on the blog + on YouTube)
- Join our December Daily® Facebook Group for community, ideas + inspiration
- Follow along on our December Daily® Instagram account for inspiration + ideas
- Play along with our December Daily® Product Play workshop where our team is sharing one idea per day in November
- Check out our December Daily® $5 Prep Day (this was held earlier this month but all the content is accessible to watch any time)
- Check out the December Daily® Blog Archives for years of ideas
Bring on the magic of the season. I am looking forward to sinking into December and telling one story per day in my album.
Let's dive in to an overview video:
Here are images of where my album is at right now along with some notes + thoughts:

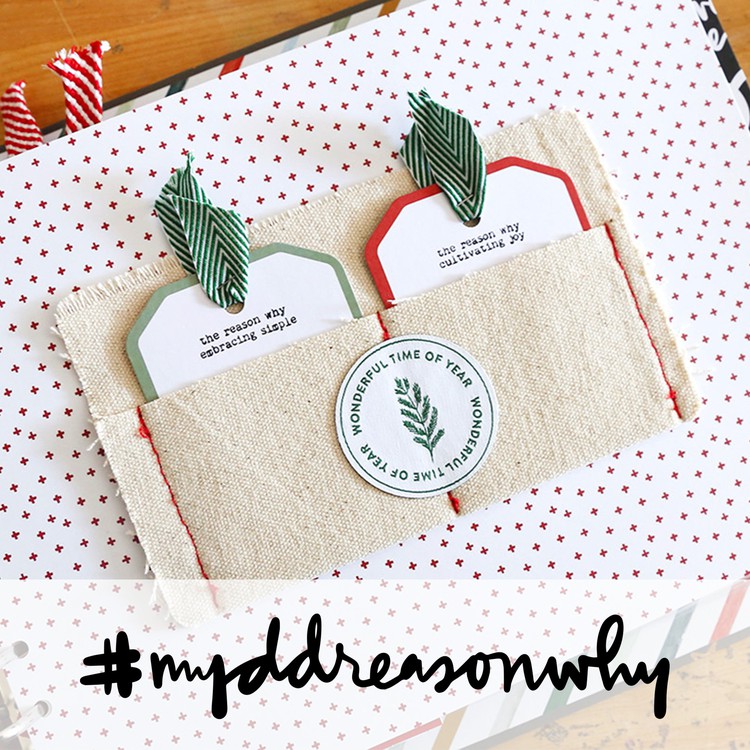
For my Reason Why page this year I adhered one of the canvas pockets onto a sheet of pattern paper. These have been sized to the size of the page protectors in the album and work great as a background for your stories and content. On the outside of the pocket I added a fabric patch and the "2021" numbers from the Main Kit.

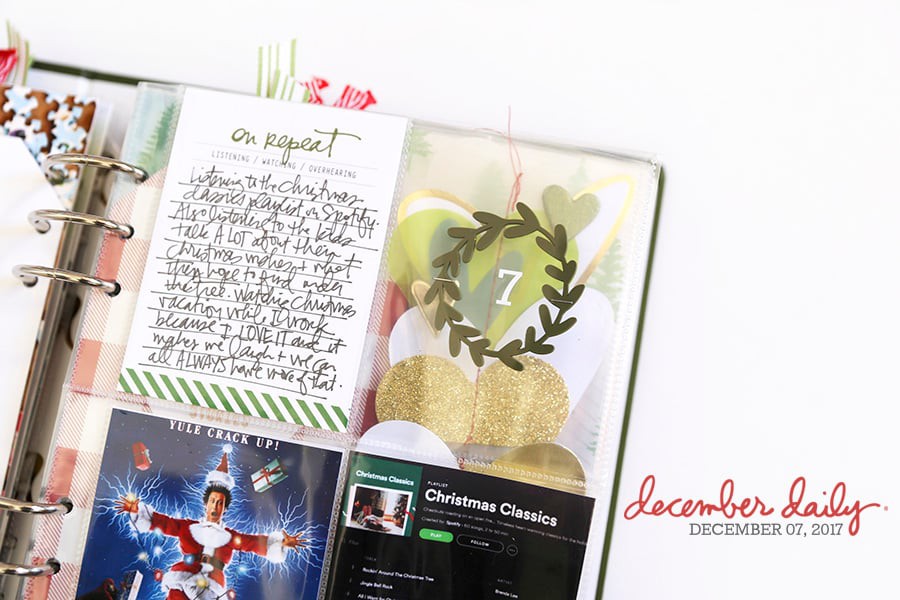
On top of the tags I used the Holiday Phrases Stamp Set to create my titles and journaled below.
Green Twill Ribbon is from Amazon.

I decided to start off my album with a full page of alpha stamping. Technically I'm working ahead on my first story + I'm totally okay with that. I used the 6x8 Alpha Stamp Set to create a reminder for myself about how I want to move through the month and the season. In between the phrases I used the plus sign stamp from the Holiday Icon Stamp Set with Redwood Ink.
Inks used for this stamping were three different greens from Tim Holtz: Peeled Paint Distress Oxide, Rustic Wilderness Distress Ink, and Mowed Lawn Distress Oxide. Tim's inks seemed to work better with this particular stamp set - the Crafters Inks were a bit too juicy and I had a hard time getting the line to show up.
I'll share a process video for this one with my Story One post on December 2nd.

To go along with my full page of stamping I'm hoping to include images of our family members like I did in a past year in a 2 inch x 2 inch pocket page protector.
In addition to the 2x2 photos that will be added I'll also add some embellishments. I added one of the wood veneer embellishments and then re-stamped the plus sign + Redwoods ink to link it back to the stamping on the opposite page. On top of the plus sign I embossed a #1 from this stamp set using white embossing powder.

As you'll see I've got lots of sticky notes to help myself remember ideas for stories, photos, and embellishments. This helps me remember ideas I had or things to think about related to stories I might tell or other things I might use or include.

Story Two will likely be the back of the 2 inch x 2 inch pocket page plus one of the shipping tags ( available digitally if you missed the physical version). I hope to document 10 things I'm looking forward to this holiday season. I added puffy number stickers from the Main Kit to the back of the wood veneer embellishment.

Story three will be a list of simple joys using the -ing words from the Holiday Phrase Stamp Set stamped onto one of the large tags paired with the felt number three. I used the We R Memory Keepers Hole Punch to create the holes to fit into the album.

I added a little embroidery thread "x" to the fabric/canvas phrase.

Next up I've got one of the divided pocket pages that came with the 10x8 album. Inside the pockets I've got a journal card from the Main Kit about "decking the halls" along with the die cut/glitter "calm + bright" from the Main Kit slipped into the top pocket. I might add some sequins to that and stitch across the top to create a shaker pocket.
As I was working on my pages this time I pulled out my box of large numbers that I've collected over the years from past projects. It's not very often that I would use all the numbers in one project so I have an interesting collection of random numbers that are perfect for adding into this project. I'm not 100% sure that I'll use the large wood four for this story but I've got it pulled out just in case.

I keep this box in one of my drawers at my table and really like having all of them stored together.

Next up in the album is one of the 10x8 Vellum Sheets. I added a "right now" chipboard speech bubble from the Main Kit and plan to either add circle photos or circle journaling spots to the inside of those circles for this story. I added the "making a list" card to the back side of the previous page and will likely use that as the jumping off point for my story (maybe the photos I add there will be things on my list).
A lot of the papers this year have grids on them that could also work here if you didn't get the vellum sheets (there's a pattern paper that is very similar as well as other straight line grids).

For the next story I'm imaging that I'll added the Main Kit pocket card to the middle of the 6x8 transparency (and add a second one on the back). Currently it's attached with a small paper clip (they are super useful when you are wanting to keep elements together before actually constructing the page).
Notes to myself here include a reminder that the back of the vellum wreath page includes 6 circles and that I might want to add a photo to the edge of the transparency. Love all the page size options.
The white felt 6 is from a previous collection.

As mentioned above I think I'll add another of those pockets from the Main Kit to the back of the transparency. That might simply hold the story for the day or I might pair it with the next page.
For the next page I cut up a piece of transparent plastic to create a clear foundation. My plan is to layer the wreath circles from the Main Kit across the page to hold a photo and story.

While waiting for the story + photo for this page I'm simply paper-clipping the circles together to the top of the transparent page.

Next up I know I want to use the December Moments die cut page so this felt like a good time to add it to the mix.

Next up is a page I created using one of the 3x8 transparencies and two of the plastic frames. I stitched them together on my sewing machine to create the page. This is another example where you can add more or less depending on your story. I can imagine a bunch of funny face images going in those spots similar to a photobooth.


Next up I added one of the 1/2 circle die cut pages and am thinking that it will go with the next page which is one of the vellum sheets.

On top of all the speech bubbles I added puffy numbers from the Main Kit and will find 12 things to document.

One of the 6x8 transparency pages is next. Lots of possibilities with this wreath design.

I'm considering cutting this envelope in half to hold the tags (a download available in the Prep Day digital package). I'll also likely add an Avery Index Tab along the edge.

Goal is always to have kids + adults fill these out. I'll add ribbon to the top of each one.

One thing that I often add to my albums is felt. This year we offered the large felt numbers and in addition to that I wanted to play around with adding a full page of felt and stitching one of the die cut phrases from the Main Kit on top.
Felt is from Benzie Design on Etsy.
I kinda love this very simple, bold page in the middle of lots of fun patterns this year.

On the back of the fabric page I'm probably going to add my pie chart (an idea that was shared during the Prep Day this year).

During Prep Day I showed the pie chart living in this pocket I created using pattern paper and Grafix Plastic and it still might end up living there or I'll add photos and words.

Adhered directly behind that previous pocket page is a piece of pattern paper with another canvas pocket adhered on top. I took the journal card out and replaced it with tags and shaker tags. I'll add a story to the "little details" tag for this day.

Next up is a page I put together for December Daily® Product Play this year which includes window cards adhered to a transparency.

I followed that up with another 10x8 pocket page with directed journal cards (tell a story about what I'm currently embracing) and a die cut phrase from the Main Kit. I really like that this page will likely be similar to a page earlier in the album as it brings some cohesion to the design. I'll probably turn that bottom pocket into a shaker pocket with sequins if I do that on the earlier page.
It's also often pretty refreshing to come to a page like this in the project where I'll simply be printing out a photo or two and writing down some words. Keep that in mind as you plan ahead in your own album.

I love the idea of combining these two pages together so that's my plan for another story. One of the things that's really fun about this album size is that you have all kinds of construction options for page sizes and shapes.

I have one more page in my album before a few ideas for Christmas Day (saving that particular page for the Product Play workshop). I know I want to use the large felt 2 + 5 for Christmas Day so I stitched them together. I might add holes and put it into the album via the rings or I might add it inside a full page protector. I'll make that decision later.

The last page I have in my album right now is this grid pattern paper where I could add little snippets of photos or tags or other things after we've experienced the day.
One other thing I did as I got started on my foundation pages was go through some of my stash and pick out a few things that might work really well to support my December stories. Here are a few things I pulled out that might find their way into my December Daily® album this year:

SUPPLIES
- December Daily® 2021 Main Kit
- December Daily® 2021 10x8 Album (similar)
- December Daily® 2021 Canvas Pockets + Tags
- December Daily® 2021 6x8 Transparency Sheets
- December Daily® 2021 10x8 Vellum Sheets
- December Daily® 2021 Fabric Holiday Patches
- December Daily® 2021 Painted Wood Veneer Pieces
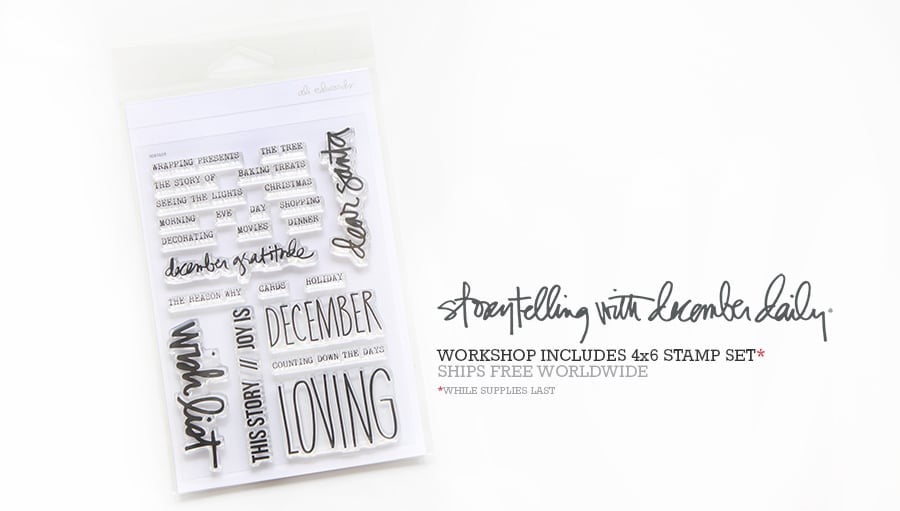
- December Daily® 2021 4x6 Holiday Phrase Stamp Set
- December Daily® 2021 6x8 Alpha Stamp Set
- December Daily® 2021 Holiday Icon Stamp Set
- December Daily® 2021 6x8 Number Stamp Set
- 2 inch x 2 inch Page Protector
- December Daily® Shipping Tag Bundle (digital available)
- December Daily® Plastic Frames Set
- December Daily® Shaker Tags
- Green Twill Ribbon
- Ranger White Embossing Powder
- Versamark
- Heat Gun
- We R Memory Keepers Hole Punch
- Avery Index Tabs
- Tim Holtz Mini Paper Clips
- Grafix Plastic Sheets 12x12
- Large Felt
- Peeled Paint Distress Oxide
- Rustic Wilderness Distress Ink
- Mowed Lawn Distress Oxide
- AED Redwoods Ink

Shop This Post


Love your pages and I can't wait to see that project with the word phrase stickers ;) I also pick out non Christmas pieces that would go well in the album. Thank you!
Sign in or sign up to comment.
Love your pages, Ali. Such fun & versatile products this year. I’m having so much fun playing & neglecting all of life’s jobs.
Sign in or sign up to comment.
Love seeing all this. Thank you!
Sign in or sign up to comment.
Looks great Ali! Are you still planning on releasing some more 10 x 8 digital templates? I think I saw on Facebook last week that they might be coming
Sign in or sign up to comment.
Wonderful, as always! Thanks so much for sharing.
Sign in or sign up to comment.
Again, a home run in creativity.
Sign in or sign up to comment.
So awesome!💕 Where can I find the attacher tabs like the ones you used on the shipping tags in your album?🙂
Yes, I want to know where I get them too!
Sign in or sign up to comment.
Love these pages! This project makes me so happy!
Sign in or sign up to comment.
Thanks Ali! Always love seeing your foundation pages and getting lots of inspiration. Do you need to use a special needle in your sewing machine to stitch through the plastic sheets?
No special needle!
Thank you! Can't wait to give it a try!
Sign in or sign up to comment.
Always inspiring Ali!! Thanks!
Sign in or sign up to comment.
I am so excited to start December Daily 2021! Where do I find those attacher stickers?
Sign in or sign up to comment.