December Daily® 2022 | Crafting With Krystal 03
Tags:
Hi friends! Krystal here, back again with a recap of my next Crafting Life with Krystal - December Daily Edition recap!
This mini-series is composed of a weekly Live video on the December Daily Facebook Group. This live event takes place each Thursday at 12PM ET throughout the month of September.
This week, our product topic was the December Daily 2022 Stories of Christmas’ Past Kit. If you missed the video this week, you can check that out below.
LET’S RECAP
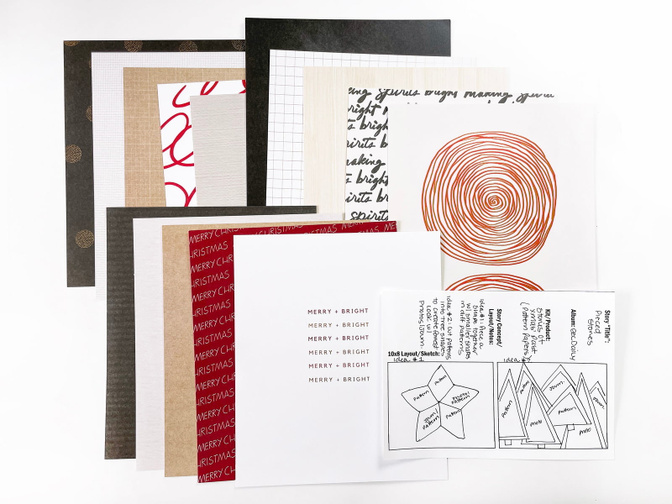
In today’s video, we discussed ways to use the products included in the 2022 Stories of Christmas’ Past Kit to tell a variety of stories and use them in a bunch of different ways. Let’s go through each product individually and talk about design ideas. For the products that contain text/sentiments, I’ll also add in some different story sparks too.
My hope is to give you ideas that you can translate into your own projects this year - helping you to love + use all the beautiful components of the Stories of Christmas’ Past Kit this year.
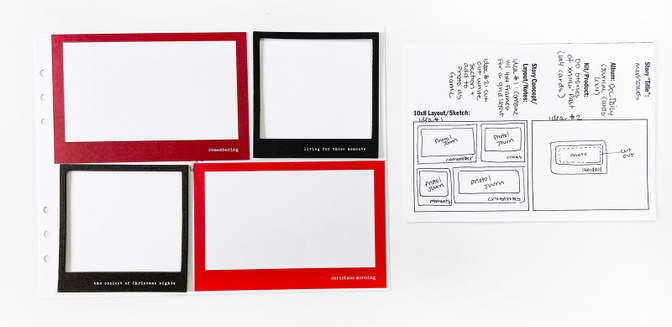
1. JOURNALING CARDS
The December Daily 2022 Stories of Christmas’ Past Kit includes a set of nine 6”x4” journaling cards. They all have the same polaroid type design with a sentiment in the bottom right corner. If you are looking for story prompts, these are a perfect place to start. Here are some ideas for the different titles:
“Homemade” - Document the different things you homemake throughout the December season: food, Christmas Dinner/Breakfast, Desserts/Cookies, Gifts, Cards, etc.What homemade gifts do you receive?
“Under the Tree” - Document the gifts placed under the tree, gathering around the tree, a pet’s favorite sleeping spot, your tree skirt story, etc.
“Christmas Morning” - Perfect for documenting Christmas morning stories: what time you woke up, the different activities that make up your Christmas morning routine, etc.
“Remembering” - Great for stories of your past Christmases: favorite childhood Christmas memory, favorite gift you’ve received in the past, Christmas now vs. then (empty nest vs young kids), etc. This one is NOT Christmas specific and can go into any project/story.
“Santa Photos Here” - document the santa photo from this year or from previous year. Print more of this card and create a mini album with the 6x4 cards.
“This Christmas Memory” - Same stories as “Remembering”. This one is more Christmas specific though. “Christmas Classic” - What is something you watch/listen to in December that is Classic Christmas for you? Classic Christmas recipe you make.
“Family Recipes” - Document your family recipes - Christmas or any time: Dinner/Breakfast/Desserts/Baking, recipes passed down through the generations, what is the side/dish you are tasked with making every year, etc. “Christmas Eve” - Document the different parts of your Christmas Eve traditions, What is the same/different as Christmas eve as an adult vs. as a child, etc.
Here are some ideas I have for how you can use these cards in your album this year:
Use the journaling cards like polaroid frames. Add a photo into the middle box OR cut the frame out and add on top of a 6x4 photo. Pair these with the 4x4 chipboard polaroid frames to make a grid page.
Using washi tape or copy paper, create a flip up with photos and these journaling cards. This can allow you to use more than one Journaling Card on a page OR more than one photo on the page.
Create a flip up using a 6x4 transparency - place a number on top of the transparency and have journaling/photo on card underneath.
Trim off the bottom portion of the card that contains the sentiment/prompt. Trim the sides to add a V-shape - making the word strip into a banner shape. Use this as a subtitle on a journaling page, on top of a photo, or as part of a layered embellishment cluster. Pair with the Alpha Stamp for a layered title look.
2. PATTERN PAPERS
Included in the December Daily 2022 Stories of Christmas’ Past Kit are 15 - 7”x8.25” pattern papers. Thirteen of these papers have a fairly subtle or repetitive pattern on them and two have a more unique look. Here are some ideas for how to use these different papers this year:
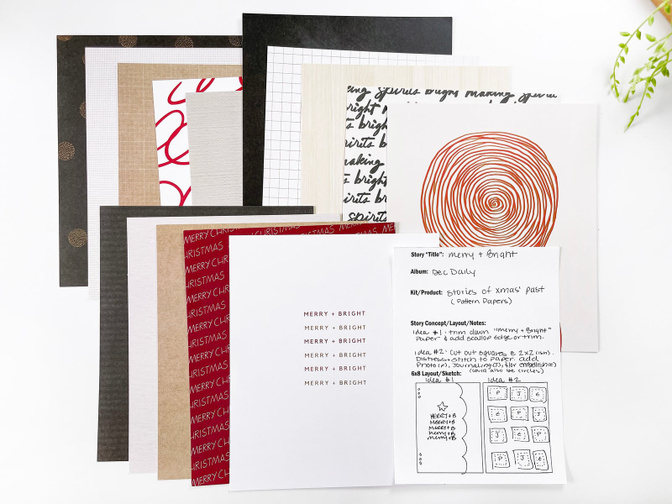
Trim down the “Merry + Bright” pattern paper to a 3”x4” card and use as a filler.
Trim down the “Merry + Bright” pattern to a narrower page (possibly 5”x8.25”) and add a scalloped edge or trim to the side of the page.
Add a photo to the tree stump pattern OR create a new patterned paper by cutting the tree stump patterns out, cutting the full circle in half, and re-adhering in three spots on the page.
Trim the patterns down into 2x2ish squares or 2”ish circles. Add these in a grid layout with photos, journaling, embellishments, etc.
Use multiple patterns and cut into small shapes. Using the smaller shapes, create larger shapes/elements on your page (i.e.: Diamonds = Stars, Triangles = Hearts OR Trees, Pie Shapes = Circles, etc.
Cut patterned papers into large triangle shapes. Back the paper with black or white to create a small border around the outside edge. Layer these triangles together to create a tree/forest look. (Can also add journaling on lighter patterned paper AND triangle photos instead of paper).
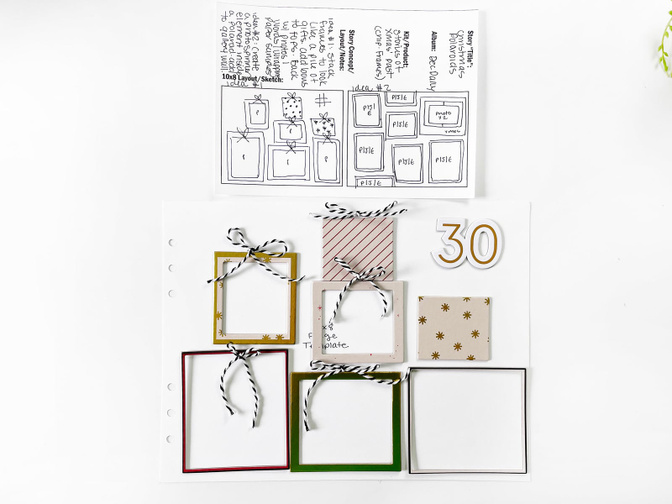
3. CHIPBOARD FRAMES
Next up in the collection are the nestled chipboard frames. The December Daily 2022 Stories of Christmas’ Past Kit has three sets of the nestled chipboard frames, with each set being comprised of 5 frames in total. Three are made to look like polaroid frames, and the rest are patterned rectangles. Here are a few ideas for how to use these on your layouts this season:
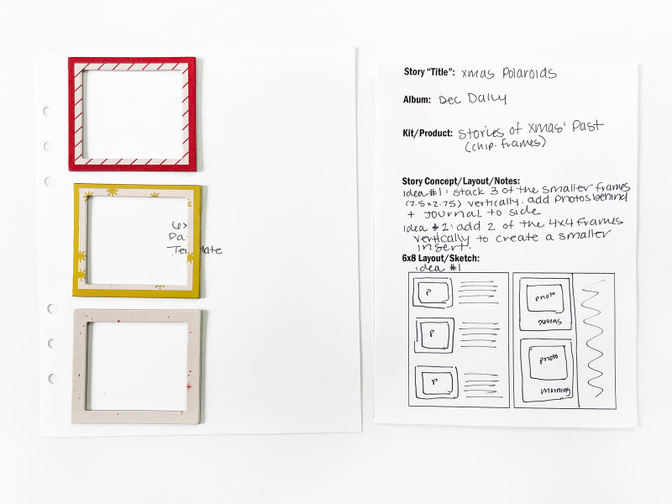
Add two of the 4x4 polaroid frames vertically onto a 5”x8.25” page. Back the frames with photos, papers/embellishments, or journaling. Use as a smaller page or insert.
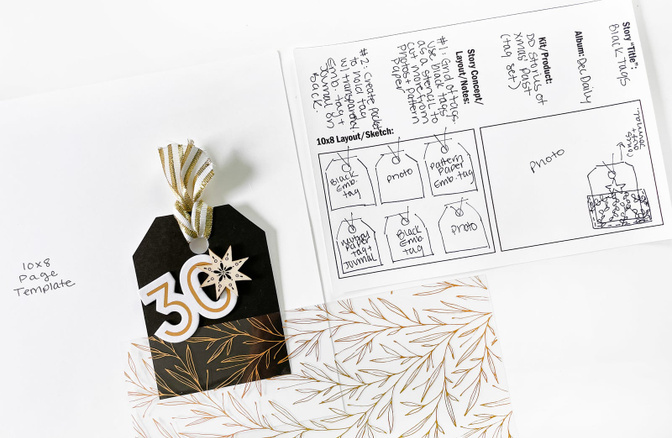
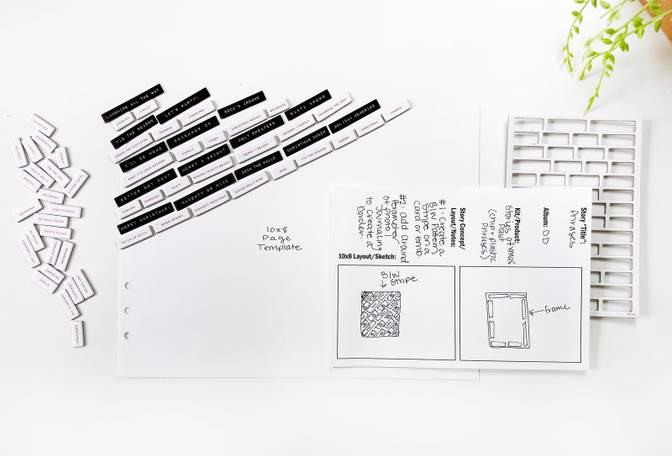
Stack three of the smaller frames vertically on a 6x8 or 10x8 page. Back the frames with three photos from the day and use the space to the side of the frame to place your words on your layout.
Back a polaroid frame with a patterned transparency and add a number on top. Then, cut out the section of paper where the image/transparency would be on a piece of patterned paper. Adhere the polaroid/transparency on top of the whole to create a small transparency/window - giving you a small peek-a-boo to the next page.
Use a bunch of the frames all on one page to create a unique grid look.
Create an interactive window photo: Add a polaroid frame to a piece of cardstock. Cut out the hole where the photo would go. Add a piece of twine vertically in the middle of the “window”. Finish the backside of the cardstock by adhering another polaroid on the back of the original. Print two of the same sized photos - slightly smaller than the polaroid hole. Adhere back to back with the twine in-between. The photo can now turn in the window!
Pile a bunch of the frames on top of each other to look like a bunch of stacked presents. Back the frames with images of your wrapped gifts or samples of your paper. Add twine/bows to the top of the frames to give a finished present look.
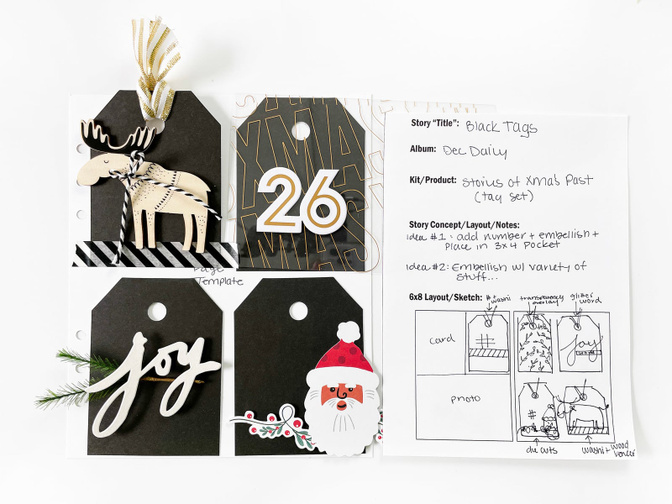
4. BLACK TAGS
The ten black 3”x4” tags included in the 2022 Stories of Christmas’ Past Kit are super versatile. I love the black matte finish and can’t wait to try out a bunch of different techniques on them to spruce them up + make them look super custom. Here are some ideas for how to use these awesome tags:
Using a white paint pen, hand write a sentiment on a tag or add your journaling right on top.
Use a stencil (purchased OR diy) and white/gold acrylic paint to create your own patterned tags.
Use white/red/gold embossing powder and stamp sets to create your own textured tags.
Add a Glitter Cardstock Word, paired with a sprig of greenery or a tiny phrase sticker.
Use washi at the base of the tags to break up all the black + add in more color/pattern.
Cut the same tag shape out of a patterned transparency and layer the two tags together.
Embellish the tags with: die cuts, wood veneer, felt gifts, chipboard numbers, etc.
Use a patterned transparency to create a pocket on top of a full page photo. Store an embellished tag inside the pocket and add journaling to the back of it.
Use the black tags as a pattern and cut out additional tags from patterned paper, photos, etc. Use a combination of all the tags to make a grid page or a collaged page.
5. 6X8 CARDSTOCK FILM STRIP SHEETS
Of all the products included in the December Daily 2022 Stories of Christmas’ Past Kit, the 6x8 film strip pages are definitely my favorite! After brainstorming ideas for these, I totally want to use all three of them in my album this year. Here are some ideas for how to use these awesome die cut frames:
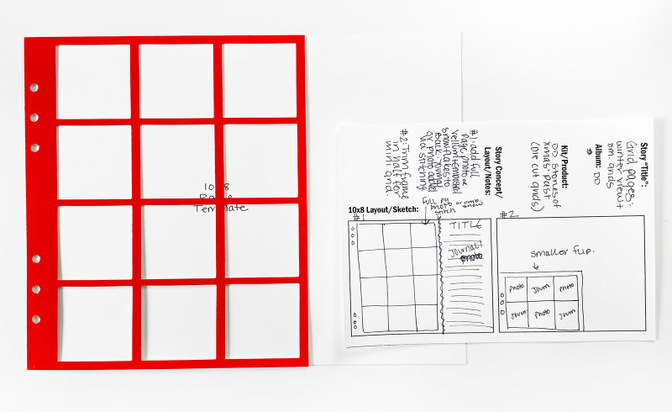
Use like you would a 2”x2” page protector. Add photos, journaling, patterned paper, and embellishments into each of the 12 - 2” squares.
Add the full page over a full page photo to make it look like a window. The photo could be of a shopping display (window shopping), the show falling, your view outside, etc.
Create an embossed vellum page sized to the 7x8.25 page. Using a snowflake stamp set, stamp and emboss white snowflakes all over the vellum. Then, adhere behind the cardstock die cut page to look like a snowy scene through a window.
Trim down the squares to create your own custom size or design. Trim in half to create a 6x4 die cut with 6 - 2” windows. Trim pieces of the inner frame to create larger square/rectangle openings for photos/journaling.
Stitch a page of journaling or a photo enlargement to the edge of the die cut page to bring to the full 10x8 size.
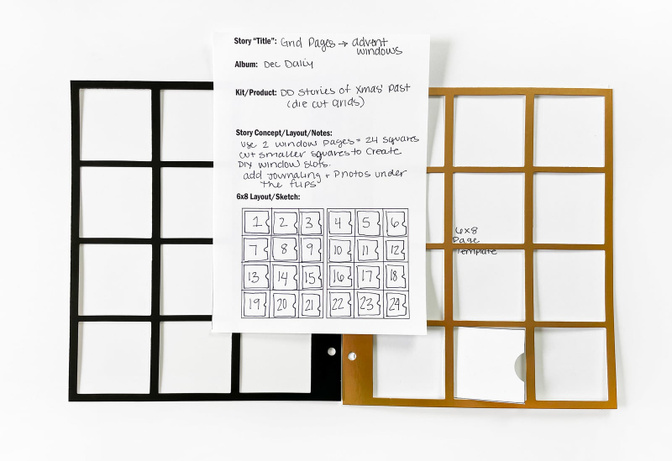
Use two of the frames side by side to create an advent calendar - 24 squares in total.
Use two of the frames side by side to create a larger window image. Back the frames with a horizontal photo sized at 14”x8.25”. Create wreath elements to add in the middle of the frames - making it look like decorated windows. (Could have the wreaths loose so you can flip to the back OR swivel - then add journaling underneath/on back)
Create window card pieces that fit into each of the 2”x2” squares. Punch the right side with a small circle, creating a notch to easily pull the window portion up and reveal the photo/journaling underneath.
Use a portion of the die cut page to represent an apartment building. Add die cuts, photos, pattern paper to the inside of the squares - making it look like individual apartments for each square.
6. CHIPBOARD + PLASTIC PHRASES
This collection of products includes two similar tiny phrase elements - a white chipboard tiny phrase set with red writing AND a black plastic tiny phrase set with white writing. Here are some ideas of what you can do with these - individually and together:
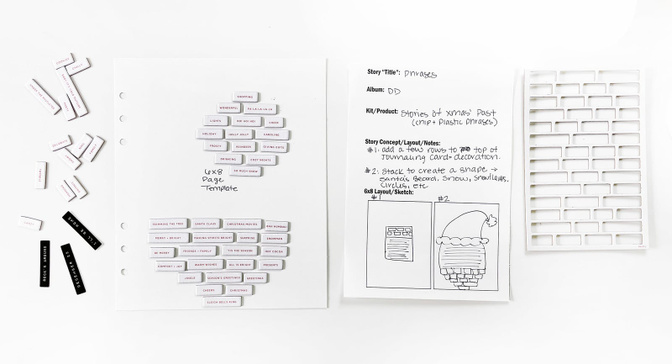
Create a grid pattern on a 3x4 journaling card to use as a filler. Could also add the pattern to just the top 1-1.5” and use it for a place to add journaling underneath.
Stack the tiles together to create larger shapes: i.e. circles, snow/asterisks, Santa’s beard, etc.
Use the negative portion of the chipboard sheet as a stencil for a brick pattern! Could use texture paste (tinted if desired), acrylic paint, or ink blending.
Mix the two colors/textures of phrases to create a black and white striped pattern - horizontal or diagonal.
Pair with the vellum tags OR glitter cardstock words to make a subtitle.
Add as a simple embellishment.
Use a Xyron Sticker Maker to add adhesive behind plastic pieces.
7. VELLUM TAGS
I love the fun shapes and sizes of the five vellum tags included in the 2022 Stories of Christmas’ Past Kit. They give off such a whimsical feel and the vellum texture is super neat. Here are a few ideas for page designs including these tags:
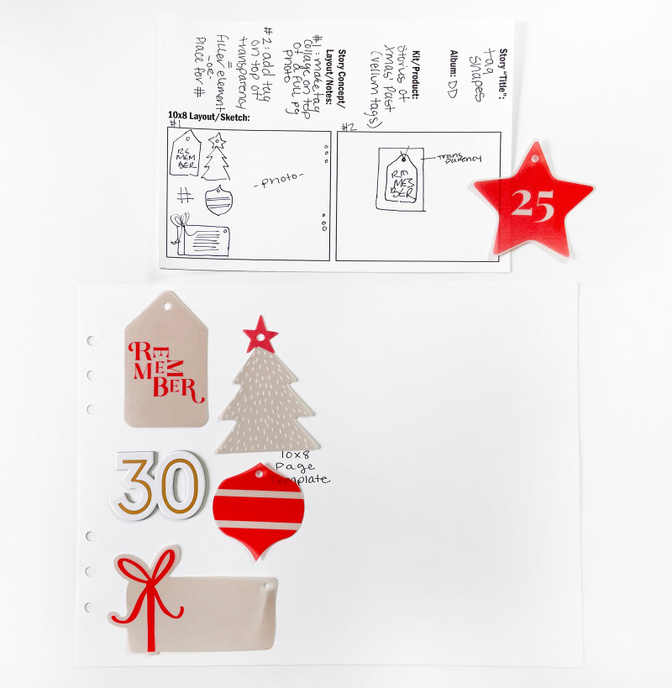
Create a collage with the tags, adding them directly on top of a full page photo. The present shaped tag would be a great place for some small journaling - using a slick writer pen.
Add to a tag embellishment including other textures.
Add a vellum tag on top of a 3x4 patterned transparency and use it to designate the story number or as a filler card.
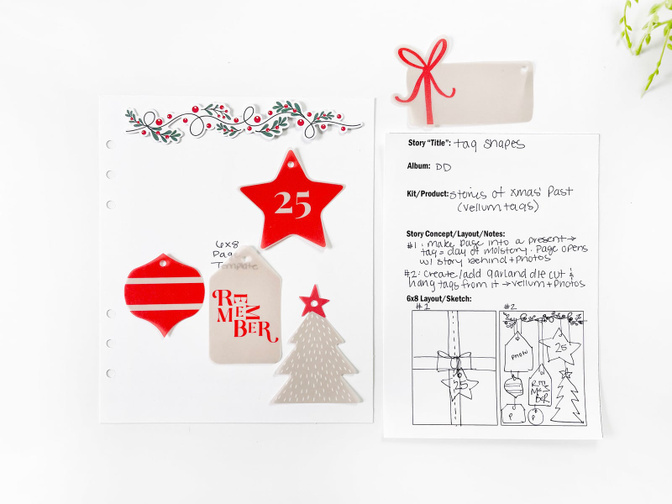
Create a garland look across the top of the page (or use a die cut). Hang the tags from the garland like ornaments. Cut out photos into additional shapes and hang those in amongst the vellum tags to fill in spaces & add photos.
Tell a story about your wrapped gifts/wrapping paper. Take photos of your wrapped gifts and add the tags on top as though they were there when the photo was taken.
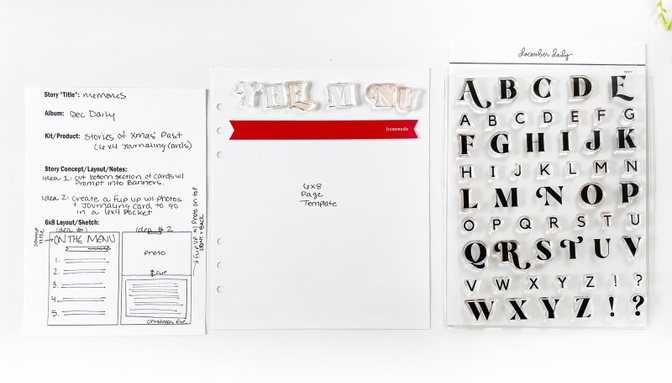
8. WOODEN NUMBER STAMPS
Number stamps are SUPER versatile and can help you to tell an incredibly wide range of stories. The 2022 Stories of Christmas’ Past Kit comes with the cutest wooden number stamp! Here are a bunch of ideas for stories you can tell with it:
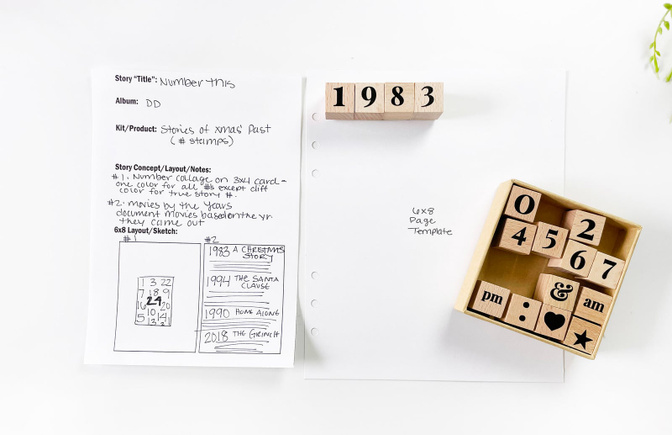
Stamp a collage of numbers on a 3x4 journaling card. Use the same color ink for all of the numbers except the number story it’s for. Having one number in a different color will help it to stand out.
Use the numbers to create a journaling list.
Stamp the numbers 1-12 to tell a special 12 Days of Christmas Story.
Stamp the years that your favorite movies were produced in or the year that you first saw the movie.
Use the number stamp to document an advent calendar. (Possibly use with the die cut window page.)
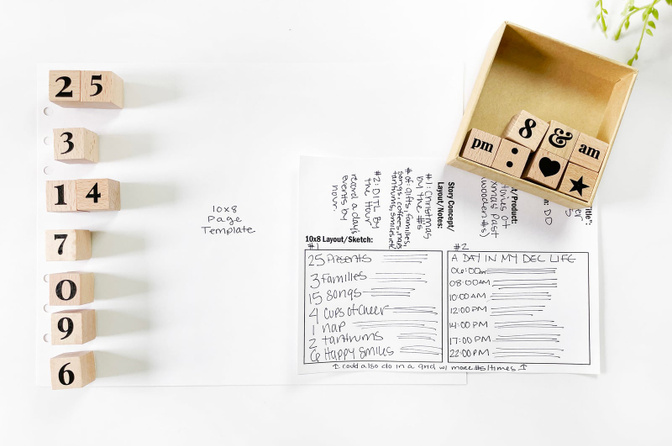
Number the things of Christmas for a new take on your Christmas day story. Examples of things to number: presents, families visited, movies watched, songs listened to, naps taken, tantrums thrown, cups of cheer (aka coffee), miles driven, photos taken, hours playing, smiles seen, etc.
Create your own calendar page for the December season.
Document a December day in the life using time as your prompt. Use the stamp to create your time blocks and journal what you did at those times.
CONCLUSION
I don’t know about you… but SO many of these ideas have me feeling super excited to use the December Daily 2022 Stories of Christmas’ Past kit this year. I’m especially excited for the die cut window/film strip pages. What element are you most excited to work with from this kit?
Today, I want to leave you with a challenge to help you think ahead about how you want to use some of the Stories of Christmas’ Past Kit elements this year: Take one of the ideas presented in today's video/blog post and create a page sketch idea of your own. Store this with your December Daily supplies to pull out when your products arrive OR when you are documenting your December memories this winter.
I’m going to be back again next week working with a handful of shop items from this year's collection. I hope you’ll join me live on the December Daily Facebook Group this coming Thursday 9/22/2022 at 12PM! (The video will be recorded and I will include a blog post as well recapping our live session.)
Until then friends, have a great day!


Comments
Sign in or sign up to comment.
9 comments
This is really great, Krystal. This was the kit I ordered (a little smaller than the Main Kit, since I have so much product already), and I'm really excited to incorporate these ideas into my project this year. Thanks so much for sharing your creativity with this community!
Replies to achaffin39
My pleasure! I'm so happy that this one was helpful for you and gave you ideas for the kit you ordered. The Stories of Christmas' Past has a ton of possibility and is perfect to adding to an already healthy stash of DD stuff lol!
Sign in or sign up to reply.
I have a love/hate struggle when I watch your videos!
I absolutely your ideas and creativity!
But I hate that I always end up spending more money on products 😉!!
Lol
Thanks for sharing!!
Replies to RRies
😬 I totally understand that!
I'm glad the ideas are exciting and that you can see yourself incorporating some of them. Don't forget to shop your stash too! Many of the ideas from these newer kits could totally relate to older product too. (AND I also totally understand feeling excited and wanting the newer stuff LOL. That fomo is no joke!)
Sign in or sign up to reply.
Love, love, love...Great ideas, as always! Thanks for doing these videos! What a great addition to the Dec. Daily tradition!
Replies to inouyeflo
Thank you so much! I'm really enjoying this process too... I feel like I'm getting my DD Prep/foundation ideas all set up and come December, I'll just need to pull out a planning sheet and tell my story with that design LOL. It's an absolute joy to share the process with everyone here too!
Sign in or sign up to reply.
So many wonderful ideas again. Thank you so much Krystal.
Replies to aussiehostie
Sign in or sign up to reply.
OH MY GOODNESS Krystal! I missed the live...didn't know about them, but so glad I followed the link in Ali's email this morning. What a treasure this is! I was taking notes and making screen shots and about half way through I noticed the text under the video. I love that you went ahead and did all that work for me, but I'm still keeping the parts I did too just because (not really sure why).
THANK YOU, THANK YOU, THANK YOU for so much inspiration and information! 🤩😍
Now I see I have even more videos I can watch...I need to get some work done first. 😉
Have a wonderful day!
Cindy B.
Replies to FL_Cindy
Sign in or sign up to reply.
Last night, I was bored, craving some fun. Wanted an online casino with exciting games. Found https://bollywoodslots.in/, a vibrant Top X Casino site. It offers slots, roulette, live dealers, with bonuses like free spins and fast payouts. Mobile-friendly with secure deposits, it’s great for thrilling play. It was a perfect way to make my evening lively and entertaining.
Replies to SergioMaq3
Sign in or sign up to reply.