Week In The Life™ 2023 | Crafting Live With Krystal 01
Tags:Hi friends, Krystal here! With the launch of the Week in the Life 2023 collection this week, I’m excited to bring you a three day mini-series where I will be sharing sneaks and ideas for how to use the new collection to document your stories this year.
This mini-series is composed of a daily Live video on the Craft the Story Facebook Group. The next live will take place on Wednesday, March 15th at 12:00PM ET. And today’s live will be posted here tomorrow.
Today, we are taking a deep dive into the main kit components and discussing how they, along with some of the shop products, can work inside of the 6x8 album. If you missed the live video, you can check that out below.
Let’s take a closer look at the ideas we discuss in the Live video:
1. 10x8 Transparencies

These text based transparencies are SO fun! While they are designed to fit outside the page protector in a 10x8 album, they can also be cut down and used in any of the album sizes offered this year! Here are a few ideas of how to use these in your project:
Trim the transparency down to fit your album - 6x8, WITL Notebook, Travelers Notebook, and more. Add a tab to the top to make finding each day of the week quick & easy. Open each day of your weekly documenting with the transparency and a kraft pocket adhered on top. The contrast of the kraft and bold black in white is so striking! Trim the transparencies down even further to create filler 3x4 or 6x4 cards. This gives you a fun peek-a-boo effect in your album AND can serve as a home for some fun embellishments. Fussy cut titles from the transparencies to create your own plastic word titles. The transparencies include SO many sentiments that can be used as story prompts. Some examples include: Home, Stories, People + Places + Things, Stuff of Life, Thankful, Etc.
2. Highlights 10x8 Paper
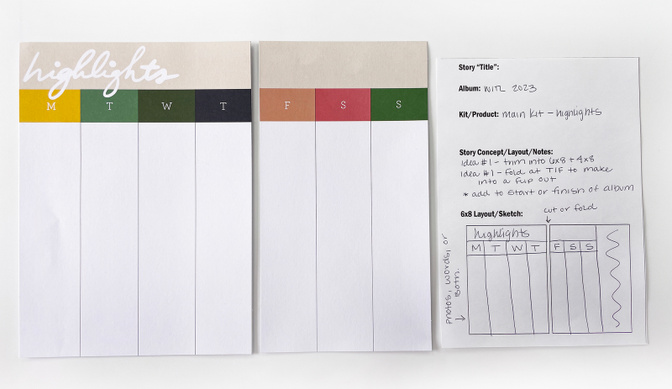
I absolutely love a paper that gives us space for direct storytelling. The 10x8 Highlights paper would be the perfect way to start or finish a WITL album. If you’re working in a size smaller than 10x8, you can still use this paper by trimming it down or creating a folded flipout. Then, fill the columns with words, photos, or both!
3. 6x4 Journaling Cards

The main kit comes complete with a set of seven days of the week 6x4 cards. These feature sections to fill out your currently -ing activities: thinking, feeling, watching, listening, laughing. Aside from sticking these straight into a 6x4 pocket, here are some additional ways to use these cards:
Trim off the top header portion of each 6x4 card and re-adhere the daily titles to the top of a 6x8 page of journaling. Trim each 6x4 card in half so the title and prompts become a 3x4 card. Use the second half to stamp a different title/prompt OR simply add journaling into the blank section.
4. 4x4 Journaling Cards
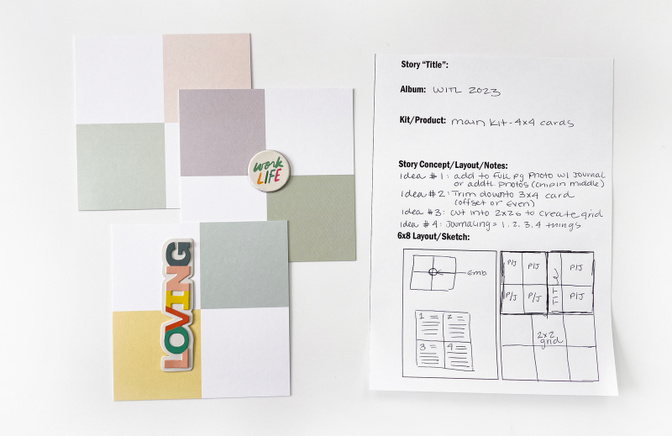
With a little bit of trimming, these square color-blocked 4x4 journaling cards can totally work in a 6x8 album. The mix of colors also adds a nice colorful touch to the daily documenting. Here are some ideas for incorporating these cards into the 6x8 album format:
Add the full square directly to a full page photo or to patterned paper. Adhere on three of the four sides to make the square into a pocket. Use the squares as homes for words or photos. Trim down to 3x4 journaling cards - either by evening removing .5” from each side (making the rectangles even), or 1” from a single side (making the square sizes offset). Trim the color squares into 2”x2” sections and add into a 2x2 page protector, or onto plain white cardstock - intermixing photos throughout. Using the layered stickers and circle chipboard, create journaling prompt titles to help guide writing. With four sections, there’s lots of opportunity to tell four details of a single story.
5. Kraft Pockets
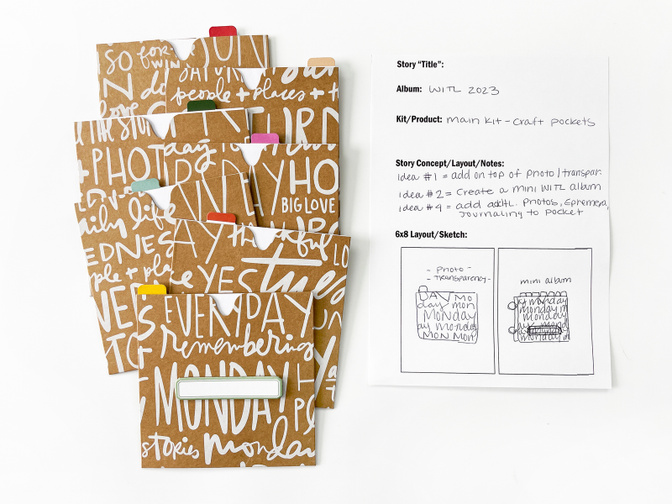
These kraft pockets add such a fun textured element to the collection this year. The contrast of the kraft with plain cardstock is gorgeous. Here are some ideas for these pockets:
Add on top of a full page photo (one that is just a background-type photo) or on top of a transparency (backed with additional journaling/photo). Add attacher strips to the back of the left side, add into the album as a small insert OR put onto rings and create a small mini WITL album. Use the pockets to store additional photos, ephemera, journaling, etc.
6. Embellishments - Layered Stickers & Chipboard Circles

The chipboard and layered stickers are SO FUN! I can’t wait to see how these are used by the community in the WITL project this year. Here are some ideas to think about for ways to use the layered stickers and chipboard circles from the main kit:
Remove the foam tape from the layered stickers to create a flatter embellishment - good for keeping the bulk down or using in a flatter project altogether. Use the layered stickers at titles/journaling prompts on 3x4, 6x4, and 6x8 journaling cards/pages. For a pop of contrast, consider placing a black tiny phrase sticker or strip of washi in-between the title and the journaling text. Add a circle chipboard to the middle of the color-blocked 4x4 card. Use the sentiment to help guide your journaling and tell four things related to the prompt. Use all seven circle chipboards as journaling prompts for a 6x8 bulleted list. Create a mind-map using the circle chipboard. Include “today’s story” in the middle, then branch out to the other six prompts, and branch from there to journaling/photos/stamps/etc.
7. Embellishments - Vellum Tags & Plastic Circles
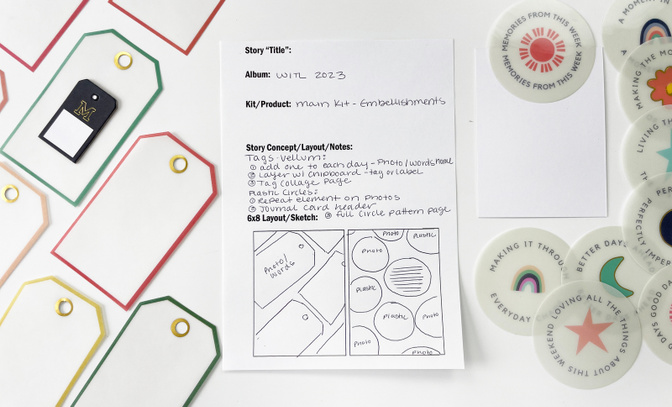
The final two embellishments included in the main kit add two more textures into the mix: vellum and plastic. Here are a few ideas for these pieces:
Add one vellum tag to each day, placing on top of a photo, transparency, patterned paper, etc. Use the space as a home for a photo, some journaling (slickwriter pen recommended), or an embellishment. Layer the chipboard tags and vellum tags (or vellum tag and label chipboard) for a formulaic way to designate the day on your layout. Create a patterned tag collage page using the full set. Add photos, journaling, or embellishments into the various spots. Use the plastic circles as a repeat element throughout your album. Use an older circle nested chipboard as a frame around the plastic circle, giving the page more texture & dimension. Cut the circles in half and use them as a journaling card title header. Create a circle patterned page using the full collection.
8. Add On’s - Cardstock Number Page Inserts 10x4 Journaling Cards
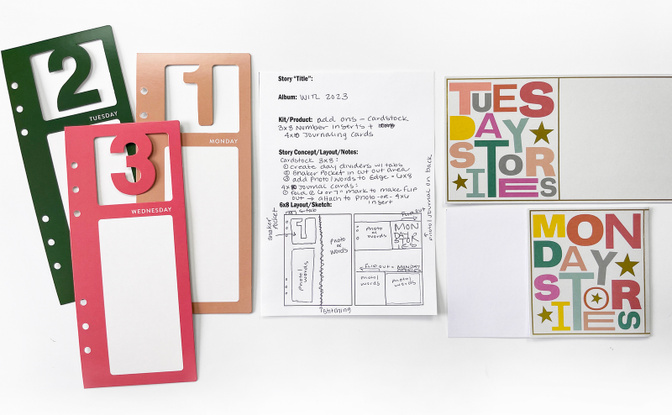
Last, but not least, we have two fun shop products to consider this year. These are two of my top favorite components of the WITL collection for the whole release! Between the cardstock cutout number inserts and the 10x4 journaling cards, the colors are so fun and make me want to jump right into documenting. Let’s talk ideas for how to use them in your 6x8 album:
Create smaller dividers using the cardstock number inserts. Adhere a tab to the top of the frame so you can easily find your place for each day in the album. Make the window portion into a shaker pocket, using all the colorful sequins to match the collection. Add a 3x8 photo or page of journaling next to the cardstock number inserts and stitch the pieces together to form a full 6x8 layout. Fold the 10x4 journaling cards to create a flip out component. Attach into the album with an attacher strip. Include journaling/photos on the inside and back of folded card.
And with that - we have the first set of ideas for using the WITL 2023 collection to document your life this April! I hope you enjoyed talking through a bunch of ideas and seeing these sketches come to life. Thank you so much for stopping by today and please let me know if you have any questions. If you have more ideas for ways to use the supplies discussed today, let us know in the comments below. Don’t forget to tune in on Tuesday, March 14th at 12PM ET to see ideas for the 10x8 album AND additional ideas from the mini kit and shop products. Until next time, let’s tell stories together!


Comments
Sign in or sign up to comment.
8 comments
These ideas are so GREAT! Thank you Krystal!
Replies to AliEdwards
Thanks Ali!
Sign in or sign up to reply.
Super thankful Krystal puts all the effort into making planning pages full of ideas!
Replies to swimfin
So glad these videos/posts are helpful + that you enjoy them!
Sign in or sign up to reply.
Thank you for translating so many of these products to the 6x8 size. I completely balked at last year’s kit because it was geared to 10x8. I ended up buying an older kit geared to 6x8 because I didn’t want to do the larger size, but I also didn’t want to “waste” the products. I’m beginning to see that I can still use these lovely products and make this kit work for 6x8. Thank you!
Replies to JLynne4
Yes, definitely!! There are SO many components of the main kit that would be so much fun in that 6x8 size. It requires a small bit of thinking outside of the box, but those usually end up being my favorite elements of my album as a whole. Glad you are able to re-envision the kit components!
Sign in or sign up to reply.
Thanks for these ideas, Krystal! I'm doing the 6x8 size and appreciate the ideas for translating the 10x8 and 4x4 pieces.
Replies to ahiggins83
Absolutely! I'm happy to have helped show some ideas for how to get the pieces into a 6x8 album. They are too good to set to the side! lol
Sign in or sign up to reply.