December Daily™ 2013 | Day Three
Tags: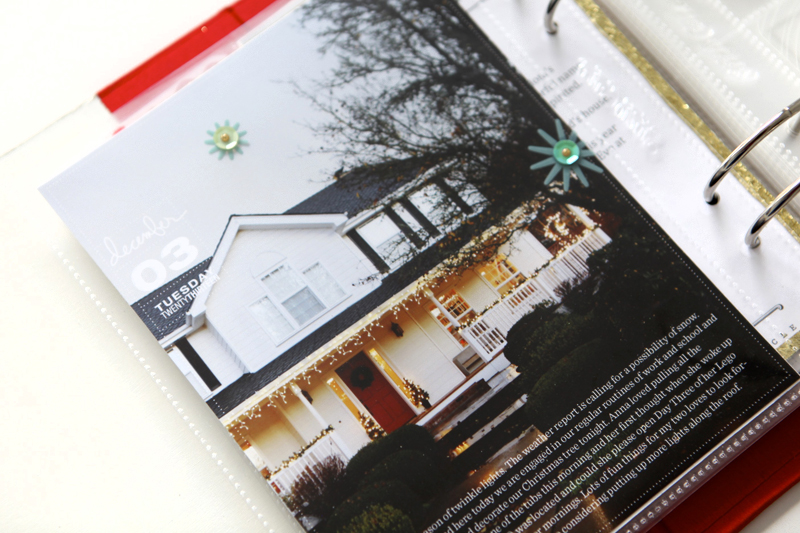
Welcome to December Daily™ 2013 | Day Three.
One thing to remember with this project is that every day doesn't have to be multiple pages. Every day doesn't have to be about holiday stuff either. It can be a single photo or it can be three pages or more of photos. Make it work for your life.
I like taking advantage of the opportunity to take a deep breath with this album - a chance to pause and make sure I'm savoring the season like I intend to throughout the month. Writing helps me to get to that place and you can read my journaling below.
Here's a look at Day Three:
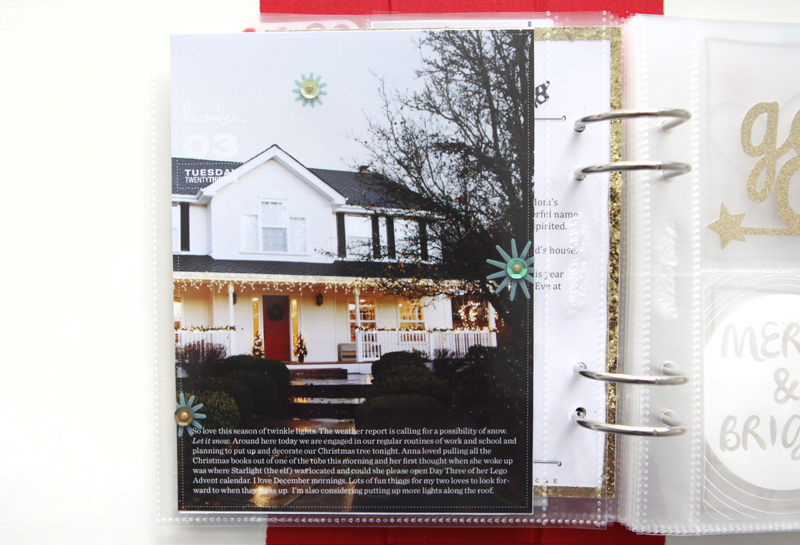
I used one of the 6x8 overlays on top of the enlarged photo of my house as dusk.
Here's what it looked like in Photoshop right before printing:

You can see a tutorial on working with overlays like this one here. This tutorial uses overlays from a couple years ago but the steps and ideas are the same.
After printing I added three of the plastic starburst elements + a sequin + a small gold enamel dot around the page (all from the Studio Calico kit):

I love simple embellishments like this in groups of three. Initially I used a Martha Stewart Glue Pen to adhere the starbursts but the glue ended up showing on the bottom two (because of the dark background). To cover that up I added the sequin with a mini-glue dot and then the gold enamel dot on top.
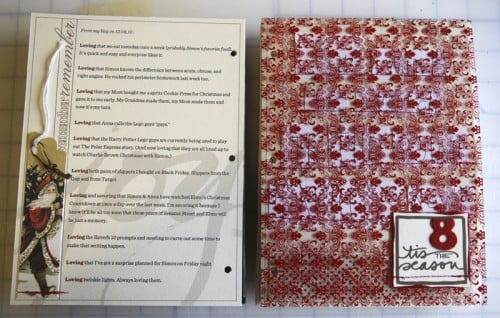
JOURNALING |So love this season of twinkle lights. The weather report is calling for a possibility of snow. Let it snow. Around here today we are engaged in our regular routines of work and school and planning to put up and decorate our Christmas tree tonight. Anna loved pulling all the Christmas books out of one of the tubs this morning and her first thought when she woke up was where Starlight (the elf) was located and could she please open Day Three of her Lego Advent calendar. I love December mornings. Lots of fun things for my two loves to look forward to when they wake up. I’m also considering putting up more lights along the roof.
SUPPLIES
Click on the images to link to the products.

TODAY'S POST SPONSORED BY | CLICKIN MOMS
You’re invited to include a link to yourDAY THREE page here. Please link directly to your post vs. your general blog link.


Comments
Sign in or sign up to comment.
29 comments
Your home looks so beautiful. My daughter and I just went for a drive to look at Christmas lights, so nice.
Replies
Sign in or sign up to reply.
I love the full page photos and your lights look wonderful. Regards Kathy A, Brisbane, Australia
Replies
Sign in or sign up to reply.
This is a stunning page Ali. The way it almost looks like the top half is B&W and the bottom colour you made magic with the lighting there. L O V E it. Simple but stunning.
Replies
Sign in or sign up to reply.
Sold! on those overlays that I do not have... yet. I cant wait to see your photos with snow in them... how magical a white Christmas must be. I love December mornings too.
Replies
Sign in or sign up to reply.
Beautiful, Ali! Love the simplicity!
Replies
Sign in or sign up to reply.
[…] This post is linked to Ali Edwards’ Day Three. […]
Replies
Sign in or sign up to reply.
Wow - just stunnig photo and layout! Your blog is my most favorite advent calendar, you surprise me every day - thanks so much!
Replies
Sign in or sign up to reply.
I had trouble using the Multicolor overlays. I'm not a photoshop expert, (I'm a beginner) but the black ones worked fine. The Multicolor didn't seem to work as an overlay (bakground of the layer was not transparent, so the dat woudn't show through on the photo when placed on top). Anyone else have trouble? I wanted to use the Multicolor as an overlay, but ended up using the black and changing to color to red. Anyone have any advice?
Replies
Thank you!
Thanks Ali! I was stumbling at that one too!
Hi Cindy - the multi-colored piece of the journal card/overlay package was designed to be used with the white background. I was hoping that would make it easy for those that just wanted to print multi-colored journal cards for one specific day (using the PNG files - the PDF files are even easier).
In years past I've just done the transparent overlays but this year I decided to included a full-color version as well for those that just want to print and go.
The black/white overlays with a transparent background for those that want to add them onto their photos and are able to be recolored.
Sign in or sign up to reply.
Thx for the chance to win. I love DD! Great project!
Replies
Sign in or sign up to reply.
Love it! Great capture!
Replies
Sign in or sign up to reply.
Day 3 is very cool, love your journaling too :)
Replies
Sign in or sign up to reply.
Beautiful page. You have a lovely home.
Replies
Sign in or sign up to reply.
I am becoming frustrated with the studio calico album. Apparently I do not take horizontal photos, so the 4x6 horizontal pockets on some of the page protectors is becoming a giant thorn in my side.Any suggestions would be greatly appreciated.
Also, when I try to resize my photos to 3x4 in photoshop, they still come out 4x6. Ugh!
Replies
Hi Linda - first off, here's a tutorial for getting 2, 3x4 photos on a 4x6: http://aliedwards.com/2012/01/video-tutorial-printing-two-3x4-images-on-a-4x6.html
As for the horizontal orientation of many of the pockets, there's a couple things you can do:
(1) crop your vertical photos to 6x4 - I shoot almost all horizontal photos so anytime you see one of my photos in a vertical orientation (like any of these full page 6x8 photo) they were cropped from horizontal to vertical.
(2) Print 2, 3x4 photos on one 4x6 (following the tutorial above) - that will give you two photos on one canvas and you can either cut them in half and include pattern paper as a background or leave them both on the 4x6 and slip them into the pocket. Maybe your album will have more photos in the 3x4 slots and more journaling in the 4x6 pockets.
(3) Play around with shooting horizontal. Just like I could mix things up shooting vertically - it's a great way to spark creativity by doing something different than what you normally do.
Make it work for you. You can do it!
Sign in or sign up to reply.
this is gorgeous, of course, and i love your philosophy and reminder that everyone can make this work for their own lives! the readers' link-up is awesome for that, as well, one can really SEE that this can have infinite variations, all of which are AMAZING! :)
Replies
Sign in or sign up to reply.
What fonts did you use for the journaling?
Replies
Sentinel.
Sign in or sign up to reply.
Beautiful photo, and I love how you did the journaling. Thanks for the tutorial....I am going to give this a try, since I shot a very similar photo on Sunday!!
Replies
Sign in or sign up to reply.
Love your picture! I am off to work on my book! Thanks for the pep talk! Love the less is more look!
Replies
Sign in or sign up to reply.
Love the picture! Such a great idea.
Replies
Sign in or sign up to reply.
Just love the twinkle of white lights. So pretty Ali.
Replies
Sign in or sign up to reply.
Your home looks so beautiful Ali!! It has such a warm and cozy look and feel. I'm sure when you are away from home
you can't wait to get back:-)
Replies
Sign in or sign up to reply.