Project Life® 2014 | Week Eight (Studio Calico Project Life® Kit)
Tags:
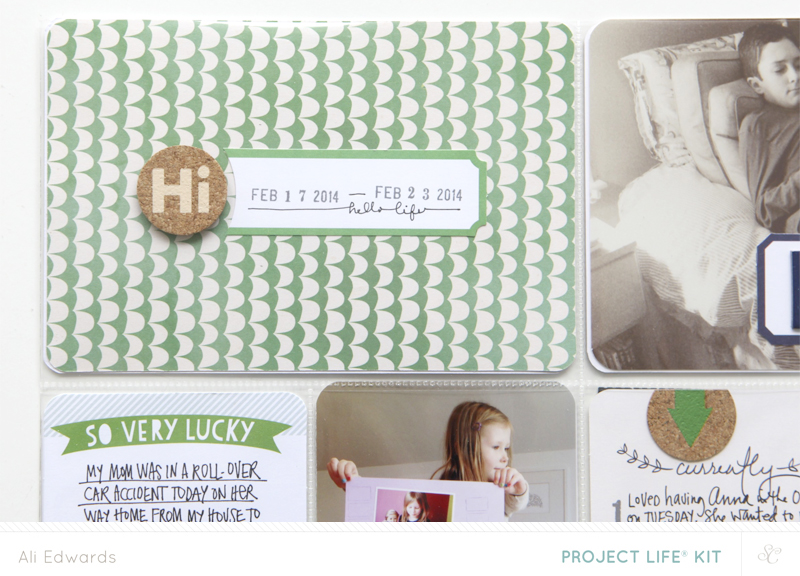
Welcome to Project Life® 2014 | Week Eight (February 17th through February 23rd).
Each month during 2014 one of my Project Life® weeks will be using the Studio Calico Project Life® kit.
You can check out all the new kits for March (called Office Hours) over at Studio Calico here: Scrapbook Kit | Project Life® Kit | Card Kit
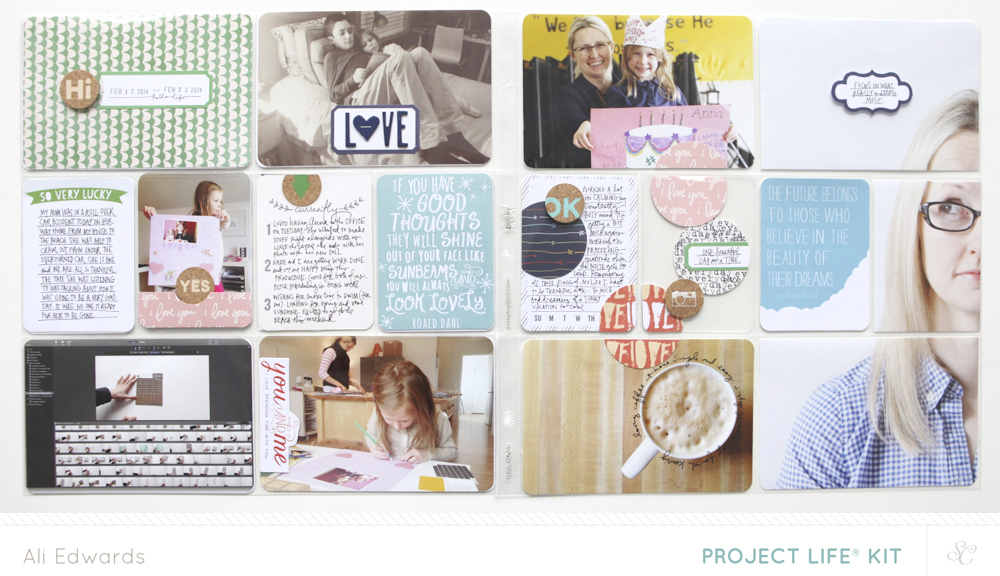
Here's a look at Week 8:
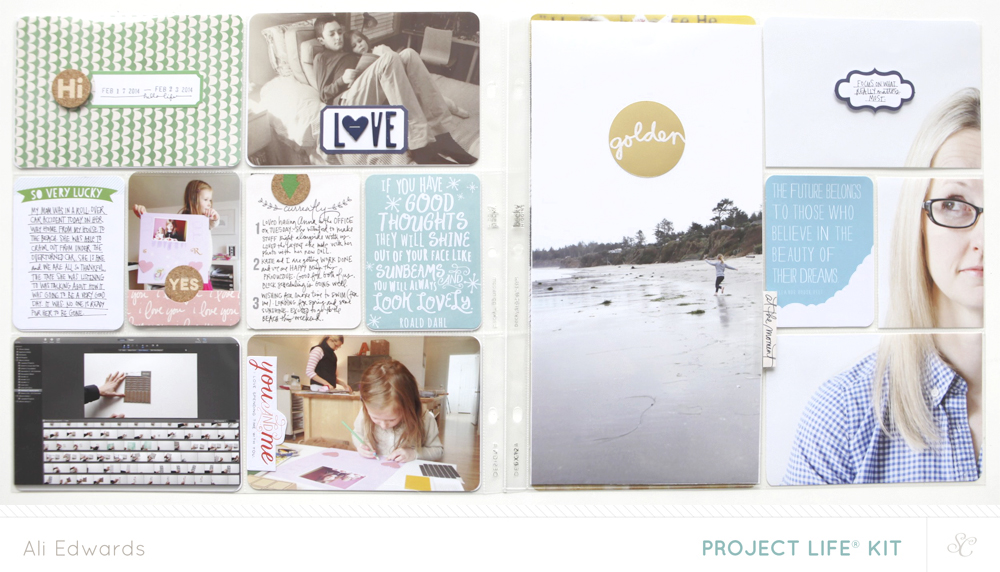
This week I really had fun playing with circles + enlarged photos. I've done enlarged photos before - sometimes they are 12x12 and sometimes 6x12. I think they are a nice visual break from all the smaller pockets. You can see other examples here (Paris), here (Ireland), and here (my skirt & boots).
I've got a tutorial for cutting those enlarged photos to fit into the pockets here.
I included two enlarged 6x12 photos from our weekend at the beach as an insert - these two are stored in a 6x12 page protector. The other photos from the beach will go into a regular layout.
These enlarged photos are printed here at home using an Epson R2000 printer and 13x19 photo paper.
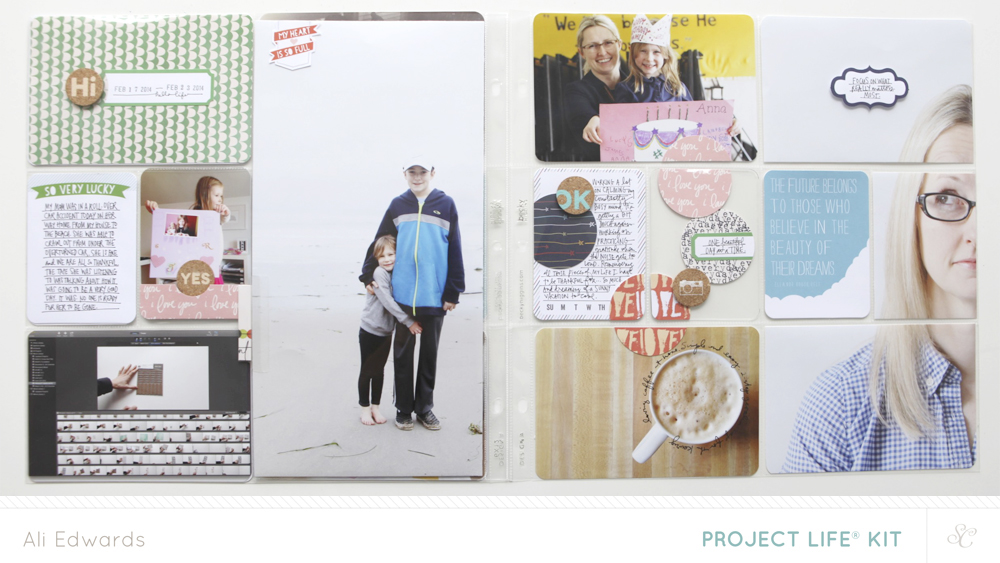
Above is a look at the spread without the 6x12 insert.
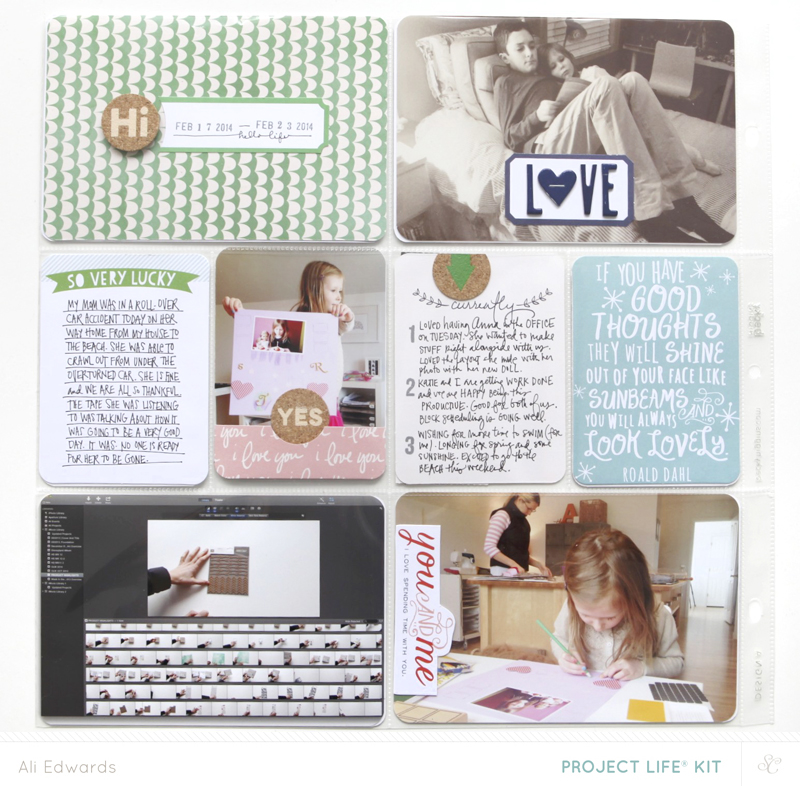
I really like those cork circles.
For the title card I used a small circle punch to knock out the end of that label creating a nice little home for the cork circle.

For this love label I ended up cutting the chipboard letter stickers to fit onto the label (they were too tall). I was able to trim off the tops of the "L" and the "V" and for the "E" I cut it just below the top and and also trimmed part of the stem to make it fit. Loved using the heart as the "O."
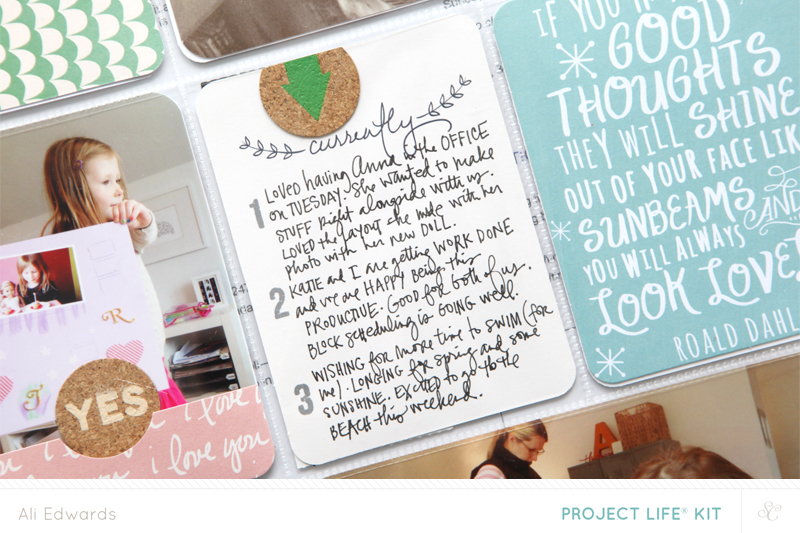
The kit this month includes some cute and perfectly sized number stamps. I used Studio Calico's new Color Theory ink in Clean Slate to stamp them onto the currently card. You also might notice that I trimmed the top off of the cork circle - I like the look of things going off the edge.

Another way to use the cool designs from the journal cards is to cut them out and add them to a photo. These little scissors from Fiskars work great for that.

You can also insert cut pieces of the journal cards into an index tab ("at the moment" was cut from a journal card). I almost always add an index tab when I include a page protector insert.

The enlarged photo of me came from a little photo-shoot Katie and I did where I was trying on a bunch of eye-glasses from David Kind (full post on that here).
In my opinion there are three cool things happening here:
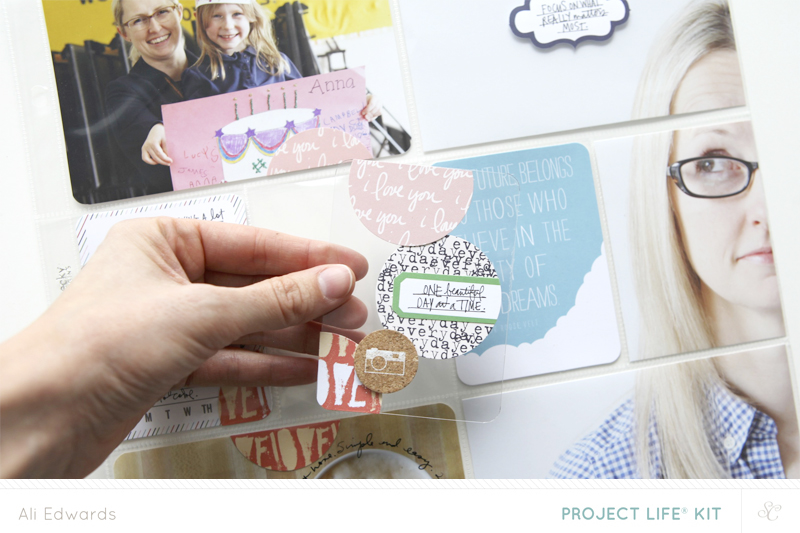
(1) PUNCH CIRCLES | If you happen to have a lot of Project Life® cards (whether from Becky's line or from Studio Calico or other kits) a fun way to work with them is to punch the pattern ones into circles. I used both a 1-inch and a 2-inch circle punch here.
(2) BREAK FREE OF THE GRID |Sometimes the pockets can feel a little restrictive (stay in your box) and it's nice to be able to play around with elements that cross over from one pocket to another whether that's a photo or pattern or embellishment.
Speaking of that I loved how Catherine Davis used the little butterfly stamp from this month's kit across more than one pocket: Golden.
(3) CLEAR 3x4 CARD |This month's kit includes 2, 3x4 clear acrylic cards. I used one as the back for my gathering of circles. If you're wondering what I'll do on the back, most likely I will punch some more circles (or maybe photos) and add them to the same spots on the back of the 3x4 card to maintain the see-through quality. These cards are pretty sturdy but you can also achieve this same look by cutting up some of your extra page protectors and adding elements and then sticking it inside the pockets. You can see how I did that in my December Daily® album last year here.
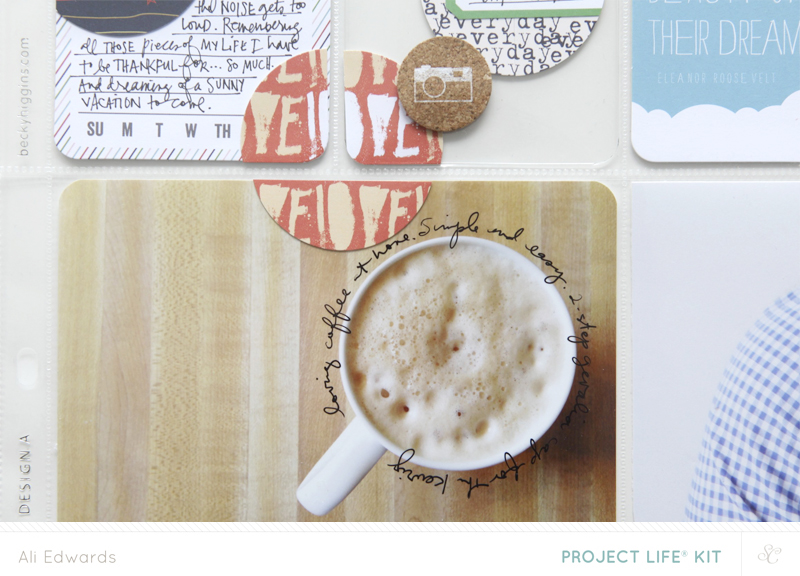
Writing on photos = yes. Always. I used a Fine Slick Writer to journal around the coffee cup.
SUPPLIES | 2014 | WEEK EIGHT
Click on the images to link to the products.
Project Life® is a product and a system and a lifestyle created by Becky Higgins. It can be anything you want it to be. The core pieces used in my album are available here. If you live outside the US check Becky’s site for more information on sources. View all my posts about Project Life® here.


Comments
Sign in or sign up to comment.
30 comments
I absolutely love what you've done with the circles Ali. Inspirational as ever.
Replies
Sign in or sign up to reply.
Those tall photo inserts looks really great. Love it all. Infused with inspiration right now!
Replies
And I just noticed the note on your Mom- grateful with you that she is fine.
Sign in or sign up to reply.
Love the tall 6x12 photo and the circles throughout this spread. I love the look of "see through" pockets and am sure I'll be adding a few into my spreads this year. Thanks for the inspiration Ali.
Replies
Sign in or sign up to reply.
This layout totally rocks. Awesome job Ali, inspirational as always.
Replies
Sign in or sign up to reply.
Very neat. Love the enlarged photo of the kids by itself like that in the page protector. Also the one of you trying on the glasses then cut to be in the multiple pockets is awesome, thank you for including a link to a tutorial. I've been making my own cork embellishments for my layouts for a while, lately it's been arrows. Thank you. Michelle t
Replies
Sign in or sign up to reply.
I just purchased my first Studio Calico kit and then when I saw you had this post today...it was perfect! So totally love how you use the products in their own way. Thanks for reminding me to think outside the box :)
Replies
Sign in or sign up to reply.
Is there any place that sells just the cork circles? I love them but don't really need to whole kit.
Replies
This particular set is exclusive (at this time) to this kit. Sometimes products in the kits show up in their wholesale lines later in the year. Here's some other cork options from Scrapbook.com: http://store.scrapbook.com/products/?w=cork.
Sign in or sign up to reply.
Love the acrylic 3x4 cards. I bought a box of transparencies at Staples and can cut those down...good idea!
Replies
Sign in or sign up to reply.
Awesome tips! Just in time for my crop tomorrow. Thanks for sharing!
Replies
Sign in or sign up to reply.
Love the circles. So love the full page photos. The circle repetition is fun, draws it all together. Hope your mom is feeling well, so very blessed.
Replies
Sign in or sign up to reply.
Ali, I am very thankful that your Mom is okay. She radiates peace and happiness in your pictures.
Replies
Me too - thank you.
Sign in or sign up to reply.
Like! Fun to see your different weekly themes.
Replies
Sign in or sign up to reply.
Hi Ali--my heart stopped as I read the card regarding your mom's car accident. So happy and thankful that she is ok. Its obvious you two have such a special relationship! Please pass on well wishes to her!
Replies
Sign in or sign up to reply.
I always love how you work with enlarged pictures. Great inspiration! Thanks you!
Replies
Sign in or sign up to reply.
I really love the 6x12 side photo from your glasses photo shoot, I love how you mixed the bubble 3x4 card in that had a similar colour scheme. I noticed another reader commented about the journalling card that mentionned your Mom and the roll over, so glad she's okay and it wasn't more serious. So happy our Moms are still in our lives :) Love the circles, and the happy feel of the every day life going on! Awesome!
Replies
Sign in or sign up to reply.
Love seeing a 2014 spread from you, especially with such distinctive and creative touches. I'm so very glad that your Mom made it through her accident with no injuries, and a sunny vacation ahead sounds wonderful. :) I hope your travels bring you to Africa one day, ideally while I'm there. ;)
Replies
Sign in or sign up to reply.
I really like how you make it your own. Punching the circles from printed PL cards is a great idea. I don't use a lot of printed papers in my layouts. The punched circles would be just enough! I'm also going to try and spread items beyond the different pockets. I really like that look.
Replies
Sign in or sign up to reply.
[…] pair these tabs with this stamp set: Just Awesome. Check out an example of how I use these here: 2014 | Week 8 or 2013 | Week […]
Replies
Sign in or sign up to reply.
Thanks so much for showing us the details of your spread. Love it! It looks great!
Replies
Sign in or sign up to reply.
OMG! I love this so so much!
Replies
Sign in or sign up to reply.