Tuesday Tutorials : Janet Hopkins : Baby Milestone Binder Book
This week Tuesday Tutorials welcomes Janet Hopkins.
Janet walks you through her creative process in putting together a baby memory binder using printable products (PDF files that you can print on cardstock, patterned paper, acetate, etc). She also demonstrates how to stamp in gel medium to create a cool, texturized cover.
Here's Janet:
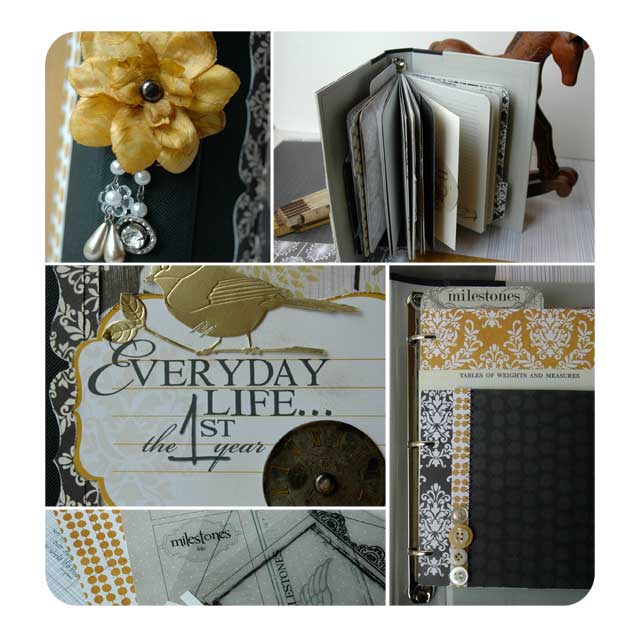
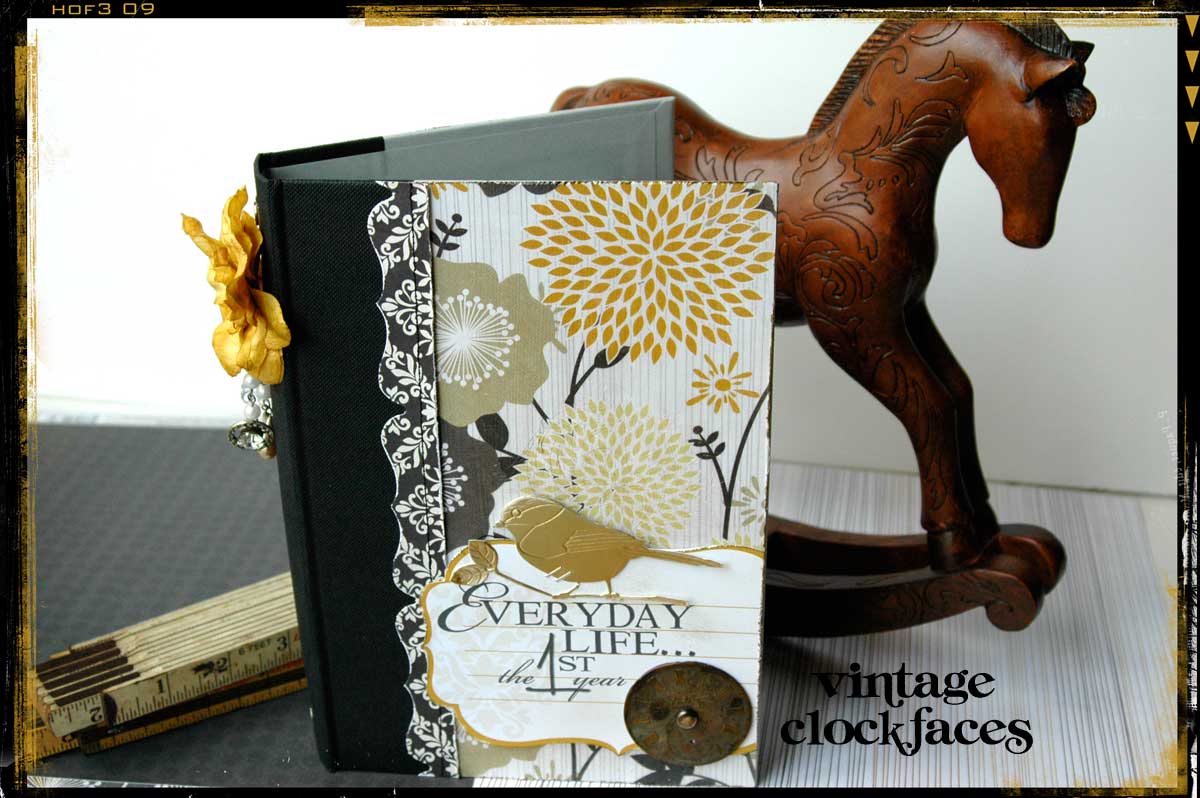
When Ali asked me to be a part of the Tuesday Tutorial series I knew immediately that I wanted to work with the Memory Binder a.k.a. Junk Binder as this has by far been my most asked about technique/project/class of all time. There has not been a week that has gone by that I do not get an email asking questions about it and I have loved answering them all! And, with the impending arrival of our daughter (as in the day after this tutorial is posted!) I also knew the subject matter that I wanted to work with for my project. I wanted a way to capture my babies first year, especially with milestone dates and photos so I dove in and this is what I came up with.
Whether you are using the pre-made Heidi Swapp Memory Binder or actually constructing your own from an old book and binder mechanism the results are always unique and fun to put together. Although this may look like an involved project it actually came together quickly and I want to share with you a few of the techniques I have used on my book.
You can download a PDF/text version of this tutorial here.
House of 3 : Babies First Year Printable Template

I wish I could say that I am an organized, plan ahead kind of girl…but I can’t. So I knew that if I did not force myself to pre-make this project I would always be playing catch up with my daughters first year of memories. And since I know there are Mom’s out there just like me I decided to make it a template so that others could print and make this project as well.
But first…let’s talk about printables. A printable is a template that can be printed on any material: patterned paper, photo paper, sticker paper, canvas, cardstock, acetate….and the best part, it can be printed over and over again in different variations and color ways for different projects…it is just a template for you to create with. (Also, there are no special printers required. All pages are formatted 8.5 x 11 so you do not have to have a wide format printer!)
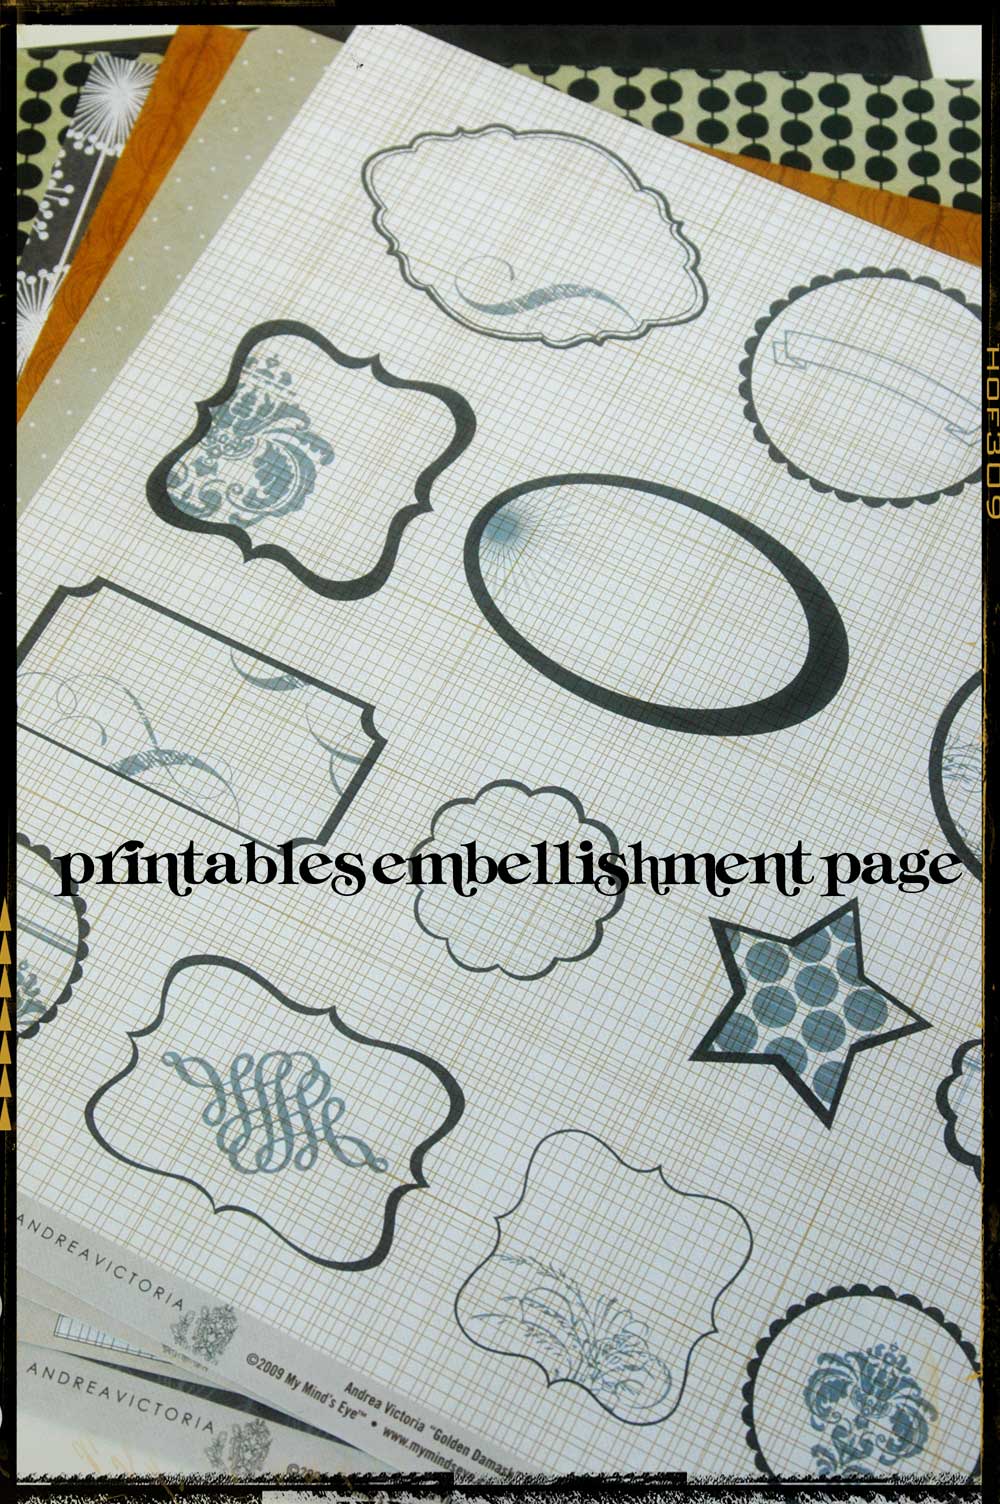
For this printable set I have created 3 different title pages, 6 journaling pages, 6 photo pages, 1 milestones mini journaling cards set, 1 pocket page template, a set of blank pages as well as an embellishment page. Each page is a 5x7 and will fit perfectly into your binder book. The fun part is mixing and matching your paper choices. I fell in love with My Mind’s Eye Andrea Victoria Line (also available in digital from Designer Digitals), it was exactly what I wanted for my project…not too girly and the patterns are so fun!
To find out more details on how to purchase and download the Babies First Year printable kit visit House of 3.
Here are just a few examples of pages I have printed on different materials to get my project started: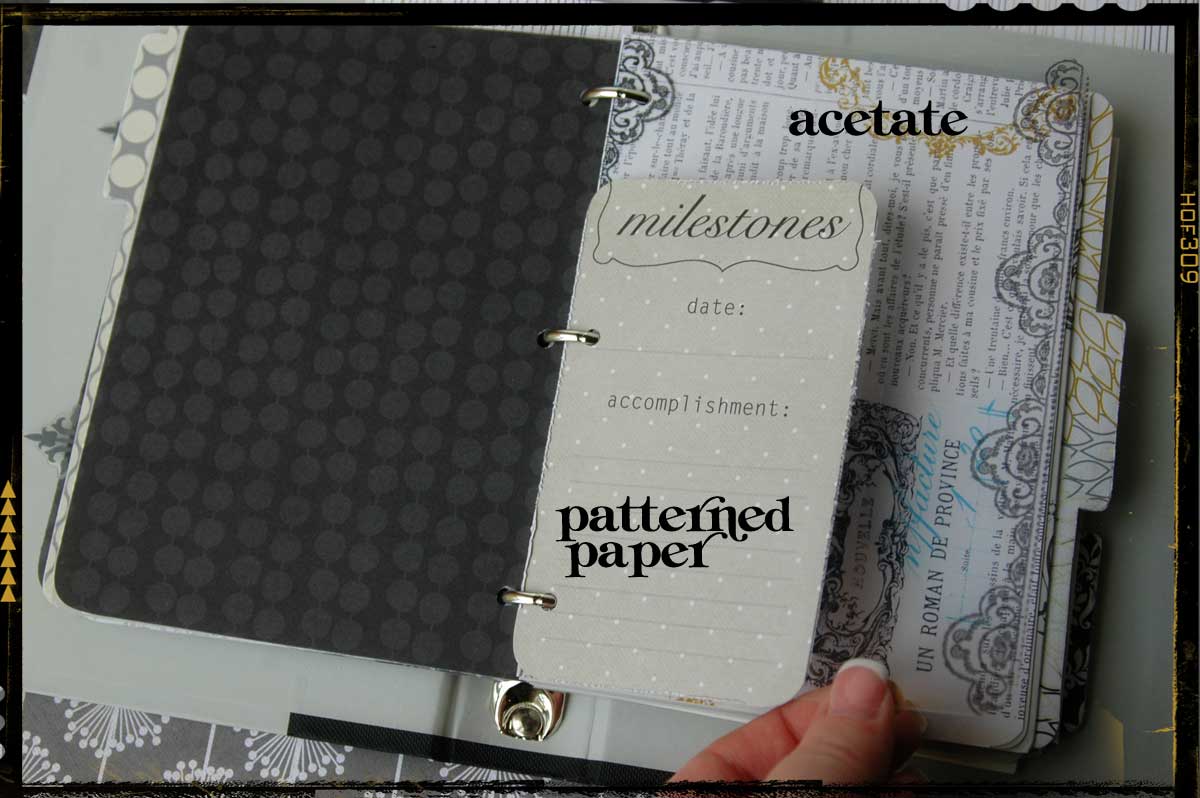

Gel Medium/Stamping Cover Technique
I love making the cover of my binders my focal point and this gel medium stamping technique is a great way to add texture. To make this cover:
ONE: Choose from your three title pages, print on the material of your choice (I would say patterned paper or cardstock would be your best choices). Trim to the appropriate size but do not attach to your book binder yet.
TWO: Apply Golden’s Regular Gel Medium Gloss to the front with a 1” foam brush. You want to have a thin layer that will leave a slight haze to the paper, almost as if you have laid vellum paper over your cover. The texture you add is up to you, if you leave wide brush strokes with lots of peaks it will add more texture to your cover but will add to your dry time so keep that in mind. I chose to make my brush strokes follow the lines of the paper.
THREE: Once I applied the gel medium to my liking I immediately chose a large scale Tim Holtz stamp and stamped it directly into the gel pressing my stamp firmly and then lifting it directly off without rocking it at all as it will slip from side to side if you are too rough with it. Set aside to dry. (Approximate dry time, depending on the amount of gel you used is 45 minutes.)
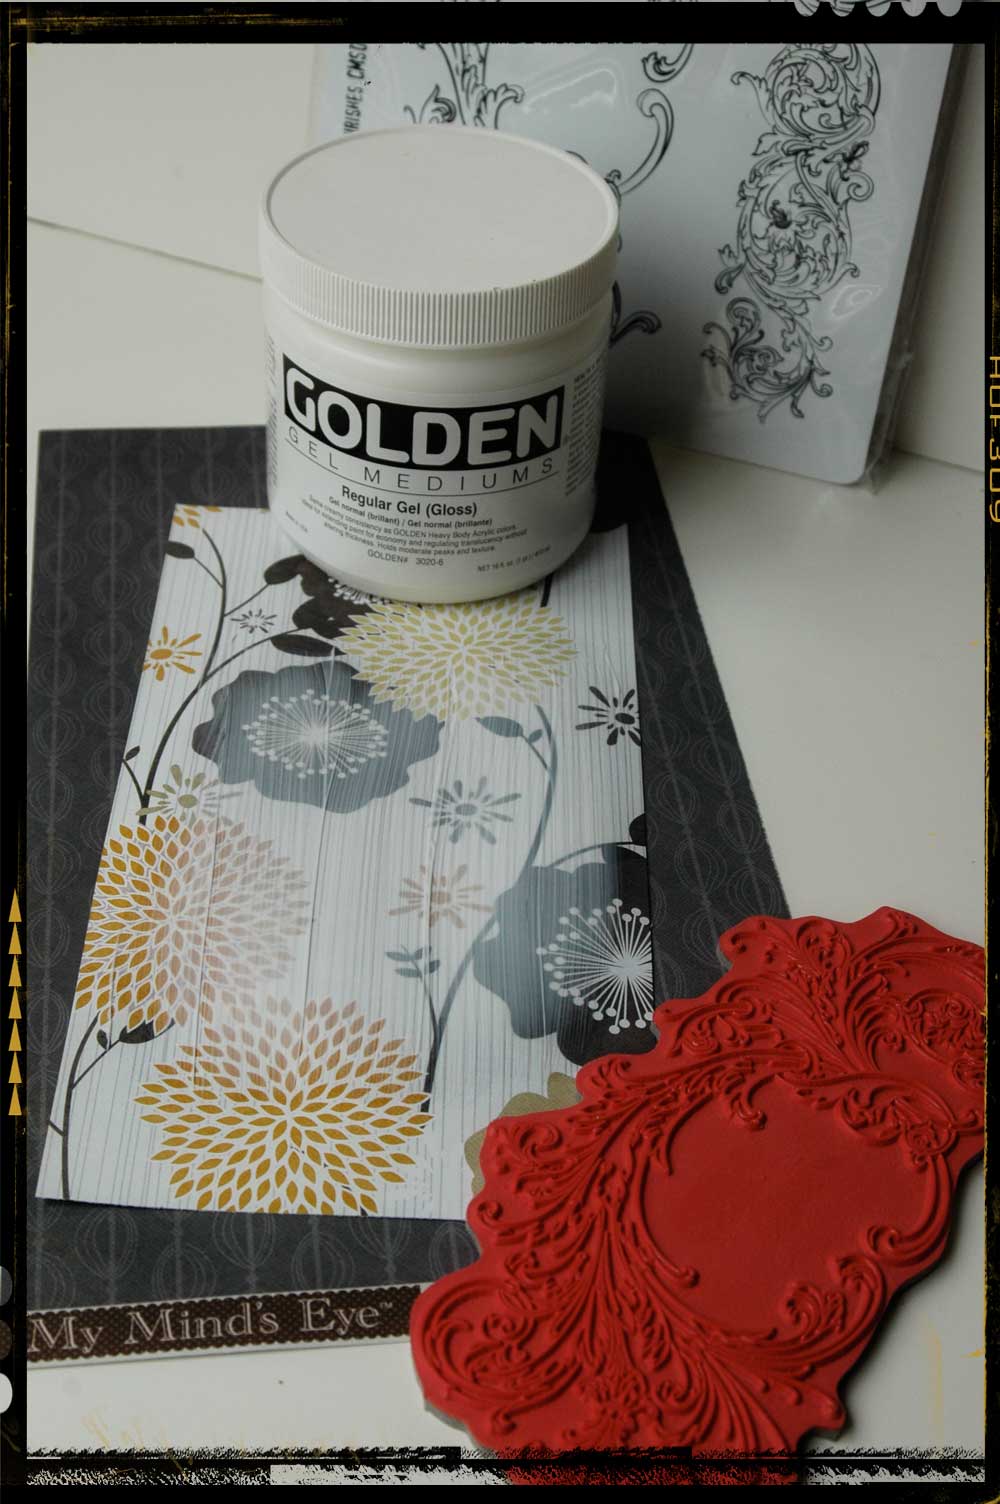
As you can see from the photo below, once dry you have a beautiful impression of the stamp on your cover.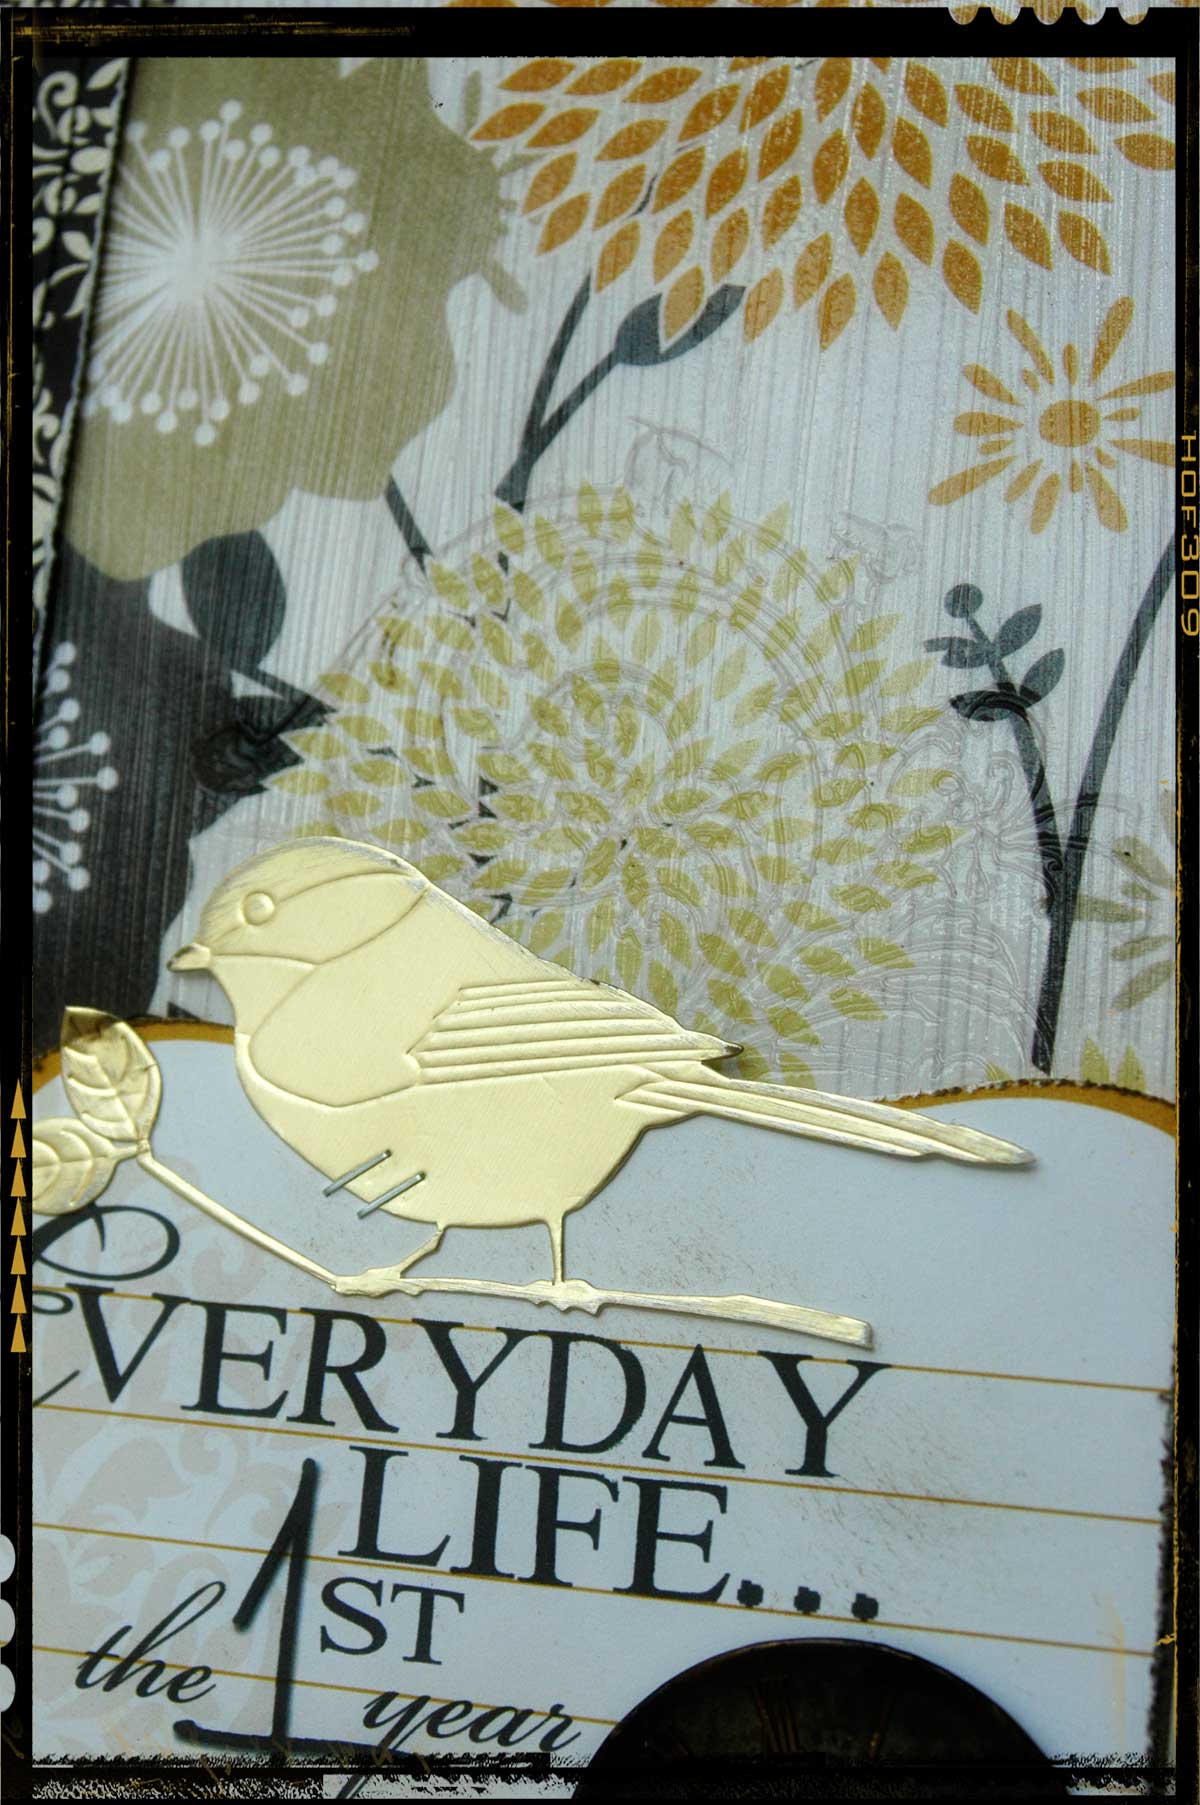
FOUR: Once dry, attach cover to binder. I have found a glue stick and brayer work best for this.
FIVE: To further embellish the cover I have layered a die cut embellishment with my title printed on it, a vintage clock and a bird, all mounted on foam dots.
Mixing It All Up: Vintage Embellishments, Technology & Several Patterns
It’s tough sometimes to marry all of the different styles you may have into one project…but don’t let it intimidate you! I love vintage elements on my project and believe it or not it worked perfectly with this tech savvy, downloadable template that I chose a super graphic pattern for….it’s all in how you balance them. Don’t be afraid to try different things that might take you out of your comfort zone.
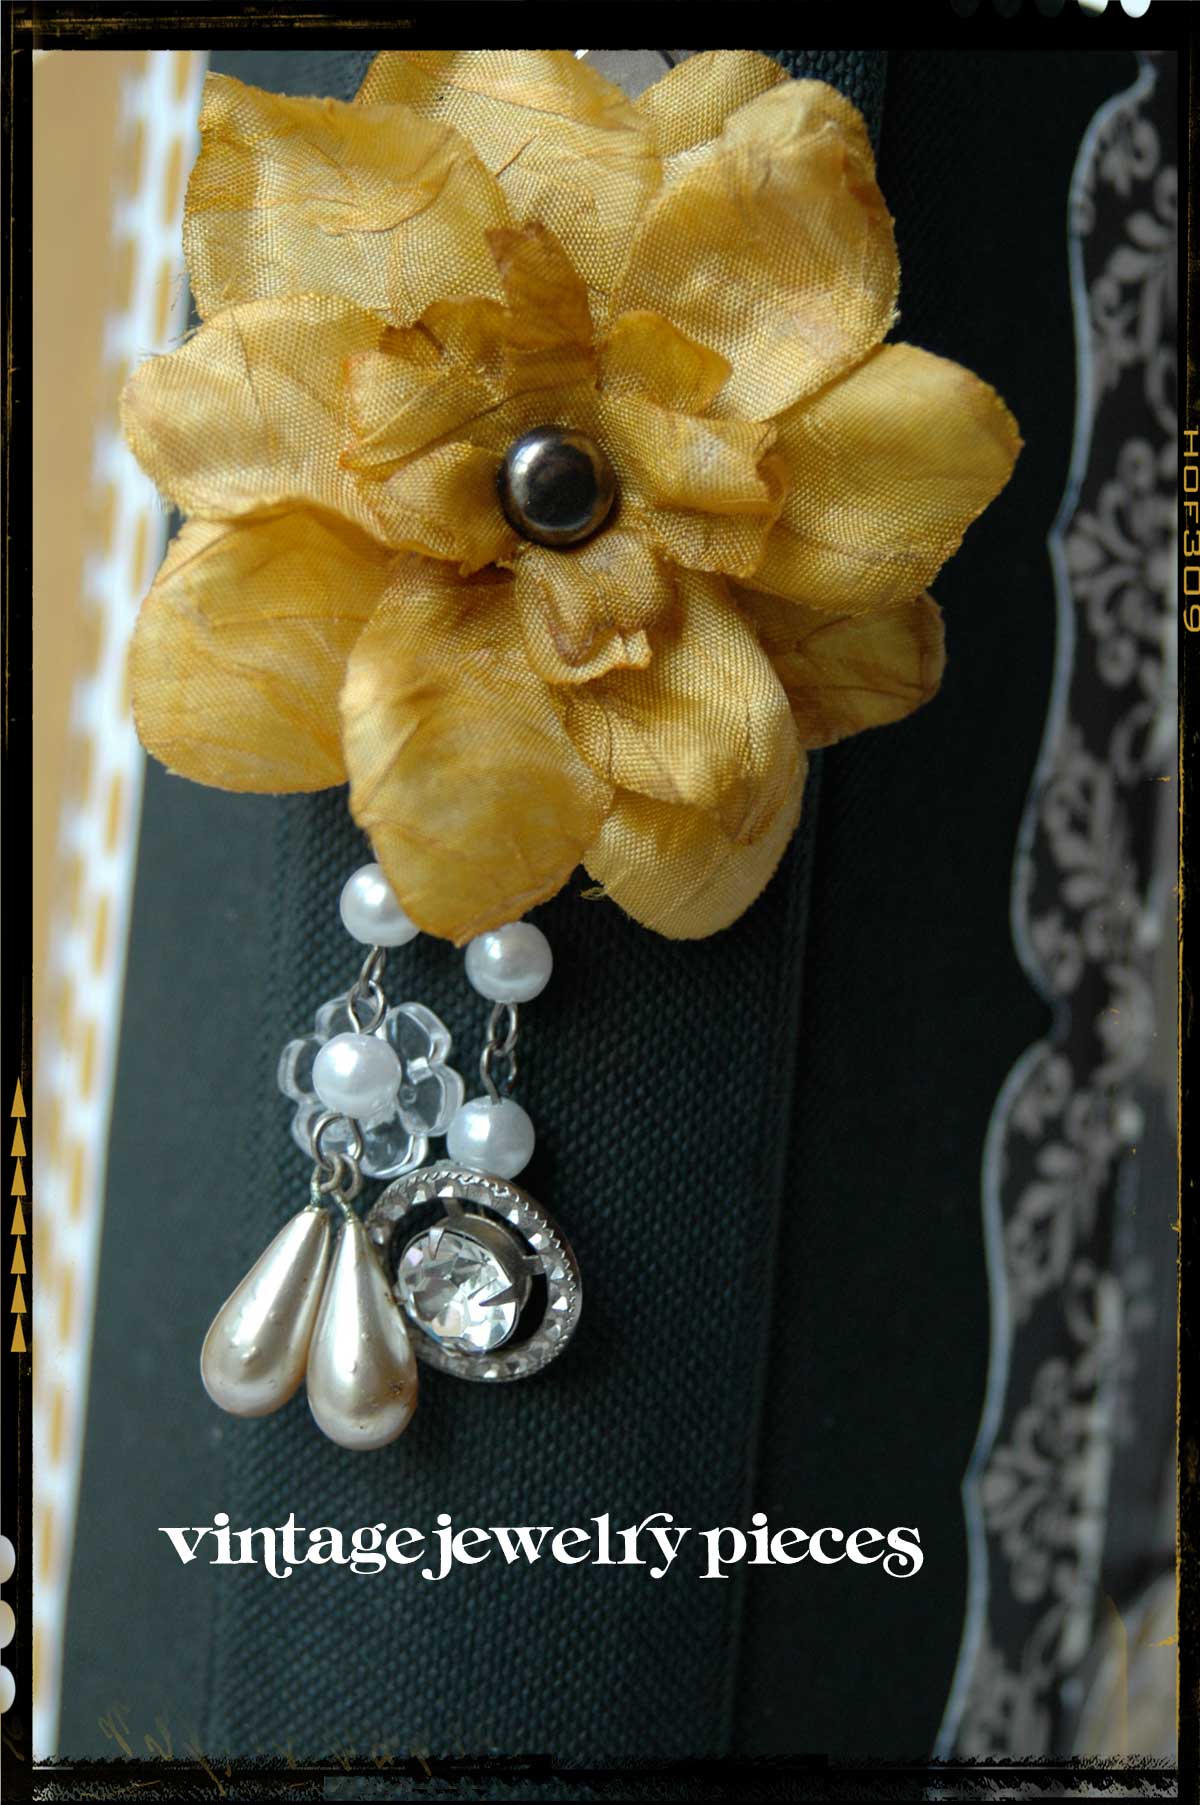
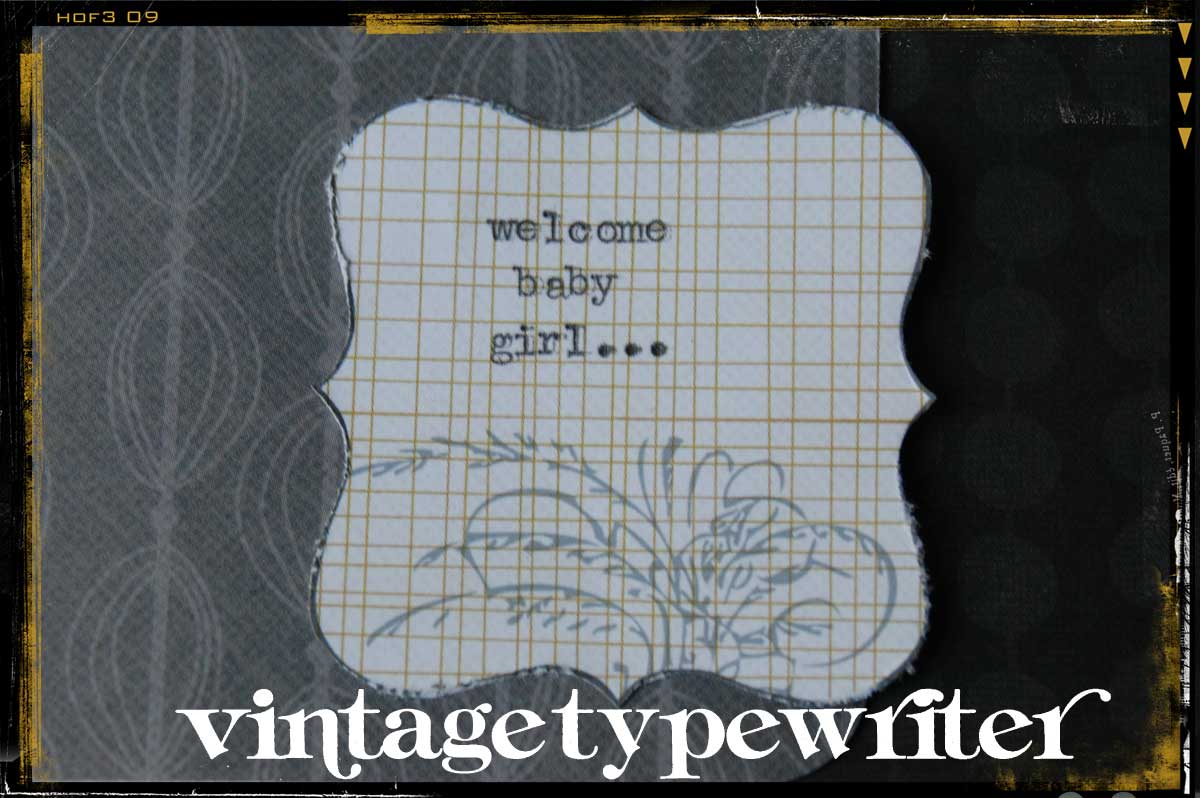
I started with my color palette and went from there. It’s okay to mix and match from all different manufacturers as long as they are complimentary. Once I had determined my colors and patterned paper choices I gathered vintage items from my stash that fit well with the color scheme and put them in a bowl on my desk. I like having them out where I can see them so that I can grab from them as I am creating. I gathered vintage buttons, clock faces, jewelry pieces as well as tickets and a few French labels.
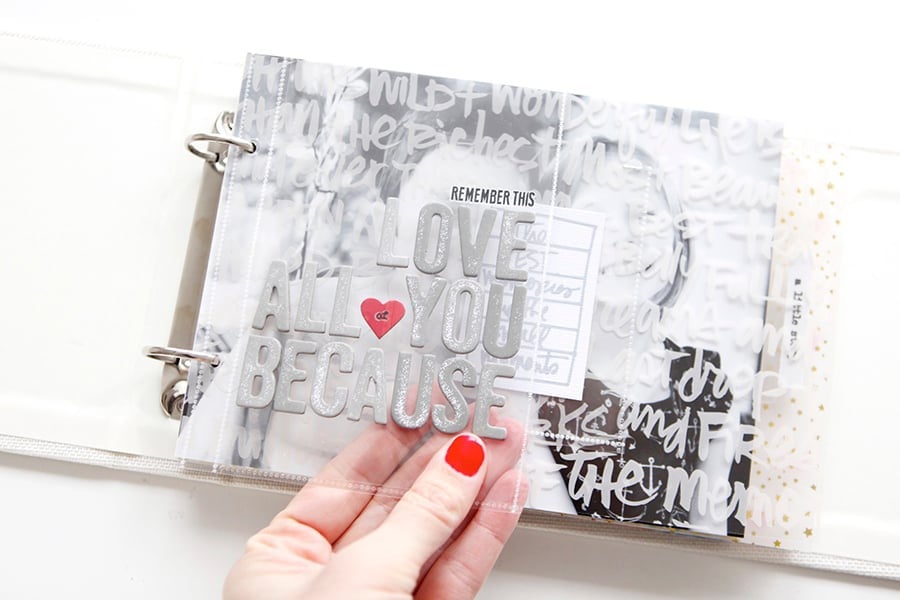
After the base pages of my book were complete I started embellishing the pages. Since this will be a work in progress I will still add many more embellishments along with my photos and journaling but adding in a few starter embellishments really made the book come to life.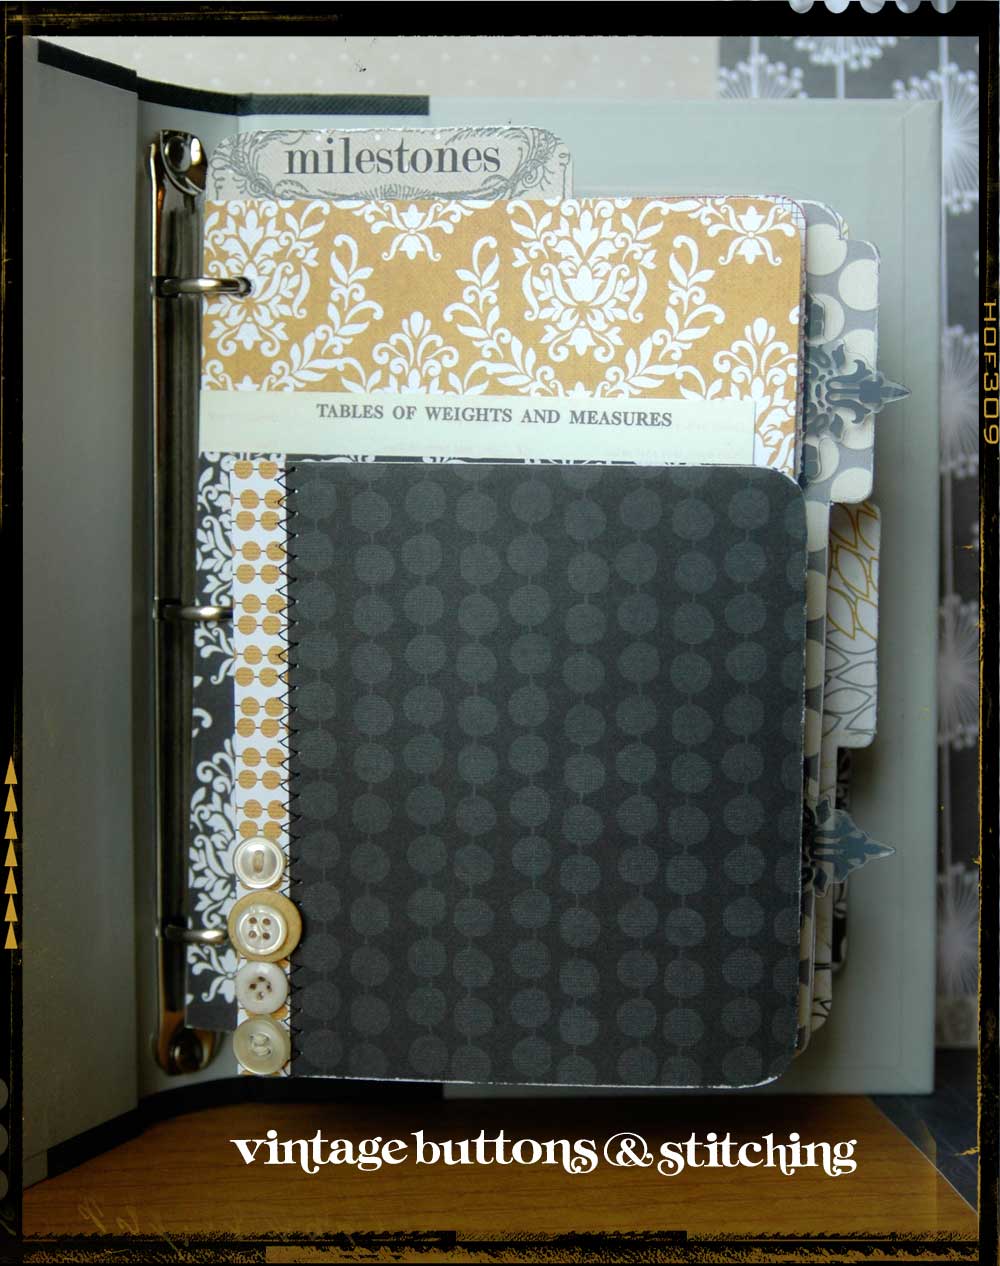
I hope you have enjoyed a peek into my process for this project. To see more examples of my memory/junk binders and more photos and a full manufacturer supply list for this project, please check out my blog. 

An experienced educator having taught at stores, conventions and events across the world, Janet truly has a talent for teaching people new ways to use the innovative products on the market today. To see more examples of her work, visit: janethopkins.typepad.com.
Janet's most recent venture is House of 3 with Heidi Swapp and Rhonna Farrer. The site has a funky vibe and has been a true creative collaboration that she is truly grateful for. You can see all of the digital and physical products they have to offer at www.houseof3.com.
Janet lives in North Texas with her husband of thirteen years, Rick, and their three wild but beautiful children who are 11, 6 and 3. They are expecting baby #4 in August and could not be more excited.


awesome book!!!!!
Sign in or sign up to comment.
This is amazing - thank you so much for sharing. I hope to use some of these techniques for my new baby girl!
Sign in or sign up to comment.
Love your work, Janet! And, I'm a House of 3 fan -- love that style.
Wonderful baby book. Would make a precious gift, wouldn't it?
Sign in or sign up to comment.
This is just an awesome project, loving that color combo as well!
Sign in or sign up to comment.
This is gorgeous! Totally love it!
Sign in or sign up to comment.
fantastic, janet! how amazing!!!! love it! thanks, Ali!!!
lovin' the tuesday tutorials!
R
Sign in or sign up to comment.
Ali...so excited you featured Janet. She is one of my all time faves...love her personally and love her work...how she mixes current and vintage. Anyway thanks to both of you for being such an inspiration :-)
Sign in or sign up to comment.
very beautiful! I love these papers!
Sign in or sign up to comment.
great project -- love the dangle on your book!
Sign in or sign up to comment.
That is an amazing baby album. This would make a great shower gift. Hmmm..?
Sign in or sign up to comment.
This is darling!! I will have to remember this IF my girls ever decide to have children!
Sign in or sign up to comment.
That is a beautiful book!
Sign in or sign up to comment.
This is so great, I was going to go 'girly girly' for my neice's book but this shows that elegant and stylish works great too! Wow! Jo x
Sign in or sign up to comment.
amazing work!
Sign in or sign up to comment.
Great info. I will use this in my own work.
thank you.
Jen
Sign in or sign up to comment.
Believe it or not, I'm having my baby girl tomorrow too! Looks like they will be birthday buddies. That is awesome (oh and I love the project too!)
Sign in or sign up to comment.
I love Janet's work - thanks for featuring her!
Sign in or sign up to comment.
LOVE this binder project!!! I will definitively try the gel and stamp technic.
Sign in or sign up to comment.
This is a great project. It gives me lots of ideas. Thanks Ali for the Tuesday Tutorials.
Sign in or sign up to comment.
This is a FABULOUS project! I make lots of little gift albums and this is full of wonderful ideas. Thank you for sharing with us.
Sign in or sign up to comment.
This is so cool. I am so glad your back Ali, I was having AE withdrawals. But, I know you needed much family time.
Sign in or sign up to comment.
Though I have little time just now for a new project, this one, I confess, has absolutely captivated me, so I'm going to have to SQUEEZE it in. LOL But, because I have no kids, and all my nieces and nephews are older, I'll have to come up with a different theme--no worries, I've got plenty of ideas for my own "junk binder." I think it might make a perfect idea book. Hmmm.....
Sign in or sign up to comment.
Beautiful! Now I just need a baby ;) Kidding!
Sign in or sign up to comment.
Thanks for sharing! I posted a link on my tutorial blog!
Sign in or sign up to comment.
Oh wow - this is simply stunning! Love the color choices and adding the other patterns (My Mind;s Eye Andrea Victoria) just made it all the more gorgeous!
Sign in or sign up to comment.