Tuesday Tutorials : Cynthia Friese-Hassanein : Autumn Nostalgic Paper Bag Mini Book

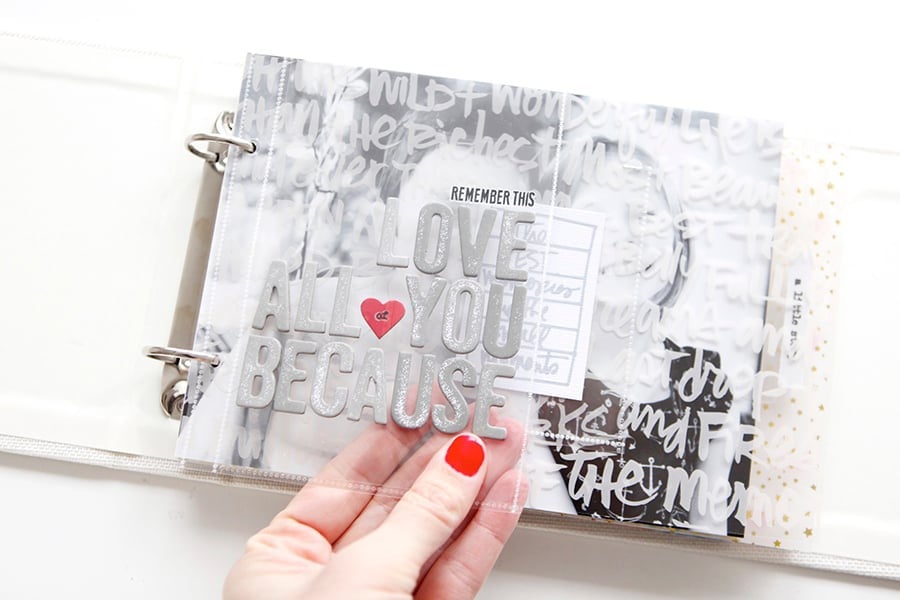
This week Tuesday Tutorials welcomes Cynthia Friese-Hassanein with a wonderful minibook for documenting Autumn. Her foundation design is really lovely and would make a great base for all kinds of stories. I like the idea of running some brown paper bags through my printer - definitely want to try that on an upcoming project. And, I really love how she did the cover - such a cool, graphic way to begin an album.
Here's Cynthia:
AUTUMN : NOSTALGIA PAPER BAG MINI BOOK
Autumn deserves to be documented. This past August, like every prior one before, I get one bad case of Fall fever. Anticipating those crisp nostalgic days arriving....
So now that fall has arrived, I prepped to create a Autumn mini book where repetition rules. Photos and Words. The main products I used are paper bags to overlay the pages. Simple. Simple Simple.
This year I have made the pledge to creatively embrace scrapbooking formulas that work for me and remove me from the frustration of trying to reinvent the creative wheel every time. Oh so liberating!!! Especially now with the beginning of the hectic holiday season quickly approaching.
The Autumn: Nostalgic paper bag mini book is a celebration of all the details and traditions I adore about Fall. Before I even began the book I sat down at my favorite window with a cup of coffee and did some basic brainstorming. One page of whatever comes to my mind about Autumn: how I love using my typewriter in the fall or sitting at my writing window all bundled up. These little everyday traditions are moments I want to document and remember for many years.
Once I had my ideas on paper, I decided to gather photos and make a list of new ones I wanted to take for my little mini book.
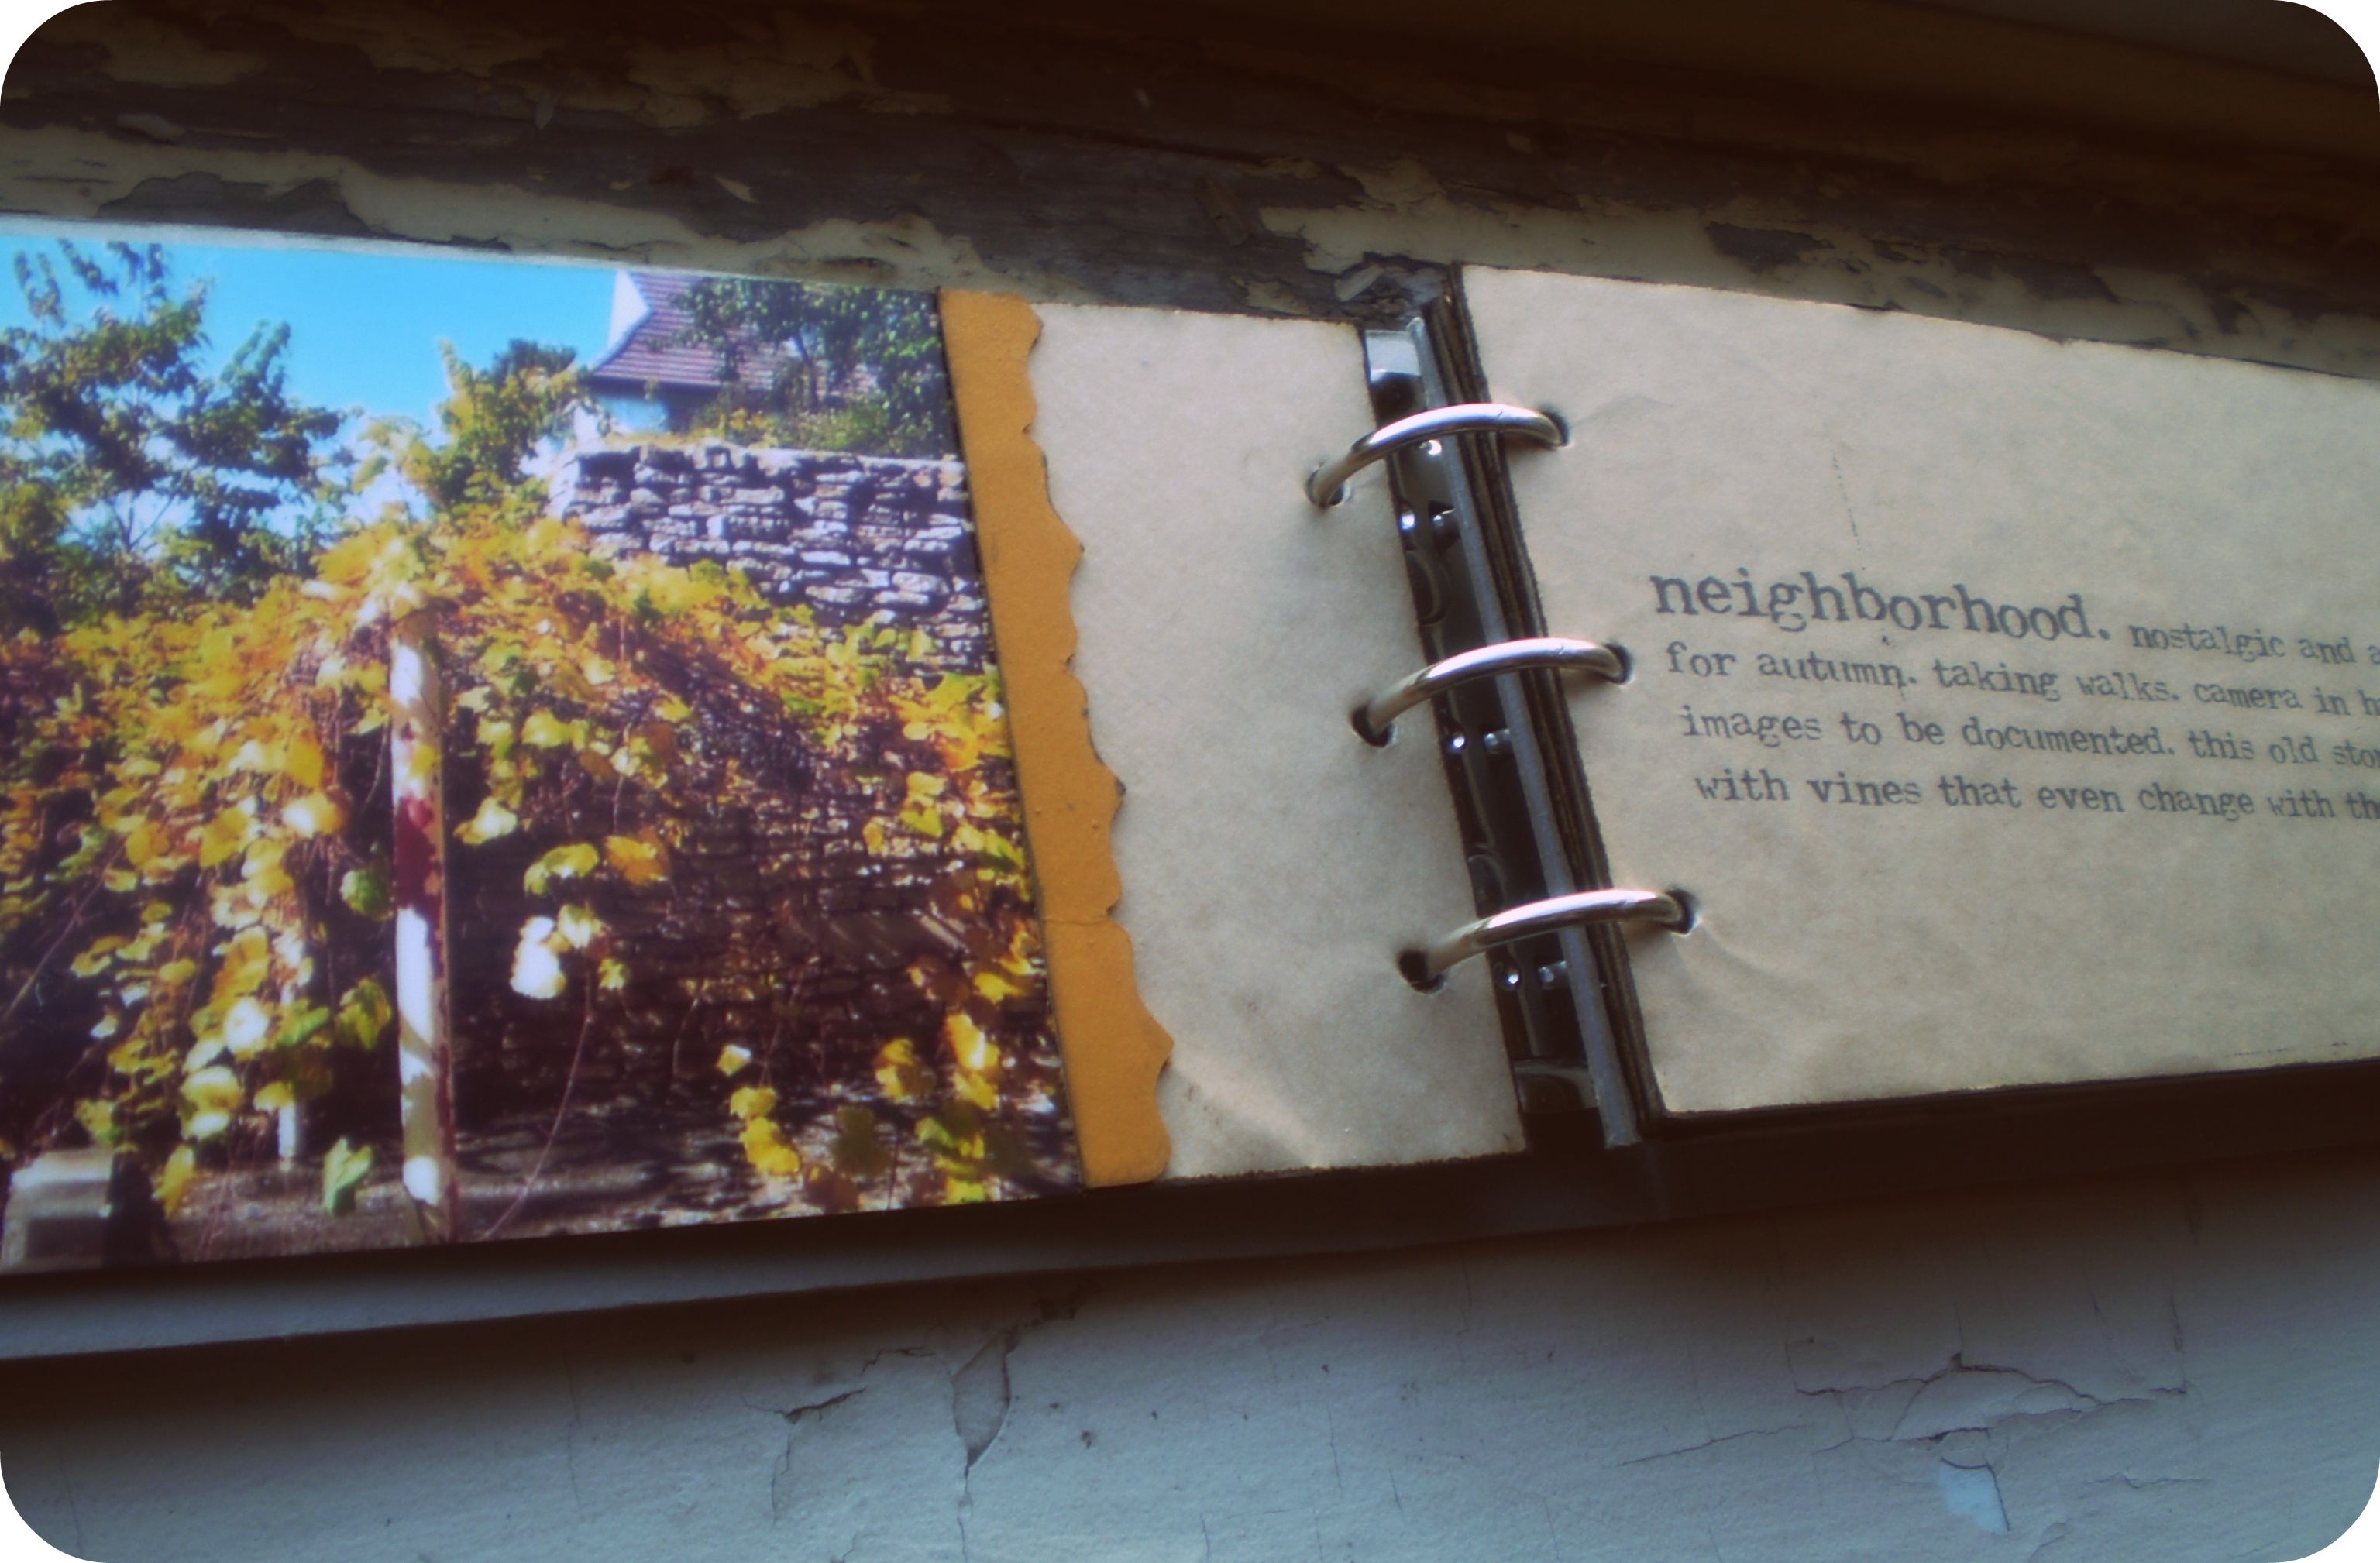
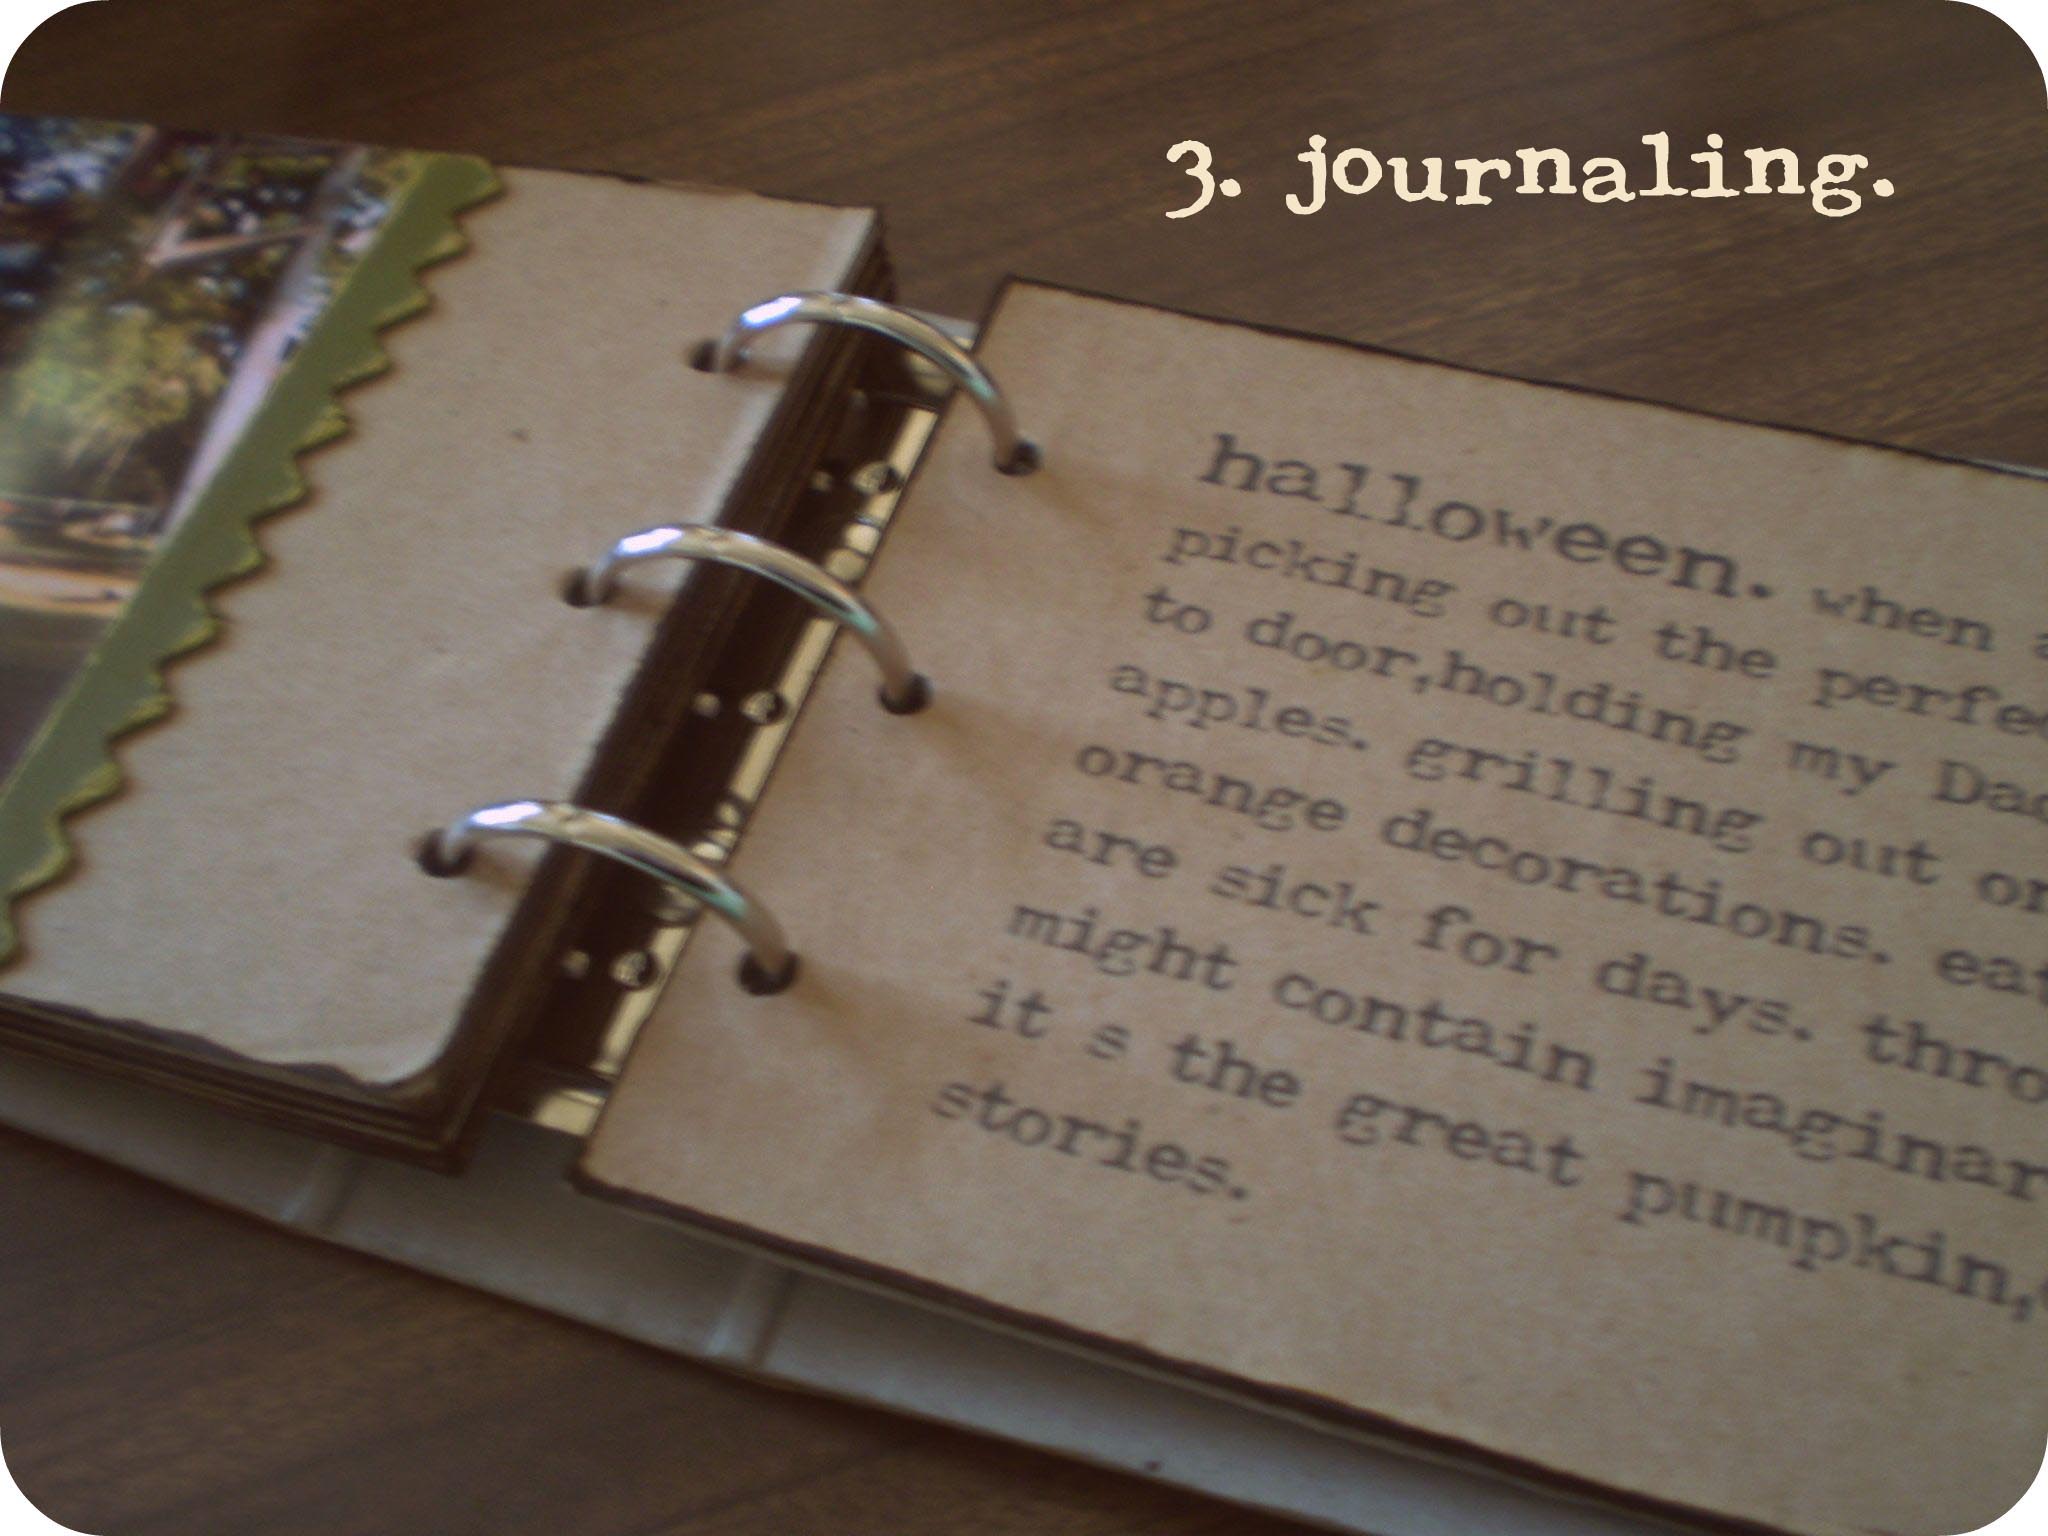
Before constructing the physical book. I sat down with each photo and wrote down whatever thoughts came to mind about that particular image. Some shorter than others. I stuck with a list style journaling for the book. So no matter how random the memories, they flow. After finishing the interior page journaling. I wrote my introductions as a gratitude "letter" to Autumn. For the End-note I documented the process of creating this little ode to Fall so that whomever comes across it will have a little peek into how I create.
ALBUM SUPPLIES: *all these supplies can easily be substituted with items from your own stash.
- Maya Road landscape chipboard binder album in 4x8 inches
- 7 gypsies ATC chipboard trim
- Making Memories paints in autumn colors (wheat, evergreen, nutmeg, espresso and shopping bag)
- Foam brushes
- Ink pad in grey or dark brown for distressing page edges
- 8-4x6 autumn images: good mix of horizontal and vertical and make sure to have it least one horizontal for your cover page
- 8 paper lunch bags or 3 grocery paper shopping bags
- Adhesive sheets suggestion: Quikutz double sided (8) 4x12 or K&Company Wackytac Large (6) 5 1/2x9
BASIC SUPPLIES:
- Paper corner rounder in 1/4 size
- Exacto knife
- Cutting board
- Masking tape
- Paper trimmer
- Small Hole Puncher
- Scissors
- Ruler
- Pencil
- Eraser
- Black or Dark Brown pen (American Crafts or my favorite pilot fine tip g-2 pens work as well)
- Adobe Photoshop Elements or Word if you choose to type your journaling
*If you currently do not have Photoshop Elements, Adobe offers a free trial here.
- Royal 200 typewriter font (free) available at Dafont.com.
AUTUMN : NOSTALGIC STEP BY STEP
Now that you have picked out your autumn images and wrote out your fall past and/or present descriptions it's time to begin to construct your very own yummy Autumn: Nostalgic paper bag album.

Step 1: Plan the placement of your photos and journaling.
I have created a simple page planner (Download: Autumn Nostalgic Page Planner) that you can print out or you can take a more hands-on approach by just writing on the pages with pencil or pen where the photo/journaling will go (don't worry the notes will be covered). This step will make the construction process so much faster and easier.

Step 2: Cutting paper bag album page overlays.
If you are handwriting your journaling, I would recommend using the standard paper lunch bags. If you will be printing out your pages I suggest using shopping bags - the larger size will allow you to cut them down to 8.5x11 to easily run through your home printer. For both sizes of paper bags, trim both front and back of the bag to the bottom leaving both the bottom and the sides for scraps.
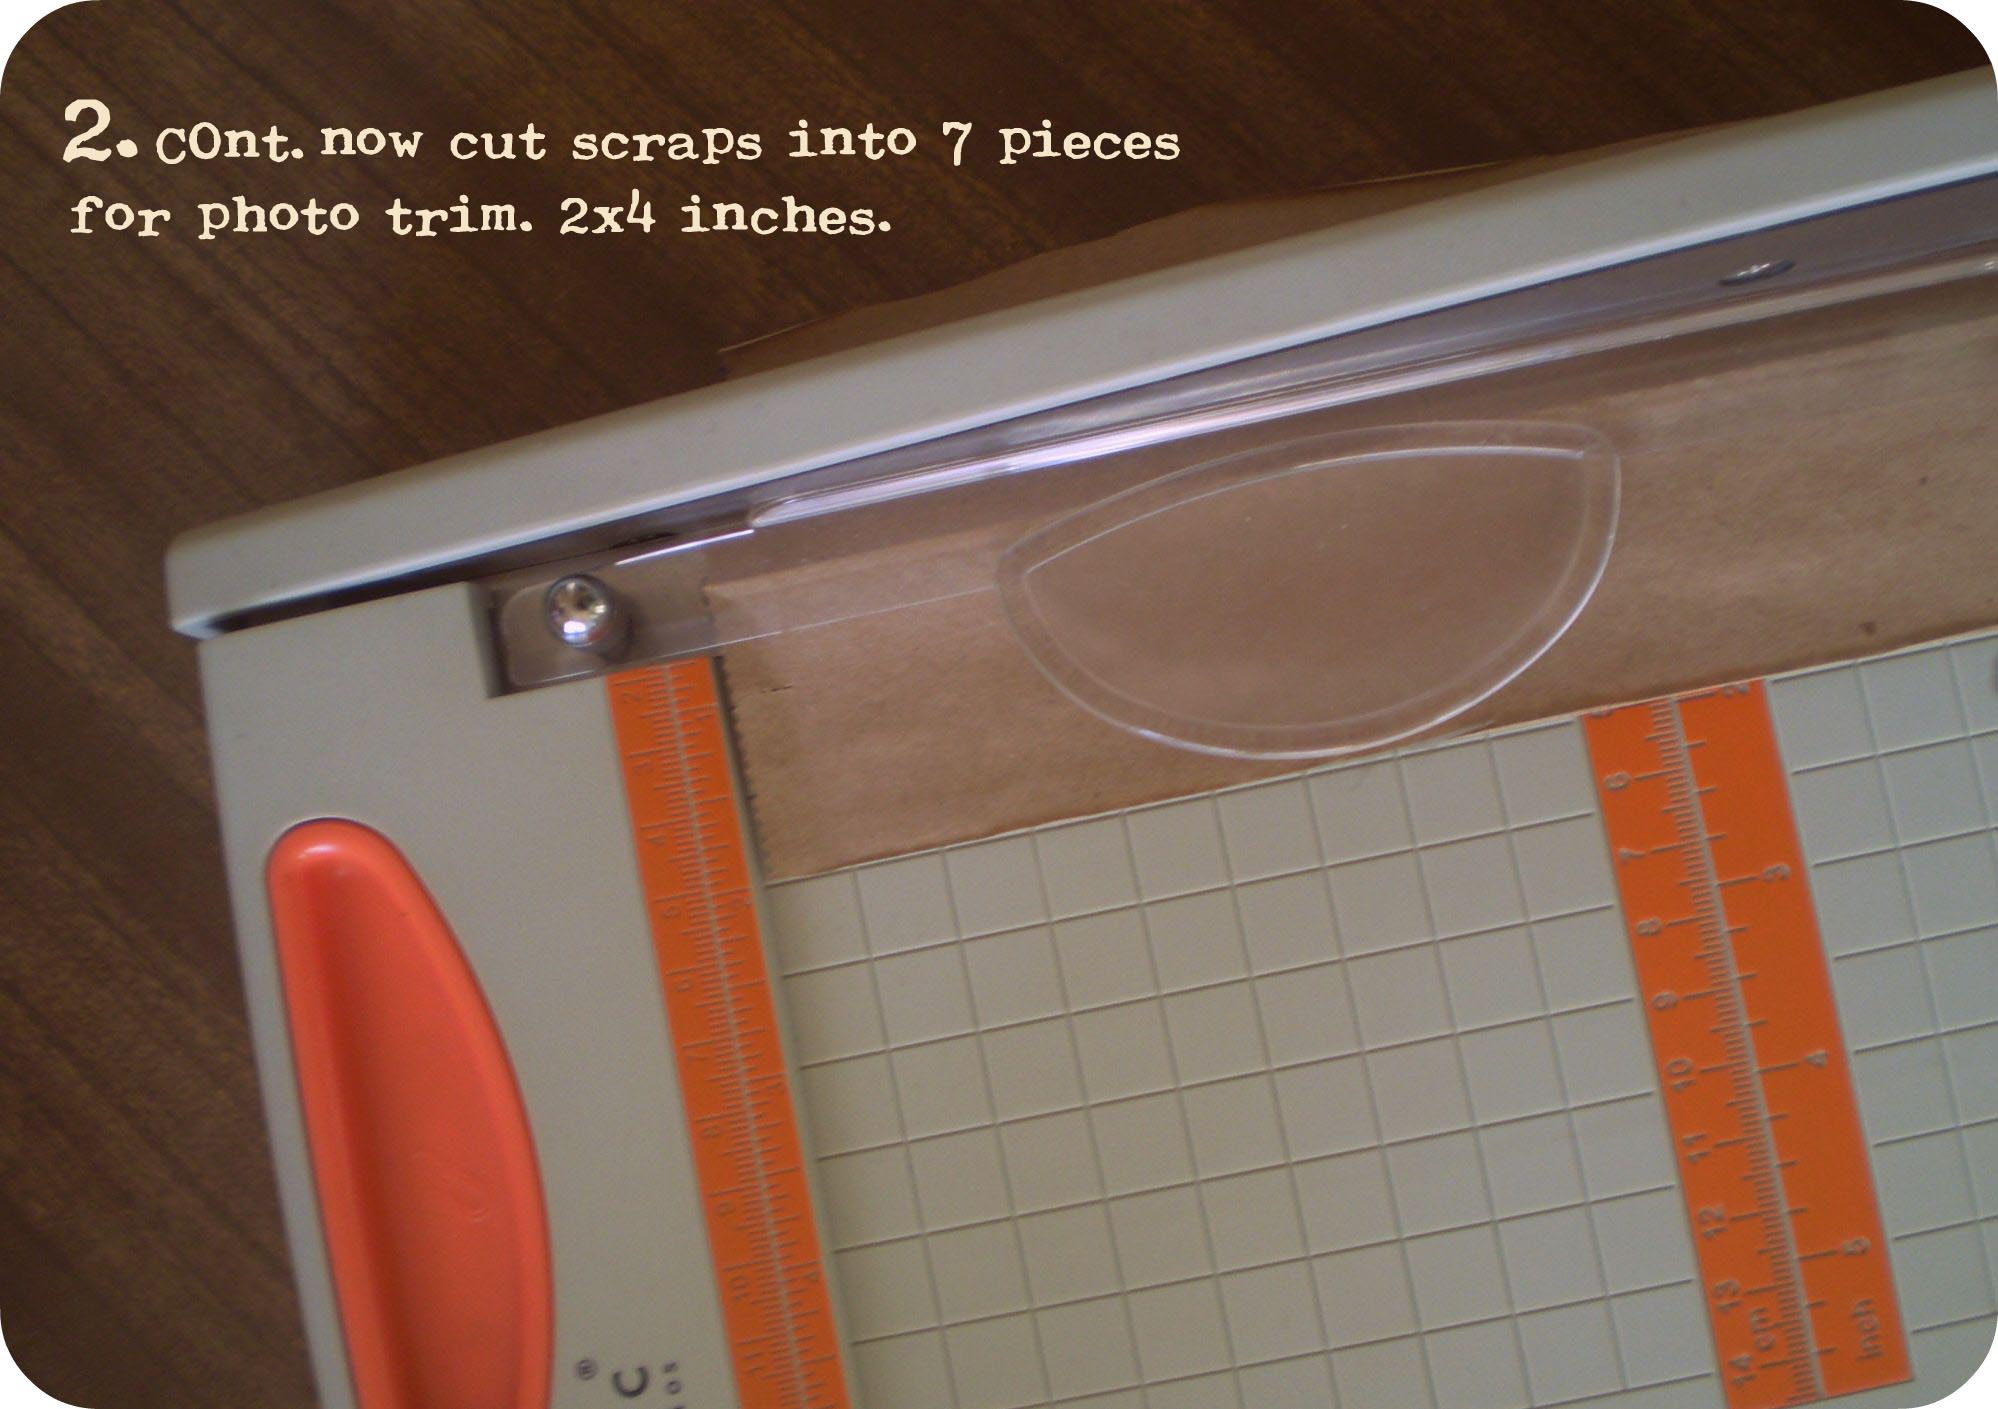
After the bag pages are cut you will need to use the scraps for trim by your photos. Use your paper trimmer to cut 7 pieces down to 2x4 inches. Don't worry about the seams on the paper bags it only lends more to the vintage look:)
Step 3: The journaling. Photoshop and handwriting instructions.
A) Photoshop step by step.
1. open< blank file>.
2. Grey box will appear. Fill title< height: 4 inches
3. Go to View on toolbar. Make sure to turn on ruler and grid by clicking on both.
4. Go to left sidebar and click on the capital T icon. Then go over to your page and create a journaling box. Leave it least a 1/2 to inch around your journaling box.
5. Pick your font and font size.
6. When finished and ready to print make sure to apply crop marks to page :)
B) Handwriting friendly reminder: If your anything like me it is difficult to write straight without lines. So, I always draw with a pencil and ruler journaling lines. I also write my journaling in pencil and then go over it with a pen after I am done.
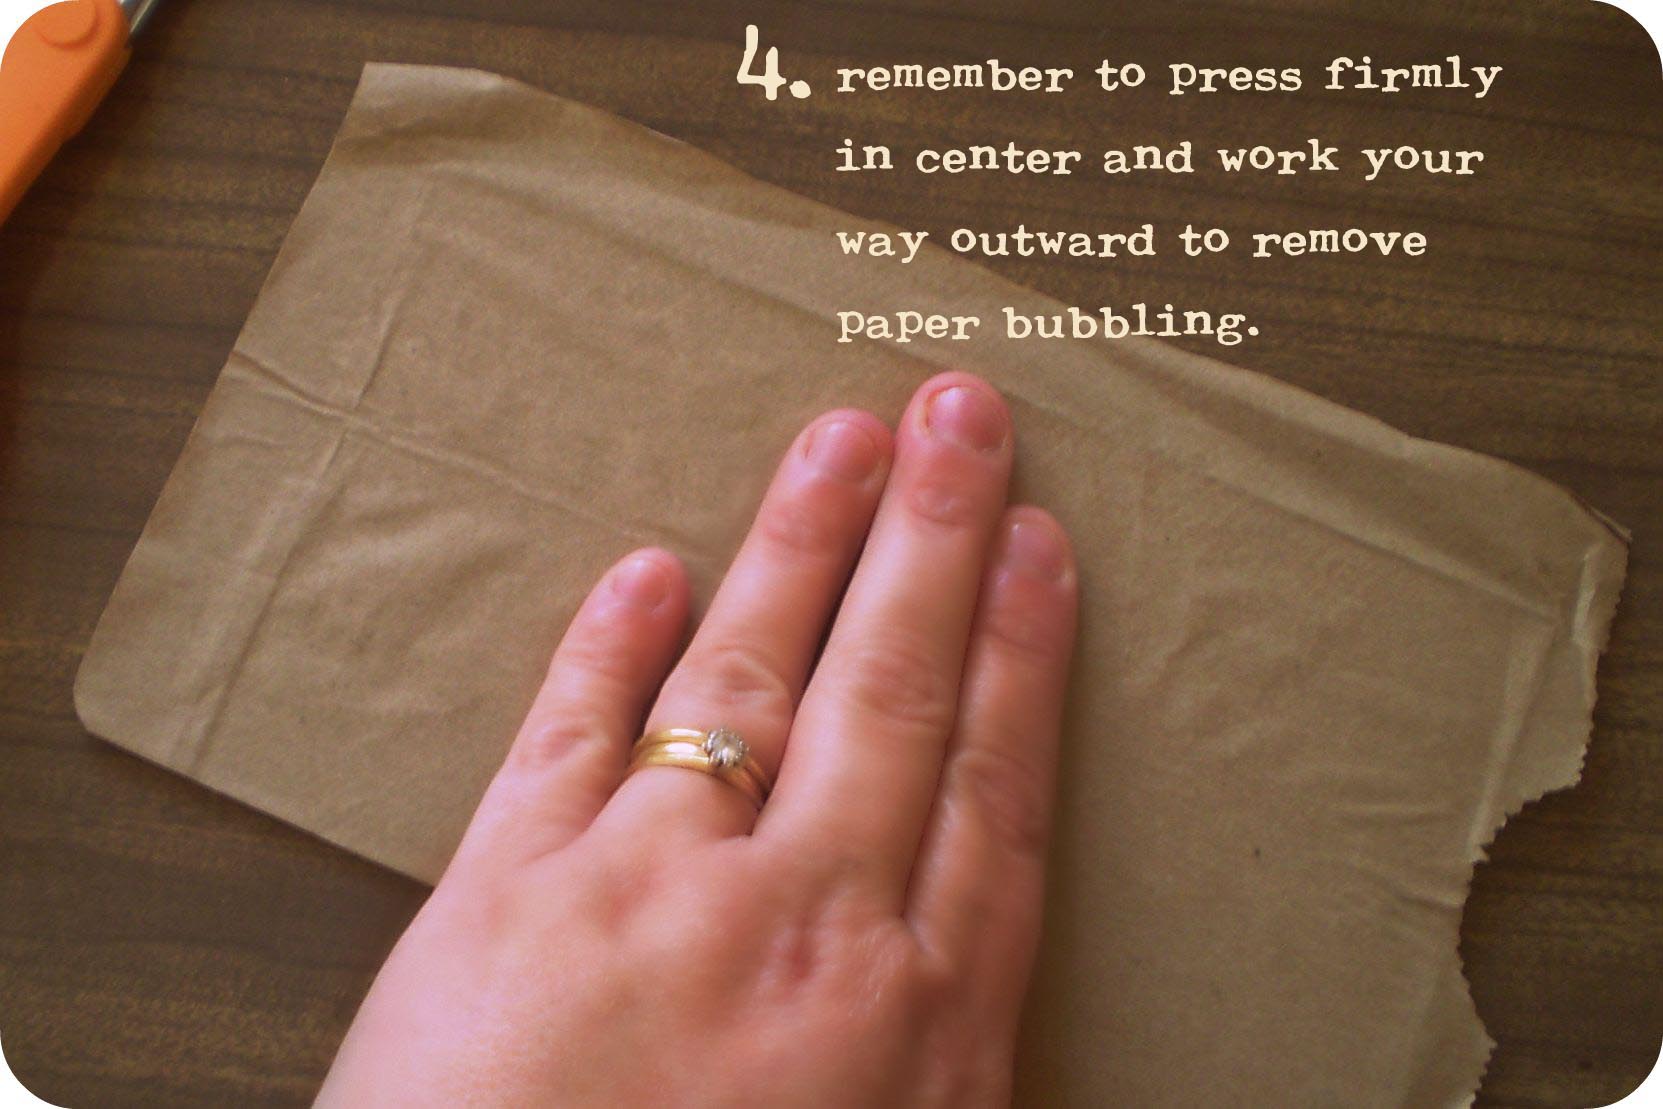
Step 4: Applying adhesive and Overlays to album pages.
Now that your journaling pages/image trim is all cut, apply adhesive sheets to the naked album pages. Position the paper bag sheet over the page. Press firmly from center outwards to make sure bubbling does not occur. If there is a little bubbling, no problem - it gives the page some imperfect-perfect character.
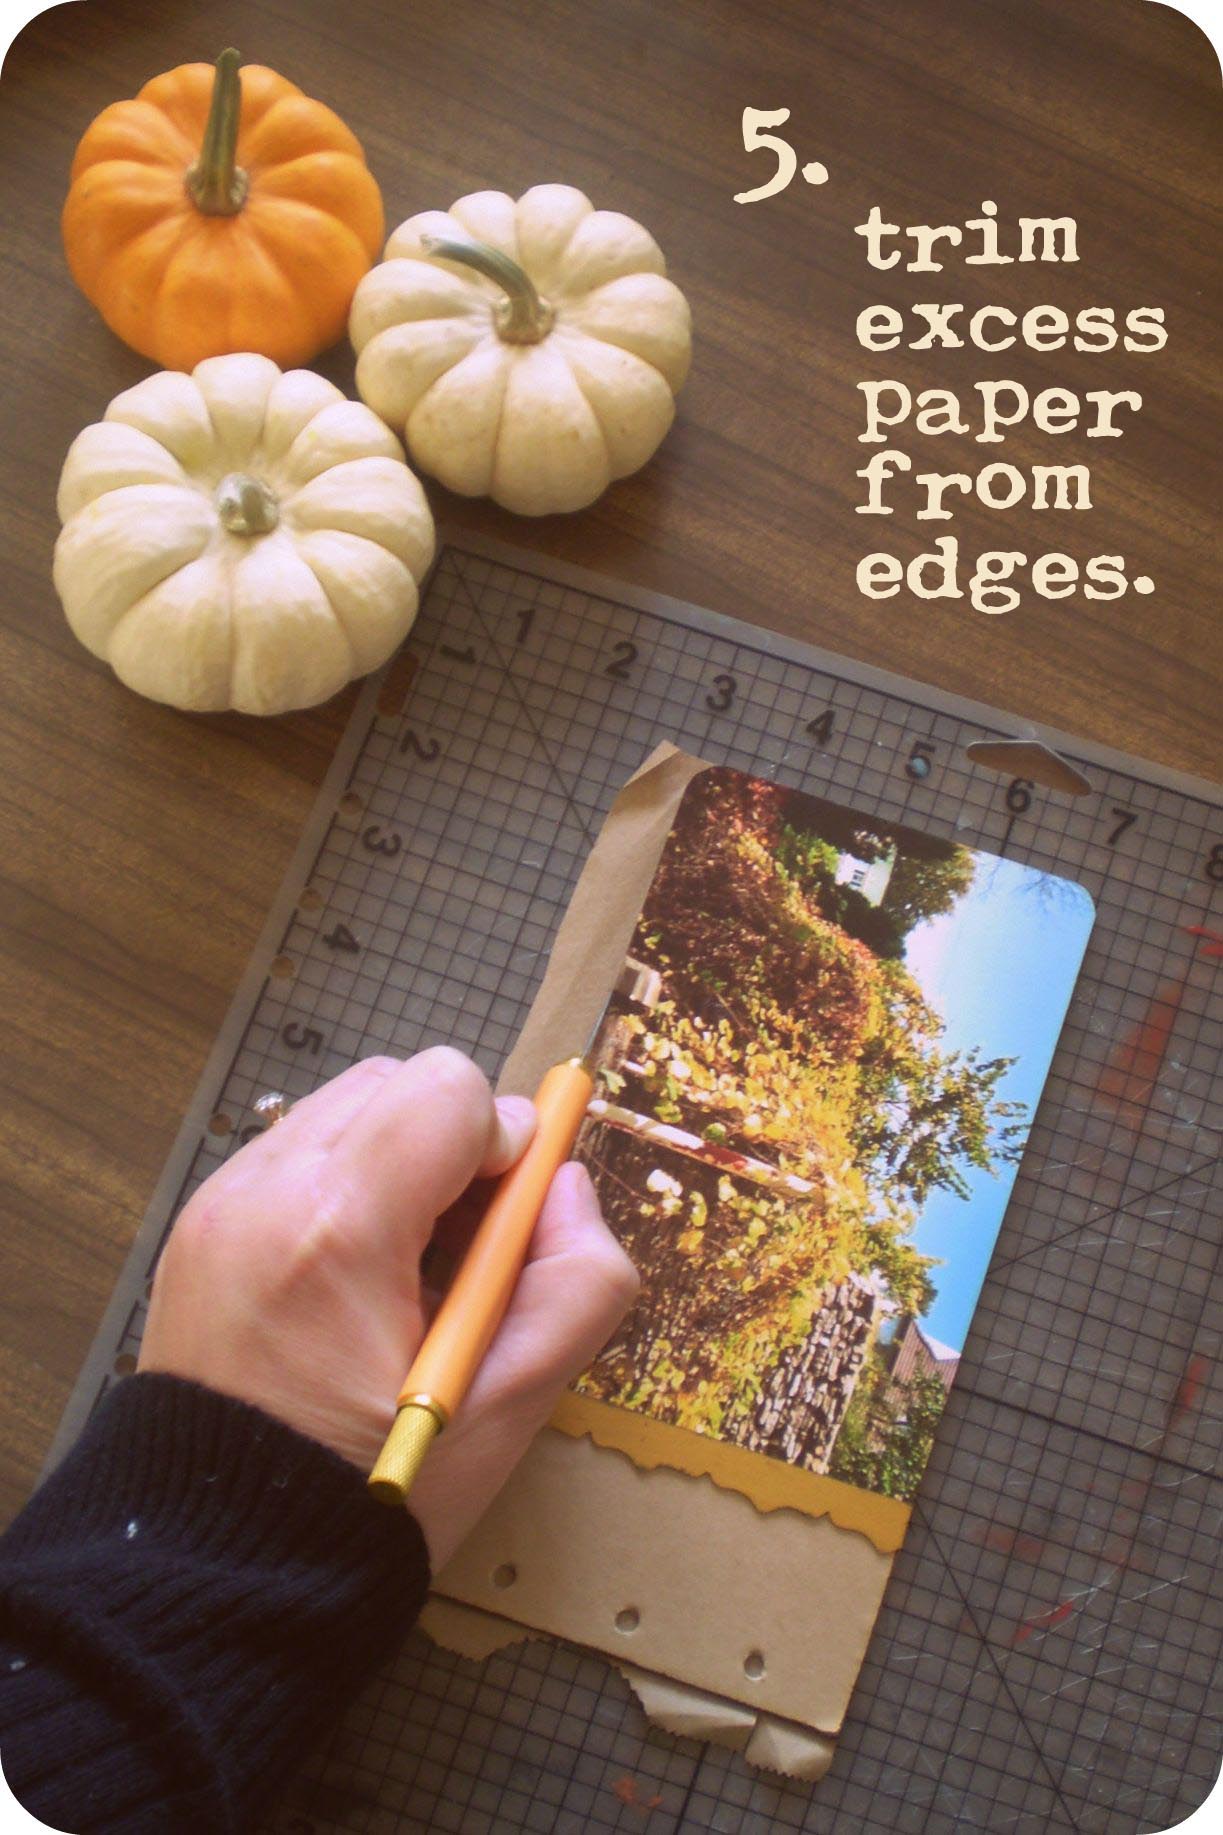
Step 5: Trimming overlay excess.
Using your exacto knife, cut away any excess paper from the edge of the pages. Leave the excess on corner edges to cut with your 1/4 corner rounder. Or if you are feeling sassy, carefully do it with your sharp exacto knife.

Step 6: Hole punching.
Once all the journaling pages are adhered use a small hole punch to remove the paper covering the binder holes of the pages.
Step 7: Repeat steps 3, 4 and 5 with completing the picture side.
Remember to place the photo on the outside edge of the chipboard page with embellishment of your choice in the middle and then paper bag trim on the inside of your page by/over binder holes.
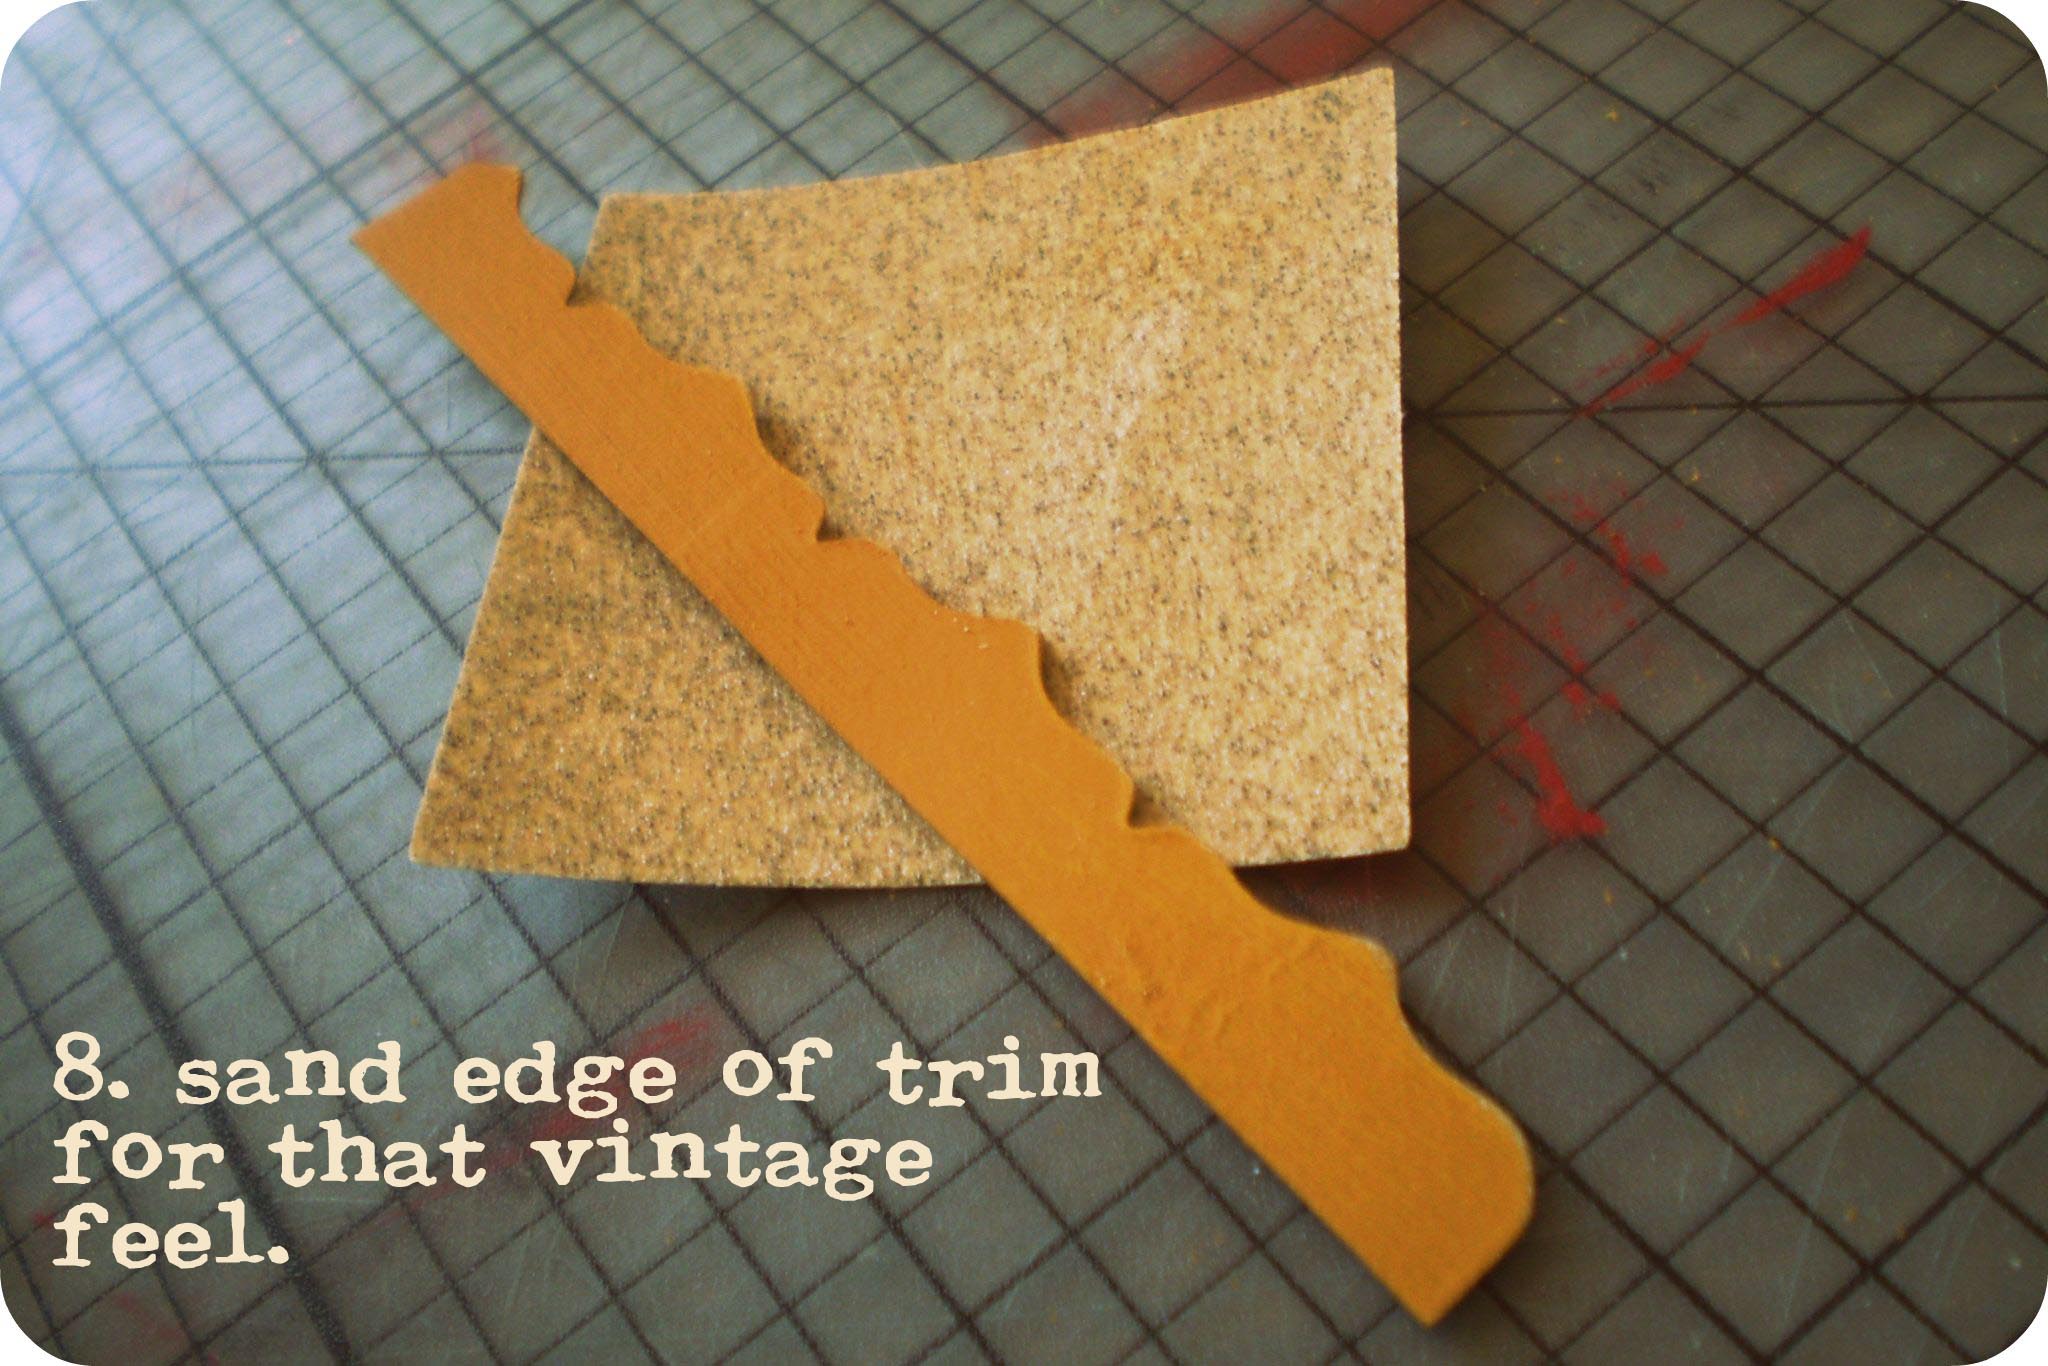
Step 8: The embellishment detail.
Trim the 7gypsies chipboard page edges to 4 inches. Paint them individually with a different choice of my five Autumn color palette. Give them few minutes to dry and then take medium grained sandpaper to the edges to give a little more vintage feel.
Here's a few other fabulous embellishment alternatives: Autumn colored Ribbon (1/4 or 1/2 inch width size works best) or ribbon works as easily and equally charming.
Once all the interior pages are done use dark brown or black ink on the page edges to give a finished but raw touch if you prefer.
Now it is time to design the cover.
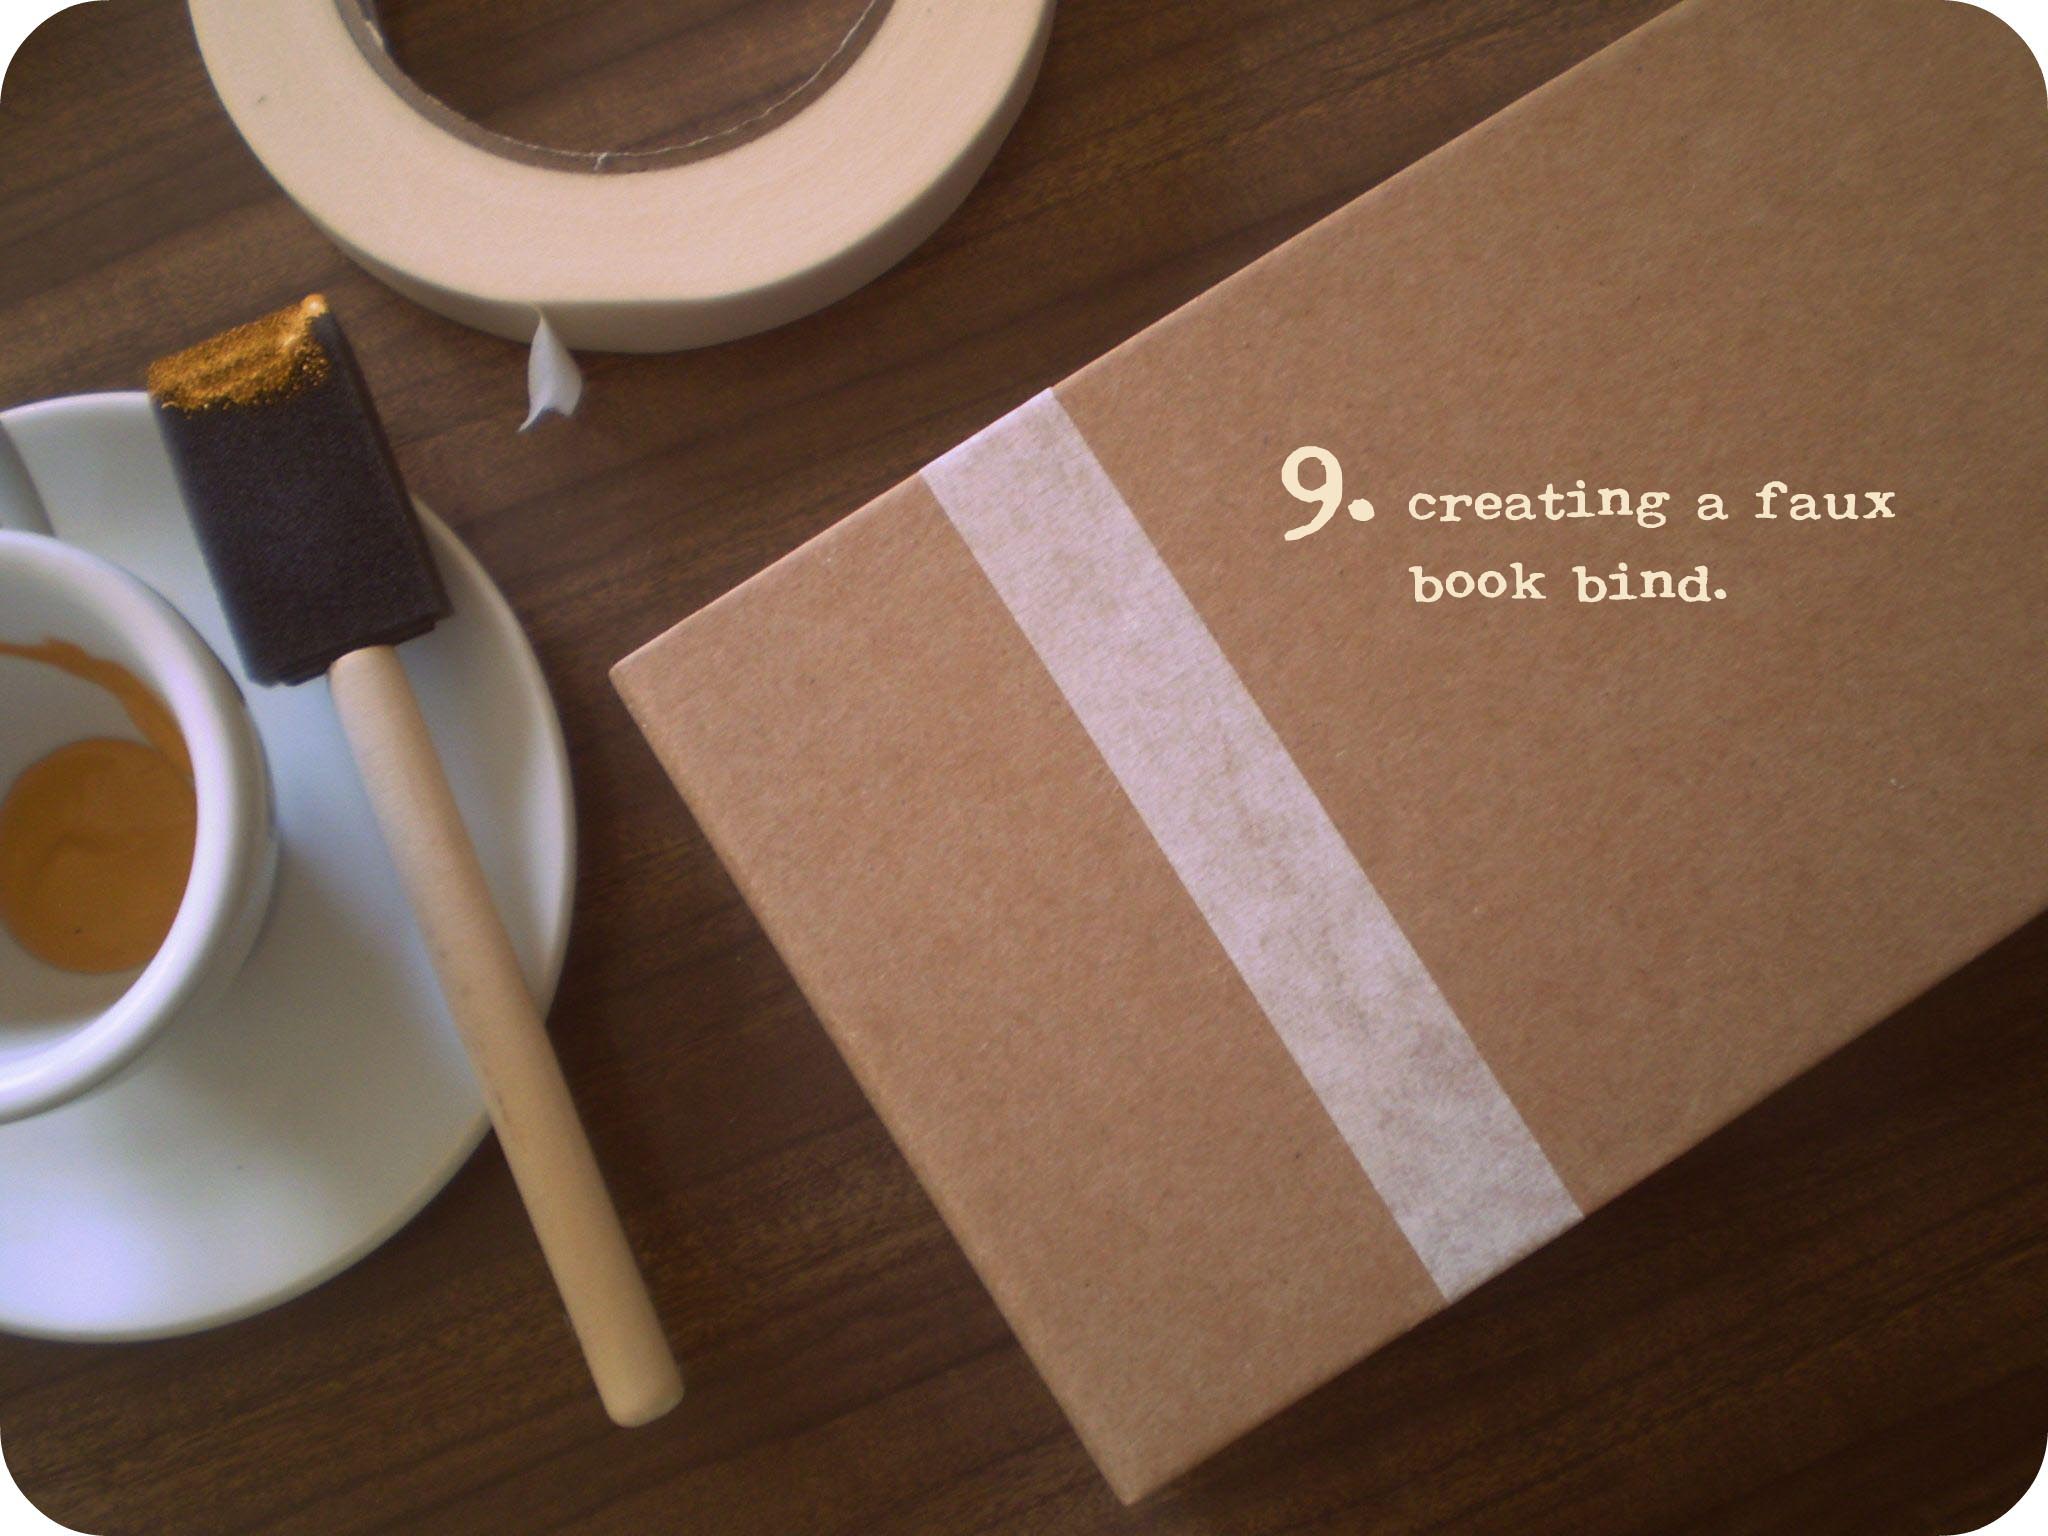
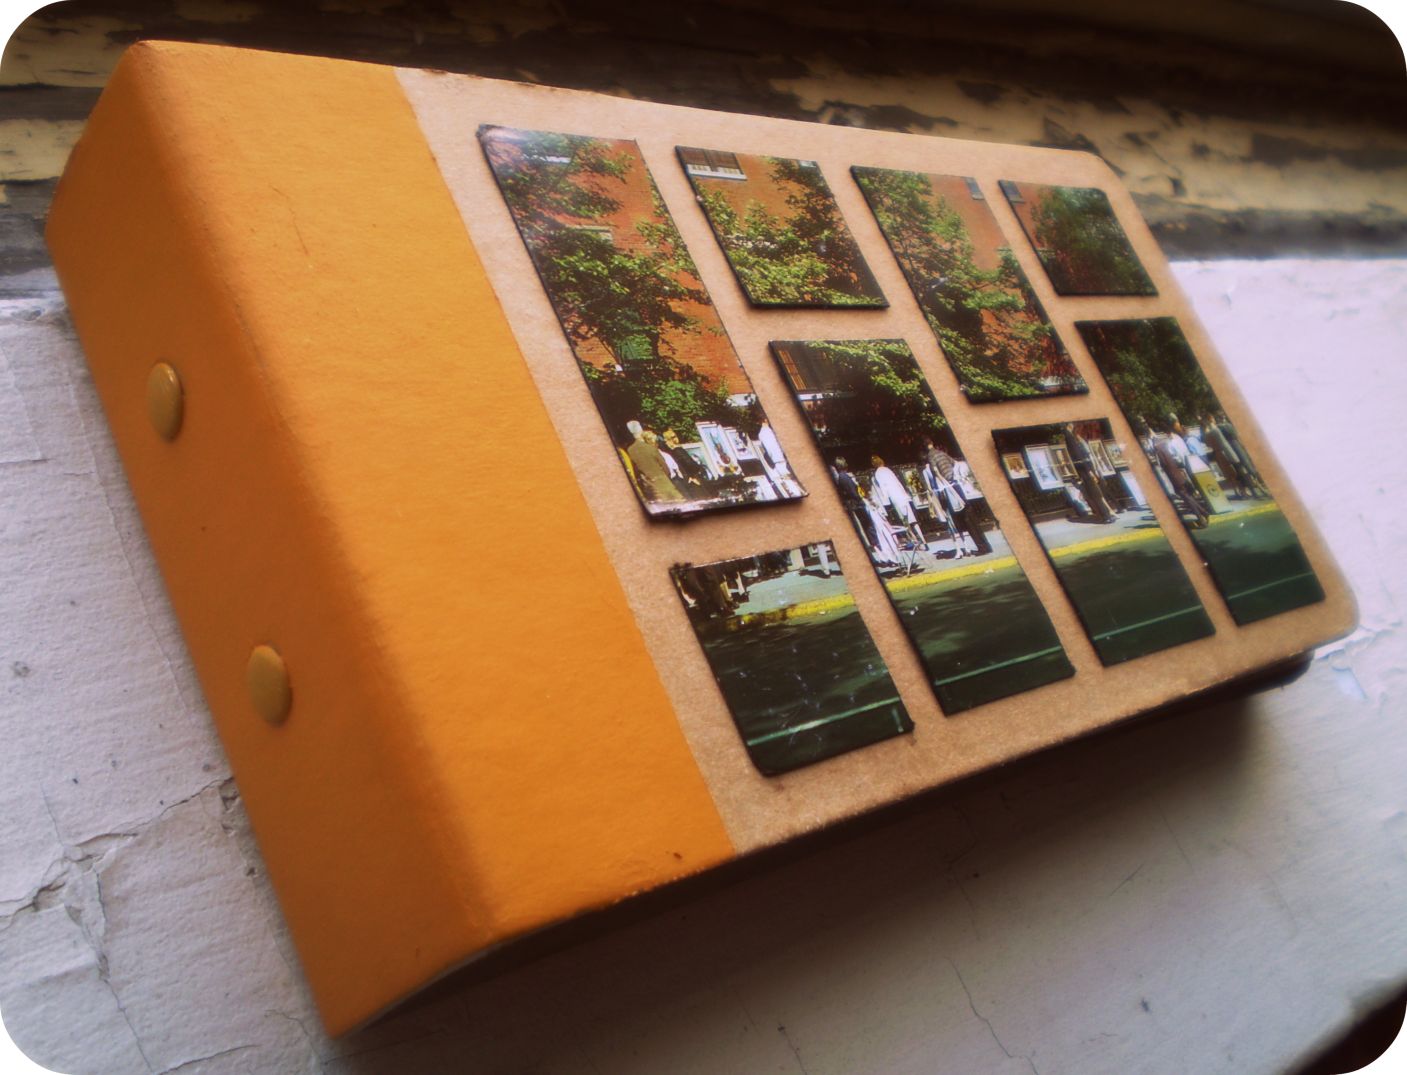
Step 9: Faux book bind.
Using masking tape, create a faux front book bind with paint. Using your ruler measure out 1 1/2 to 3/4 width and make a small line to know where you will be applying the masking tape. Once masking tape is applied make sure to press firmly over the tape so paint bleeding won't occur under the tape.
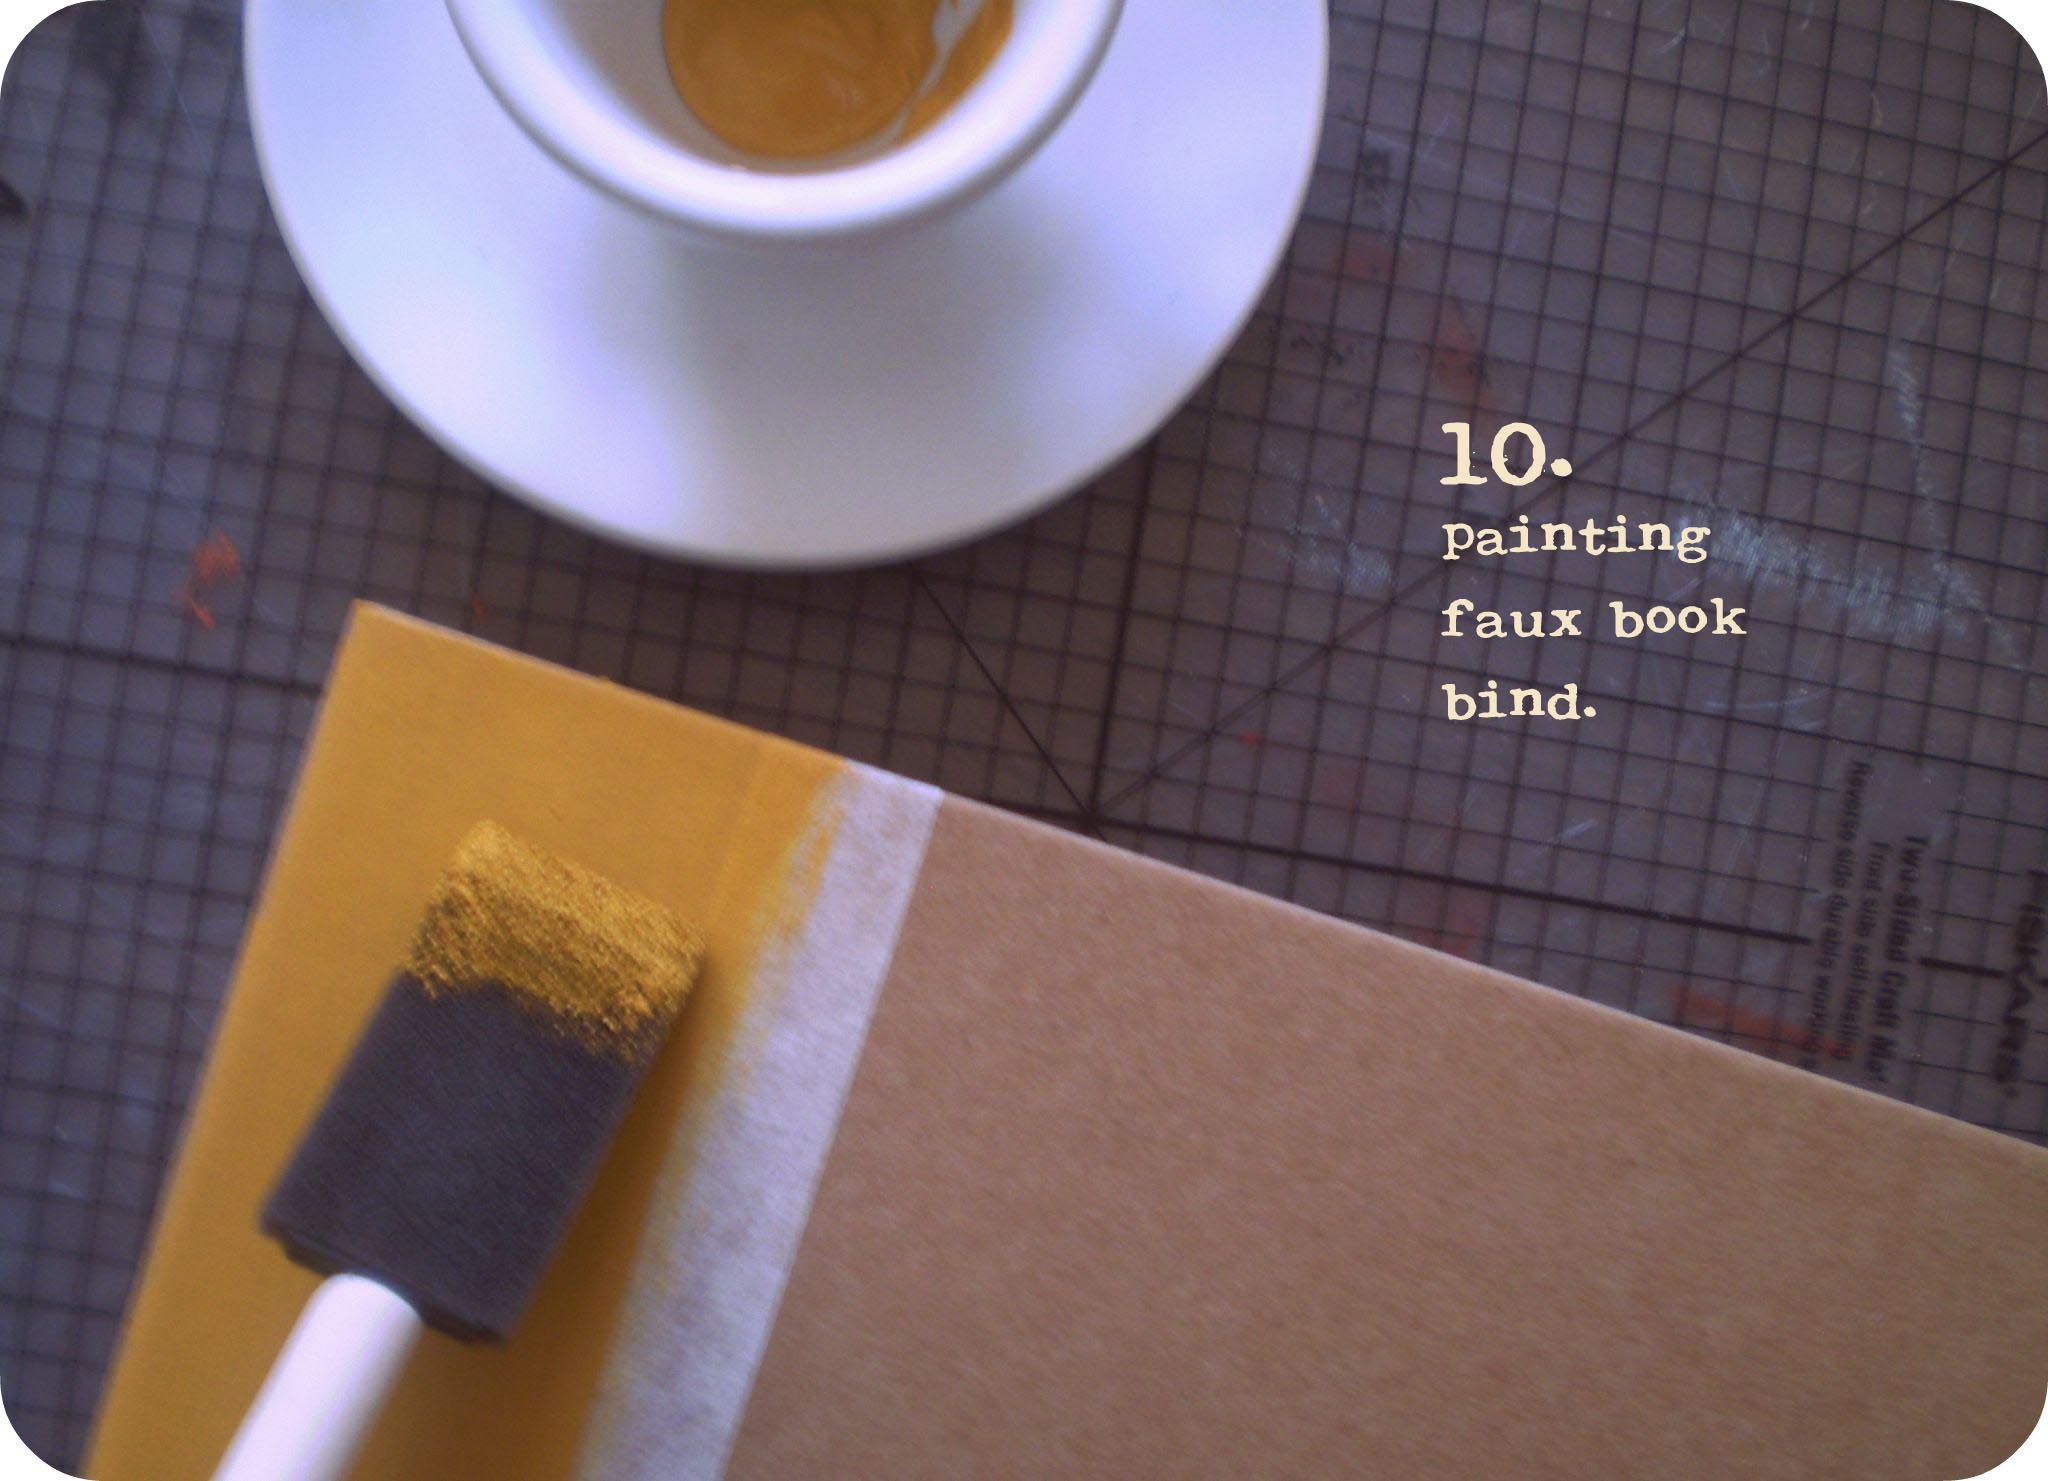
Step 10: Painting faux book bind.
Choose a paint color that will compliment your cover image. Apply your paint choice to the foam brush and start painting away. I extended the paint all the way to the back cover page, but you can choose to complete the faux book bind on the back as well as the front cover.
After the cover paint dries, you might need to apply a second coat depending on your paint thickness and also make sure to pull masking tape off slowly to prevent ripping.

Step 11: Creating a cover image.
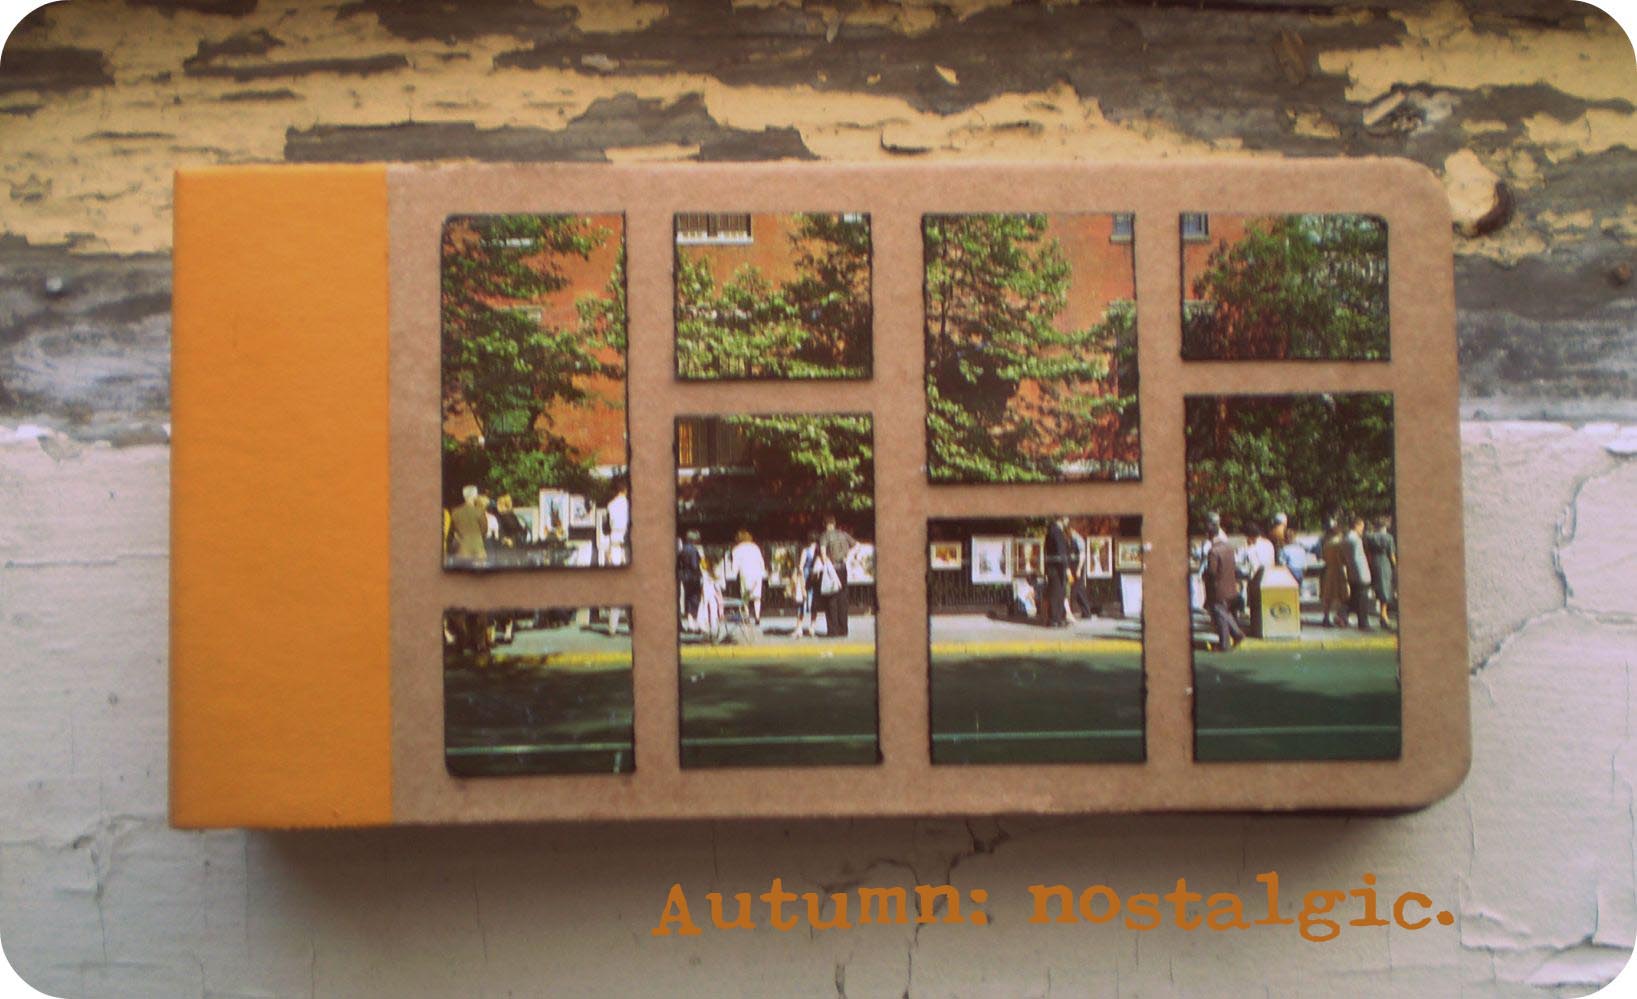
I call this style of cut the Mondrian Cut after the mid-century mod painting style. For my cover image I chose a vintage postcard of an Autumn NYC sidewalk art show. Any 4x6 Autumn image of your liking will do for the cover page.
I have also purposely chose not to title the book, maybe to entice future readers to peek inside, but you sure can title yours if you desire too.
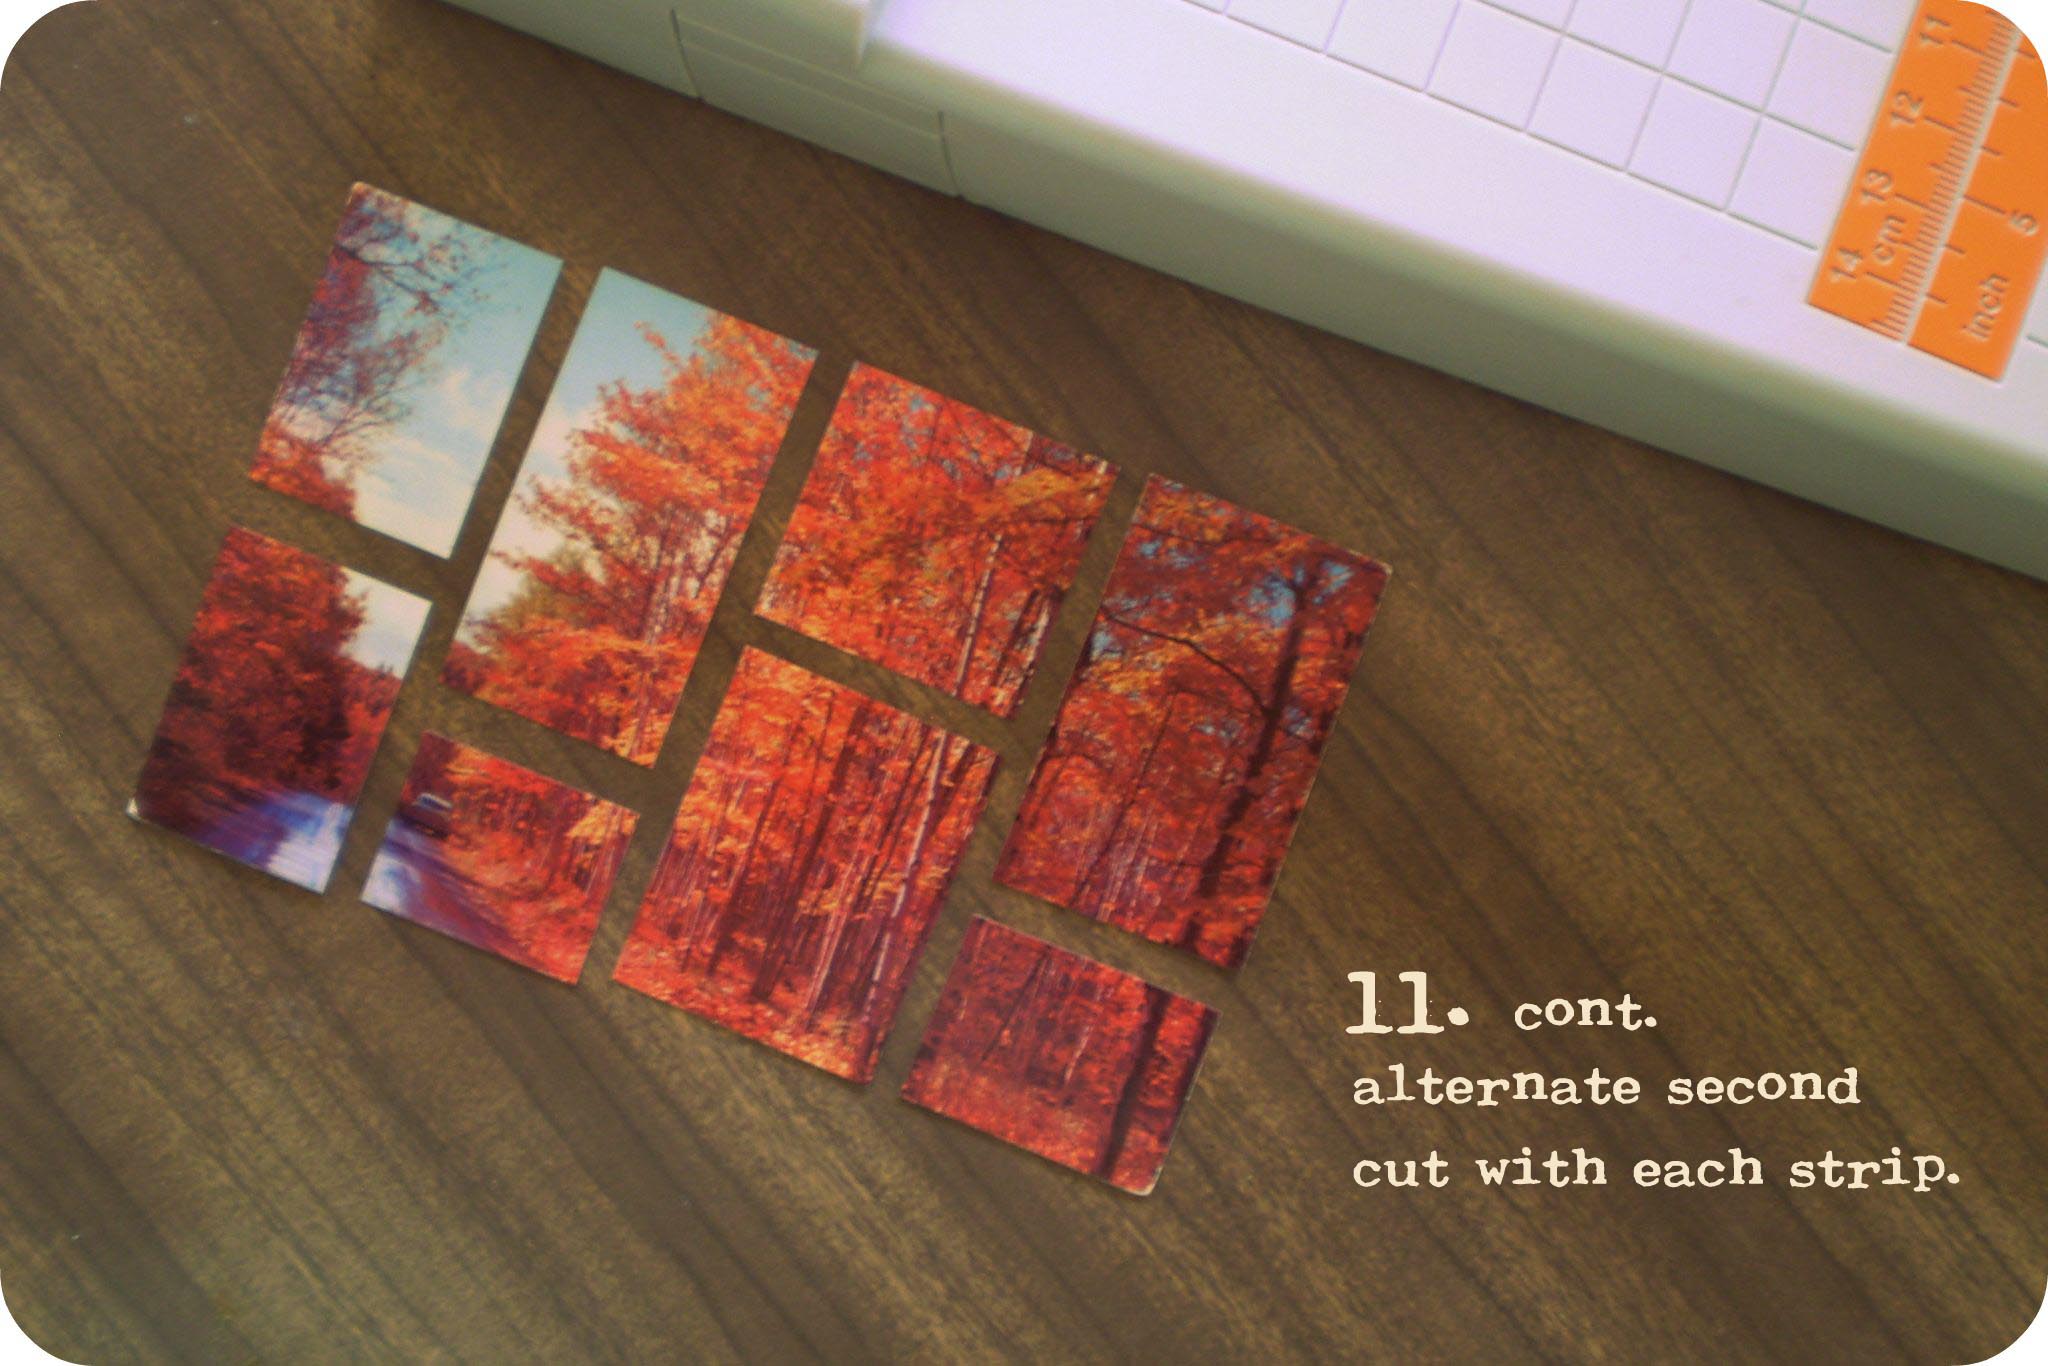
A) Place image in paper trimmer width wise. Make four cuts (try to have them slightly different sizes to give it more depth and style:).
B) Take each piece and cut again either higher or lower on strip. Alternate height of second cut with each strip.
C) Place all the pieces together like a puzzle and then apply adhesive to each to back of each individual piece and place them one by one on album cover. Remember to leave space in between images to complete that Mondrian cut look.
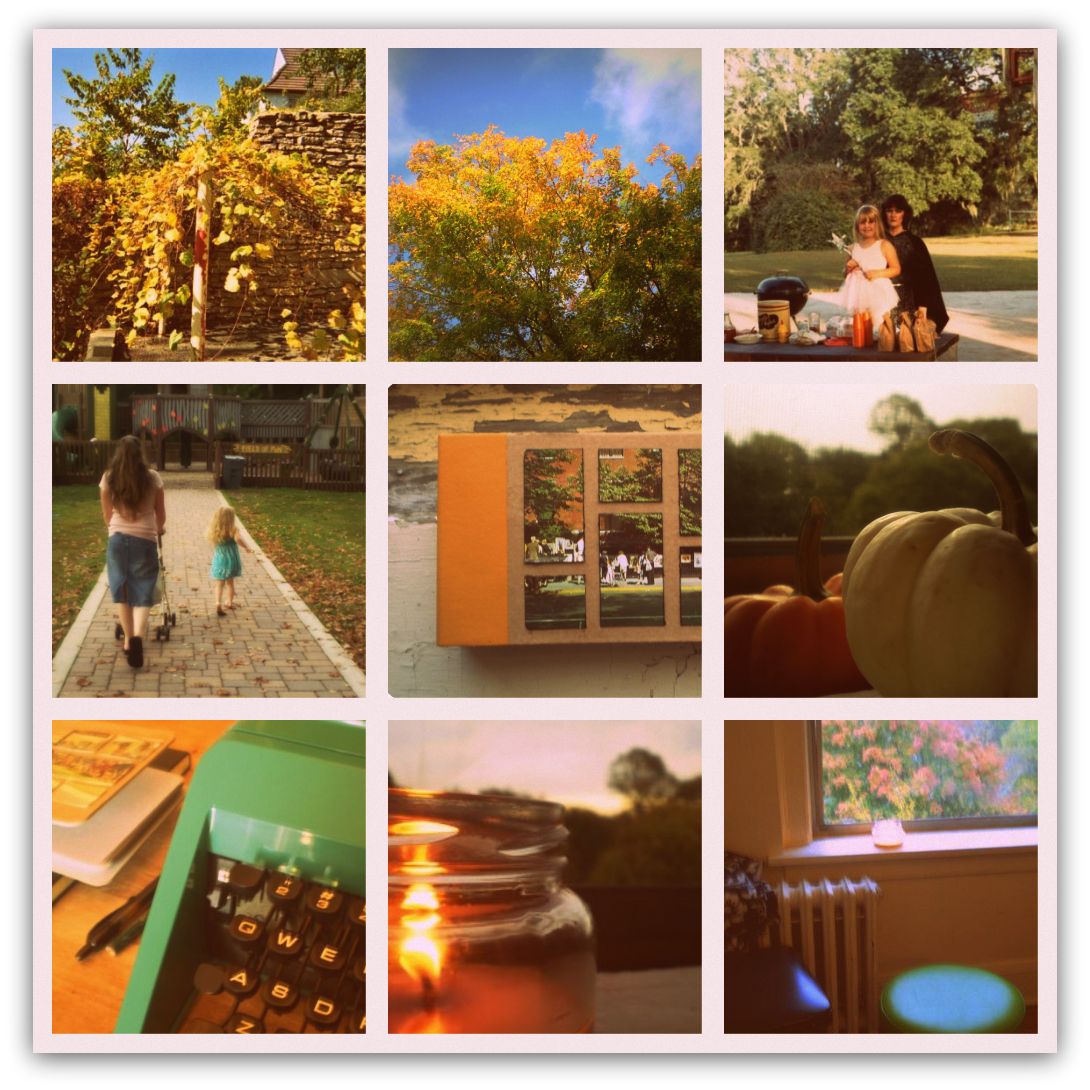
Step 12: Now take the time to enjoy your new very own Autumn: Nostalgic Album.
Show it to your family and friends. Even maybe take pictures of it and share with your blog readers if you have one. I was so inspired I taught a local workshop recently @ my favorite coffee shop to show non- scrapbookers the joy of documenting your everyday life and seasons. I even plan on doing a four season series with this simple mini book formula:)
Happy creating and Have a wonderful Autumn.

Cynthia Friese-Hassanein took up scrapbooking a little over three years ago after stumbling upon her local scrapbook store and has been in creative love ever since. Cynthia keeps it simple and is constantly trying to embrace her scrapbooking mantra of "Imperfection is creative perfection." When she is not making pages or mini books and teaching creative workshops @ her local coffee shop, she enjoys spending time with her husband Ahmed, writing, drinking obscene amounts of coffee, blogging, watching Mad Men and reading biographies. To discover more about Cynthia visit her blog or check out her Typist work @ The Creative Type Challenge Blog.


I was revisiting some of the tuesday tutorial posts today and started wondering if you might not consider bringing back this series (even if only on the 1st and third Tuesday of every months, lets say), perhaps in a modified format.
I thought that mini-albums would be ONE excellent subject for it - and I'm sure you can come up with others. There is always room for new inspiration, techniques and recent small scale products that cater specifically to working "mini", and you, Ali, could round up the big & the best names in the industry. Personally,I work hybrid, I work mini and I can always learn something new. I havent mastered "the techniques" that render a color-coordinated, well put together mini-album every time - regardless of the style. Even if this effort amounts to only a compilation of links to various blogs - it would still be a helpful feature, and easily implementable for you, if the reqtest for such were made in one of your posts.
This is just something for your consideration, I guess .... in my opinion, it's always good to hear what others 'throw into the ring" for consideration, good, bad or indifferent, we dont always think of everything ourselves. All my best to you, V.
Sign in or sign up to comment.