Project Life® 2014 | Week Twelve (Studio Calico Project Life® Kit)

Say hello to Project Life® 2014 | Week Twelve (March 17th through March 16th). You can check out all the new kits for May (called Camelot) over at Studio Calico here: Scrapbook Kit | Project Life® Kit | Card Kit.
This month I received a suggestion to play around a bit more and include a traditional layout within Project Life®.
I gladly accepted the challenge and well, I kinda did it. Ha. I think what I ended up with is close enough and I liked the end result. I decided to go with a full size photo for the background of my "layout" as you'll see below. In the past I've done 12x12 photos in Project Life but I cut them up to fit into the pockets. You can see examples of that here, here, and a tutorial on how I do it here.
Here's what I can tell you about adding in a full page that was cut up into pockets: I liked mixing it up.
It was a little weird at first. I'm so used to sticking to a very specific formula for Project Life (which has been great for me and simplified my overall process). I had to let go of the way I've been thinking about Project Life to focus more on what I was going to choose to highlight from the second part of the week.
As you'll see below I ended up adding a 6x8 divided pocket page which made a nice transition to the full 12x12 (and allowed me to include a bit more of the story + have the full page 12x12 with not a lot of extra stuff on there).
This week I used supplies from the Studio Calico Project Life kit plus a few supplies from the Project Life Add-On kits as well (those all appear on either the 6x8 insert or the 12x12 page).
I totally loved adding in that 6x8 page protector (Becky Higgins Design 4). Did you guys know they fit right into the 12x12 albums? Awesome. I did a little testing and it looks like the Simple Stories 6x8 page protectors also fit into 12x12 albums.

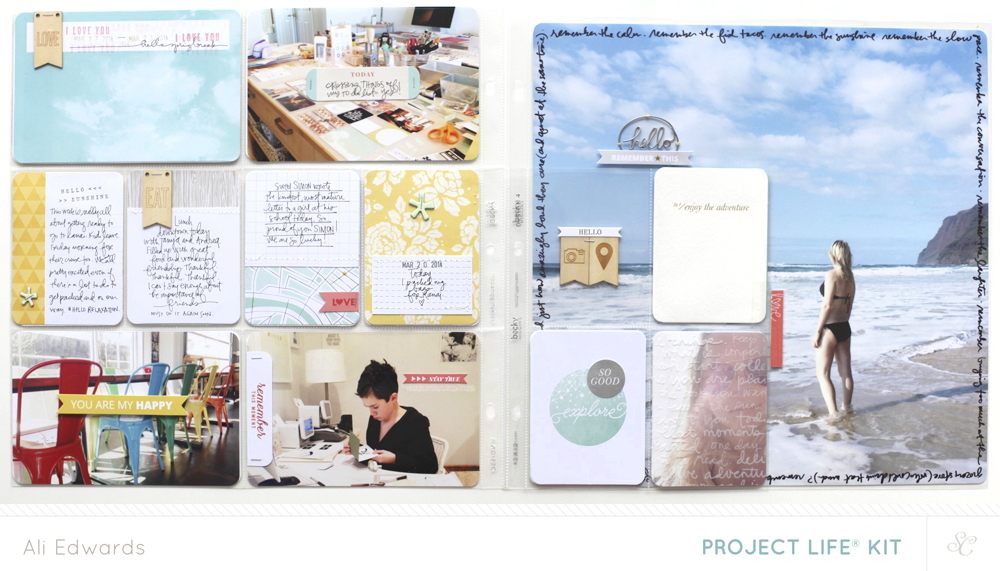
Yellow and teal = happy. I really liked those wood veneer banners.
I did some repeated stamping for the date card. To do this you simply ink-up your stamp, stamp once for the full effect and then stamp multiple times around it (the ink will be less and less each time you stamp).

This week I also cut up some of the 3x4 cards to give myself more white areas for adding my stories. Most of those were stitched on with my sewing machine.
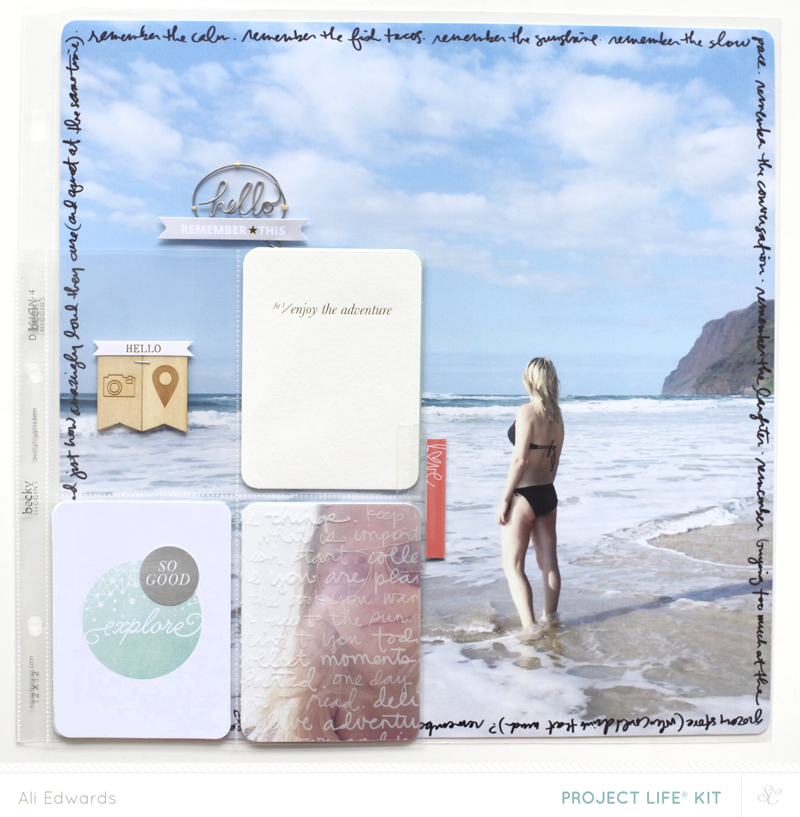
Here you can see the 6x8 page protector laying on top of the 12x12 photo as it appears in my album.
That "enjoy the adventure" card is one of those that I almost wanted to just frame instead of use. I love gold foil and I love cream cardstock. I decided to use it but not add anything to it and just let it exist on it's own merit.

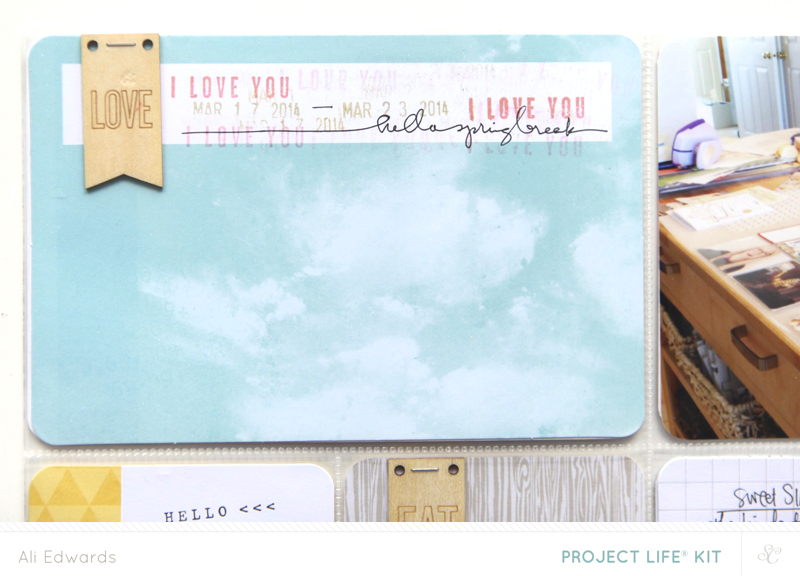
In the top left pocket I used one of the printed banners to hold two wood veneer banners together. On the back of those I used the alphabet rub ons to add "a & a" and "2014" directly to the wood veneer (see the image below). I also added another printed banner to match the one on the other side.
Including in one of the add-on kits this month is the white printed transparency that I added to the photo of myself on the bottom.
On the back I included a photo, a sentiment card and a card with space for journaling. In the plastic tab along the edge I added one of the label stickers from the Cosmo Cricket which is also included in an Add-On Project Life kit (Lancelot) this month. You can grab them individually here.

I used my Epson R2000 printer to print out this photo here at home. On top of the photo I added a "hello" metal speech bubble that's included with the Arthur Add-On Kit. I actually hand-stitched that in place with yellow embroidery floss.
Writing around the edge of the photo made it feel more like a layout and less like a big photo added in a pocket.
I plan to do another layout/full page photo on the back of this for the beginning of Week Thirteen.
AE IDEAS/ACTION ITEMS
- What can you try this week that's different than you normally do? Changing up my approach was good for me creatively.
- Mix & match page sizes. I loved adding in that 6x8 page protector this week. If you already have some 6x8 page protectors at home and the holes don't match up you could always punch new holes using a Crop-A-Dile or other hole punch.
- Add embellishments to a pocket that are smaller than the pocket size to give you a transparent view through to the next page. I did that with the wood veneer flags and stapled them in place in the pocket.
- Get out your pens (I used a Slick Writer here) and write around the outside edge of your photo.
SUPPLIES | 2014 | WEEK TWELVE
Click on the images to link to the products.
  |
Project Life® is a product and a system and a lifestyle created by Becky Higgins. It can be anything you want it to be. The core pieces used in my album are available here. If you live outside the US check Becky’s site for more information on sources. View all my posts about Project Life® here.


Love this spread! The big photo is amazing, and I like how you rounded the corners on it too.
Sign in or sign up to comment.
I love everything about this spread... Your big photo is very impressive and I love the see through pocket in the 6x8 sleeve. The colour combo looks great (yellow makes me happy!) and all the little "extras" add the perfect finishing touch. Another inspiring spread, as always!
Sign in or sign up to comment.
This spread is awesome! Thanks so much for the in depth insight about what went into putting it all together.
Sign in or sign up to comment.
Very neat layout. I really like that concept of the 12x12 photo for the layout. That kit looks real cool. I enjoyed reading how you were challenged with your creativity. Thanks for writing about it, I found it inspiring. Michelle t
Sign in or sign up to comment.
What kind of paper did you print the photo on?
LOVE LOVE LOVE This!
Yes I would like to know as well!!! What kind of 12x12 paper did you use?!!!
the 12 x 12 photo?
Sign in or sign up to comment.
Wow, this is amazing! Love your work and the inspiration you continually provide! LOve it.
Sign in or sign up to comment.
Another great page, and especially liked the action items, thanks!
Sign in or sign up to comment.
Absolutely love this!! Great additions and I also enjoy doing 12x12 spreads with the pocket pages/PL pages. So fun to mix in within the album. Thanks for sharing.
Sign in or sign up to comment.
I am in love with this. Thank you for bringing in the traditional layout to Project life. And what a beautiful photo to do it with! Really, someone should nominate you for those magazines that do the spread, "At this age..."you do justice for growing "old" gracefully and you are so real. Thank you for being such a positive influence and keeping it real.
Sign in or sign up to comment.
How did you print white on transparency/vellum? I don't get "white" print unless I knock it out of something else.
It's a product that was included in one of the kits. With at-home printers you can't print white ink but printing presses/off-set presses (I think they are called that) can.
Sign in or sign up to comment.
Thank you for posting this. It addressed something I had struggled with all weekend, how to incorporate a 12x12 page into PL (especially when it doesn't flow chronologically). I'm taking your Hello Story class and I want to incorporate those layouts into my current PL. Thanks for this great idea. Your new ideas are always so awesome.
Sign in or sign up to comment.
Great spread! And I hadn't even thought to try the Simple Stories 6x8 protectors in a PL album... awesome, I have a bunch!
Sign in or sign up to comment.
Thanks for sharing this. As much as I really liked doing Project Life in 2013, it took up so much of my limited scrapbooking time that there was not as much left for the more traditional scrapbooking I still enjoy. So I've been working on how to do a blend of the two...and this was a helpful link. =)
Sign in or sign up to comment.
Hi Ali!
Love that you challenged yourself! This is awesome! I think that is such a great photo of your spring break vacation and kudos for adding one that you will probably remember forever. Love how you made this simple but still embellished it in such a lovely way too!
Sign in or sign up to comment.
[…] last month when I shared Week Twelve that included a full-page 12 inch x 12 inch photo? Here’s the companion to that page that […]
Sign in or sign up to comment.
This is really inspiring. The biggest challenge for me about PL is feeling like I am railroaded by my photos and don't have room to get the stories in there. Then the pages are not as satisfying. Love al all the layers in there and pushing the pocket boundaries a little to keep it real! Thanks for sharing.
Sign in or sign up to comment.