December Daily® 2023 | Plan + Play with Linda 04

Hi everyone! It’s Linda and I’m back again for the fourth and final segment of the Plan & Play December Daily series. Today we are going to be talking about albums! Whether you already have an album selected or you’re still on the fence, today’s post will hopefully give you some ideas to decide which album size is best for you + adapt the products/projects to the size and style you are working with.
ALBUM SIZES
There are lots of album sizes that you can use for December Daily, really there is no wrong way to do this project! In the past I have done: 4 x 5.5 (vertical), 4 x 6 (horizontal), 6 x 8, 10 x 8, 7 x 7 photo book, a DIY cover that was roughly 5 x 8 and included the project in my 12 x 12 project life album.
So whether you have already selected on a size or are still deciding, it’s important to consider how this project adapts to the album you are using.
In the video above, I talk you through the various sizes I have done and considerations for each. Here are some things to consider if you’re still undecided:
- (01) How much time do I have to devote to this project? Larger albums take more time. If you have limited time, you might want to consider using a smaller album.
- (02) Do I like to include multiple photos per day? The super small albums lend themselves well to one photo per day. If you don’t think you could limit yourself to only one or a few photos per day, you might want to consider using a larger album.
- (03) Do I want to use a lot of products? Smaller albums just hold less stuff. So if you want to use a lot of products, you might want to consider using a larger album.
- (04) Do I prefer vertical or horizontal photos? If you prefer taking photos in one orientation rather than the other you might want to consider using an album that is also that orientation so you can easily print full page photos to add into your album.
- (05) How large can I print photos easily? If you print at home and are limited to a specific size print, you might want to keep your album under that size so that you can easily complete this project.
- (06) Where will I store my album once it’s completed? If you have limited storage space, you might want to consider smaller albums. Alternatively, if you plan to keep your albums lined up on a shelf, make sure you’re selecting an album size that is conducive to that.
- (07) How do I feel about page protectors? Divided page protectors are great for many reasons, but there are also lots of benefits of not using page protectors. If you want to use page protectors for most of your pages you will likely want to select a size that has a lot of page protector options. If you don’t want to use page protectors, this would be less of a concern and you could go with a non-standard size.
- (08) How much flexibility do I want? I have never used a bound book as my album base (such as a traveler’s notebook or the art journal [https://aliedwards.com/december-daily/item/floral-art-journal]), but I’ve always thought they would make a super fun album. If you want the flexibility of being able to move your pages around, this might not be for you.
- (09) Do I want to do a lot digitally? If you want to work with a lot of digital supplies, consider how you intend to put those into your album. Do you want to do a lot of hybrid spreads? Would you prefer to create your album digitally and have it printed after the month?
- (10) What inspiration am I hoping to find? If this is your first year, or if you really like to take inspiration from others literally, then you might want to do a 6x8 album as that is the most common when seeking out inspiration online. You also might want to consider 10x8 because Ali plans to use that size for her album. That said, your album should be what you want it to be, not what others are doing, so I would strongly suggest doing the size you are most drawn to regardless of what others are doing.

For this project, I plan to use the green floral 6x8 album. I created a spine label for my album by cutting out the “DEC” circle from one of the kraft envelopes that the Stories by the Month kits come in and pairing it with numbers from this set.
In addition to thinking about what size you want to work with, you might want to consider other things, such as color. Do you want all your albums to match on your shelf? Or do you want them to at least coordinate? For me, I like that they don’t match and enjoy mixing up the size each year. I am working with a 6x8 this year partially because I haven’t done that since 2019. You can see in the photo above how most of my albums look on my living room shelf.

USING THE PRODUCTS
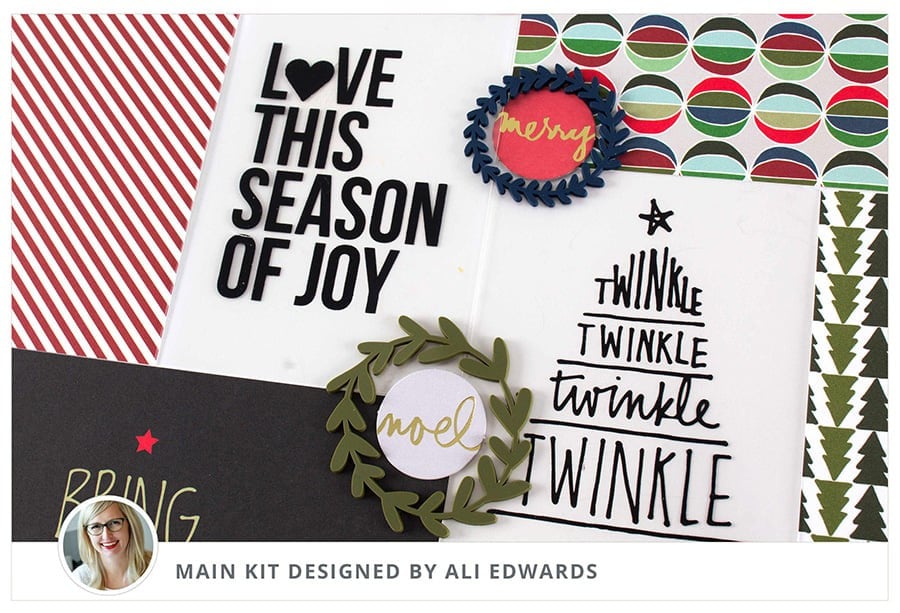
The main kit was designed so it could be adapted to various album sizes, styles, and formats. But, sometimes it’s hard to see how supplies can adapt, especially if you don’t yet have them in your hands. Here are some ideas to help you translate the products to work for your project.
Patterned Papers
A lot of patterned papers have simple patterns that can easily be cropped to any size. But what about larger patterns and prompt papers? You can often make those work in smaller sized albums as well!
In the video below I talk through some ideas for adapting the patterned papers in the main kit + add on paper pack to smaller albums.
Create a template. If you are using a smaller album, a great way to visualize how papers will fit in your album is to create a template. To do this, create a cut out in a piece of scratch paper so that your scratch paper has a hole in it to match your album page size (see photo below or video). Then lay this template over the papers to get an idea of how they will look in your album size. The template I made below is sized 4 x 5.5 inches, which matches the album size I used last year.

Consider rotating or cutting up the paper. Lots of the papers this year lend themselves well to being cut up, such as the tags and banner page in the main kit, or the circles and gifts in the paper add on pack. I loved the JOY vellum in the main kit but, because the type is so large, you really needed the full 10x8 to get a good visual of the pattern. But, that’s okay. I cut out the full letters of JOY and am able to use them in a smaller album.

Consider spanning two pages. If you love the large scale pattern on a 10x8 paper, consider cutting the paper to fit across two spreads. For example, you could turn a 10x8 paper into a 6x8 and a 4x8 for a 6x8 album.
Consider flip outs. You can also use a larger paper in your album by turning it into a flip out. In the video above a created a foundation page using the 1-5 paper that will fit in my 6x8 album. If you are using a shorter album, you can cut off some of the numbers and make your list only 1-4 or 1-3.


Consider pocket pages. Just because you are working with patterned paper, doesn’t mean that you can’t still use pocket pages. Even if you’re using a larger album, you might want to cut down papers to slip into pockets. If you are unsure how a page will look cut down, create a template like the one I shared above to match the pocket size you’re considering.
Pocket Cards
The main kit comes with an assortment of 4x6 and 3x4 cards. There are also some add-on cards. If you want to use these products, but don’t want to do divided page protectors, there are still a lot of ways you can make them work.
Cut out the cards. Last week I shared an idea for cutting out the documenting blurbs on the 4x6 card in the main kit to adhere on top of a full page photo. Lots of the cards in the kit can easily be cut out and adhered on top of photos or used as embellishments in layouts.
Create a grid. Pocket cards are really, at their most basic, just rectangles. You can create a lot of fun layouts with these cards as rectangles of patterned paper on top of your spread. I really love the nutcracker 3x4 card but am unsure if I want to use any page protectors in my album. I sketched out an idea to crop the card down to 2.25 x 3 and pair it with a photo + words + patterned paper of the same size in a grid.


Turn them into tags. You can easily turn most 3x4 cards into a tag by cutting off the top two corners at an angle, punching a hole, and adding some ribbon.
Add pockets on top of photos. Even if you don’t want to use divided page protectors on their own, you can cut one of the pockets out and adhere it on top of a full page photo or patterned paper to add your pocket card. I first saw Ali do this in a travel album and have since used the technique myself.
Embellishments & Extras
Most of the embellishments are small enough to fit into most sized albums. But, you still might need to get creative! You can use the same techniques as discussed above to adapt the embellishments to your album.

Wreaths. If your album is too small to include an entire wreath, you can purposefully have it go off the page (see template above). You can also fold it over to create a flip up with the side of the wreath you cut off (similar to my 1-5 page above).
Kraft pockets. These are super fun and small enough to fit in most sized albums as is! But, there are lots of other things you can do with them besides add them into rings! You can adhere a pocket on top of a photo or patterned paper to create an interactive page. Alternatively, you can adhere a pocket on the inside of your album cover to hold your reason why.
If you’re not going to use the pre-punched holes you can cover them with washi tape, tie ribbon through them, or add brads in the holes to adhere it to your page.


I used the JOY craft pocket to create my reason why and adhered it to the inner cover of my album using red line tape. To cover the holes, I used one of the red ribbons from this set and some metal tags from my stash (I believe they are from Tim Holtz).
I hope that this post gave some ideas for ways you can use the main kit no matter the album size or style you decide to go with. I have enjoyed hanging out with everyone on the blog and on instagram each Monday in September. Even though the plan + play series is over, I intend to continue sharing my ideas and set up for my album as we get closer to December. You can find me on instagram & youtube @lindalovescreating to see all of my updates!
I will also be over on the @decemberdaily instagram account LIVE today, September 25, at 4 PM EST to answer your questions and chat about the things we talked about in today’s post. Hope to see you there!


The template idea is awesome. I am doing a 6 x 8 album, but I have no spatial awareness of what outside of the page protectors would look like so I made the 7 x 8.25 template and then laminated it so I have a little window to use. And I use it year in and year out.
Laminating it is an awesome idea! It would be great to have a set of them for various frequently used sizes.
Sign in or sign up to comment.
This whole series of inspiration(s) has been amazing.. I know I will return to them throughout the holiday season. Thank you so much. I can't wait to see what you do this year in your December Daily album.
Thank you! I really hope they are helping you get prepped now that the holiday season is quickly approaching!
Sign in or sign up to comment.
Your planning tips have been so helpful, thank you for putting all of this great content together. I have a demanding career too, and I don't know how you do it...thanks for the inspiration!
Thank you! It's a lot of balance, ha. I'm happy to be here :)
Sign in or sign up to comment.
Thank you Linda! This has been awesome!
Thank you for having me!
Sign in or sign up to comment.
Linda, this is so great! Thank you for being such an inspiring planner and crafter (from a planner!) Thanks for this series of lessons! Loved your reason why. You will have so much fun documenting this new kind of december!
Thank you! I'm super excited too.
Sign in or sign up to comment.
I have LOVED this series of yours so very much!! I am someone who really loves planning, and organizing, so this series has been so fun for me! Ive looked forward to your posts, and Live video every Monday for the last few weeks! Thank you so much for all of the details, and hard work you put into this series, it’s been much appreciated! I’m so sad it’s over, but I will be watching your personal page to see your album progress throughout the season. Thanks again!
Thank you! I love the planning process too, but it will be fun to move into the next phase and put the project together.
Sign in or sign up to comment.
Thank you so very much, dear Linda
I can only agree to the other comments: this whole series of inspiraton is so great!
Thank you!
Sign in or sign up to comment.
This whole series has been so incredibly helpful. I didn’t know what to expect when I saw there was going to be a planning series in September, and I didn’t know what I might glean from one… I’ve watched every one throughout the weeks and they have been SO helpful! Linda has such a great way of presenting and I love all of her information. I am really sad this is the last one! A+++ work.
Thank you so much! So happy to hear your feedback. I still share planning tips over on my instagram & youtube, and these posts will still be here for reference :)
Sign in or sign up to comment.
Great tips!1
Thanks!
Sign in or sign up to comment.
Well done, Linda. Thank you for all of your fantastic ideas. I even started an idea notebook similar to yours because I loved your idea so much.
Thank you! I hope your notebook works well for you :)
Sign in or sign up to comment.
I have pored over every last one of your lessons! You put so much work into these and I totally appreciate it!! Thank you!!
Sign in or sign up to comment.