December Daily® 2023 | Story 10

Welcome to Story 10 in my 2023 December Daily® album.
Today's story is about Audrey traveling to New York this month with her friend + family. She's been sending us photos along with way and it was so fun to incorporate them into my storytelling this year. The foundation page for today is one I put together for our December Daily® Product Play workshop (that lesson includes a cut file for the 10x8 and 6x8 sizes).
Here's the video that takes you through my ideas for this one:
Today's Table Of Contents pen is the Micron:

And here's a look at the full spread.

At first I was thinking that I would leave the back of Story 09 blank but those squares presented an opportunity for me to include a bunch of the photos that Audrey has been texting. I could have saved this story for later in my album but decided, with the help of all those spaces on the back, to use it for today. I used the same layered template that I shared in the Story 09 post.

In one of the rectangles I added a bit of journaling for context about the basics of her trip.

I considered adding word phrase stickers or some embellishments to the photos but decided they were great without anything added.

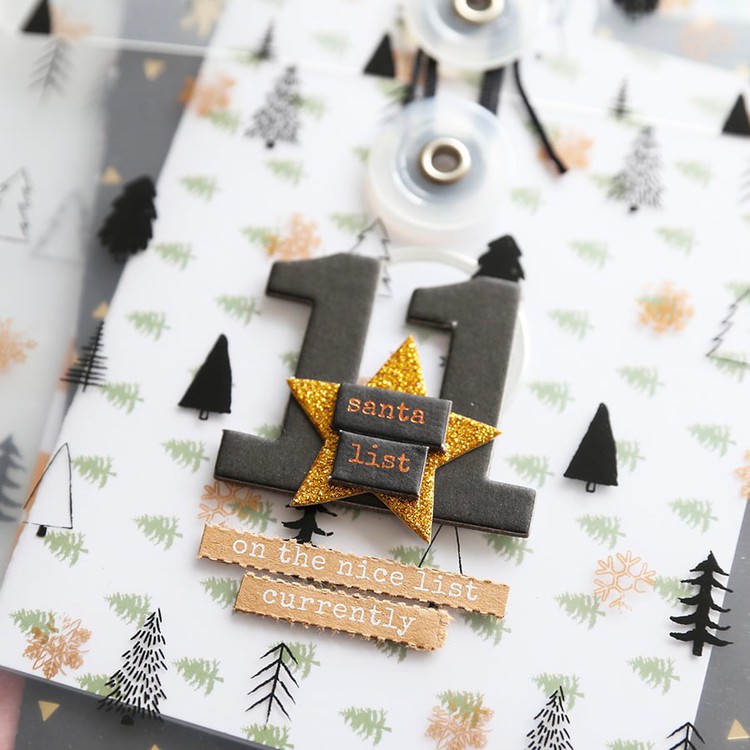
There are so many different things you could do with this triangle as your base! You might want to put a photo or memory behind each photo or count up something around your house. I loved making this when I put it together for the workshop.

Rather than using each of those circles as a home for one piece of content I decided instead to pick one of those photos that Audrey has sent and go big with it to fit the triangle shape.
This is our friend Rowan. She's one of the cool teenagers we get to have around in this season of life. She gives great hugs.
To create the flip open I cut and folded a piece of cardstock. It ended up being about 1 inch x 9 inches and then I trimmed it at the end after adhering it with red line tape.

On the underneath of the die cut triangle I ended up adding a piece of Grafix Plastic cut to the triangle shape. Doing that keeps the hanging circles on the front side of the triangle. You could also use that plastic piece as a base and add embellishments on top for the front or the back (and still end up using an enlarged photo).
I used red line tape to get all these pieces stuck together and then covered up that tape with pattern washi tape.

Along the bottom edge I used one of the labels for a NYC title using gold puffy letters and chipboard stars.
So fun!
SUPPLIES
- DD23 Canvas Circles (digital also available)
- DD23 Main Kit Pattern Paper
- DD23 Pattern Paper Pack (digital available)
- DD23 Specialty Paper Pack (digital available)
- 1.5 Inch Circle Punch
- Small Gold Eyelets
- We R Memory Keepers Hole Punch
- Crop A Dile (for setting the eyelets)
- Embroidery Floss
- Merry Little Christmas Black + White Washi Tape
- Silhouette Machine
- Gold Puffy Numbers
- Red Line Tape
- Grafix Plastic
- Other basics via my Amazon Storefront

Shop This Post


Love this! I had made the triangle as a flip up during prep but had not thought to use one big picture! Definitely lifting this idea :)
Sign in or sign up to comment.
So fun! We were in NYC last weekend. It was magic! So fun for Audrey! I bought those fabric circles and they’ve completely gone missing. Boo! I can’t find them anywhere. Love the triangle shape. I might try that!
I spent WAY TOO LONG looking for the labels for this one. HA HA HA.
Sign in or sign up to comment.
Fabulous as always!!
Sign in or sign up to comment.
Fabulous!
Sign in or sign up to comment.
Loving your pages so far and thanks for the tiny photo templates!
Sign in or sign up to comment.
did you find the source for the pink and red washi? please and thank you.
I didn't! I looked through a bunch!
Sign in or sign up to comment.
thanks for checking! I looked thru a bunch also. Did not find any.
Sign in or sign up to comment.