Studio AE Blog Hop | May | Scrapbook Layout + Process Images
Welcome Studio AE from Technique Tuesday's May Blog Hop!
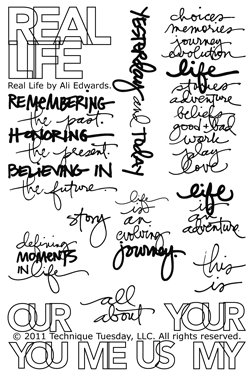
Today the Studio AE team is joining me to show some projects made with May’s stamp set “Real Life by Ali Edwards.”
The set includes 16 clear stamps with an emphasis on sentiments about real life.
Studio AE sets ship to members between the 10th and the 15th. Non-Studio AE members can also purchase the set for a limited time through Technique Tuesday's web site. Some retailers are also now offering the Studio AE stamp sets for purchase. Check with your favorite retailer for more details.
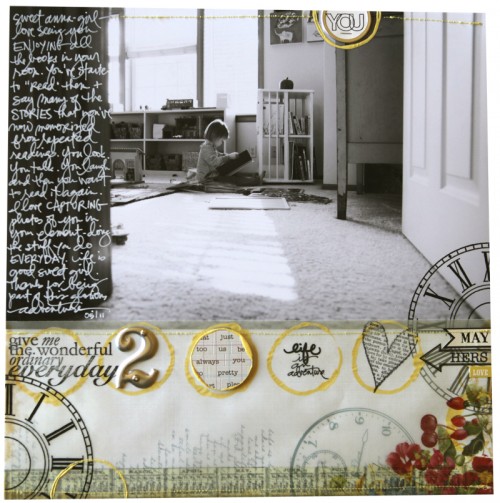
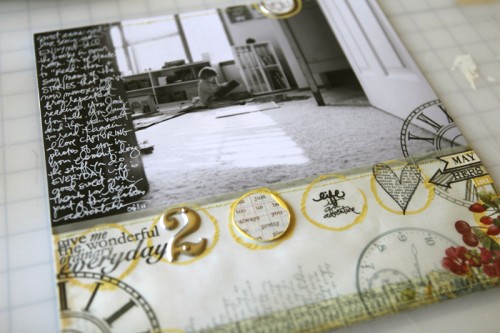
Here’s a layout I worked up with the stamp set:
A single page, 12x12 layout with an enlarged photo (12 inches x 8 inches).
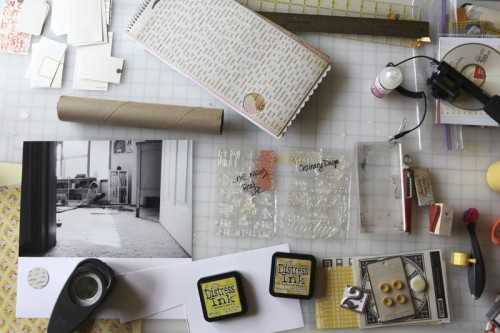
Here's a look at my process:
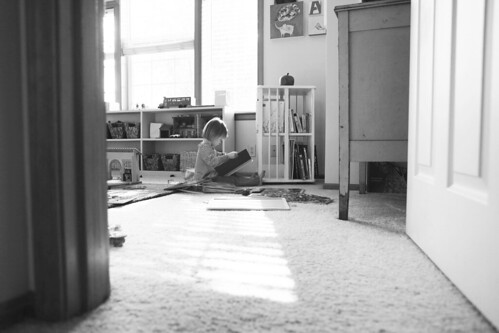
For this layout I started with a photo.
I knew I wanted to enlarge it and going for the full 12 inches was a simple solution. Photo was printed here at home on my HP Photosmart B8550 on Office Max 13x19 photo paper.
When I start a layout like this I usually grab a few supplies that I envision using - stamps, embellishments, inks. I don't always know where I'll end up and sometimes the story I want to tell evolves through the process of working with my supplies.
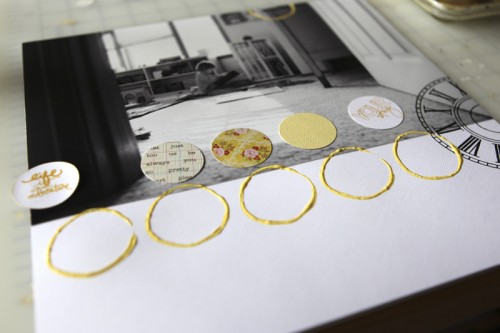
I started thinking about circles, as I often do when thinking about accents.
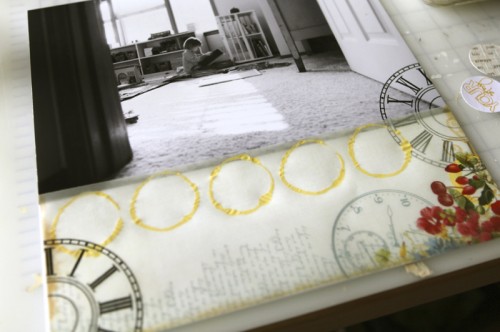
At first I was just going to do a line of punched circles. A couple pattern paper, a couple stamped, etc. I decided I needed some variety in circle size so I cut a large Jenni Bowlin clock rub on in half and added it right on top of the photo and the background cardstock.
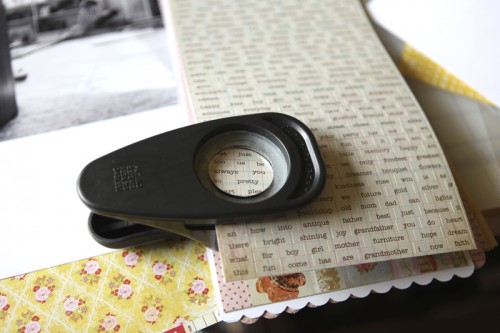
For one circle I opened up this pack of stickers from Girl's Paperie and just punched a circle right from the word sticker sheet. I know I saw someone do this somewhere but I have no idea who it was. If it was you - thanks!
But then I started thinking about texture and paint and more circles.
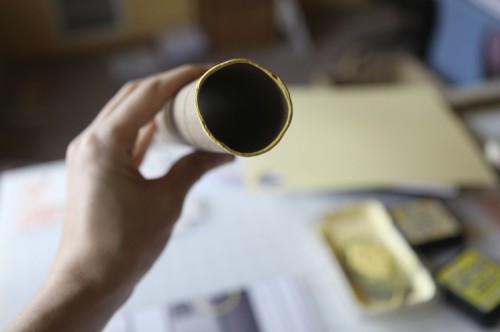
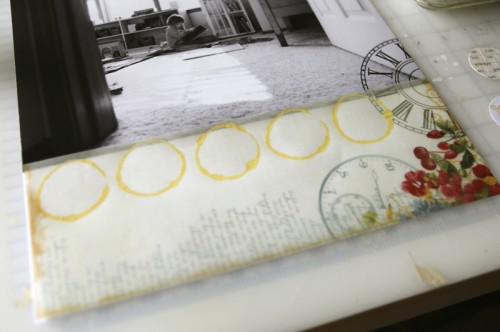
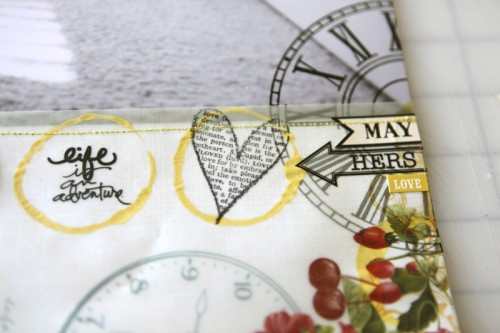
I grabbed an empty paper towel roll and some yellow paint and decided to create yellow stamped circles as homes for those other circles.
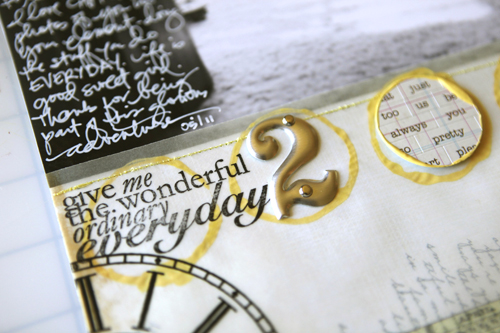
Then I decided that those paint circles would make a great adhesive for this pattern vellum I've been wanting to use.
As I was looking at the page I decided that the opposite side needed a clock too. Love cutting something like that in half and using it in more than one spot.
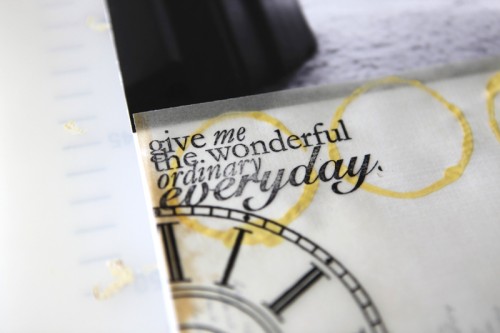
At this point I was ready to start adding some stamps and other accents to the circles. This first stamp, "give me the wonderful ordinary everyday," is part of my Ordinary Days set. For stamping on the vellum I used jet black Staz On ink.
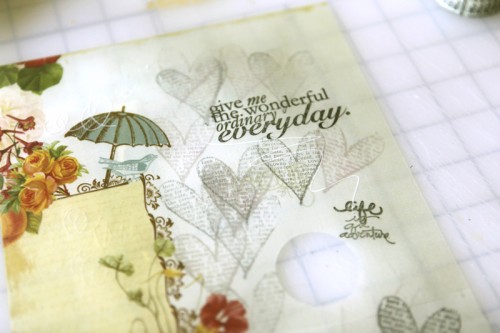
A lot of times I do a test stamp before actually adding it to my page. This time, because I was stamping on vellum, I definitely wanted to test out the stamp/ink/paper combination first.
The extra piece of vellum (left over from what I cut off to use) worked well as a test sheet.
On another circle I used a sentiment from my new Studio AE May set. I also used staz on for both that stamp and the heart from Cats Life Press in the next circle over.
Along the right edge of the page I added a Jenni Bowlin banner flag sticker, a "hers" rub on, and a word sticker from Cosmo Cricket.
You'll also notice that I added a couple lines of yellow stitching. Hooray for stitching!
A Tim Holtz Metal Number 2 was added as well as the circle I punched from the Girl's Paperie word sticker sheet (I added a yellow paint border).
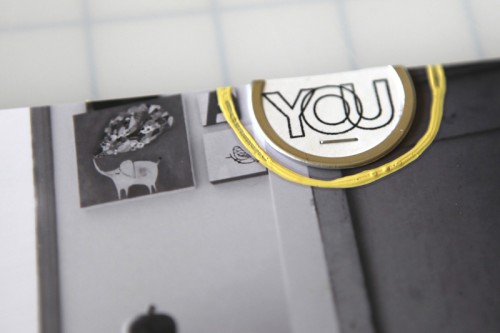
Along the top I added a painted outline circle (stamped off the page), a metal rimmed circle tag (cut using Tim's scissors that will cut through just about anything), and used the "you" stamp from the May Studio AE set.
Along the bottom I added a piece of Tim's tissue tape underneath the vellum.
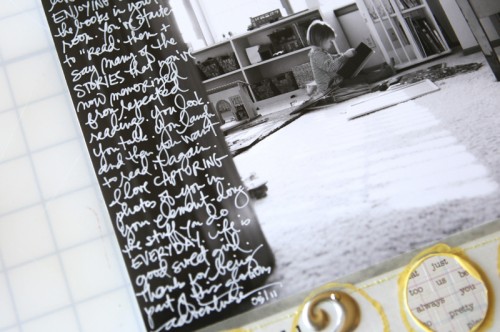
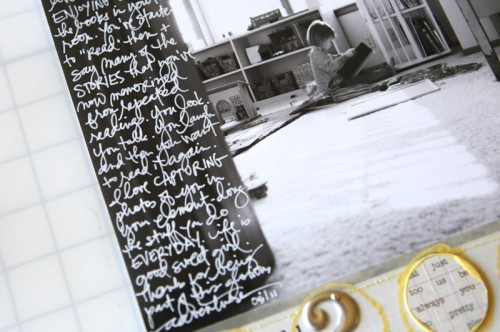
Last up was the journaling. I don't always leave it for last - it really just depends on the layout. When I first started this page I thought I'd probably do some journal strips along the bottom. As that space got filled up I decided that the dark strip on the left of the photo would make a great home for my words.
Journaling was written using a white Sharpie Poster Paint pen (extra fine).
JOURNALING | Sweet Anna Girl - love seeing you enjoying all the books in your room. You've started to "read" them and say many of the stories you've now memorized from repeated readings. You look. You talk. You laugh and then you want to read it again. I love capturing photos of you in your element - doing the stuff you do everyday. Life is good sweet girl. Thanks for being a part of this glorious adventure.
SUPPLIES
CARDSTOCK | Bazzill Basics
PATTERN VELLUM | Webster's Pages Spring Market Vellum
CLOCK RUB ON | Jenni Bowlin
STAMPS | Real Life (Studio AE), Ordinary Days, Cats Life Press Heart (heart with text)
INK | Jet Black Staz On
METAL 2 | Tim Holtz Metal Numbers
WHITE PEN | Sharpie Poster Paint Pen Extra Fine
WORD STICKERS | Girl's Paperie Whimsey Collection Sticker Book
MAY STICKER | Jenni Bowlin banner flag sticker
HERS RUB ON | Jenni Bowlin
PAINT | Claudine Hellmuth Yellow Pastel (Ranger)
TISSUE TAPE | Tim Holtz Traveler
YELLOW WORD STICKER | Cosmo Cricket Tiny Type
Please check out the blogs of Technique Tuesday’s Studio AE team members taking part in today’s blog hop to see more ways to use the new set.
Leave a comment on one or all of our blogs by Midnight PST on May 12th. Technique Tuesday will pick two people from comments received on all seven of the blogs to receive the Missing You by Ali Edwards stamp set.
Winners will be announced on Technique Tuesday's Facebook page on May 13th.



love your page & looooove seeing your process!!! you are so amazing! (and that pic is precious!)
Sign in or sign up to comment.
Lovely layout... and I love the detailed journaling.
Sign in or sign up to comment.
Love the idea of punching a shape out of the Girl's Paperie sticker sheet -- I'll definitely be incorporating that tip sometime soon. :)
Sign in or sign up to comment.
Love seeing how you use these stamps. It's a wonderful layout with a lot of fun techniques. Must join this monthly adventure in stamping.
Sign in or sign up to comment.
I always love seeing your process Ali. So inspiring! Makes me want to mix it up.
Sign in or sign up to comment.
I love this layout!! You make everything look so simple, yet there is so much involved in it. Fabulous photo too. :)
Sign in or sign up to comment.
Thanks for sharing your process! A good reminder for me to just go with the flow.
Sign in or sign up to comment.
I always love seeing your creative process! Awesome as usual!
Sign in or sign up to comment.
Love the painted circles using paper towel or toilet paper rolls!
Sign in or sign up to comment.
I just signed up for the subscription and I can’t stand the wait!!! I LOVE how you used the stamp!!! To win one would put me over the EDGE!!! Thanks for making stamps we can use in our scrapbooks!!!
Sign in or sign up to comment.
Beautiful! It reminds me of when my daughter was 2 - she just turned 14!
Sign in or sign up to comment.
I love this! Thanks for sharing the step-by-step process!
Sign in or sign up to comment.
What a beautifully, detailed layout. I love all of the embellishments added!
Sign in or sign up to comment.
great layout! Love the details + thanks for the awesome instructions. This is an awesome blog hop - I hope you guys continue to do it each month. Brings the stamps into a whole new light :-)
Sign in or sign up to comment.
Love the layers on the layout! thanks for sharing.
michelesscrapycreations35 at yahoo dot com
Sign in or sign up to comment.
I love all the different elements you included on this layout, thanks for the inspiration.
Sign in or sign up to comment.
DEFINATELY lifting this, love that you punched from the word stickers.
Sign in or sign up to comment.
Ali, thank you for sharing your process, really enjoyed it! I signed up for studio AE membership after last month's blog hop and loving it!
Sign in or sign up to comment.
I really enjoyed reading through your process and realizing that you start with an idea and build out as you go. LOVED the paper towel tube for circles - great organic, not-so-perfect circles. Ali, you are such a huge inspiration.
Sign in or sign up to comment.
I seriously need to pull out my stamps!
Sign in or sign up to comment.
Thank you so much for sharing your process!
Sign in or sign up to comment.
I'm loving the yellow circles. I think I'll have to try that one. Thanks for sharing your process.
Sign in or sign up to comment.
I love the yellow with the black and white. I'm so inspired to do a layout using these colors.
Sign in or sign up to comment.
Ali, I've never understood which stamps are one group and which ones are separate stamps. Are the top right words: choices/memories/journey all one stamp or separate so you can use a single word from the group? Thanks!
Thank you for your quick response! I assumed so but wanted to make sure.
Hi Jill - on this set that long group of words is all one stamp. Most of the time if they are grouped together/overlap they are one stamp. On this set "story" is a single word. "This is" is together. "Real Life" is together. The other words "our" "your" etc are individual words.
Sign in or sign up to comment.
Great LO!!
Sign in or sign up to comment.