Week In The Life™ 2016 | Getting Started With The Album + Working With The Layered Templates

So you took a whole bunch of photos and wrote down some stories last week - now what?
First off, pat yourself on the back for even documenting your week. It's a big task but totally worth the effort both during the week and after the week has ended.
The next step, if you haven't started already, is to create a plan for yourself to get the project into an album and on a shelf or in the hands of your family sooner rather than later.
You can do this.
Here's what I know to be true followed by the steps I'm taking to get started:
- Sometimes it takes me awhile to get going on this portion of the project. Breaking it down into tasks helps me get through all the different parts vs. feeling like I have to do everything all at once. I usually focus on printing my photos (often with my words on them) first and then move on to the cards/embellishments from the kit.
- I'm not after perfection, I'm after completion. Repeat: I'm not after perfection, I'm after completion.
- I work with what I have (photos, stories, products, etc) and don't worry about what I might not have.
- It feels AWESOME to get this project done. That in and of itself is a major motivator for me to get it done. But I also remember that it isn't a race.
- I always run out of ink and/or paper during this project so I ordered more before starting knowing that I don't want that to be a barrier (especially if I get really into it and don't want to stop my mojo).
- Make this album work for you. There is no prescription that says you must follow how I do it - use what you have in front of you to make it happen.
STEP ONE | Open up the kit if you haven't already and get your page protectors in order. Here's the order I'm using (at least initially, I might move the two "content" divided pages around on different days):

STEP TWO | Next I placed all the day of the week cards from the kit into either the top or bottom 4x6 pocket. I also punched out all the chipboard circles and put them in the 3x4 pockets (one for each day). I like to have a general sense where things might go, even if I end up chaining my mind after dealing with my photos.
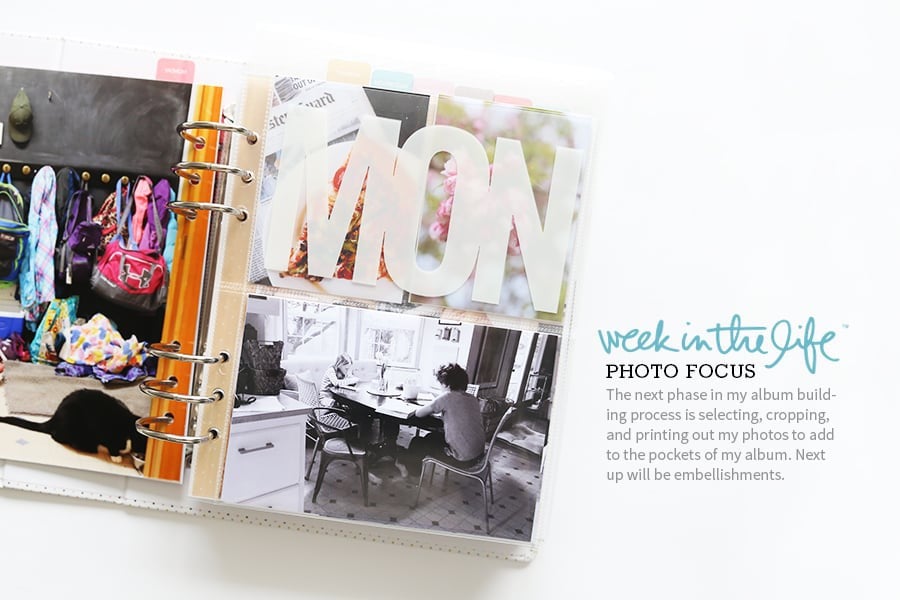
STEP THREE | Print out the full-page 6x8 daily photo. I'm a major fan of full-page photos and always include one or two each day (the second one is often the last photo within the content for the day - sometimes I'll use the collage pages that come with the layered templates and sometimes I just use a full page photo). This year I'm using these layered templates in Photoshop. I print here at home using an Epson SureColor 400 printer for anything larger than 5 inches x 7 inches.
Here's a tutorial that shows you how to work with these layered templates in Photoshop:
Feel free to ask any questions you might have about the steps in the video in the comments below.
STEP FOUR | After doing the title page for each day I do the end page. This page is either a full page photo (which I think is what I'm doing again) or I use a collage template that's included in the layered template package (and I talk about it in the video above).
STEP FIVE | Next I go day by day through my photos with my album sitting next to me at my desk. I assess and print photos to fit the pockets available to me and if I have extras I usually print them and adhere them back to back and punch holes and add them directly to my album. I'll share what this looks like if I use that technique again when I get to this part of the process. Many of those photos will have the story added to them in Photoshop before printing. I also often have the cards from the kit on my desk so I can place/assign them spots based on the number of photos I have and the stories I'm telling.
STEP SIX | After getting each days photos into my album I'll start playing around with the other stuff from the kit (embellishments, etc).
Those are the basic steps I follow to get this project completed. Right now I'm working on the last page for each day. I'll share more as I get farther along in the process.
Again, thanks for joining me for this adventure! There has been lots of awesome sharing in the Week In The Life™ Facebook group if you'd like to see what other people are creating with the photos, words and kits. You are more than welcome to join if you are interested.


So excited to see how your album comes together and to work on mine! I have a couple of questions... first, where are you putting the chipboard dividers? are they going after the introductory 6x8 photo? Are you decorating them at all?
Second, what are you doing for your intro page? I tried laying everything out in my album and it seems lopsided to have a 6x8 in the front then a chipboard divider (for Monday) right behind that... I can't wait to see what you do!
Intro page will be the front of the first 6x8 - full page photo. Monday starts on the other side of that and the chipboard piece will go between the 6x8 and the first divided page protector.
Thanks for such a quick response!
Sign in or sign up to comment.
Thank you for this!
Sign in or sign up to comment.
Any chance you can tell me where you got your white office chairs? Thanks!
Amazon: http://amzn.to/1OJzDuw
Sign in or sign up to comment.
What fonts do you use on the "This Was" templates? I want to make sure I have the right fonts before I buy them.
Those are flattened layers - meaning you don't need the font (it won't ask you for it because they are "word art"). That said, the font is Bodoni.
Thanks for giving us the font names. Off to finish my pages. So many thanks.
Sign in or sign up to comment.
Hey Ali, this is probably a really dumb question. I'm frustrated. I just bought Photoshop Elements 14 so that I could use your templates. I've watched several tutorials but am getting stuck in same place. When I open my photograph and template in Photoshop, I can't place them side by side to merge. I've watched you pull from top several times but I can't do it. I can either manipulate the template or photograph. Also, they don't both appear in layers at the same time. Can you help?
You need to check "float all windows" (or some kind of language like that). Here's a link for how to do it in Elements 9 (not sure if it's the same): http://www.dummies.com/how-to/content/how-to-view-multiple-documents-in-photoshop-elemen.html
Thanks Ali. That was helpful. I'm making progress.
Hi Ali! I am also working in Elements... (straight Photoshop is way too expensive)...and I am not able to change the color of the words just from black to white.
Any chance you have Elements and can do a tutorial using it as well?
Sign in or sign up to comment.
Hi Ali, Can you use the layered templates in Letterglow?
I don't think so - only PNG files.
Sign in or sign up to comment.
A couple questions.
Could you please tell me what size font you usually use to type on your photos. Do you use the same on all size prints?
Also with he new layered templates for this year. I notice they have a white border around the photos. Are you planning on cutting those to put into the page protectors (the 4x6 and 3x4), or leaving them as a 6x8 page.
For this journaling font (I'm using Garamond for journaling this time) it's 10pt. I usually range between 10pt and 8pt depending on the font - for some people that would be too small - it's my personal preference at this time. The white border (I think you are talking about the collage pages included in the layered template pack) is a design element that I intended for people to keep (of course you can do whatever you like) on the 6x8 page. They are meant to be 6x8 pages vs cutting up into the other sizes (I'm not even sure that the photo spaces on those templates are designed to 3x4 and 4x6). I will crop my photos to those sizes in Photoshop and then print them to the right size.
Thanks for the reply. That helps!
Sign in or sign up to comment.
My plan:
1. "I'm not after perfection, I'm after completion. Repeat: I'm not after perfection, I'm after completion"
That little quote takes a HUGE amount of pressure off! As does "I don't have to use everything in the kit".
2. I spent 51.00 (Can) at the Kodak kiosk on Monday; all pics. What I don't use will go into my PL-ish 2016 album. Also, I used a circle punch to cut up other pics with elements I liked and I am using them in the 2x2 squares page at the end for a closing. The other squares page is for my title page. I'm using one of the round WITL stickers used to close the plastic envelopes from the kit packaging :)
3. Mine goes 6x8, 4x6, 3x4 for each day. That's it. Work with it, baby. Pics in.
4. Journaling a 6x8 story telling about the day for the reverse of the daily 6x8 photo (BTW, this was my first time printing bigger than 4x6 and I LOVE it-thanks for the inspiration). I am also planning on journaling directly onto the photos with my FAVOURITE new pen-the ae writer. Thank goodness I bought two.
5. Play with the embellishments.
I am currently beginning step 4. And loving it :)So glad I am participating!
t.
Sign in or sign up to comment.
Hi Ali - love what you've done so far!
I am having trouble in photoshop. I have the daily title open in photoshop and the photo I want to use. But when I move the photo on top of the daily title nothing happens - the photo doesn't appear as a layer in the daily title. Can you help?! Thanks!
Can you see the layer in the layers palette? I'm wondering if your photo is going behind the background (white) layer?
I can see the layers for the daily title file and the one layer in the photo, but I can't get the photo into the daily title as a layer. Any suggestions would be appreciated!
What are you using to attempt to move the photo onto the daily title?
Sign in or sign up to comment.
Hi Ali, do your templates work with Keynote? I Don't have photoshop and often play around in Keynote editing bits and pieces. Thanks!
Hi - the layers functionality only works in Photoshop :).
Sign in or sign up to comment.
Hi Ali, I had a problem. I want to change the color of the words. I follow your instruction, but when I highlighted the layer and 'fill" the "foreground" with white, the entire page turn white. Can help? thanks!
This is happening to me as well. Were you able to find a fix?
I got it! I'm on a PC, so if I hold down the ctrl key and then click the box in that layer (on mine it looks like a checkerboard to the left of This Was Saturday), it outlines the word art. Then, I can follow Ali's steps and the color changes for just the words.
After clicking on "fill" you need to check a little box that says "preserve transparency" or else it will fill the entire layer.
Sign in or sign up to comment.