Two Layouts Using A Couple Of The New Stamp Sets

Sharing my Craft The Story video (Episode 21) a little early this week as I had a whole lot of fun playing around with some of the new stamp sets + inks we released on Monday.
Don't forget that we are offering free shipping everywhere on the new stamps, restocked stamps, and new inks through May 28th.

Let's dive into the process video and you can see images of my finished layouts below:
IDEA ONE | CREATE A FULL PAGE STAMPED BACKGROUND WITH ALPHA STAMPS

This project is a 2-page outside the page protector layout (each page is 7 inches wide x 8.25 inches tall). I printed a full page photo and added a chipboard heart and a fabric phrase on top and paired that page with a background page I created using the new Lined Alpha Stamp. I love creating stamped backgrounds especially ones that are text-based. For this page I took the phrase "Man I love you so much" and repeated that four times using the new McKenzie ink, Willamette ink, and Columbia ink. On top of my stamped background I added my printed journaling paired with pattern paper and another fabric phrase from the Paislee Press Week In The Life™ Mini Kit. Before adhering I rounded the corners and then used foam squares to attach it to the background. As a final touch I used my rolling date stamp to stamp along the bottom edge of the page.
SUPPLIES PROJECT ONE
- McKenzie Ink (Dark Green)
- Lined Alpha Stamp
- Week In The Life™ Mini Kit (“yes to this” fabric piece)
- Week In The Life™ Chipboard Bundle
- Black Dot Pattern Paper
- Corner Rounder
- Adhesive Foam Squares
- 6 Hole Punch
- Epson XP15000 Printer
- Rolling Date Stamp
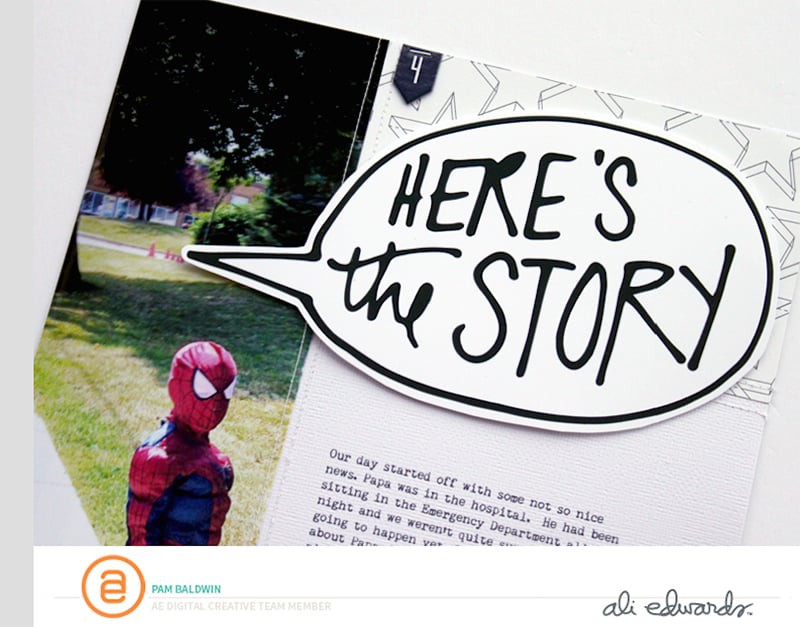
IDEA TWO | ADD STAMPED SPEECH BUBBLES TO A FULL PAGE PHOTO FOUNDATION

For my second layout I started off with a full page photo foundation sized to 9 inches wide x 12 inches tall. I knew I wanted to play around with the Filled Speech Bubble Stamp so I started off trying a couple things you'll see in the video above. I ended up using the new Oregon Pinot (purple), McKenzie (dark green), and Rose Garden (pink) inks to stamp three filled speech bubbles and three outline speech bubbles.
On top of the filled speech bubbles I used the new 4x6 Number Stamp Set and versamark embossing ink. On top of the embossing ink I added white embossing powder and used a heat gun to set it in place. I love this look! I cut those out using small Fiskars scissors and left a white border around the whole shape. Metal star brads finish off those embellishments.
On top of the Outline Speech Bubbles I added a small "this" stamp from this set and "just awesome" from this rolling stamp bundle. I added my journaling before adhering each speech bubble to my foundation photo using foam adhesive squares.

SUPPLIES PROJECT TWO
- Oregon Pinot Ink (Purple)
- Rainbow Ink Bundle
- Filled In Speech Bubble Stamps
- Outline Speech Bubble Stamps
- Numbers 4x6 Stamp Set
- Roller Stamp Bundle
- Alpha 6x8 Stamp Set
- Metal Star Brads
- Versamark Embossing Ink
- White Embossing Powder
- Small Fiskars Scissors
- Heat Gun
- Circle Stamp Block
- Precision Pen
- Epson XP15000 Printer
- Epson 13x19 Photo Paper
- Rolling Date Stamp
Also don't forget to sign up for our $5 Stamp Your Story Live Community Day happening on Saturday, June 19th. Get all the details here.


Darn it. Now I need to buy the speech bubble stamps! 😉
Sign in or sign up to comment.
Have you considered making dies for the numbers? Those would be perfect so we could make the numbers 3D on the speech bubbles, cards, and pages.
I absolutely love the Man I Love You So Much page. I think it says more and means more than if it said enjoy instead of love. It also has a double meaning because he loves that movie and making grilled cheese for the family. He's a sweet kid!
Sign in or sign up to comment.
I LOVE these pages so much, Ali!! Doing a bit of drooling over here. So glad I bought those stamps!! 😍🤩💕
Sign in or sign up to comment.