December Daily® 2022 | Crafting With Krystal 02
Tags:
Hi friends! Krystal here, back again with a recap of my next Crafting Life with Krystal - December Daily Edition recap!
This mini-series is composed of a weekly Live video on the December Daily Facebook Group. This live event takes place each Thursday at 12PM ET throughout the month of September.
This week, our product topic was the 2022 December Daily® Main Kit. If you missed the video this week, you can check that out below.
LET’S RECAP
In today’s video, we are talking about the different story prompts you can find in the 2022 December Daily® Main Kit components + different design ideas for how to use the various products included in the kit. Let’s go through each product individually and talk about design ideas. For the products that contain text/sentiments, I’ll also add in some different story sparks too.
My hope is to give you ideas that you can translate into your own projects this year - helping you to love + use all the beautiful components of the Main Kit this year.
1. PLASTIC TITLES
The 2022 December Daily Main Kit includes five large plastic titles. If you are looking for story prompts, these are a perfect place to start. Here are some ideas for the different titles:
“Twinkle” - Document Christmas lights on your home, a beautiful night sky (maybe even the night sky on Christmas Eve), a light parade, etc.
“Merry” - Document things that made you feel merry today, a happiness log, pair with a stamped word “Christmas” to document Christmas morning, etc.
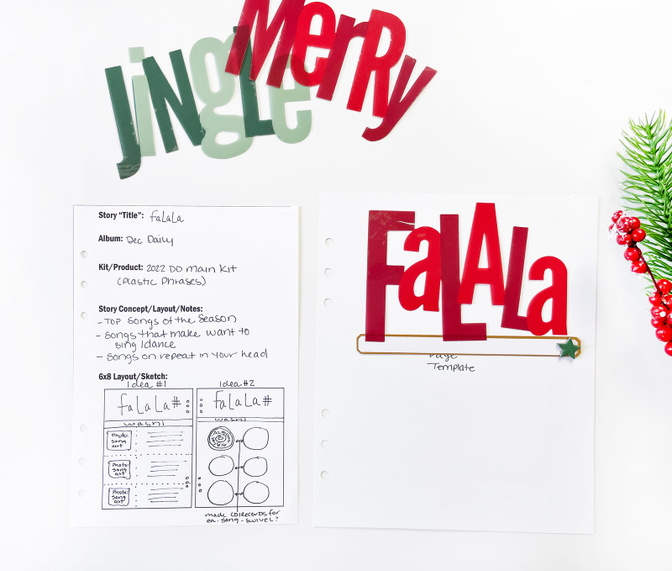
“FaLaLa” - Perfect for documenting Christmas music (top songs of the year, songs you sing on repeat, songs that make you want to dance), Christmas caroling, etc.
“Jingle” - Do you love or despise the song Jingle bells, documenting the sounds of the season, have an ugly sweater with bells on it or accessories that jingle, etc.
“Ba Humbug” - a tough day, having trouble getting into the Christmas mood, favorite books/stories of the season, write a letter to Mr. Scrooge, etc.
With the plastic phrases being so big (part of what makes them so cool), I know they can seem a bit daunting to work with. Here are some ideas I have for how you can get these awesome elements on your pages this year:
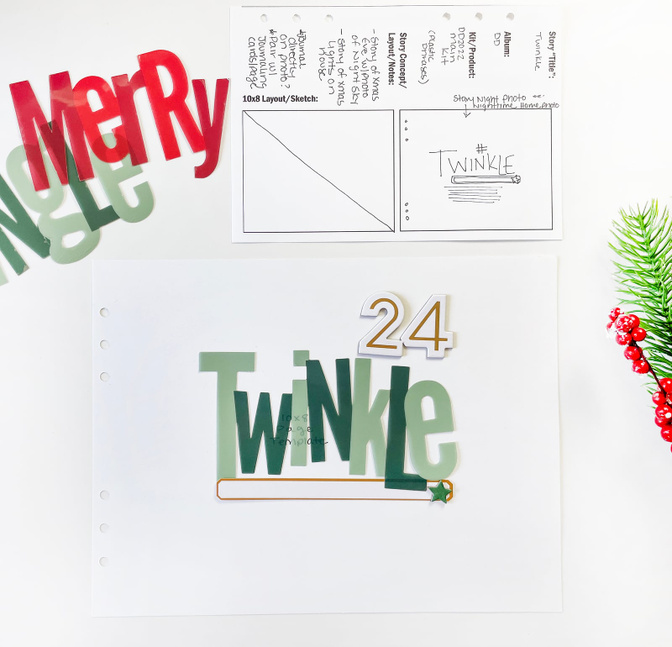
Pair the large plastic phrase with a gold foil label layered underneath. The labels can help to ground the phrase AND give you space for adding a subtitle with text, handwriting, or stamps. Add the large plastic phrases directly in the middle of a full page photo. This would be a great way to document a scene (photo of your decorated living room, photo of your house exterior, photo of the sky, flat lay photo of gifts, ect.).
Place a plastic title at the top of a blank piece of cardstock. Use it as a direct journaling prompt and create your own “journaling page”. Using a pen, printing, or stitching on the page, you could create grids to journal inside of - giving your page a designer feel.
2. JOURNALING CARDS
The 2022 December Daily Main Kit comes with a wide variety of journaling cards this year. When looking for journaling prompts, the journaling cards definitely have you covered. Here are a few different story ideas from the cards in this kit:
4x4 Journaling Cards - use the cards to tell eight separate stories OR combine them all together to tell 8 pieces of one story.
“Gather Together” - great for telling a story of a holiday gathering. Could be a Christmas Eve/Christmas day story… or any holiday party on your schedule this year.
“Traditions We Love” - what are some of the holiday traditions you have kept from your childhood, NEW traditions you have started and why
“Memories” - Tell a story of a Christmas past, use it for a final story and document your favorite memories of the season.
“Around the Tree” - document the gifts you have wrapped and around the tree, the story of your tree skirt, the story of gathering around the tree, your town tree lighting ceremony
For design, here are some ideas I love:
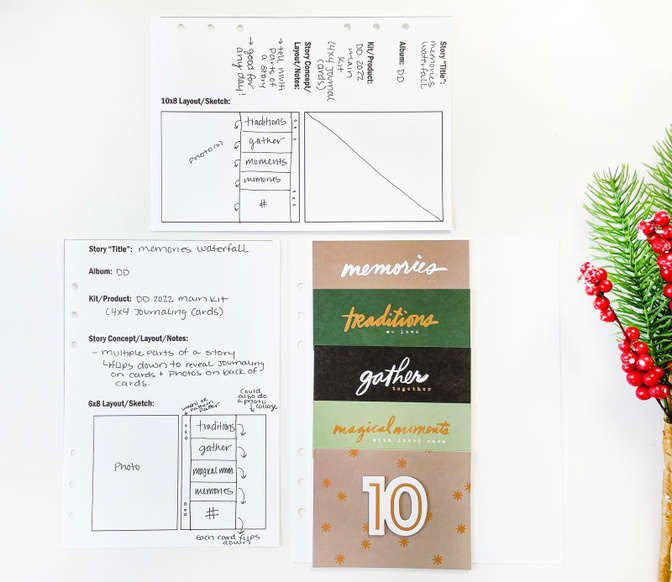
Use a handful of the 4x4 cards to create a waterfall element. Add photos on the backside of the cards - so you can see journaling + a photo when you flip the cards down.
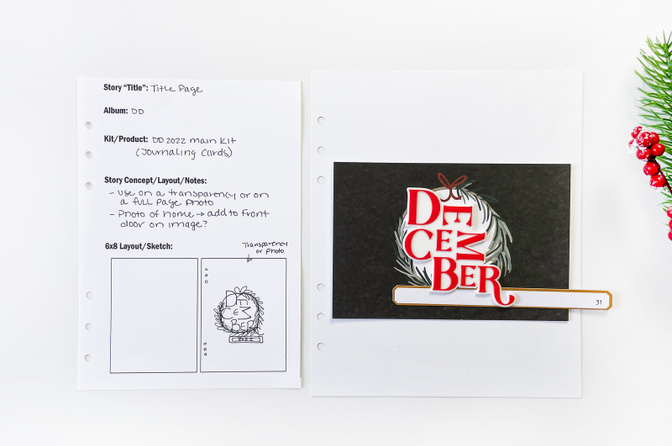
Layer the rubber DECEMBER on top of the wreath card. Add to a pocket for a beautiful title piece OR fussy cut out an add to a transparency/photo for an album opener.
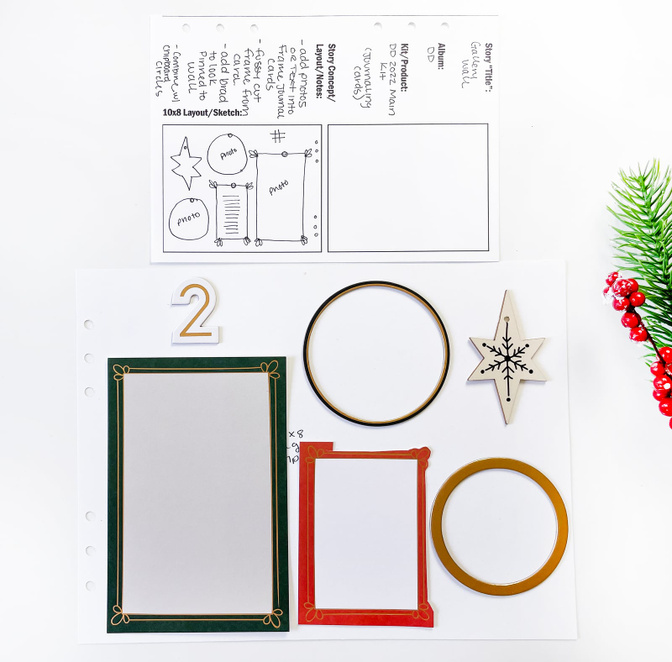
Fussy cut the gold foil frames out of the 6x4 and 3x4 journaling cards. Use the frames with the nestled chipboard circles to create a gallery wall look. Add photos/journaling into the various frame elements.
3. FELT HALF CIRCLE POCKETS
These are hands down my favorite product of the year. I love the bright red colors, the interactive possibilities, and the texture these pockets bring to the collection this year. Here are a bunch of ways you can use these in your album this year!
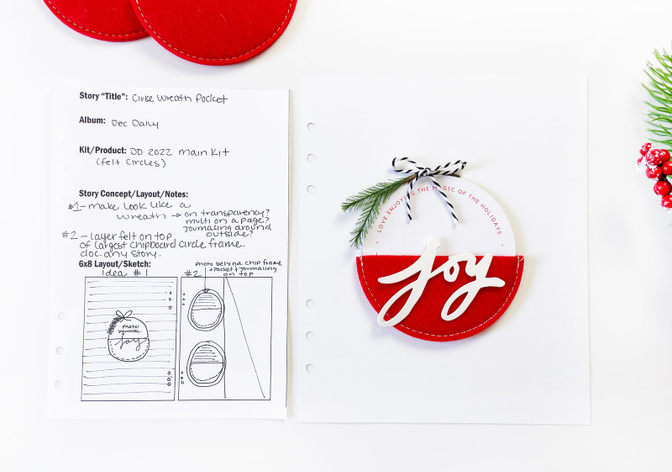
Create the look of a wreath or a circle wall decor piece. Add some holly and ribbon to the top of your circle journaling card (or a circle/half circle photo) + place a glitter cardstock word at the top edge of the felt pocket for a gorgeous decorative looking piece. You could layer this on transparency, patterned paper, OR a full page photo.
Use one of the largest nestled chipboard circles/frames to back the felt pocket. You will get a small outline of black around the entire piece. You could back the chipboard with a photo… So when the card is pulled out of the pocket, a photo is revealed behind it.
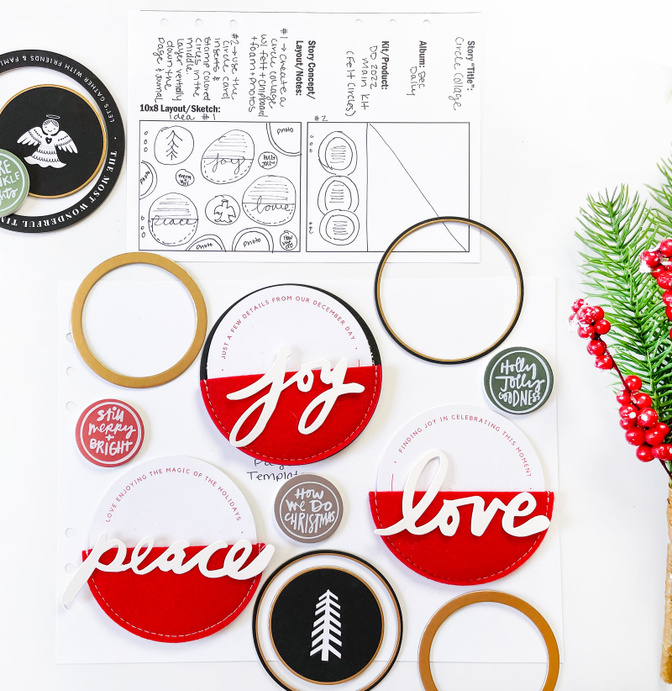
Using the nestled chipboard, foam circles, and felt pockets, create a circled collage page. Back the chipboard with photos and use the pockets for journaling.
Using the AE Circle Stamp and just the circle journaling cards, stamp a colored circle into the middle of the cards and layer on a page to tell three parts of a story.
Fill the pockets with tiny letters to Santa (could make the pocket look like Santa by adding a belt embellishment across the top edge).
Create more DIY felt pockets and make them into an advent calendar for your wall. Each pocket holds something for you to do that day.
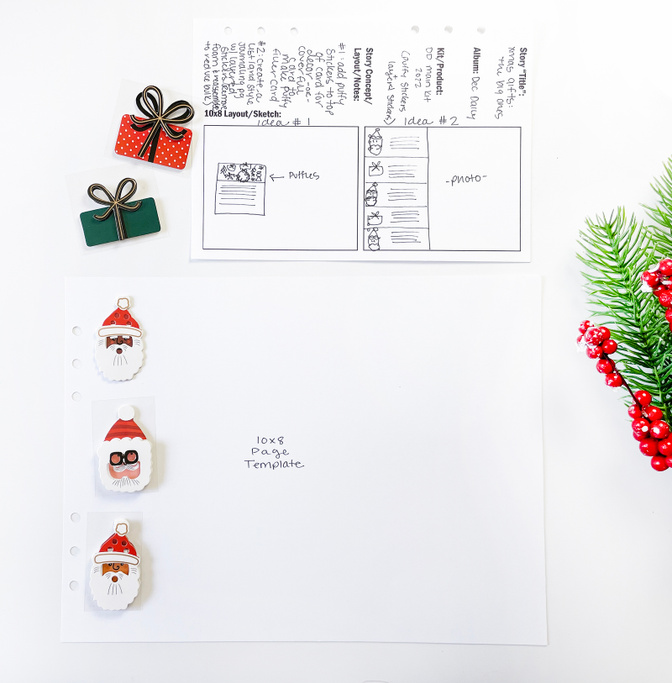
4. PUFFY + LAYERED STICKERS
Dimensional stickers are usually a bit of a struggle for me to find ways to use but so cute it’s hard to pass them up. This year, I’m determined to use the adorable layered Santas! Here are some ideas I’ve had for both the puffies and the layered stickers in the Main Kit.
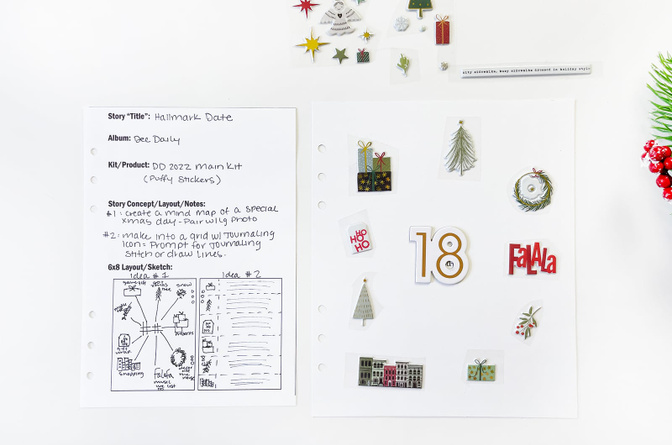
Use the adorable puffy stickers to create a mind map of a special holiday day. Maybe you document a holiday themed date night, or decorating the tree, or going Christmas shopping. Use one side of your page to map out the different components of the day with stickers + a word or two. Then pair this with a full page photo or collage of photos from the day.
Create a grid page using a pen or machine stitching. Add one puffy sticker into a small section for each row, then journal/add photos into the larger sections that relate to the stickers you chose. (OR have the stickers be totally unrelated and there just to be cute.)
Use the puffy stickers to completely fill up a 3x4 journaling card - make this a fun filler card or add a number on top. You could also fill just the upper section of a card and journal underneath.
Just like adding to a journaling card, you could add to a shape/half of a shape to make an interesting embellishment or repeating element for a page. Add the layered Santas/presents to a journaling page and use them like bullet points for telling your story.
Remove the foam adhesive between the layers + on the back of the layered stickers.
Readhere everything together to make the layered stickers no longer dimensional. (The details + texture will totally still be there!)
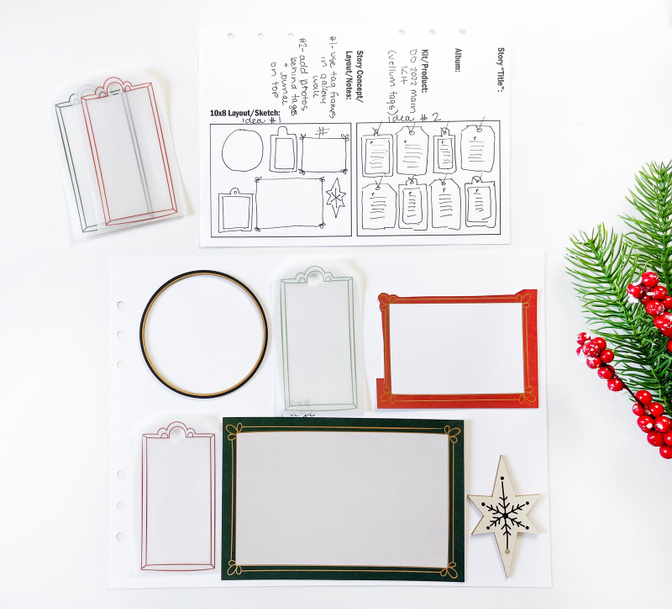
5. GOLD FOIL LABELS
The skinny gold foil labels from the main kit are such an amazing element. They are perfect as a layering piece and can help carry a sense of cohesion throughout your album. You could add them to a photo for each day of the month, or cover up the number and add to any page with some writing/stamping inside as a layering element.
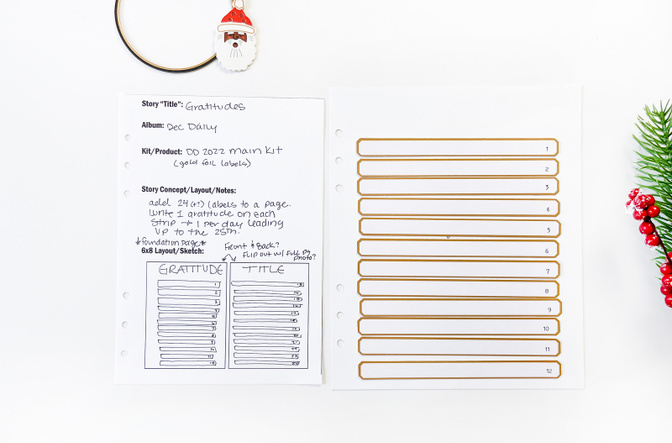
Another idea to consider is adding them ALL onto a page to document gratitudes throughout the month and having that be one of your stories this year. With the 6x8 album, you would either need to create a double page layout, add them to the front and back of a page, or create a flip out.
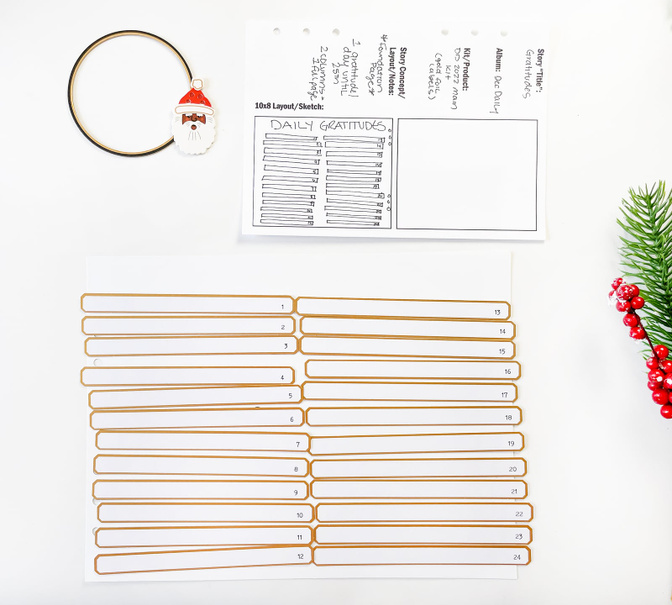
The 10x8 has a bit more room, so you may be able to squeeze them all onto one page… or use the flip out idea and have a page that’s a bit smaller for page size variety.
6. FOAM CIRCLES
Whenever I have a kit that includes a pack of embellishments that are all the exact same size and shape, my mind immediately goes to… bullet points. I love the way they look spaced out evenly on a page and help direct the eye through the story I’m telling.
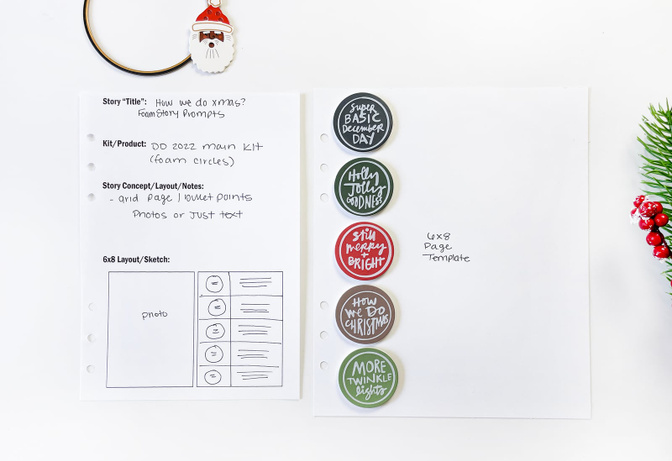
Working in a 6x8 layout, the foam circle embellishments fit perfectly vertically down the side of a page. I would totally create a grid look and add my journaling next to each one (maybe using the titles as my journaling jumping off points for the day) and pair this with a full page photo.

For the larger 10x8 format, I think the foam circles look amazing in a horizontal line. I think it would look so good to add the circles about half way down the page, put my journaling under each one, and then have a full page photo or a photo collage above the circles.
Some other ways you could use these:
Put in 2”x2” pockets and pair with either six 2”x2” journaling squares or photos.
Stick two of the circles back to back with a piece of twine down the center. Then add it as an interactive spinning element on a page. Use them on a page with other circle elements to make a circle collage page.
7. VELLUM TAGS
Tags are definitely a favorite shape of mine to work with. There are so many ways you can use tags - as embellishments, as a design feature, interactively, collaged, and more.
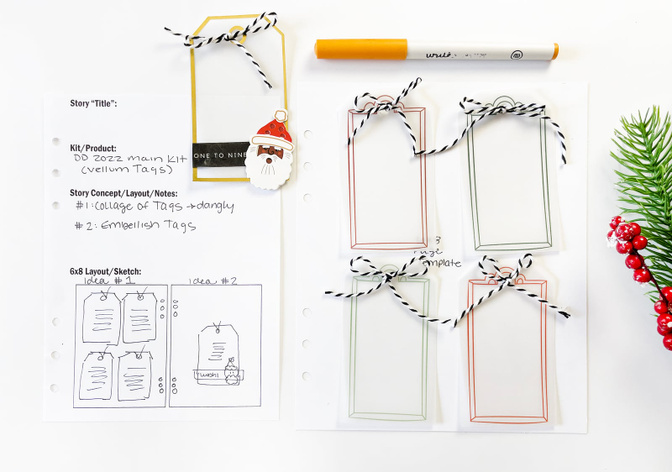
On a 6x8 layout, add four of the vellum tags to a full page. Back the tags with photos, cut to the same tag shape. Then, add your journaling on top of the vellum tag and tie off with twine. If you adhere the photo to the page, you will be able to swing/lift the tag aside and see the photo underneath, as well as being able to see the muted version through the vellum. Add a strip of washi to the bottom of the tag and layer a sticker/die cut on top for an adorable embellished tag.
Create the same full tag page as the 6x8 but add all eight tags instead. Alternate between the hand-drawn and gold foil tags for a pattern that is nice on the eyes.
Fussy cut the hand-drawn frame portion of the tags and combined them with other “frame” like embellishments on a gallery wall page. Add a brad to the punched hole to mimic a tack holding the element to the wall.
If all else fails, use them as tags for your gift wrapped packages this season.
8. VELLUM PHRASE STRIPS
This product is another one that feels a little tricky to come up with ideas to use. However, if you look at these vellum phrase strips as being the same as a thin washi, that may help open up some different possibilities for how you could use them (beyond the obvious layering element).
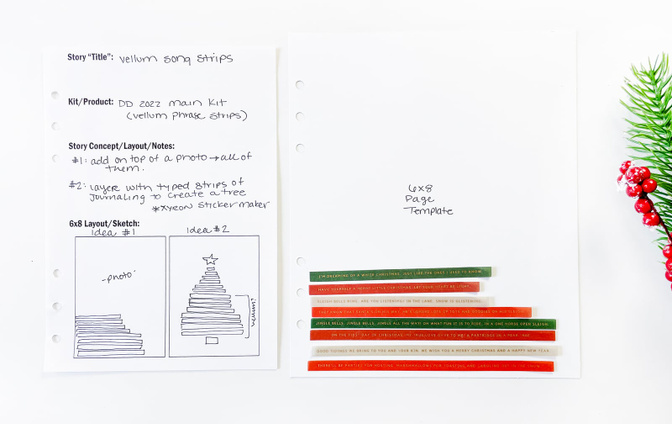
The vellum strips look really pretty when they are placed all together. I think they would look super nice on a full page photo where the strips are placed justified to one edge at the bottom of the page.
You could also type out your journaling and cut it into strips. Then, add your journaling strips in amongst the vellum phrase strips and position in such a way that it looks like a tree.
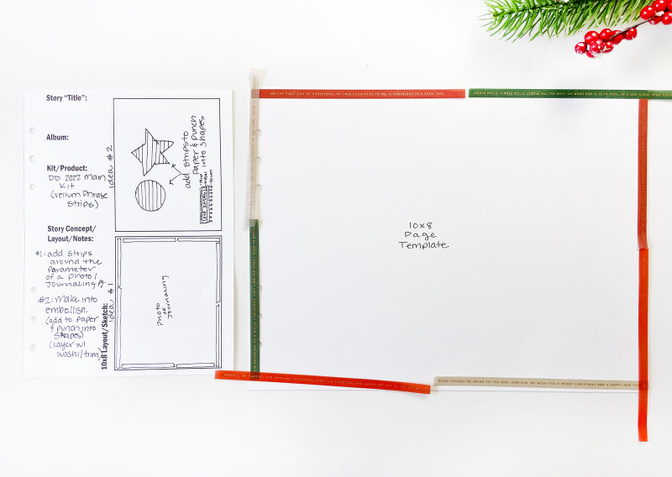
Another great way to use the vellum strips would be as a border to your page. Add them around the parameter of a 6x8 or 10x8 full page photo or full page of journaling. The pops of color would be gorgeous like this!
Layer the vellum phrase strip with washi and trim to create a decorative border to a tag or journaling page.
Add all of the vellum strips to a piece of cardstock, then punch into shapes to create a textured embellishment.
(PS: wondering how to adhere the strips? I would suggest using a stapler OR a xyron sticker maker to add adhesive evenly on the back of the vellum. This makes it almost impossible to see the adhesive.)
9. WASHI TAPE
Many of the same ideas from the Vellum Phrase Strips will apply to the washi tape in this kit as well. I especially love the idea of alternating the black phrase washi with the gold foil washi and creating a beautiful pattern with the two.
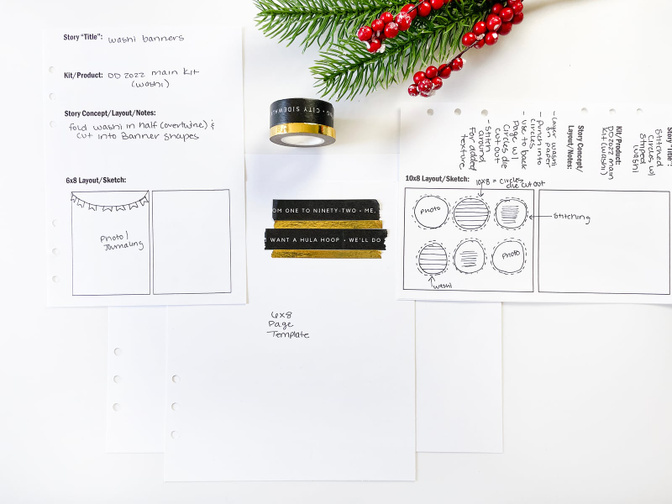
Another idea would be to create tiny banners with the washi tape. Take a piece of the wash and fold it in half over a piece of twine. Then snip the bottom into a banner shape. You could use this in addition to any washi tapes you currently have to create a really cute + festive element for your page.
10. WOOD VENEER STARS
The wood veneer stars in the Main Kit are just so beautiful. I love that they have the look of stars and snowflakes at the same time. Here are some ways you could think about using them in your album this year:
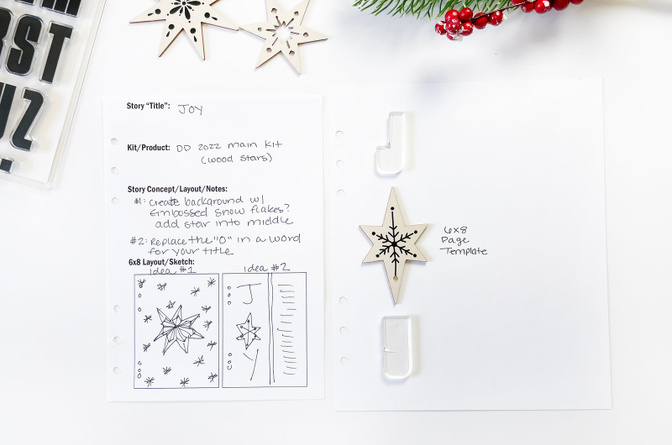
Using the Tag & Star Stamp, create an embossed star background page and add the largest of the stars/snowflakes in the middle as a resting page. Or, place your number in the center of the star and add on transparency as an opening page to your story.
Use a star/snowflake as a replacement “O” in a holiday word. (The word JOY would fit great vertically on a 6x8 or 3x8 page.)

Use the same idea of replacing the “O” in a word, but have the word oriented horizontally on your page. Add onto a photo or a page of journaling. (The words SNOW, NOEL, HOLLY, JOLLY would fit great horizontally on a 10x8 page.)
Hole punch the top of the stars (using a crop-a-dile) and string on twine to create a star banner. You could layer with other dangly bits or with pennants/banner flags as well. Don’t want to use them in your album? Add a hole punch to the top + string and hang on your Christmas tree!
CONCLUSION
After going through all of the items in the Main Kit and planning out some different story/design ideas, I have to say that I’m more in love with this kit than I originally was. I cannot wait to apply some of these concepts to my album this year and I hope this gets you excited to do the same.
Today, I want to leave you with a challenge to help you think ahead about how you want to use some of the Main Kit elements this year: Take one of the ideas presented in today's video/blog post and create a page sketch idea of your own. Store this with your December Daily supplies to pull out when your products arrive OR when you are documenting your December memories this winter.
I’m going to be back again next week working with the Stories of Christmas’ Past Mini Kit. I hope you’ll join me live on the December Daily Facebook Group this coming Thursday 9/15/2022 at 12PM! (The video will be recorded and I will include a blog post as well recapping our live session.)
Until then friends, have a great day!


Comments
Sign in or sign up to comment.
10 comments
So many great ideas. Thank you very much for all the inspiration.
Replies to carobibo
Sign in or sign up to reply.
Thank you for another jam-packed idea session! Thank you also for including 6x8 page ideas alongside the new 10x8 pages.
Replies to JLynne4
Sign in or sign up to reply.
this is amazing thank you !
Replies to AnnieCarignan
Sign in or sign up to reply.
You’re amazing! I enjoy your videos so very much and you make me want to buy everything!
Replies to Shift2thrive
Sign in or sign up to reply.
Another amazing video. Thank you Krystal! Taking the time to share all of this content so we can prepare and plan is really helping me out! Will there be a link to your planning sheets from this video?
Replies to nsmerkt
Sign in or sign up to reply.
Thanks for showing us so many ways to be creative with our DD products! PS love your Christmas attire!
Replies to ScrappinMyHeartOut
Sign in or sign up to reply.
So fun to see your creative process and the new ideas come to you mid-video! My fave is the Gallery Wall - it will definitely be living in my album! Thank you!
Replies to nattiebleu
Sign in or sign up to reply.
WOW! So many ideas and so much inspiration!!! Thank you Krystal for putting this together!
Replies to tburley
Sign in or sign up to reply.
I like the sketch pages, is there a download for those?
Replies to kzakaras97
Sign in or sign up to reply.
I already bought two main kits...your ideas make me want to buy another!
Replies to inouyeflo
Sign in or sign up to reply.