December Daily® 2023 | Paper Play with Pam 02
Tags:Hello friends! I am very happy to be back with you again, sharing some projects created with the December Daily 2023 Main Kit! You’ll see that I’ve added just a handful of additional pieces from the 2023 collection to these projects; all of them can easily be substituted with supplies you may already have in your stash or other elements from the main kit.
I’m going to switch things up just a bit this week and start with a video overview of the 6 (and a half) projects I made with the Main Kit. In this video, I’m sharing a few ideas for adapting these 6x8 pages into a 10x8 album, as well as some suggested alternatives to the supplies I used that are NOT included with the main kit.
Let’s break these ideas down a little more.
Project #1
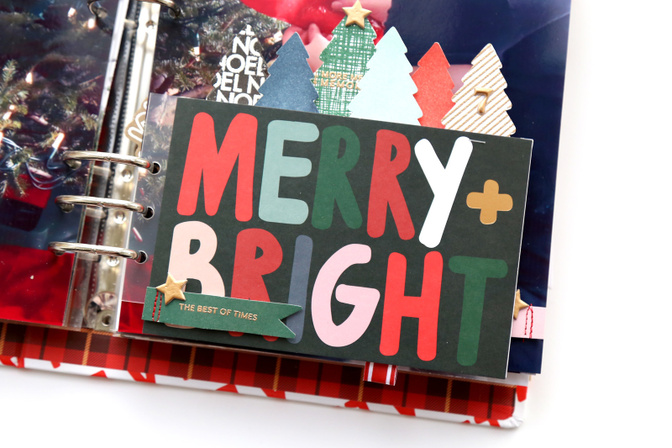
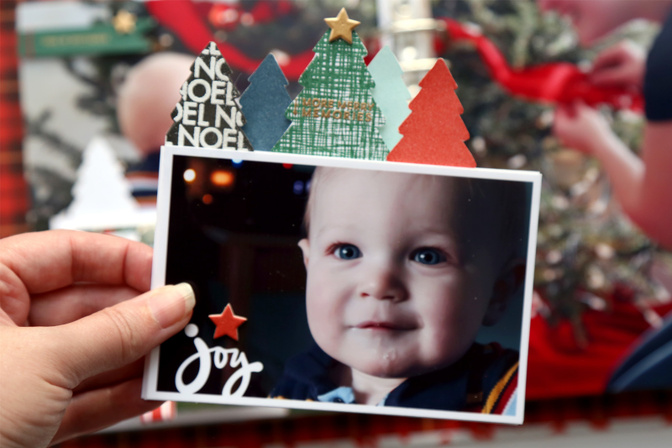
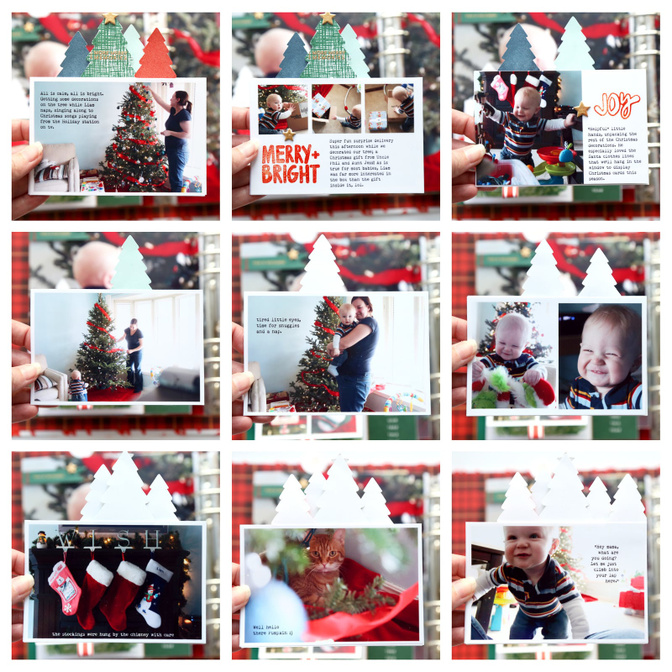
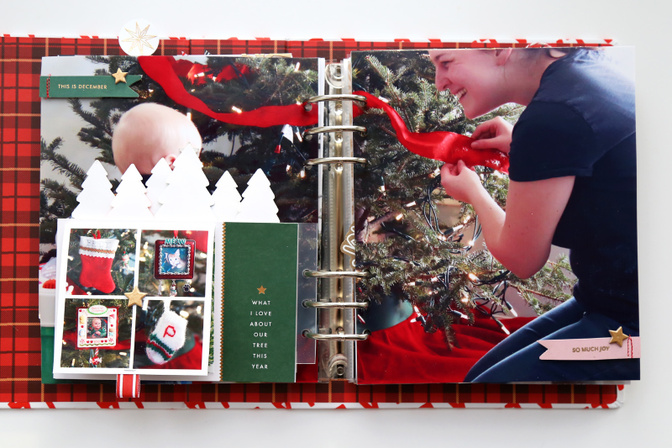
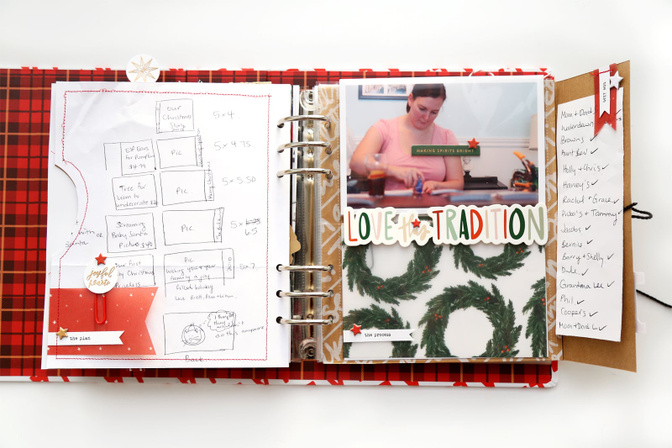
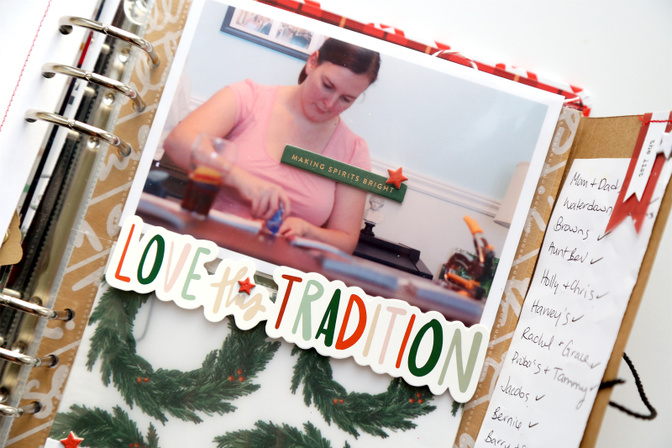
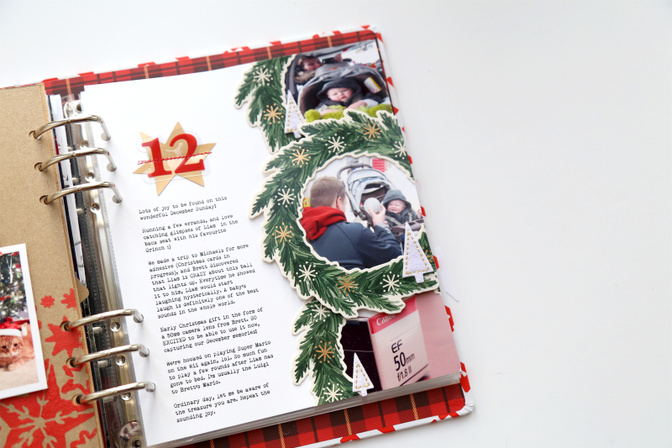
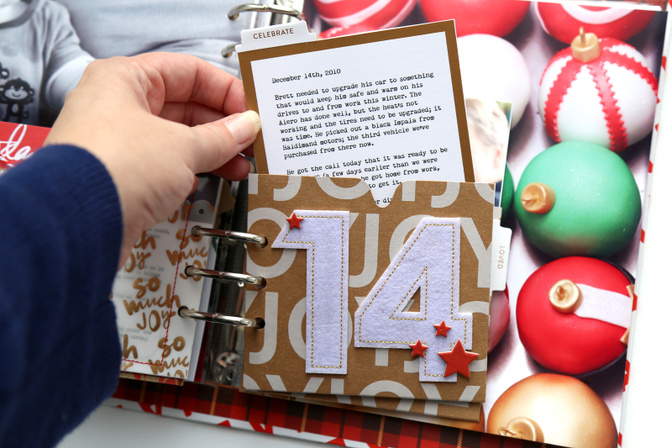
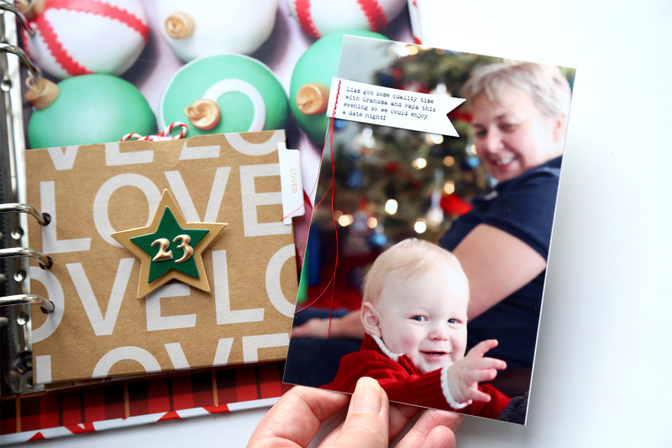
This layout is the perfect combination of many of my favourite things! Super enlarged photo, interactive pockets, flip-ups and a total photo count of 19 images in this single spread.
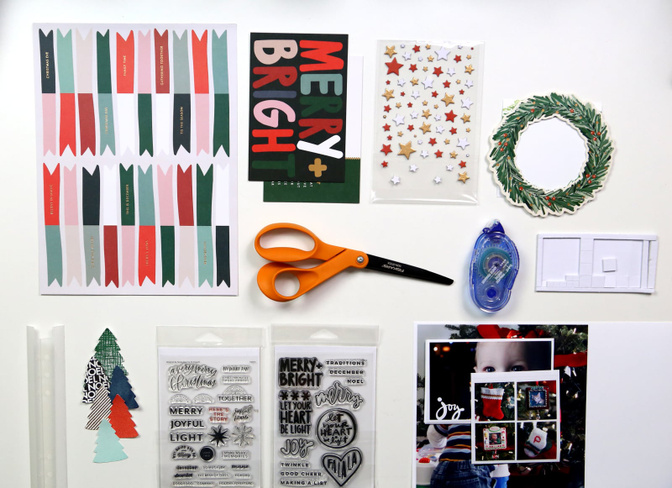
Main kit supplies: Patterned paper, 4x6 journaling cards x2, chipboard stars, cardstock wreath, puffy gold numbers (not pictured). Additional supplies: December Daily 2023 stamps (Trees, Paislee Press, “Merry and Bright”), Rolling adhesive, Dimensional foam adhesive, Scissors, Crafter’s Inks (Deschutes, McKenzie, Columbia, Redwoods, Black Butte), Versamark, Gold embossing powder, Tiny attacher, Red and White Trim pack, Plastic attacher stickers
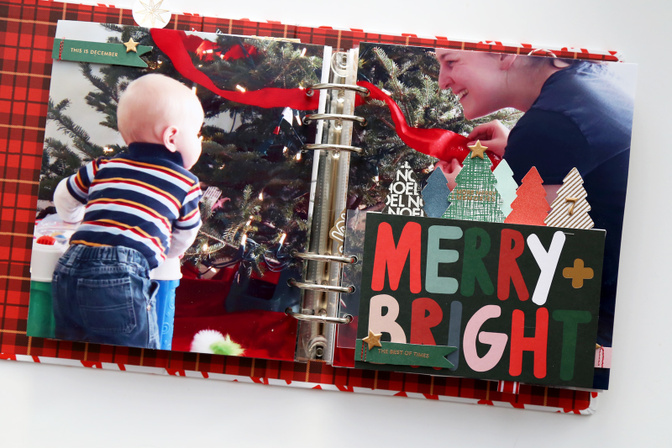
The structure of this layout is based on a full page photo as the background. It spans all the way across 2 pages of my 6x8 album. It could easily be reconfigured to a 10x8 design with a single enlarged photo.
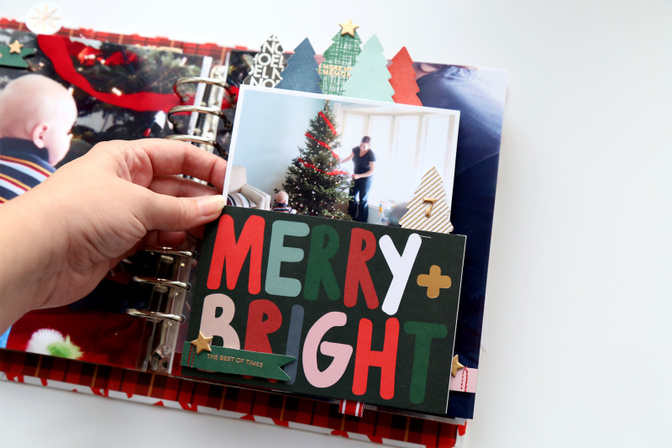
The really fun part about this spread is the pocket that holds a series of additional photos and stories. It’s constructed from 2- 4x6 cards in the main kit, dimensional foam adhesive, and a plastic attacher sticker. I used some of my leftover stamped Christmas trees from last week and converted them into tabs that make it possible to pull the photos out of the pocket. One of my favourite details here is the addition of the Paislee Press “More merry memories” stamp with gold embossing powder on top of the largest tree; just a little nudge to let people know those trees lead to something more.
The photos inside are sized at 3.5” x 5.25”. Some of them have additional journaling, and some of them have some decorative stamping or chipboard stars for a little bit of fun.
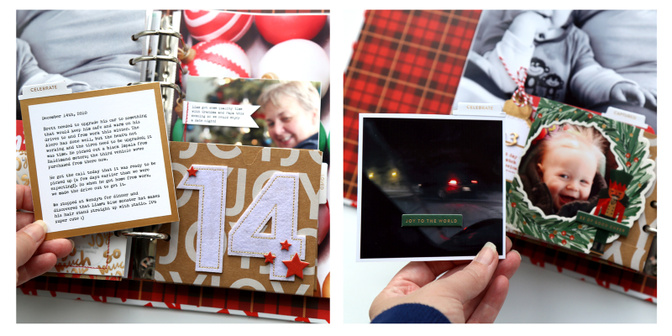
On the back of the pocket is the 2nd journaling card with the prompt, “What I love about our tree this year”.
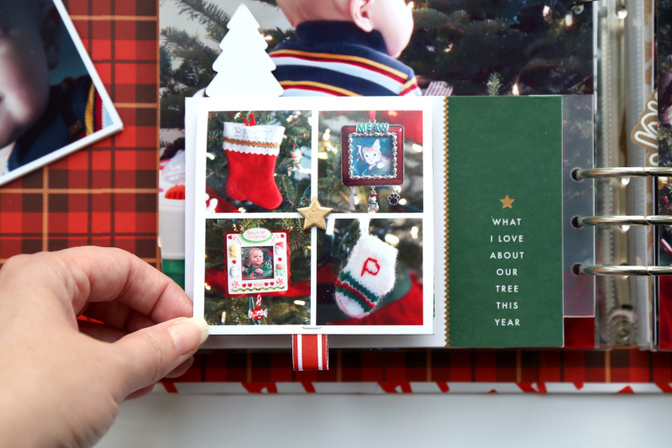
I added a few additional photos and a flip up with this prompt in mind.
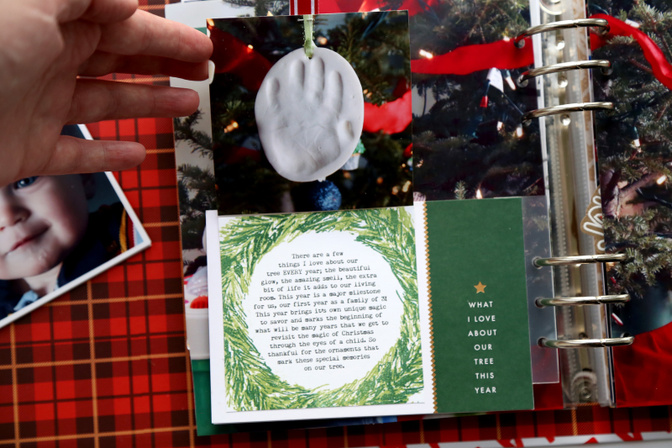
I cut out flags from the patterned paper, adding some stamping with gold embossing powder to create sentiments that felt like a good fit for this story (plus just a little bit of stitched detail with my sewing machine).
And here’s the process video of how this first project came together.
Project #2
This little folio holds the story of making our Christmas cards in 2010, starting with the plan, and right through to the finished product. It holds lots of fun ephemera, and the folio keeps it all contained as one unified story.
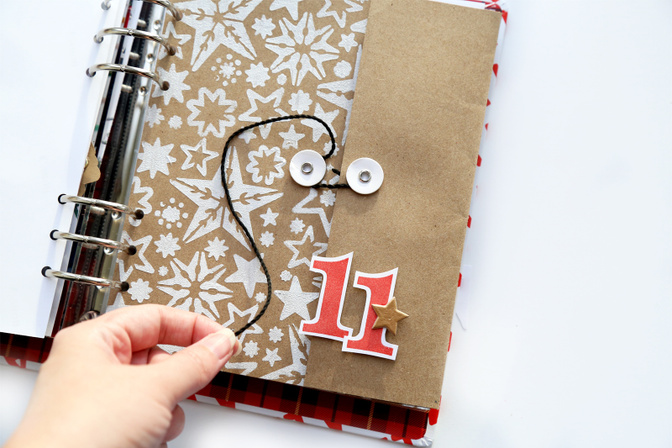
This folio is constructed out of the packaging that held the 10x8 papers in the main kit. I cut the envelope down to fit my 6x8 album, and kept the string closure as a functional element for this spread. Totally inspired by Jill’s mixed media post last week! I very much wanted to try using the stencil and white paint on some of the packaging from the main kit. It turned out so great!
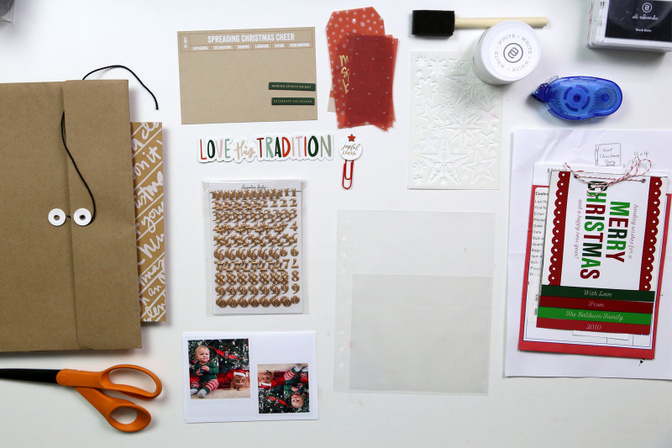
Main kit supplies: 10x8 paper packaging/kraft envelope, main kit box, 4x6 kraft journaling card, chipboard word strips, cardstock title, gold puffy stickers, vellum tags, 10x8 vellum wreath paper (not pictured), chipboard stars. Additional Supplies: DIY paper clip (see week 1), holiday stencil pack, paint pack (white and red), rolling adhesive, scissors, page protectors, number stamps, “Redwoods” crafter’s ink.
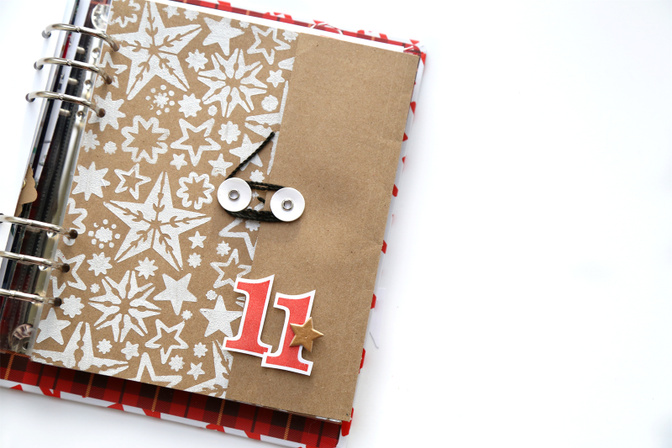
A very helpful feature that makes this layout functional is that the side of the envelope where the holes have been punched is not connected. The left and right side of the page are independent of each other, with the exception of the string closure that keeps them together. This makes it much easier to open fully inside the album and makes turning the pages much easier.
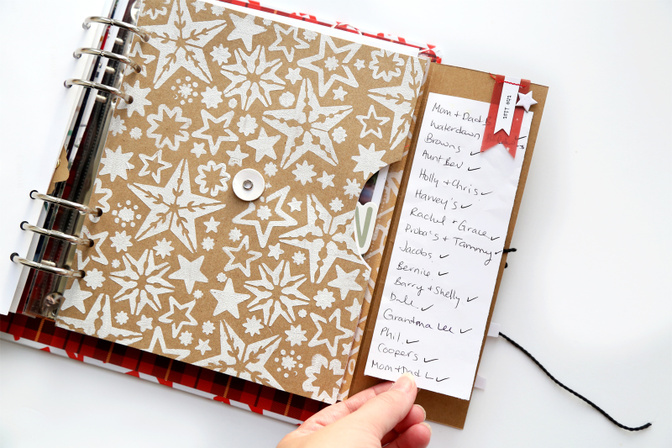
As the folio opens up, each new page reveals a different piece of the story, starting with some ephemera (Christmas card list).
Quick note to mention that any stitching you might like to add to the pieces inside the folio should be done BEFORE you adhere the pages down to avoid the stitching showing on the other side.
You’ll see in the video a different version of the bottom half of this page protector. After sleeping on it for the night, I decided to try using the wreath vellum pictured here, and I’m very happy with my decision!
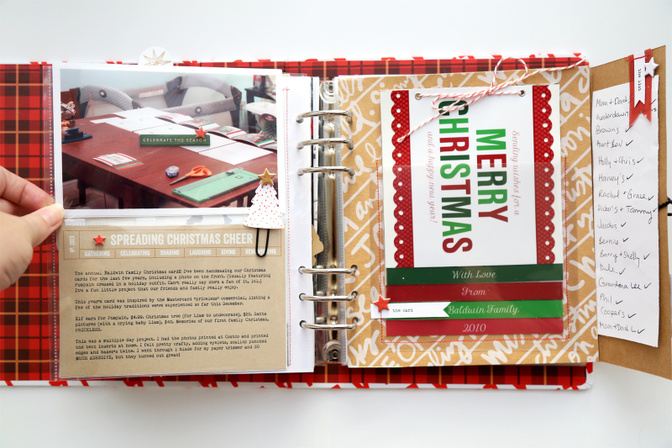
The second feature that I really love in this spread is the addition of the page protector inside the folio. I’m pretty sure this idea was inspired by Veronica Milan, and I think it’s brilliant!

The sentiment on the 4x6 kraft card was the perfect addition for this story about making our Christmas cards! I realize it has a 2023 title on it, but I’m totally okay with leaving it as is.
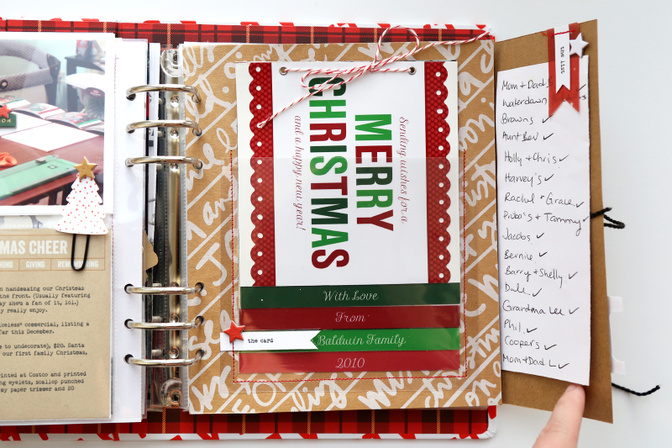
And the final element of this spread is the inclusion of our Christmas card. I cut down a 6x8 page protector and used my sewing machine to attach it. The background pattern here is actually the outside of the box this year’s main kit comes in.
Here’s the process video for a closer look at how this layout came together.
I’m calling this one “Project #2.5”. It’s constructed on the back of the folio, but it could also function as a layout on it’s own. It’s simple and lovely!
Very quick little video to share a bit about how this page came together.
Okay friends, the first 2 projects were definitely a bit more on the challenging side, but I’ve got a few lovely “easy” ones that really highlight some of my favourite pieces in this year’s main kit.
Project #3
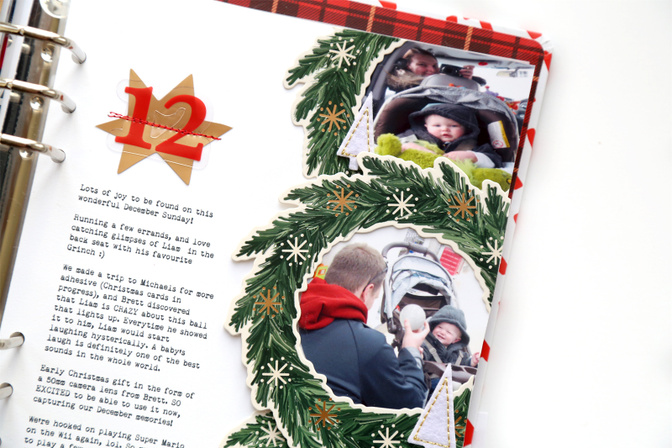
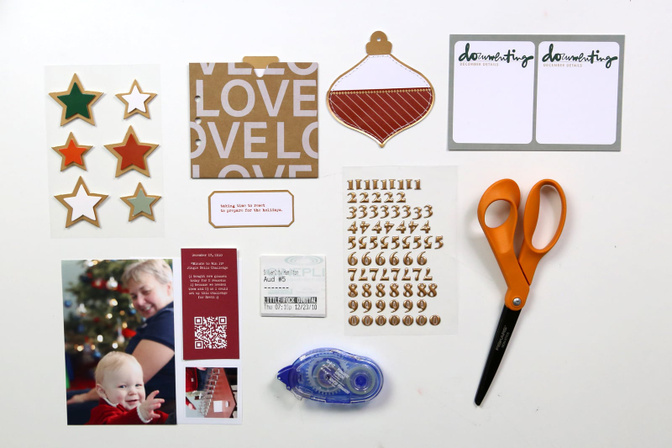
The story for this spread is just a few things that were bringing us/me joy! I went with a very simple design. 6x8 white cardstock background, typed journaling, and 3 of the main kit wreaths that held a few photos from the day.
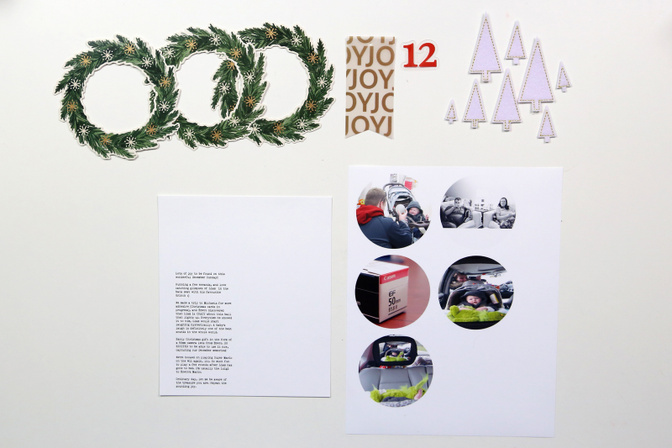
Main kit supplies: Cardstock wreaths, felt trees, plastic gold star. Additional supplies: Red plastic numbers, 3” circle punch, rolling adhesive, dimensional foam adhesive.
Here’s a look at the entire page
And the process video for how this page came together.
Project #4
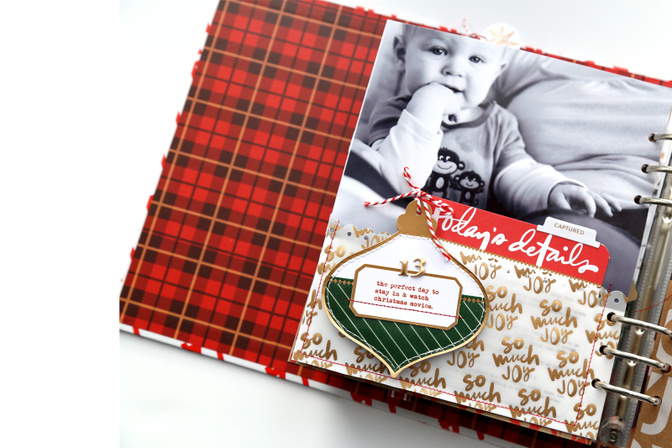
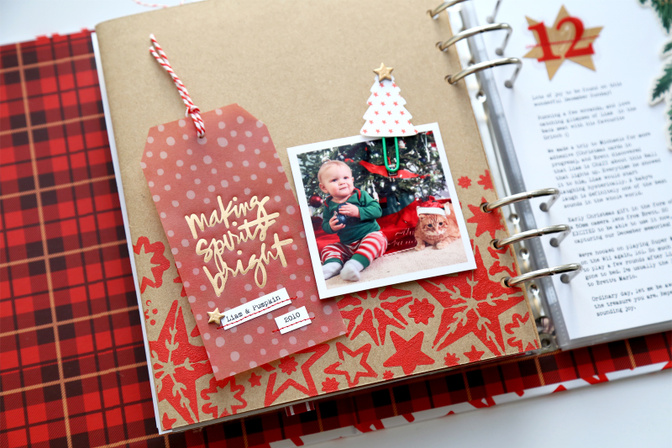
The 4th project also features an enlarged photo and a pocket to hold additional journaling and photos. The starting place for this story was really just about an ordinary day around the house.
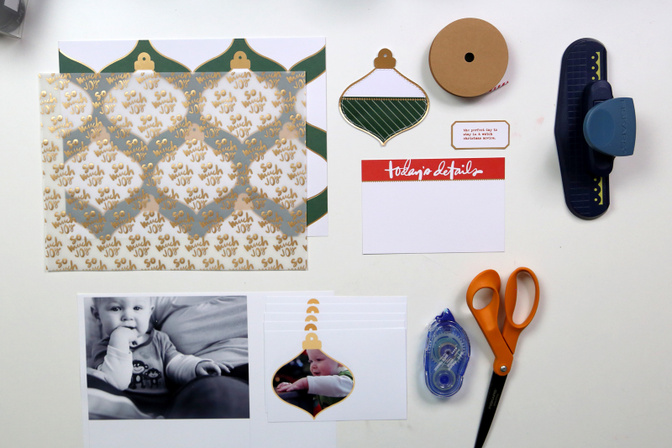
Main Kit supplies: Ornament patterned paper, “so much joy” vellum, gold rimmed phrase labels, 4x6 journaling card, puffy number stickers. Additional supplies: White tab stickers, bakers twine, paper punch, rolling adhesive.
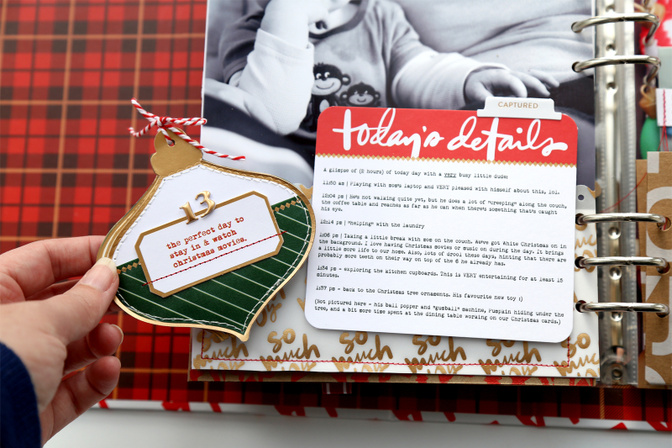
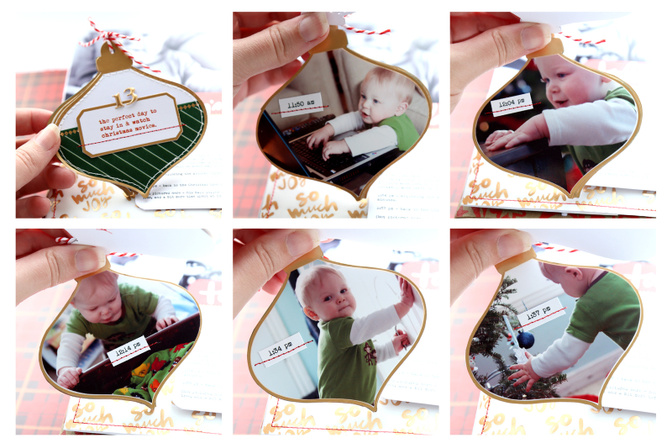
I had a series of cute photos that I wanted to include. When I tool a closer look at the time stamps in my organizer, I realized all of these photos were taken within a 2 hour time span. It gave me a different perspective of what an “ordinary day” looked like then with a 9 month old versus now.
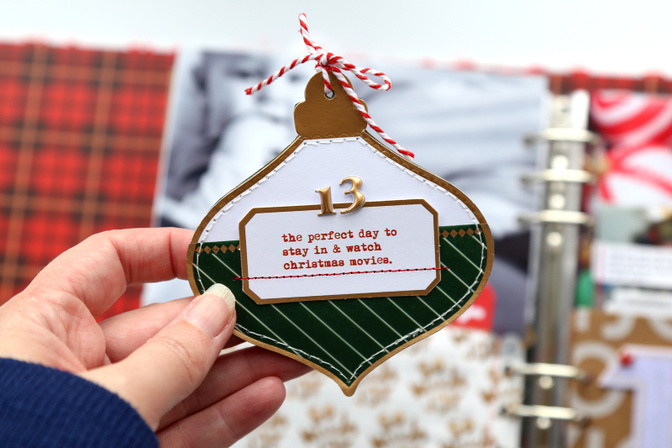
One of the key features of this page is the use of the ornament shape! I was excited to use the ornament patterned paper plus the ornament pockets to make a mini photobook.
Here’s the process video with additional information on how this page came together.
Project #5
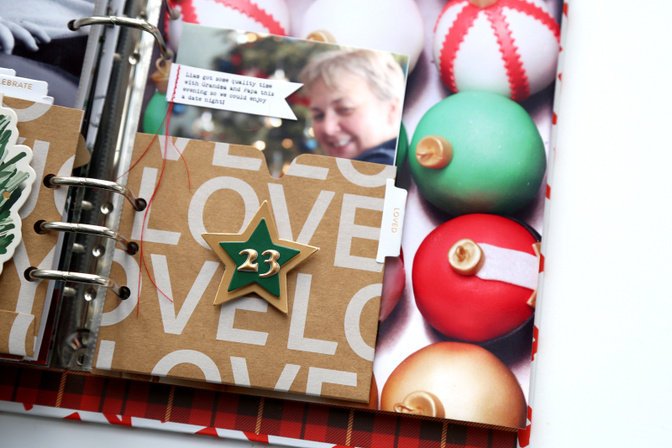
The kraft pockets are an awesome addition to this year’s main kit! If you haven’t picked up on it yet, I LOVE pockets! This was the perfect element to include a short little story in a fun and interesting way.
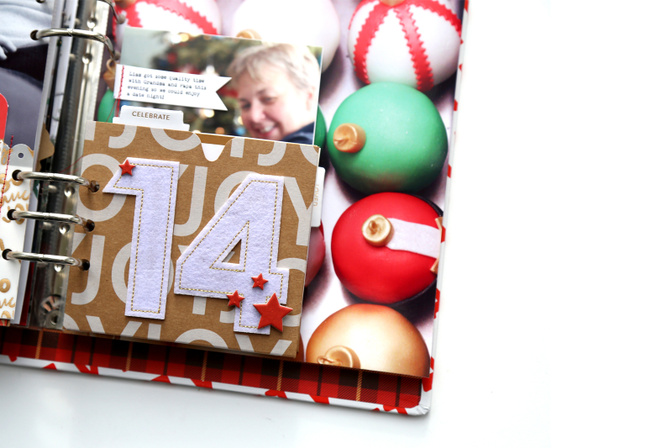
Main kit supplies: Kraft pocket and journaling card, chipboard stars, cardstock wreath, chipboard phrases, plastic nutcracker. Additional supplies: Felt numbers, white tab stickers, dimension foam adhesive.
I typed up the journaling for this story on my computer and ran it directly through my printer. While we’re talking about printers, I use a Canon Pixma iP8720. I currently print all my photos at home.
I dressed up the back of the pocket using one of the cardstock wreaths as a photo frame. I debated on whether I’d leave the entire wreath intact or trim off the edges that hung over the pocket. I decided to go ahead and trim it down so the back of the wreath wouldn’t be visible from the front of the pocket. I also adhered it to the pocket with dimensional foam adhesive. I love the way foam adhesive adds that extra dimension to my projects! The only downside is that it does create some rather bulky pages. This album is just about at max capacity after 14 stories, so I’ll need to move into a second one very shortly.
It’s also worth noting that I’ve been using “glossy accents” glue to securely attach several of the embellishments in this album. You’ll probably see in the video below that when I added it to the back of the felt numbers, it looked as though it was showing through to the front. Now that it’s dried, it’s no longer visible (thank goodness!).
Project #6
Last but not least, one more variation of the kraft pocket to hold a short story!
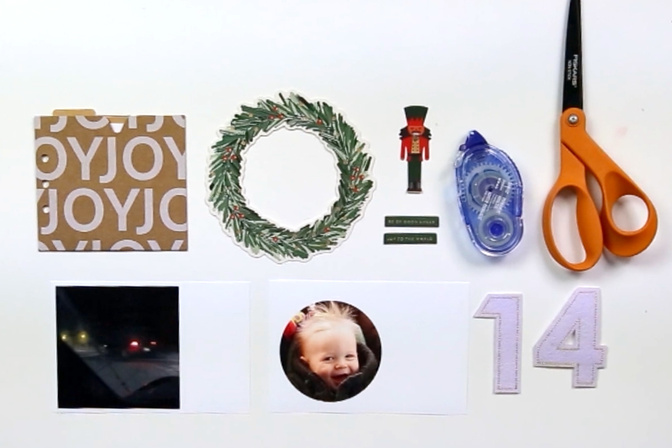
Main kit supplies: Kraft pocket, dimension star stickers, puffy gold numbers, ornament pocket, 4x6 journaling card, gold rimmed phrase label. Additional supplies: baker’s twine, rolling adhesive, tiny attacher.
The dimensional star stickers + the gold puffy numbers are a perfect fit! I added them onto the front of the pocket to get this story started. I added a bit of stitching onto a hand cut flag that hold the journaling for this 4x6 photo and opted to keep the extra threads long a loose. It’s a fun bit of extra texture and I like the way it looks!
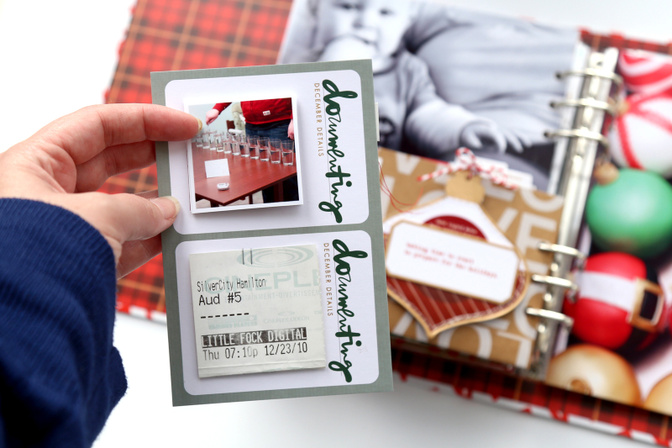
The real inspiration for the structure of this story was the 4x6 journaling card. I loved the prompt to “document December details”. The little squares there seemed like the perfect homes to hold some ephemera from the day. One option would have been to put an attacher sticker directly on the journaling card and slip it into my album “as is”. I felt that there was more about this story that I wanted to include, so I opted to use another Kraft pocket to hold everything in one place.
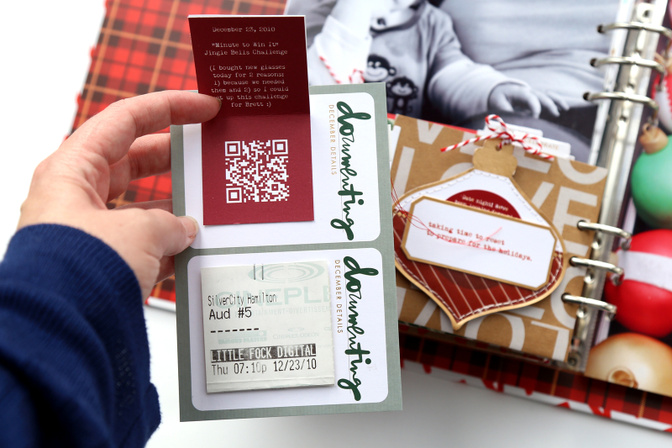
A fun feature in this project is the QR code that holds a video recorded from the day. The Minute to Win It, “Jingle Bells” water glass challenge. Super fun!
Here’s the final process video for this week.
I hope you found some inspiration and fun ideas to try in today’s post! Please don’t hesitate to leave your questions or comments below.


Comments
Sign in or sign up to comment.
44 comments
Wow, Pam you really knocked it out of the park! I feel like I just took a paid class with the amount of amazing, in-depth content you loaded into this post. This year's main kit is definitely a fave of mine and I cannot wait to get my hands on it. Thank you for all these incredible project ideas!
Replies to jlutherdesigns
Thank you!! ❤️
Sign in or sign up to reply.
Love the idea for using the envelope packaging! Really like how you shared your process video and how you think things through on the ideas you have. Thank you for sharing.
Replies to YveFen1
The envelope is definitely a fun feature of this packaging! Thanks so much 🤗
Sign in or sign up to reply.
Pam, your creativity is a gift. Thank you for sharing it with us. xoxo
Replies to kellyish
This is so kind, thank you!! ❤️
Sign in or sign up to reply.
Love your ideas Pam!! Thank you for sharing!
Replies to virginiegoujon
Thank you so much! 🤗
Sign in or sign up to reply.
Wow! Thank you Pam!
Replies to reneemc63
Thank you! 🤗
Sign in or sign up to reply.
Pam, I have been so inspired by your posts! Thank you so much for all of the content that you share! You are so very talented :)
Replies to showell
This is so lovely to hear! Thank you! ❤️
Sign in or sign up to reply.
You just blown me away! Such awesome ideas, thank you so much Pam !
Replies to disneygreg82
That’s awesome! Thank you 🤗
Sign in or sign up to reply.
Love this. Can’t wait to see the process videos. I just need to figure out an alternative to the stitching! Really enjoying this series. I think this is my fav so far!! Can’t wait to get my kit.
Replies to Tricia
Functionally, double sided tape totally works. For the appearance, you could definitely use a paper piercer and some embroidery floss OR even use a fine point pen and practice drawing on stitches. I’m sure there are even some stamps out there that mimic the look of stitching! 🤗 Thanks so much for your kind words!
Sign in or sign up to reply.
Love all the content in this blog post. So great, Pam.
Replies to Anne235
Awesome, thank you!!
Sign in or sign up to reply.
So fun. Thanks again for some great ideas.
Replies to anotheramanda
Thank you!! 🤗
Sign in or sign up to reply.
So much inspiration! Thank you!
Replies to Momany
Thank you! 🤗
Sign in or sign up to reply.
Pam,simply amazing. Love this so much ❤
Replies to fredebj53
Thank you so much!! 🤗
Sign in or sign up to reply.
Fantastic ideas Pam!!! Love them all and will probably include them all. I especially love how you included the folio and split it apart - looks amazing!!! Thanks for sharing your creativity!
Replies to CathyMac
Thank you so much Cathy! I’m excited to try that technique again too! 🤗
Sign in or sign up to reply.
Pam, your planning is absolutely amazing! Your ideas give me so many ideas! The extensive story about your Christmas cards is fantastic! It's so much better than just including the card, and this year I'm hoping (well planning, but based on experience, it's more of a hope, LOL) to use some Spellbinders stitching dies for my cards -- definitely worth a well thought out story plan like yours!!
Replies to Queen_Mary
Love that!! 🤗 Thank you!
Sign in or sign up to reply.
This post reminds me why you are my favourite guest designer! I love love love your pages - always have! Thank you Pam and cant wait to see more from you, so inspirational! THANK YOU!!
Replies to Bellaa75
Oh Bella, thank you!! ❤️
Sign in or sign up to reply.
Your posts and videos are always a treasure trove~~thank you!!
Replies to JoniG
Thanks so much!
Sign in or sign up to reply.
You are always so creative Pam. I love how you used the packaging!
Replies to Kpadalik
Thank you!! 🤗
Sign in or sign up to reply.
Pam, you wowed us all again! :) Love it all--the ornament shaped booklet turned out so cute! Thank you for all the work that you put into this and for sharing!
Replies to ahiggins83
Thank you so much! I really appreciate that 🥰
Sign in or sign up to reply.
These quick ideas are great! I will be using them in my album this year.
Replies to mrmama74
Love it!! Thank you! 🤗
Sign in or sign up to reply.
Great projects!! Can’t wait to use some of the ideas you shared. Thanks for the inspiration.
Replies to scrappinjam
Awesome!
Sign in or sign up to reply.