Tuesday Tutorials : May Flaum : Repurposing Old Magnets

This week Tuesday Tutorials welcomes May Flaum.
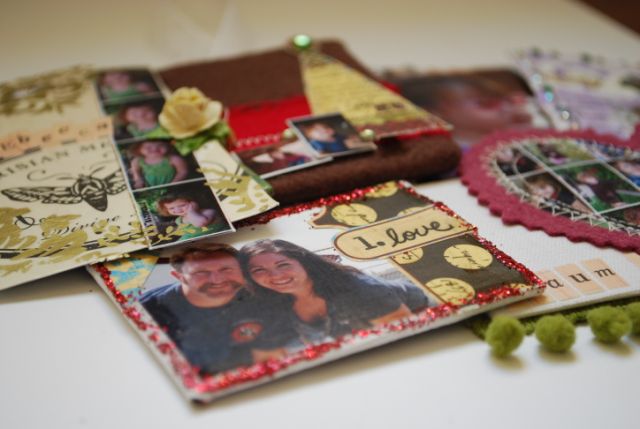
May sent this wonderful submission full of ideas for re-purposing and personalizing old magnets. Great examples to get your creative juices flowing for the upcoming holidays.
Here's May:
Do you have any magnets on your fridge, or perhaps even sitting in a junk drawer somewhere that you don't particularly like? I was trying not to snack the other day and staring at my fridge and was appalled to see how many of my fridge magnets were no longer something I wanted.
Upon closer inspection I discovered a few things about these standard fridge magnets. 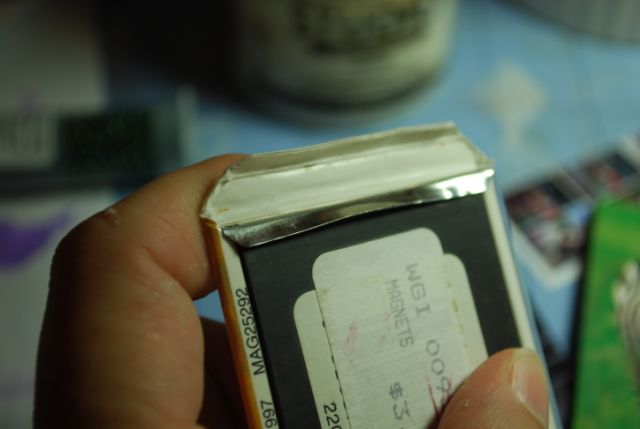
1. The paper and plastic coating can be removed.
2. They are two parts - the metal front covering and a thin board plus magnet part.
3. There is a lot of creative potential in these small bits.
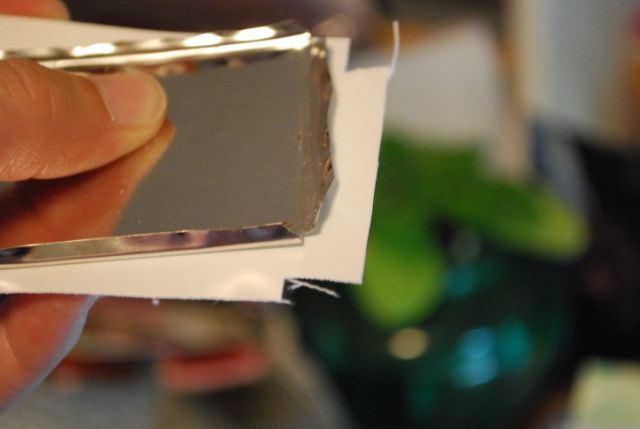
The problem I found with opening up the metal casing and removing the paper is that I always warped the thin metal. Perhaps if I was more gentle or had better tools I'd be more successful - but I always found myself warping the edges. My solution here was to either be ok with the imperfect look, slice the paper off (using craft knife) thus leaving metal casing alone, or simply scoring the paper covering to create a surface that would hold glue and allow me a surface to work with.
My process changes with the photos and supplies I want to create with, but one thing remains the same: This is a great project for re-using, recycling, scraps, and taking just a few moments to add creativity to your fridge.
SUPPLIES:
• Perfect Paper Adhesive by US Art quest (liquid adhesive, sealant, all around great product)
magnets
photos (crop-able and index prints)
• Left-overs - any scraps of paper, stickers, fabric, flowers, jewels, or anything else you desire can be used for these projects making them both economical and great stash busters.
IDEA ONE
Let's start with a simple photo magnet. First I roughed up the paper covering the magnet so that adhesive would better stick. Then I covered the back of a photo with tape runner adhesive and pressed it onto the magnet. I used a craft knife to roughly cut the excess photo off.
Once that was done I used an emery board (any sand paper or sanding block would work) all around the edges to file down and distress the edges.

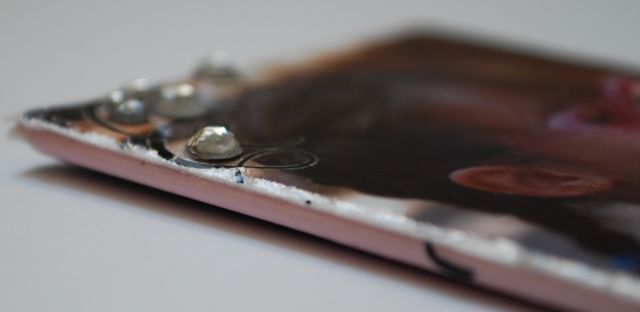
Finally I added a Basic Grey rub-on, jewels, and coated the whole thing with a generous coat of glossy finish liquid sealant (PPA by US Art Quest).
IDEA TWO
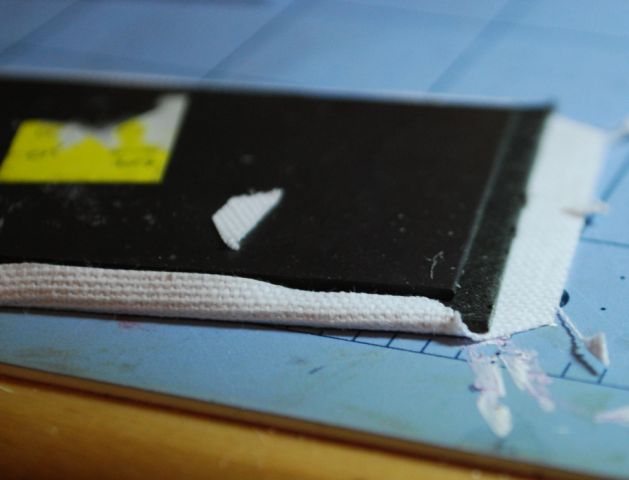
Next I made a magnet for my husband's locker at the fire station. This time I removed the metal casing from a fridge magnet and worked just with the magnet and board attached to it. I found Claudine Hellmuth's sticky back canvas to be a great product for covering these to create a neutral base to work with.
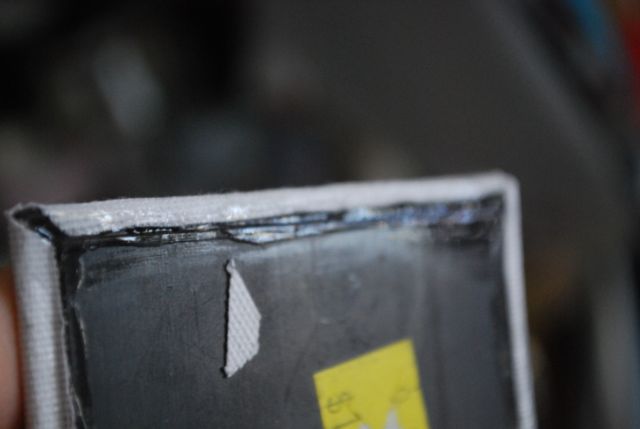
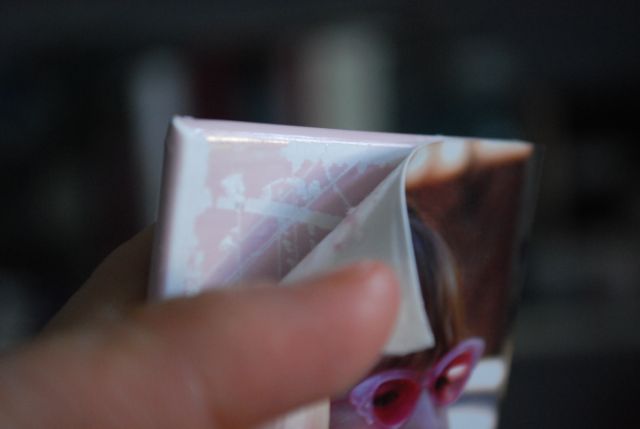
I cut a piece slightly larger than the board, removed the paper backing, and laid my magnet down centered on the canvas. Then I cut the corners at an angle (so they would not be lumpy with excess material) and pulled all the edges around to the back as shown.
Just to be safe I put a thick bead of liquid adhesive down around the edges on the back and allowed it to dry over night. This added extra stability and ensured that the edges of the canvas would not lift.
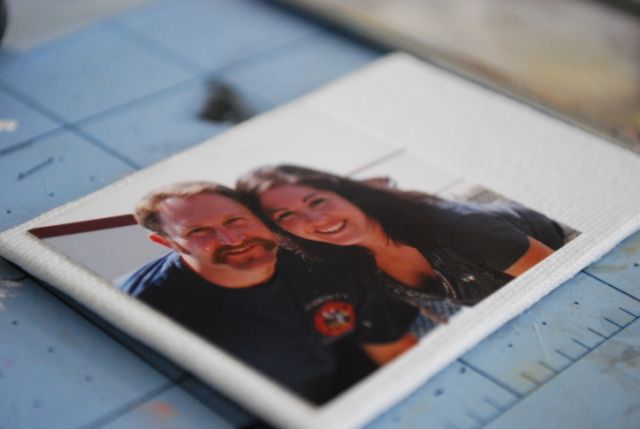
Once dry I got to work! I trimmed a photo down and placed with tape runner, then added Pink Paislee (Mistletoe & Co) patterned papers and a thin edge of glitter, and finished off with matte finish liquid sealant to keep the photo secure and make everything longer lasting.

You can see some glare off of this magnet - that's one of the downsides of using sealant is that it sometimes shows up in photos. But in person it doesn't and is totally helpful.
IDEA THREE
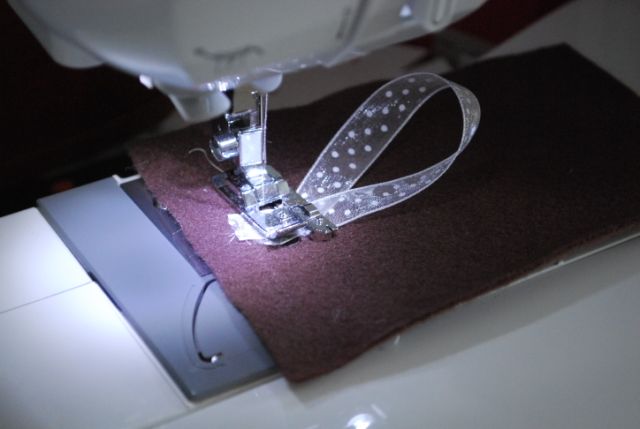
So what to do with that metal casing? I could add another magnet, but instead I wondered how it would work to create the base for an ornament. I cut a piece of brown felt larger than the front of the metal casing and sewed a loop of ribbon on where I imagined the top fold to be made. I also stitched on a scrap of torn red silk fabric across what would be the bottom third of the magnet and I stitched a paper Christmas tree (from Pink Paislee) in the spot I wanted as well.
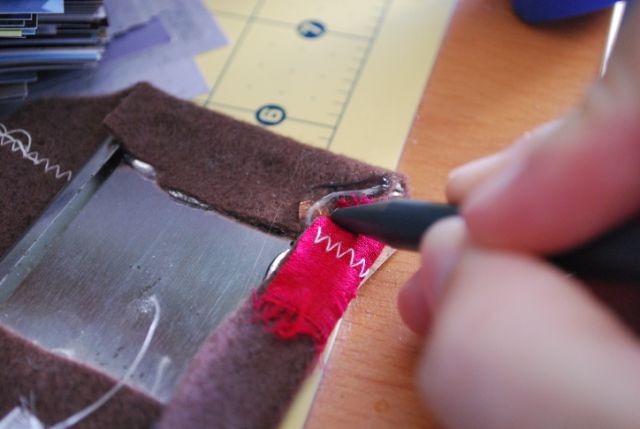
Sewing done, I got out my hot glue and attached the brown felt around to the back - being sure to pull it tight and keep everything straight.

I strongly suggest using a pencil, stylus, or other tool to keep your fingers away from the very hot glue you have to press into. I was overly generous I found out - but that's what these creative experiments are for so it's ok!

I added a paper scrap with my daughter's name and the year on the back as well as a pinking shear cut piece of brown felt to cover all the rough edges. A little hot glue slipped out - but that's ok!
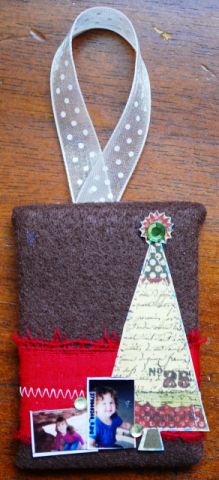
To finish off the front I added index print images of my daughters and several green rhinestones.
This is going to make a great package topper or gift for a special grandma or aunt. I think felt is the best material for the base of this simply because it's sturdy and covers up the rough spots of the metal better than a thin fabric or paper would. Just think of the possibilities for using up your stash and making special ornaments!
IDEA FOUR
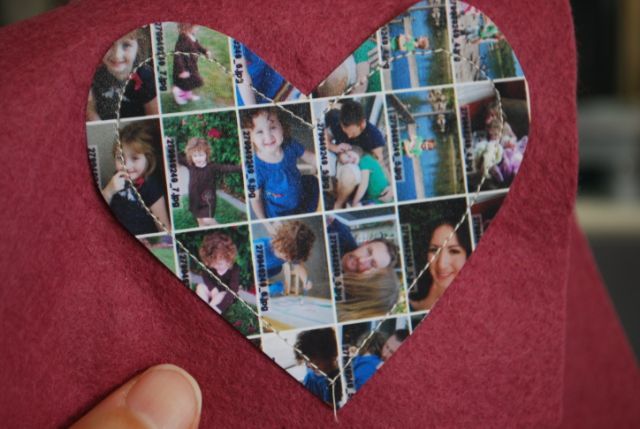
Getting out the felt started taking me in a whole new direction of creative play. For this magnet I did the same technique where I covered with Claudine's sticky back canvas first. Then I drew and cut out a heart from index prints and stitched it onto felt. I cut the felt with pinking shears about 1/8 - 1/4" from edge of photo.
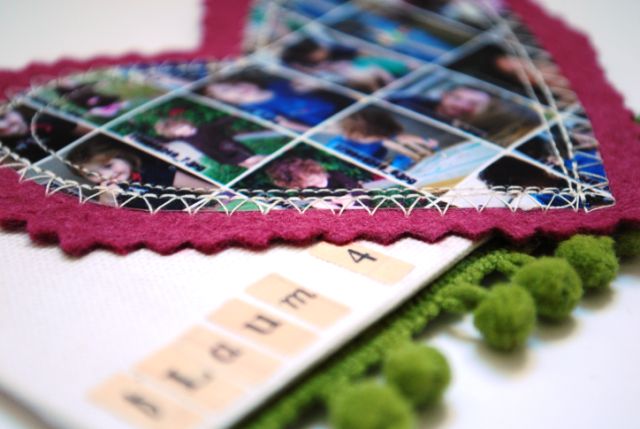
I used a flatlock stitch around the very edge - but a zig-zag or hand stitched edge would be great too.

I applied letter stickers (Making Memories) and sealed them on to complete my family magnet. I also glued a strip of pom-pom trim to the backside of the magnet (just below actual magnet).
I really liked how the heart turned out - I'd love to try a star or some other shape next time.
IDEA FIVE

Of course you don't have to play within the lines - your magnet subjects can fly off of the magnet and take on a life of their own. Here I used a (Making Memories) tag paired with a strip of index prints to make a special tag featuring my youngest daughter.
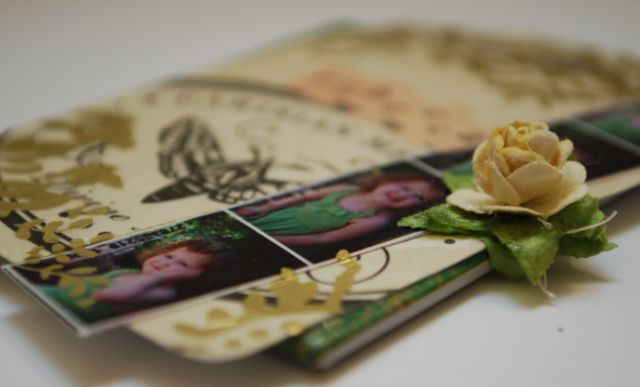
I used bits and pieces of this Jenni Bowlin rub-on (my current favorite!) along with some left over letters and a little rose to embellish this tag.
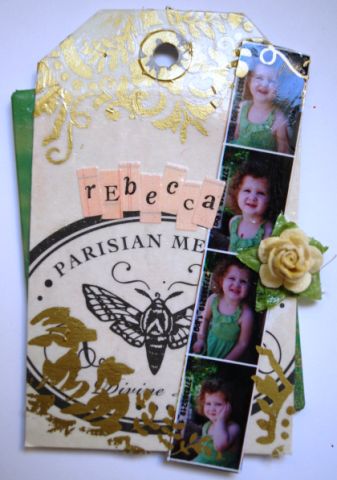
I worked directly onto a green zoo magnet - just scuffing up the surface to help the tag stick. I did apply a coat of sealant to this tag as well to add stability and ensure that my rub-ons and photos would be more protected.
EVEN MORE IDEAS

What I love most right now is that I feel like I’m barely scratching the surface here. The possibilities are truly endless. I look forward to giving these away as gifts as much as keeping some for my own home.
I've found that gift cards that no longer have monetary value are great magnet bases - just add a strip of magnet and all the techniques remain the same.

You can let your artistic side run wild and create little collages without photos - just fun works of art with stamps, charms, or any other tiny treasures you see fit.
Being able to create something from materials that might have otherwise been forgotten or thrown out, as well as working with a small surface that means quick projects is so much fun. I hope that you've enjoyed recycling fridge magnets, and that you'll have fun playing with some of your own.


She defines her style as eclectic, and has a soft spot for buttons, damask, polka dots, kraft cardstock, and mixing things up in unexpected ways. Nothing is safe when May is crafting - she'll try almost anything and has no fear of mistakes. She believes that messing up is the road to true creative discovery and has fun with her artistic adventures.
May is currently preparing for her next Big Picture class Adventures In Scrapbooking: Using kits as well as dreaming up her next wild project ideas.


I travel a bit and use the hotel door keys for similar projects. (the keys that look like credit cards) I have used them to make book marks for my friends and family. I'm thinking I may need to add a magnet for a new idea. Thanks.
Sign in or sign up to comment.
Very cool. Thanks May and Ali.
Sign in or sign up to comment.
Very cool idea! Anyone know how to print index prints at home on a mac?
Sign in or sign up to comment.
what a great idea! I cant tell you how many magnets I have on my fridge from people going places. I think i'd rather have my cute bugs face anyday! :)
Sign in or sign up to comment.
Love the idea of repurposeing my yucky old magnets. I am thinking theywould be lovely gifts and a great way to use all of my left over index prints.
Can you tell me more about the sealant that you are using? I've been looking for one but have no idea what is good. Thanks in advance!
Sign in or sign up to comment.
Heather I used PPA - Perfect Paper adhesive by US Art Quest. It's available in matte & glossy finish.
Sign in or sign up to comment.
Great ideas! I'm not going to pull of all my unwanted magnets and re-purpose them :)
Sign in or sign up to comment.
This is so clever and fun. Thanks to May and Ali.
Sign in or sign up to comment.
So fun! I'll have to try this...
Sign in or sign up to comment.
What a great project for teens!
Sign in or sign up to comment.
Awesome! Fantastic idea! Loving it! Truly inspired!
Sign in or sign up to comment.
Very clever ideas - thanks for sharing !!!!
Sign in or sign up to comment.
WoW! What a great idea!! Thanks so much for sharing!
Sign in or sign up to comment.
What fun! Thanks for sharing these awesome ideas!
Sign in or sign up to comment.
Wow what a talented lady May is!! Great ideas!!
Sign in or sign up to comment.
These are such good ideas and would make cute little Christmas presents.
Sign in or sign up to comment.
Cool idea, thanks.
Sign in or sign up to comment.
yeah! May great tutorial!
hugs, Amy
www.thepaperlife.com
Sign in or sign up to comment.
What a great tutorial. I can't decide which is my favorite. I really like them all, but I think my favorite is the one with the index print. How cool!
Thanks for sharing.
Have a great day!
Sign in or sign up to comment.
OK I'm off to the fridge to check out what needs re-purposing and I think I'll have to get some index prints just to try it out! I use Mod Podge or if I work fast, can use Glossy Accents to seal photos and patterend paper. Tissue paper from pretty serviettes are gorgeous stuck down with Mod Podge(remove the white layers of backing tissue) and a meanigful word/phrase. Don't worry about wrinkling the metal-put it thru the Cuttlebug and 're-pattern' it! Looks great with Staz-on wiped across to hihglight patterns.
Sign in or sign up to comment.
Thanks Ali and May!I was just looking at all those ugly magnets on my fridge!
Sign in or sign up to comment.
I have done this before but never so creatively!
Thanks so much for the ideas!
I know what I'm helping my 3 yr old class make for their parents for Christmas this year!!
Yea!
Sign in or sign up to comment.
Neat stuff!
Sign in or sign up to comment.
Wow, gorgeous stuff! Thanks so much for the tutorial and the food for thoughts LOL
Danie
Sign in or sign up to comment.
I am making save the date for my DD upcoming wedding and I already planed on putting magnets on the back of them. Were you peeking in my room ;) Thanks for some more great ideas.
Sign in or sign up to comment.