Scrapbooking With Your Computer : Digital Product Definitions & Suggestions
This is part two of Day Three of my week-long series on Scrapbooking With Your Computer.
There are tons of sites and tons of different options when it comes
to selecting digital products. Below you will find a brief explanation/definition
for some of the popular product types and some suggestions to add to your collection:
ACTIONS : Actions are essentially a pre-programed set of steps/tasks that can be applied to photos or other creations in Photoshop/Elements. Popular actions include ones that will make quick adjustments to your photos such as totally rad actions (free trial download here) or ittybitty actions. Here's a link
for
learning how to load actions in different versions of Elements. You can also create and record your own action steps in Photoshop CS but you can not record custom actions in Elements.
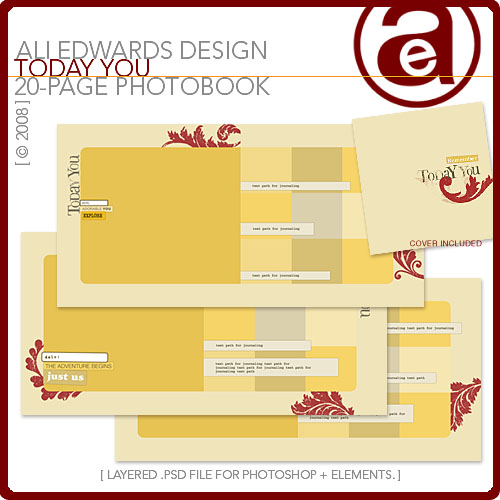

ALBUMS/PHOTOBOOK TEMPLATES : These include multiple pages (either quick pages or layered templates) that are all designed to work together. Often they come pre-designed with photobook printing in mind - such as being designed to specifications at Shutterfly. These albums can be printed out in book format or as individual pages. [ Ali Edwards Today You Photobook Layered Templates (see completed example here) and Anna Aspnes MultiFoto Layered Template Album 12x12 No.2 (see completed album example here) ]
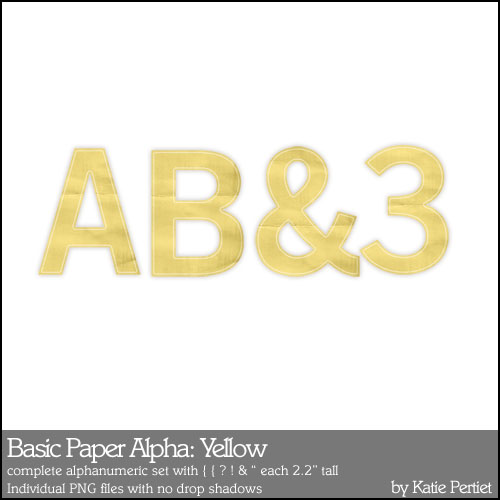
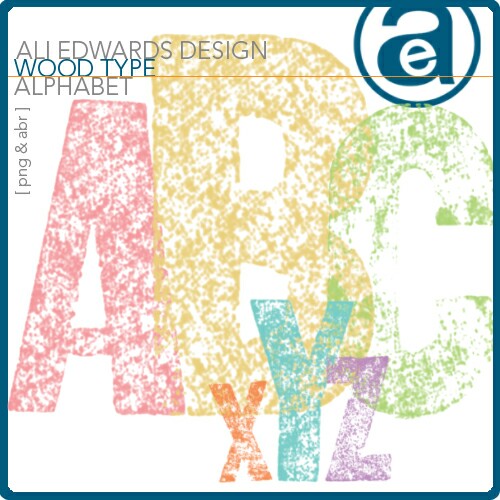
ALPHABETS : Just like traditional scrapbooking, alphabets are a popular choice for adding text and titles to your digital projects. Most sets come with each letter and number as its own .png file. [ Katie Pertiet Basic Paper Alpha/Yellow and Ali Edwards Wood Type Alpha ]
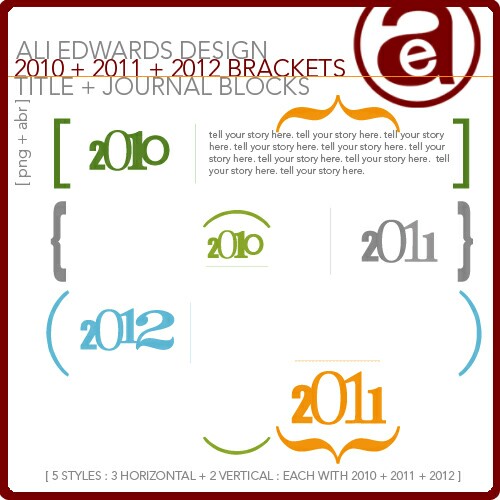

BRUSHES/STAMPS : Brushes are basically just like traditional stamps. After loading them into your brush palette you use them much like you would a stamp to add them to your photo or project. When you download a product labeled Stamp & Brush, such as the one above, you will receive the designs in .png format (the "stamp") and .abr format (the "brush"). Here's a link to a video tutorial at Two Peas by Sande Krieger about working with brushes. [ Ali Edwards Bracket Title + Journal Stamps & Brushes (see layout example using this product here) and Ali Edwards Hello Life Title + Journal Blocks ]
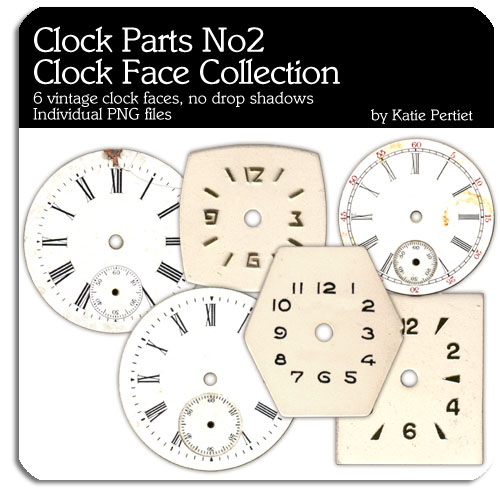

ELEMENTS/EMBELLISHMENTS : This category includes a whole range of different products. Everything from epoxy circles to tags to brads & other fasteners to acrylic clocks to stitching to word stickers and frames and borders and so much more. My approach to choosing and purchasing digital elements is similar
to my approach to traditional supplies: I like things that are
versatile with universal themes that can be used to tell any number of
different stories. [ Katie Pertiet Clock Parts No2 and Ali Edwards Love You Embellishment Collection ]
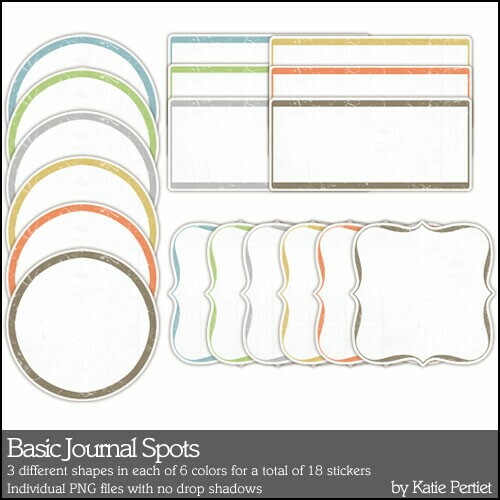

JOURNALING SPOTS/LABELS : Journal spots are elements to be added to your pages (or printed out as hybrid embellishments) as a home for your words. [ Katie Pertiet Basic Journal Spots and Katie Pertiet Worn & Torn Journalers ]

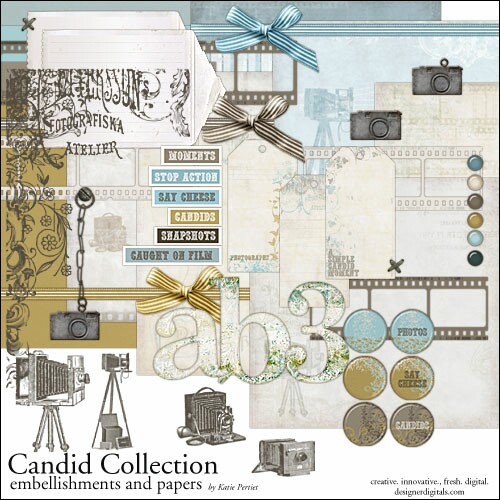
FULL KITS : A full kit is a product that includes a variety of different coordinating elements: pattern papers, an alphabet, embellishments, etc. They are great if you like to have a collection of products that all go together or you can break them up like I do and work with the pieces and combine elements with other products. [ Andrea Victoria Garland Mini Kit and Katie Pertiet Candid Collection ]
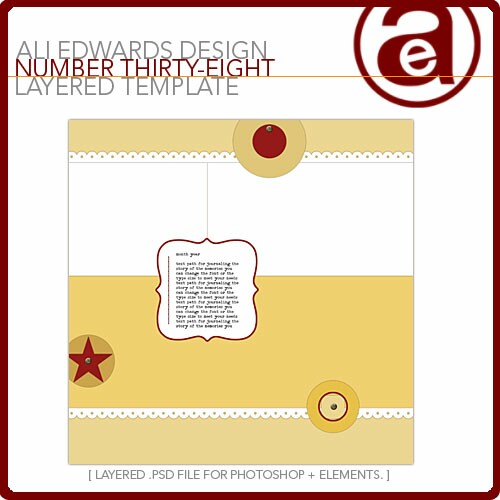
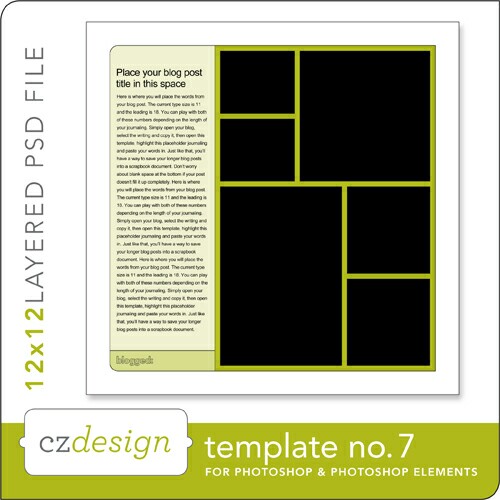
LAYERED TEMPLATES : Layered templates are full layouts designed a lot like sketches. They give you a base foundation (and often include a couple of elements or a title) and you complete the page with your choice of pattern papers, additional accents, journaling, etc. Layered templates are .psd files and are only able to be opened in Photoshop or Elements. When you open a layered template you will see that each element has it's own layer in the layers palette. I will talk more about layered templates later this week. For a previous tutorial showing how to use one of my layered templates go here. [ Ali Edwards Layered Template N0. 38 and Cathy Zielske Layered Template No. 7 ]

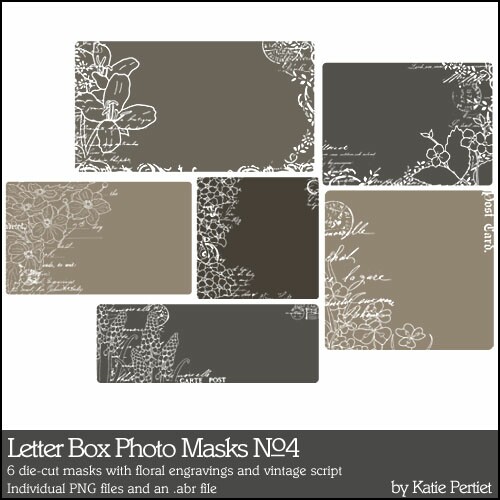
MASKS : Masks are something that may be a mystery to you if you are new to digital scrapbooking. [ Katie Pertiet Notebook Paper Masks Brushes and Stamps No. 01 and Katie Pertiet Letter Box Photo Masks No. 04 ]
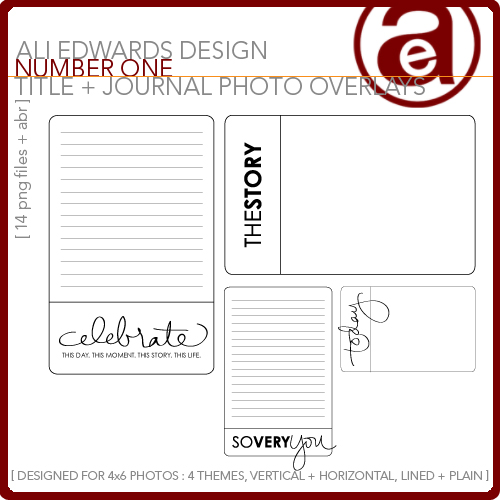

OVERLAYS : These are one of my favorite products to use printed out as the base for a layout, placed on top of a photo, or as a hybrid element on a traditional page. I have created quite a few different overlays and used them for projects such as my Week In The Life album in 2008. [ Ali Edwards Title + Journal Photo Overlays No. 1 (see example here) and Ali Edwards 365 Days Monthly Photo Overlays ]


PAPERS : Includes both cardstock and pattern papers. [ Michelle Martin Ethan Solids and Lynn Grieveson Typo Paperpack ]
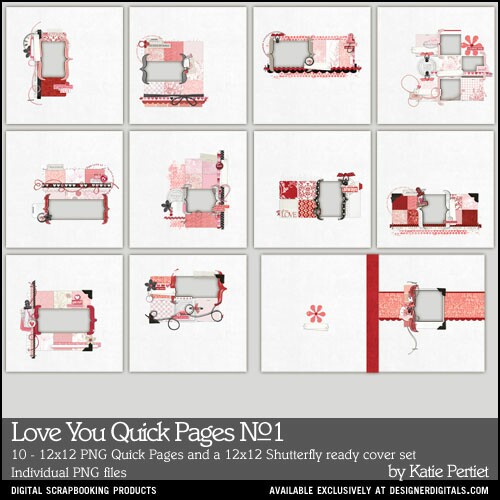
QUICK PAGES : Quick pages are pages that have been completely designed for you and all they need to be complete are your photos and journaling. Quick pages, whether as an album or as an individual page, are flattened files meaning you can not move elements around on the pages. You simply open the file, open & add your photo(s), add your journaling, and print or upload to your developer. This is a great quick, simple option for people who want to have a well-designed look but don't want to take the time to put all the elements in place. [ Katie Pertiet & Kayleigh Wiles Love Quick Pages No. 1 ]

THURSDAY : Masking And Working With Layered Templates
Tomorrow I will be taking you through the steps of creating a layout using a layered template (including how to mask photos and papers). A free layered template download will be available for you to test out the process.
For other posts in this series go here.


Thanks so much for doing this series! I bought Elements in November with the intention to start exploring the digi world...but I have yet to actually use it since it didn't seem at all intuitive after I installed it. Thanks again for helping us newbies get started - your time is really appreciated!
Sign in or sign up to comment.
Great series! I just wanted to point out that you can open .psd files with the free program GIMP.
Sign in or sign up to comment.
I have a Mac and am wondering if you suggest Photoshop over Aperture? I don't have either one, but would like to purchase one of them. I know you are a Mac user as well, so thought I would ask your opinion. Thanks!
Sign in or sign up to comment.
Hi Tawni - to me it's really not either/or. Photoshop is a photo-editing program (and so much more) and is not a library for your photos. Aperture is a library for your photos (like iPhoto) and has some photo-editing capabilities. You can't add text or other elements to photos in Aperture.
Sign in or sign up to comment.
Oh cool - I need to check that out. Do you have full layer manipulating capabilities?
Sign in or sign up to comment.
Thanks Ali, love all the info this week...just a quick question? I have PS Elements 8 on my laptop and noticed it has a wonderful organizing program. I have CS2 on my main computer and love it but haven't found any kind of photo organizer, do you know if it comes with one? The PS organizers seem to be able to do so much more than Windows!
Sign in or sign up to comment.
Can I use actions if I have a Mac and PSE 6? I was under the impression that I can't. Thanks if you can reply. You're amazing!
Sign in or sign up to comment.
For those interested, I wanted to share two more great sources of actions:
1. Pioneer Woman (Free): http://thepioneerwoman.com/photography/2008/04/actions/
2. Kubota Actions (Expensive but worth it): http://www.kubotaimagetools.com/store/cart.php?target=category&category_id=258&partner=10935&gclid=CISm87u5tJ8CFRD7agod1Bfl0w
Also, I'm loving your series this week -- great compilation of info for new and seasoned digi scrappers alike! =)
Sign in or sign up to comment.
Thanks Liz! I totally forgot about PW!
Sign in or sign up to comment.
From a google search it looks like you can - here's some instructions: http://graduategrace.blogspot.com/2009/03/installing-actions-in-photoshop.html
Sign in or sign up to comment.
Superb , Wow, thanks a lot. It helps a geek like me.
Sign in or sign up to comment.
Hi Ali, This might be a basic question but I use Picasa to make collages of photos (printed as 4x6) to sometimes include in my project 365 - is there an easy way to do this in Elements? It's not too convenient to import all my photos from my iphoto library to picasa to make a collage and I'd love to be able to use all the stuff I've been learning this week to dress up the photos. Thanks so much again for compiling all of this great stuff!
Sign in or sign up to comment.
Ali, this has truly been helpful. It's been 4 month's since converting to digital and part of that time I have been using memory mixer which has been helpful. About 1 week after using it though I wanted more options to be creative which is why I turned to elements. Thanks for the guidance on just some of the basics. Truly appreciate it and looking forward to the rest of this week and hope you will share more ofyour digital in the coming year. Looking forward to now purchasing more items from designer digitals.
Sign in or sign up to comment.
Um, Ali--you are amazing!! This series is awesome! I just got PSE8 and am hoping to start using it. Thank you for all of your incredible work.
Sign in or sign up to comment.
Thanks for the free template, Ali. Great job explaining the basics.
Sign in or sign up to comment.
Thank you so much. I don't know if you realize how big this is. I have had PSE rusting on my computer for months. Thank you!
Sign in or sign up to comment.
Thank you so much for these definitions!!! I have been wanting to know this information for so so long. I so appreciate it.
Sign in or sign up to comment.
Hi Ali! Thanks so much for the info...quick question from the video...do you have to reload the brushes every time you want to use them or will they stay in your brush drop down menu?
Thanks again!
Sign in or sign up to comment.
You are an awesome teacher. Thanks so much.
Sign in or sign up to comment.
Ali, this is the first series of tutorials that I've watched where PSE is actually starting to make sense. THANK YOU SO MUCH!!! Like all the previous commenters thank you for doing this and I hope you continue this series or something similar throughout the year.
I do have a question about the photos you used in the layout. You mentioned you kept them at 72 dpi when you move them into the LO. When the LO is completed & you save everything is that when you change the quality to 300 dpi?
Sign in or sign up to comment.
Oops, Ali. I left my comment on the wrong blog post. My comment refers to Thursday's post. Thanks!!
Sign in or sign up to comment.
I have been scrapping digitally for a few years now and I love it. It is so simple, once you know how. Your instructions are so thorough and well laid out for those wanting to take on digital scrapbooking.
I do have a question for you...Let's say I want to reduce the size of a 12x12 digital paper down to 6x6 because I want the pattern to be very small, is there a sure-fire way to duplicate those papers to fill a 12x12 page, but so that the design on the edges of those papers will line up? I don't want a 'seam' line, but to make it look like one continuous 12x12 page. Sort of like how you would line up the pattern when you put up wallpaper. Does that make sense?
Sign in or sign up to comment.
Thanks. I'll explore that link. Again, amazing.
Sign in or sign up to comment.
Mine stay - I am not sure if there is a setting for that or if that is the default. It's pretty easy to end up with tons in there :).
Sign in or sign up to comment.
Thanks Ali for posting the quick pages!
Sign in or sign up to comment.