December Daily™ 2011 | Day Three

Welcome to December Daily™ 2011 | Day Three.
Remember back on my Hello December post I suggested not getting hung up on exactly what day something happened? Here's an example of that for me today. These photos are from the last couple of days. That's good enough for me!
Today it's all about the twinkle.
Let's take a closer look:

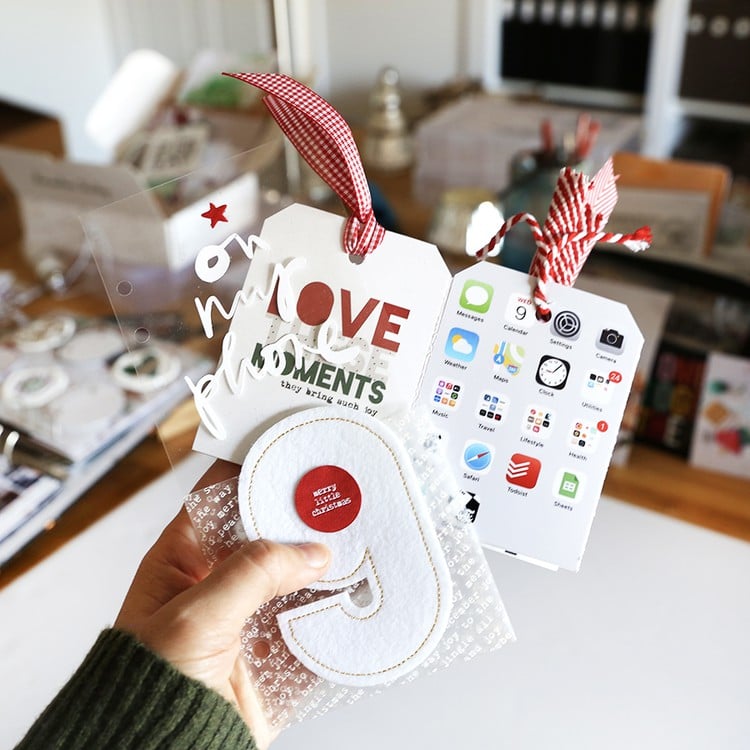
My Day Three ended up being a full page photo on the left and a photo and journaling on the right. All the photos I used to tell today's story were taken with my iPhone.
One of the biggest things I did for this spread was play with my Silhouette Cameo. Both the words above (bright and twinkle) were cut out using the Cameo which is an electronic die-cutting machine. It hooks up with your computer, you open some software, open a design (that you either create on your own or from their store or from a digital product), load some paper, and then click a button (essentially) that tells the machine to cut your design from cardstock (and other materials like vinyl).
That's a rough explanation, but you get the idea.

I've been wanting to play around with this more and I had some time to devote to it today and was super happy with how things turned out.
I ended up recording a video that shows how I opened up one of my digital word art files (from my new Christmas Preparations set) in the Silhouette software, traced it (so easy - click a button), and was then able to cut it out to use on my page.
My cut settings were this:
- Media: Cardstock (I was using White Bazzil Orange Peel)
- Speed: 3
- Thickness: 33
- Double Cut
NOTE : When I opened and traced the word "twinkle" I did need to clean it up a bit by removing two little areas. To do that I selected the word, went to Object/Release Compound Path. That allowed me to delete a couple extra shapes that appeared after the trace. When I was done deleting those two little areas I selected the word again and went to Object/Make Compound Path to connect it all together again.

When it comes out of the machine it looks like this. You can see where I started to peel up the word.
And here's what it looks like when it was completely removed from the backing:

I was really excited at this point.
I decided to do another word (twinkle) to add to the other image.

I could have easily just left these two words alone and stuck them down but I decided to play a bit more.
I laid each word down on a craft sheet, added Versamark embossing ink, poured on some Zing Brown Sugar embossing powder and then set it with a heat gun.

Awesome.

To adhere the words onto my photo I used a Martha Stewart Glue Pen.
You could also use a Xyron to add adhesive to the back (the Creatopia would be great for larger words). After I stuck the word down I put something a bit heavier, like a block stamp, on top to hold it down. And nope, I'm not left-handed - just wanted to show a photo holding the glue pen and was holding the camera in my right hand.

One thing I didn't want to deal with embossing was the dot for each of the "i" letters. Actually I tried and it just wasn't happening.

Instead I used two Studio Calico Crafty Cardstock Stickers. They are self-adhesive but I decided to pop them up a bit with 1/2 of a foam tab.

I added my journaling in the box below the image on the second page (writing directly onto the cardstock). That second page image is two photos that I brought together in photoshop that shows a before and after shot of the lights.
Here's a look at it in the album:

Bring on the twinkle!


I also wanted to let you know that I have four new products available at Designer Digitals this weekend (two are shown above): Outline Christmas, Christmas Preparations, Faithful Christmas, and Celebration Of Life (which was created to help people honor and tell stories of those who have passed). All new products are always on sale the weekend they debut.
Don't forget that Designer Digitals is also doing a Days Of December sale where a selection of a couple hundred random products are on sale each day. Check out what's on sale here.
SUPPLIES | DAY THREE
Click on the images to link to the products.
|
|
|
|
|
|
|
|
|
|
|
|
|
|
|
|
|
|

TODAY'S POST SPONSORED BY | Online Card Classes
Join Kristina Werner and Jennifer McGuire for stamping and cardmaking technique classes at onlinecardclasses.com. Each class includes lifetime access to materials including numerous how-to videos and PDF downloads. Get the most out of product you already have on hand by adding new techniques to your crafting arsenal!
SHARE A LINK TO YOUR DAY THREE
You’re invited to include a link to your DAY THREE page here. Please link directly to your post vs. your general blog link.


Good morning Ali! :-)
Soooo beautiful! Love your day 3 (like all the others before) and can't wait to see what's coming next!
Have a lovely sunday!
Ilona
Sign in or sign up to comment.
I just love the bright and twinkle word you cut out! Great idea and I will probably use it further along the way in my DD
Sign in or sign up to comment.
Ali, I love the page and the words on top...I'm so excited to be doing this again. My first attempt was in 2009 (half completed book although I did do all the photos and wrote notes but as I made the book myself the craft shop ran out of the cardboard i was using at the time). Last year's used your digital templates and printed and put them into an album and LOVE it and I'm excited about this year's as well. Thanks for sharing such wonderful projects with us to help record our families christmas traditions. Kathy, Brisbane, Australia
Sign in or sign up to comment.
Hi Ali. My first time completing December Daily and am loving it! Just completing my Day 4 layout now. Thanks for all the wonderful inspiration. XXX
Sign in or sign up to comment.
oooh! good plan! Must get the craft robo out!!!
Sign in or sign up to comment.
love love this Ali!! Way to go on those lights.
Sign in or sign up to comment.
So lovely
Sign in or sign up to comment.
Gorgeous words Ali! Now I have the words silhouette on my Xmas wish list.....This is my first year too of doing December Daily and I'm hooked. You are so inspiring. Thank you.
Sign in or sign up to comment.
I love the picture with bright. That really is the holidays. Thanks for sharing.
Sign in or sign up to comment.
We are loving this so much! Thank you!
Sign in or sign up to comment.
This is so pretty and yet so simple Ali. I really love this layout. I think I need to look more into that craft sheet too...
Sign in or sign up to comment.
Absolutely beautiful!
Thanks for posting about tracing the png files. I just played with your "Messy Little Christmas" and LOVE it.
Thank you Ali for sharing your ideas!!!
Sign in or sign up to comment.
I love what you do Ali. Thank you for sharing.
Sign in or sign up to comment.
I love this spread. The words are great!
Sign in or sign up to comment.
What a great idea. I have a lot of digital designs. Now I can use them in an other way!
Sandra :)
Sign in or sign up to comment.
Ali:
I have a tendency to start projects with lots of excitement and then flounder in the middle and regain steam towards the end. Knowing this about myself, I'm worried that I won't keep up with December Daily mid-month, but I really want to this year.
Do you ever make pages ahead of time - like with the photos & journaling & everything - as kind of filler days that you could slap the day of the month on later (so that you have your missed days already covered); and then if you didn't miss any days, maybe those filler pages would just act as additional pages? I'm thinking about doing this because I have some busy days coming up where I can't imagine that I will get to this project and I don't want to get so behind that I give up mid-month.
I would love to hear strategies for this. Thank you!
I think that is totally acceptable! There are no rules at all. I haven't done that, but I have thought about it especially as things get busier. Make it work for you.
Sign in or sign up to comment.
Beautiful. I must get pictures of mine up soon.
Sign in or sign up to comment.
just beautiful.
Sign in or sign up to comment.
that is so cool! I love anything with a die-cut.
Sign in or sign up to comment.
Great spread Ali! Love the embossing you did to the words! Do you do anything special in editing your iPhone photos? Because mine always come out grainy.
Nothing special. When I opened them in Photoshop I went to Image size and changed the size to 6.5x8 (for the big photo) at 300 dpi. Just make sure that you are using your iphone camera at the highest resolution. I have an iphone 4 - when I had an iphone 3 the quality of the pictures were less overall (my opinion).
Sign in or sign up to comment.
That is so cool! I've always wanted one of those die cutting machines that does your own images (rather than cartridges) but they used to (???) not work with Macs. Maybe someday! You make it look so easy!
Silhouettes now work with Mac!!!! The Silhouette SD and the Silhouette Cameo both work with Macs, the original is the only one that doesn't!
Sign in or sign up to comment.
Really beautiful pages,thank you for sharing them.
Sign in or sign up to comment.
I love the simplicity of this beautiful design!
Sign in or sign up to comment.
Love the idea of using cut words on the photos. Thanks for the inspiration to try something new. I have a Cricut so this is something I'd like to use in my DD. I have a Gypsy which enables you to weld letters together but I think using the Design Studio with the Cricut enables the user to use PNG files. Would love to hear feedback from other Cricut users.
Sign in or sign up to comment.
Great ideas !!!
Sign in or sign up to comment.