Three Things : For the Love of Yellow + A Layout
It's usually about this time of year that I start longing for some some lovely spots of yellow both in my house and in my work. I've definitely been into pink lately, but as soon as I start seeing yellow tulips and daffodils in the store I start getting excited about the crisp, fresh nature of spring. There are definitely not any tulips or daffodils blooming locally, but they are starting to push up through the dirt in the pots outside my front door. Ah, possibility and growth. I love the cycles of the seasons.
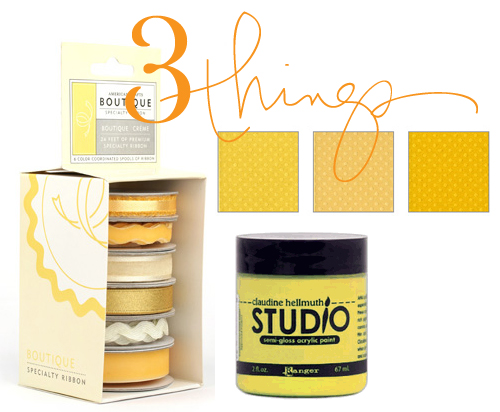
Today here's three yellow things to celebrate the newness of the next season and a layout inspired by all this yellow goodness.
Studio by Claudine Hellmuth for Ranger : Semi Gloss Pastel Yellow Acrylic Paint : See the layout below for use of this paint. Love the consistency.
American Crafts Specialty Ribbon Creme & Yellow : I always like to have a small collection of ribbon on hand for a variety of different crafting tasks. This set is a nice combination of yellows + cream.
Bazzill Basics Dotted Swiss 12x12 Cardstock Pack Honey Trio : my favorite textured cardstock.
[ Three Things is a weekly product series : check out the archives here. ]

This is a fun, fairly simple layout that is a great way to use up some of your stash at home.
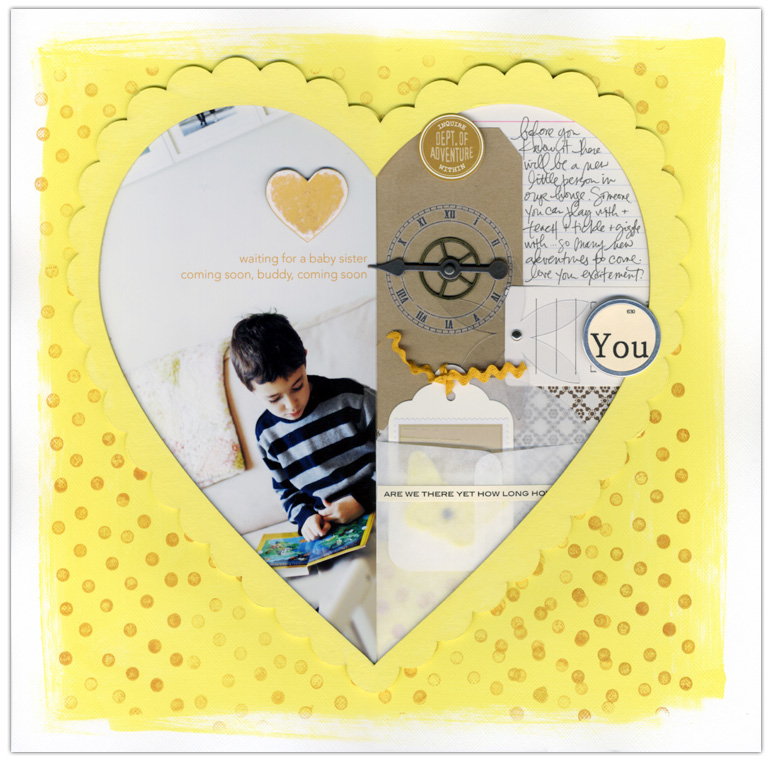
Supplies: Cardstock: Bazzill Textured White; Paint: Claudine Hellmuth Pastel Yellow Acrylic; Rolling Stamp + Ink: Stampin Up; Chipboard Heart: American Crafts Friends House Chipboard Teen; Metal Spinner Pieces: Tim Holtz Game Spinners and Sprocket Gears; Clock Rub On: Little Yellow Bicycle; "You" Circle Accent: Jenni Bowlin Studio Kit; Sticker Strip & Circle Sticker: 7gypsies; Clear Plastic Flower: Heidi Swapp; Large Scallop Heart: Technique Tuesday; Tags: Misc.
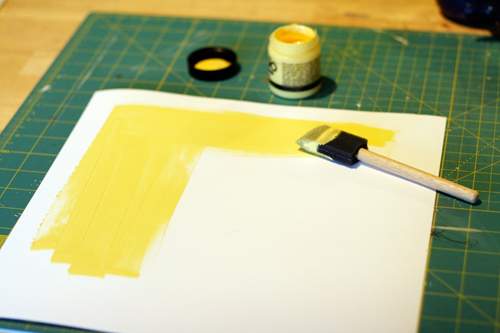
1. Start with a 12x12 sheet of textured cardstock. Paint a large square right onto the cardstock leaving a white border around the edge. Let dry.
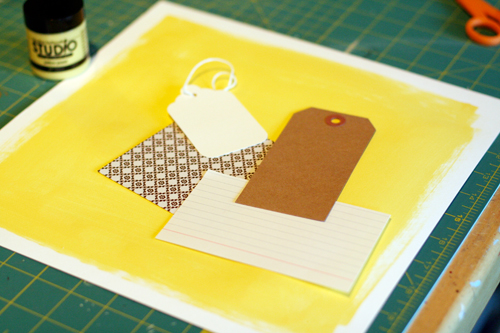
2. Collect a few tags, patterned papers, and/or small envelopes to use as the elements on one side of your heart. The idea is going to be to collage them together under the scalloped heart alongside a photo.

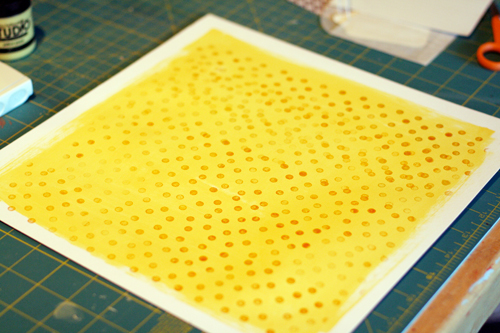
3. Create a pattern on your painted background. For this I used a rolling stamp from Stampin Up and More than Mustard ink. Here's the result after the ink has been rolled on to the cardstock:
'
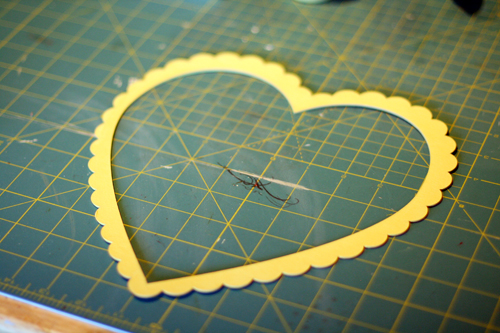
4. Paint a chipboard frame the same color as your background. This is a new heart-shaped chipboard element from Technique Tuesday. Other large decorative chipboard frames can be found here and here.

5. Lay the heart down and begin arranging your paper elements.
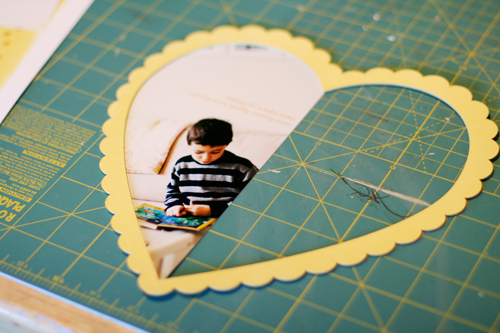
6. Measure the size of your frame and print out a photo. In this case I printed my photo 4.5 inches x 9.5 inches wide. Trim around the outside to fit behind your frame. You could easily have more than one photo in place of the single photo as well. I added a bit of text to my photo in Photoshop before printing.
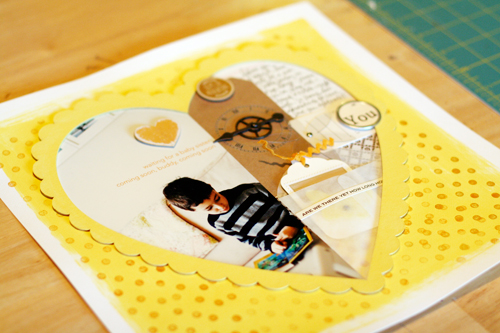
7. Trim the paper elements to fit behind photo and adhere to background cardstock. Add additional elements to complete your layout and adhere chipboard frame.
Here's a look at some of the elements I used up close:
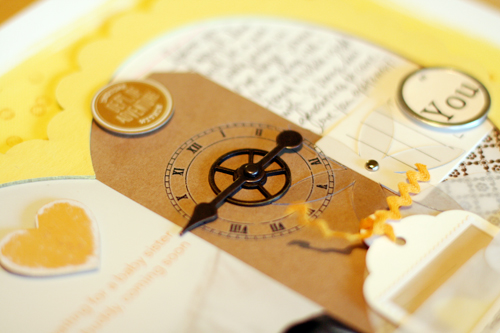
I love these metal spinner elements from Tim Holtz (a game spinner on top of a sprocket gear). I find them pretty versatile and can be added to pages that tell a variety of different stories. The metal elements are layered on top of a rub on from Little Yellow Bicycle. Cute little heart (I sanded the edges) is from American Crafts Friends House Chipboard Teen collection.
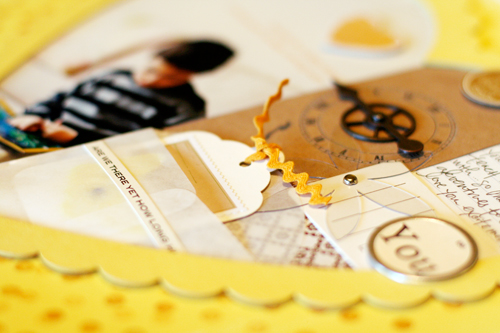
Large clear plastic flower from Heidi Swapp. Lots of little bits of this and that - a really great way to use up some of those things you have stashed away.
Coming tomorrow: A Superhero giveaway.


How do you make this look so easy? I know it's not. You have such a talent for combining many different embellishments and yet making it all come together. I absolutely love the paint and stamp technique on the background paper. Yummy!
Sign in or sign up to comment.
I'm loving all the yellow. It's a nice change.
Sign in or sign up to comment.
ali- you always inspire- love the yellow!
Sign in or sign up to comment.
Wow thank you for that step by step. I love your layout but can never "get" there.
Sign in or sign up to comment.
Time to pull out the yellow again. Think spring...goodbye snow!
Sign in or sign up to comment.
What a beautiful layout!!!!!
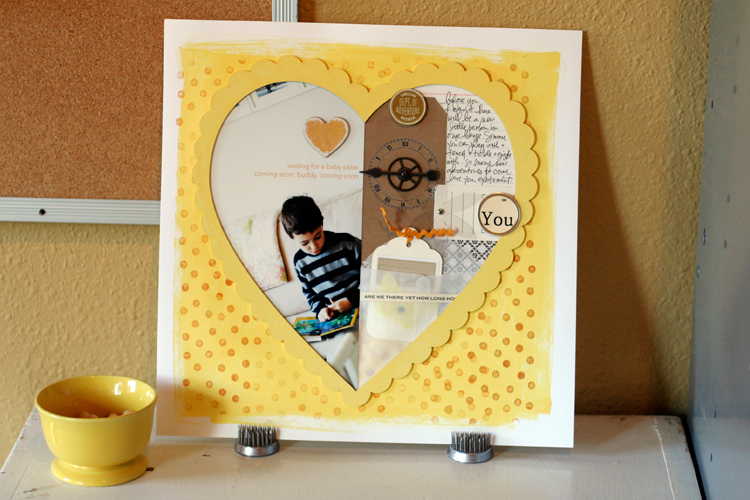
What are the little "doodads" that you use to stand up your layout in order to take a photo...they look too cool :)
Sign in or sign up to comment.
Like Mitchmac above I would also like to know what you used to stand up the layout in the first photo. It looks like it could be useful in other applications also.
Sign in or sign up to comment.
wonderful and inspiring!
Sign in or sign up to comment.
i really love your layout. i think i will make some mini versions for valentine cards...is it okay if i borrow your idea?
kelly
Sign in or sign up to comment.
Wonderful layout. I love all the layering next to the sweet photo of Simon. Like you, I'm ready for yellow...it just screams spring.
Sign in or sign up to comment.
hope Cathy's twitter means what I think it means. All the best.
Anna
Sign in or sign up to comment.
Ali - thanks so much for using my paints. Love your Layout!!
Sign in or sign up to comment.
I have been making valentine's all day and never thought to use yellow...as I keep telling myself-think outside of the box! Tomorrow it will be yellow valentine's and who knows..maybe orange or blue?
Sign in or sign up to comment.
lovely layout. and so sweet to see Simon is waiting for his sister.
thsnks for sharing
Sign in or sign up to comment.
LOL. Just had to read this post. My Aspberger's son (10) just loves yellow. He calls it his "Safe Color". I crated an awesome "Surrounded By Yellow" layout that is his absolute favorite.
Thanks for sharing this Ali.
Sign in or sign up to comment.
Beautiful, bright and cheery...exactly what we need right now in this cold dreary weather!
Sign in or sign up to comment.
It's gotta to be hard to think of another color when you are so uncomfortable inthe front of the trunk with an adorable pink bundle. Yellow is a soothing calming color. The first time I see a bucket of fresh daffodils in the grocery store I treat myself to a bunch and I have the perfect vase for them. Your layout is awesome.
Kristi
Sign in or sign up to comment.
How can I NOT comment on the yellow layout?
I was feeling a bit tired, but seeing that has revived my desire to stay up and make something.
And the nursery?!
yummy.
Sign in or sign up to comment.
I love yellow and these products are definately yellow! LOL Pretty ribbon.
Love your layout and thanks for the step-by-step!
Sue
Sign in or sign up to comment.
What are the little things that you are using to hold your layout up?
Sign in or sign up to comment.
OK, so now I am in love with yellow!!! What totally cool ideas.
Sign in or sign up to comment.
Awsome LO!
Sign in or sign up to comment.