Tuesday Tutorials : Cathy Zielske : Multi-Photo Grids

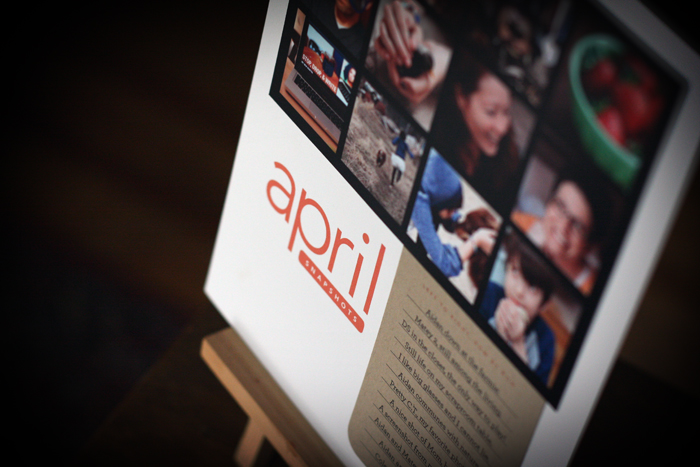
This week Tuesday Tutorials welcomes Cathy Zielske.
I first met Cathy back in 2003 when I took her Scraphic Design class at Creating Keepsakes University in Vancouver, BC. Known for her awesomely simple, beautifully designed layouts that get to the heart of the matter, she is also one of the best teachers around. Today she's going to walk you through the steps (via video + a pdf download) to create a photo grid in Photoshop Elements.
If you ever have the chance to take a class from Cathy online I highly recommend it.
Here's Cathy:
Consolidation has been a key inspiration for my scrapbook layout design lately, and I know of no better way to consolidate than to get a lot of photos onto a single layout using multi-photo grids. In this video, I’m going to walk you through how to make a 12-photo grid using Photoshop Elements for use on your next scrapbook page or project.
You can also download the PDF step by step tutorial here.
Tuesday Tutorial from Cathy Zielske on Vimeo.
Here's a look at some additional layout samples using the photo grid technique:

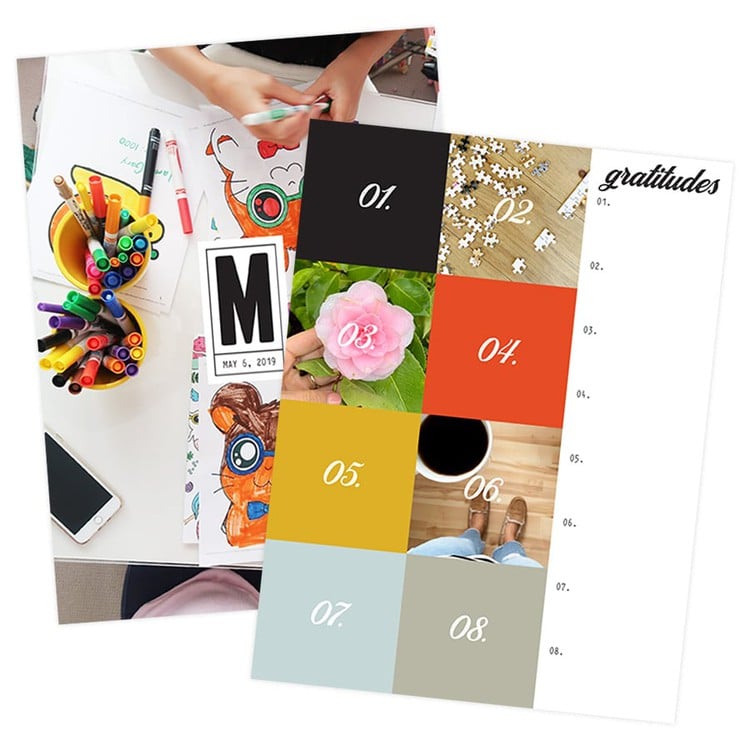
Cover one month at a glance.
I love condensing a whole month into one page. I designed a cool “monthly snaps” date artwork series so I can make a page a month for a full year. (See below for info on how you can download my artwork for free to use on your own pages.)
MATERIALS: Photoshop Elements 6; Avenir and Archer fonts
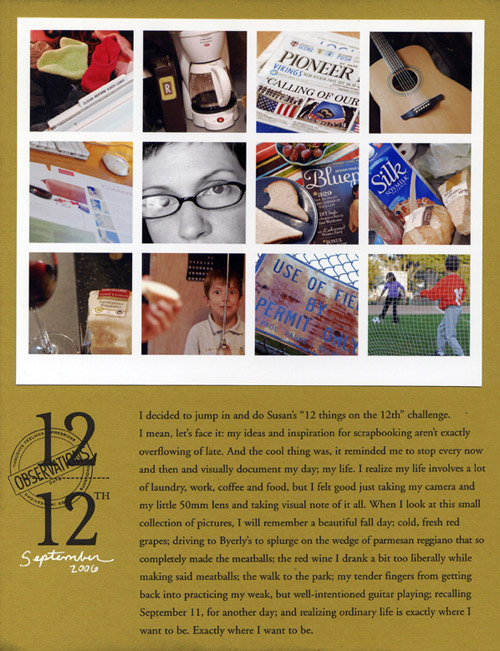
Give everyday snapshots an interesting home.
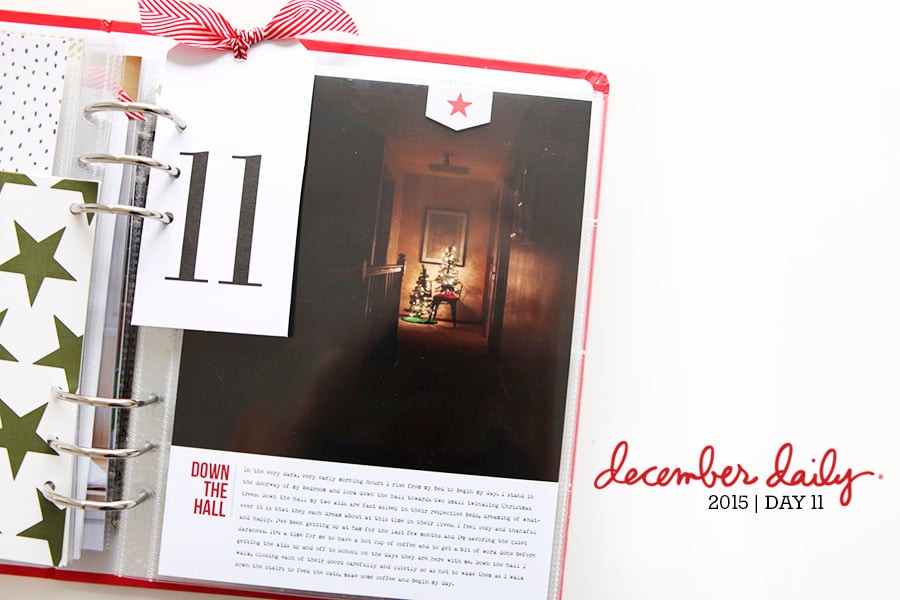
Ali and I once had a conversation where we both decided if photo grid layouts were the only ones you could ever again do, we’d both be just fine with that. Here, I used the grid approach to create a page when I was participating in my friend Susan’s 12 of 12 project. With a handful of photos and a few lines of text, you can capture a nice wide swath of your everyday life on one page.
MATERIALS: Photoshop; stamp (Cat’s Life Press); Times New Roman font

Make a grid strip.
Here one grid row is used to fill in shots taken over the years of me in my fabulous bee costume. (Note: I’ve been wearing it every year since I was in my early 20s.)
MATERIALS: InDesign CS; Amelie, Avenir and Times New Roman fonts
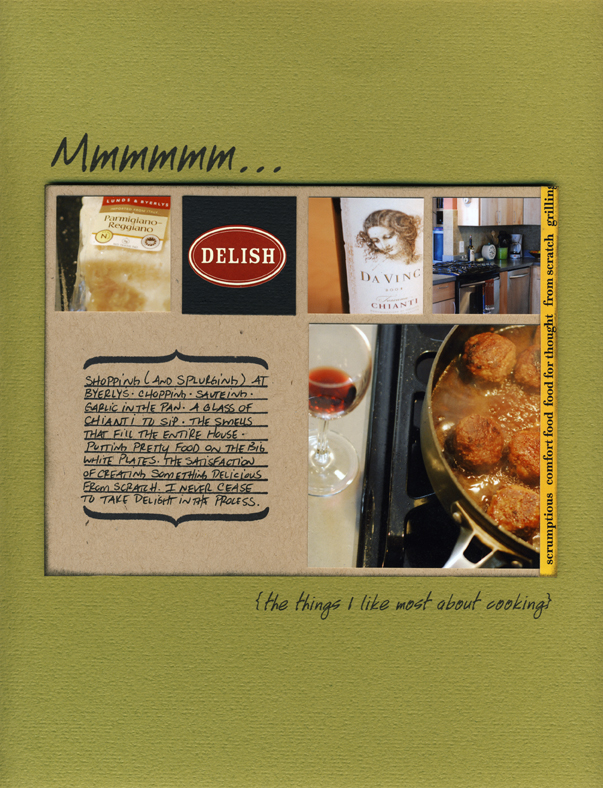
Think grid.
Thinking grid on any design can make page layout a snap. Here, the 12-square grid exists, it’s just filled in differently. One larger photo takes the place of four smaller ones, and a journaling area to fills in the other. Once you divide up the space, you’ll find that grids can be mixed and matched really easily.
MATERIALS: sticker (7gypsies); stamp (Autumn Leaves); Handwriting font.
FREE DOWNLOAD
Cathy is offering a free download of her Monthly Snaps artwork, to use in creating a page like the one above every month for a full year. You can also download the journaling card as well. Visit her blog for the download and while you're there catch some outtakes from her tutorial video.
Cathy Zielske is a graphic designer, author and blogger. She is the former art director for Simple Scrapbooks magazine, where she oversaw the visual direction of all Simple publications and books.
Cathy started scrapbooking in 2001, and found that her background in design and her passion for telling stories made her new hobby as easy as it was fun. As a scrapbooker, Cathy helped to usher in the trend of clean, graphic layout design. She is the author of the best-selling books, Clean&Simple Scrapbooking, and Clean&Simple Scrapbooking: The Sequel. Both books inspire women to take a fun, well-designed and guilt-free approach to telling their stories through scrapbooking.
Cathy is currently developing and teaching online workshops to help scrapbookers write better and take what they've written and make it look fabulous. She's currently teaming with Big Picture Scrapbooking in 2009 to offer her workshops.
Cathy also reaches scrapbookers through her popular blog, Bits&Pieces.
She hopes to develop more online content in 2010 and beyond, to inspire scrapbookers to continue telling their story in an authentic and well-designed way.


Thanks Ali and Cathy! This is by far the best tutorial you've had since starting this. I've always wanted to learn how to to masks and being a complete Photoshop novice, Cathy explained it all in a matter of minutes. Simple, quick and effective! Love that.
Sign in or sign up to comment.
This is stinking cool. Easy to follow, my page turned out so cute!! Thanks so much Ali & Cathy!
Sign in or sign up to comment.
Thanks so much Cathy. I just visited your blog and I loved it! The tutorial was very helpful and fun to do. It does take hours away from staring into a screen and trying to decide what layout you want to use. Thanks again. And,thank you Ali for having these wonderful Tuesday Tutorials.
Sign in or sign up to comment.
I really love this technique and I am new to photoshop.I am using CS4.Everything is ok until i open my picture and I cant resize it....if I go to the corners and drag the mouse it juts dsnt resize it...please anyone give me any idea about it..thanks again!
Sign in or sign up to comment.
see this is what happens when I go on vacation, I missed out on tuesday:) So, excited that Cathy is here:) Love this!!!!!!!!!!!!!!!!
Sign in or sign up to comment.
This is awesome; thank you so much! Now I finally understand how people get photos so neat in a row...
Sign in or sign up to comment.
HELP! :) I have the same issue as above. I have the grid created, the picture above the "square" I want to merge it with, and cannot get the overlapping circles, nor will the Control+G do anything, and the "group with previous" is grayed out under the Layers menu.
There is a little "+" in the bottom right hand corner of my picture's layer that says "indicates a frame layer" when I put my cursor over it. Not sure if that makes a difference...
I am using a PC and PSE 6.0. Thanks for your help... love this tutorial and am the end, but can't get the pics in. :(
Sign in or sign up to comment.
Hey Tina, will you email me directly at czdesign@comcast.net and i will see if i can figure out what's not working!
Sign in or sign up to comment.
Karen, I wish i had the solution. it could be a system error you're having. Have you tried rebooting your whole system?
Sign in or sign up to comment.
Hey Kate, your grid preferences might be under the "Edit" menu. See if you can find it there. that's where it is in older versions.
Sign in or sign up to comment.
Lola, see if your preferences is listed under the Edit menu. If not, feel free to email me at czdesign@comcast.net. I'll see if i can figure it out.
Sign in or sign up to comment.
You can try classes at www.jessicasprague.com or www.reneepearson.com. Both will help you learn a ton!
Sign in or sign up to comment.
Are you resizing BEFORE you drop it in? Email me at czdesign@comcast.net and i'll see if i can help.
Sign in or sign up to comment.
Thanks, Cathy. I got it figured out.
Lola
Scrappuccino
www.scrappuccino2.blogspot.com/
www.scrappuccino.net
Sign in or sign up to comment.
Thank you AE & CZ...love it!
Sign in or sign up to comment.
Thank you so much for this great tutorial! This is something that I have been trying to figure out forever!
Sign in or sign up to comment.
Hi Ali and Cathy! Thanks for this amazingly simple tutorial, I am a visual learner so only watching the action can I try to do it!!! Cathy I have been your student before but you never cease to wow me with your wit, intelligence, energy, you make scrapbooking fun!!!
Sign in or sign up to comment.
Excellent tutorial! I will use this a lot. Thank you!
Sign in or sign up to comment.
HELP ME SOMEBODY PLEASE!!!!
I have read and reread the instructions, and watched the tutorial repeatedly - I can't see where I'm going wrong but my pictures always end up ender the coloured square I have created. I end up with an image that is visible but fuzzy under the coloured layer that I shouldn't be able to see.....What am I doing wrong I'mn going crazy!
Sign in or sign up to comment.
Great tut!!! Thank you!
Doing a 12 on the 12th and needed help with the grid! Didn't know tha ALT on the 2 layers for masking trick either! So excited!!! :)
Sign in or sign up to comment.