You | Traditional Scrapbook Layout
Bring on the layouts!
Going a little old-school with some journaling printed on vellum today.
Embracing mistakes and making them work for my layout.
Here's a look:
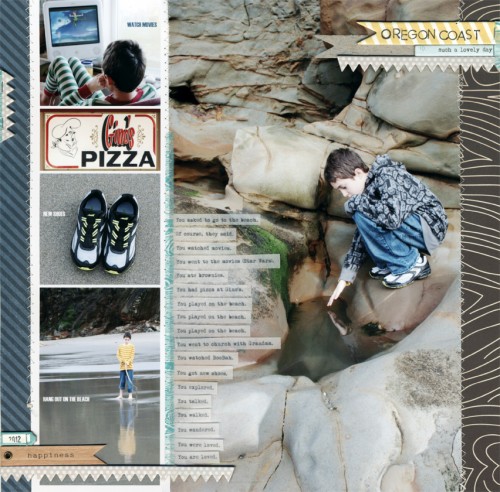
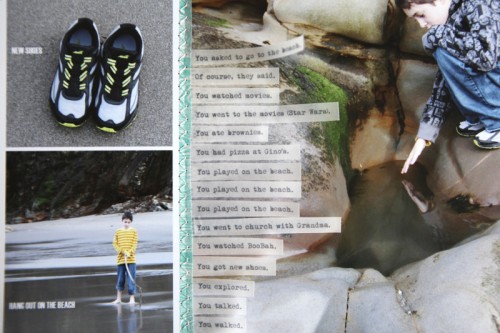
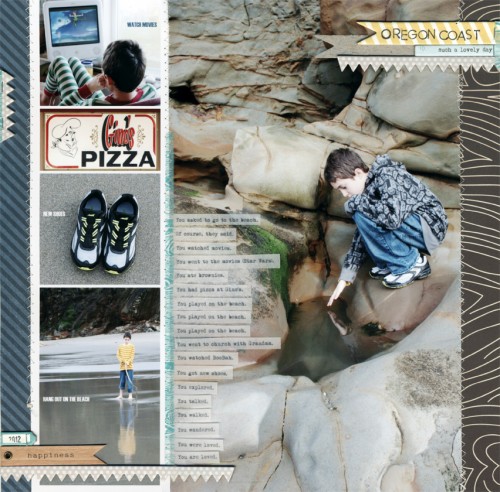
This layout pairs an enlarged 7 inch x 12 inch photo (printed here at home on my Epson R2000) with a stack of smaller photos.
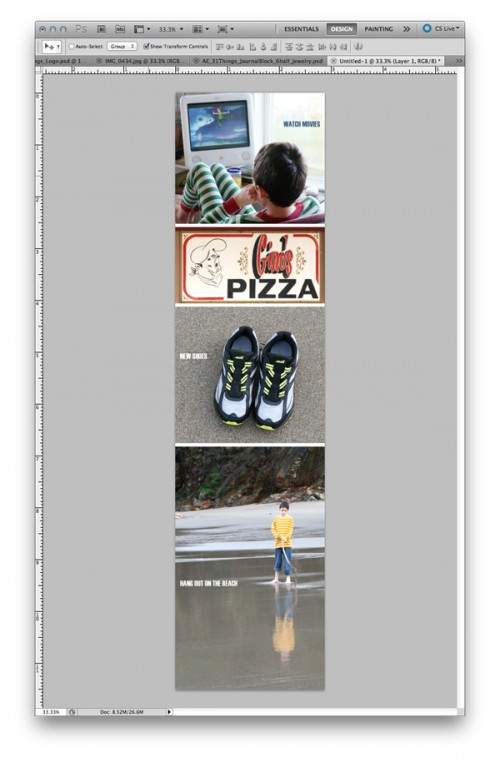
I put together the smaller photos in Photoshop, adding a little text to a couple of them and printed, leaving a border around it when I cut it out.
I actually decided to add the other photos in this way on Tuesday night when I couldn't get back to sleep after Anna woke up around 2am. Good times.
Here's a look at some of the embellishments:
The chipboard elements on this layout all come from Rhonna's new My Mind's Eye Be Amazing Chipboard. Love, love, love this set.
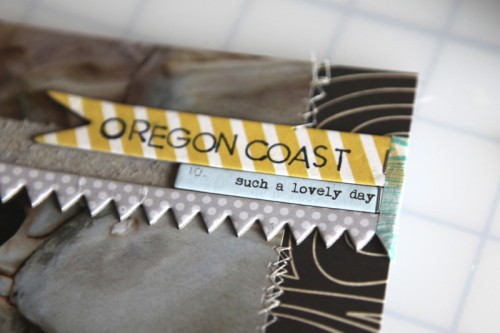
You might notice, under that yellow flag accent is the left-over backing from that same element (you might be able to see it better on the full-layout photo above). I stuck it down before I was done and ended up wanting to move it. So I pulled it up and the backing stayed down and I just decided to work with that rather than re-print the photo all over again. Looking at it now I really like the way it looks.
I also added a little bit of Hambly Teal Woodgrain Washi Tape on the outside of those three elements (it's repeated in other areas on the layout as you'll see below).
I stamped "Oregon Coast" using Outdoor Denim ink from Close To My Heart and Hero Arts Basic Uppercase stamps.
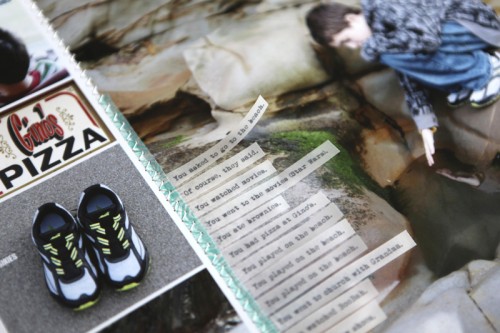
For the journaling I printed on 8.5x11 Vellum from WorldWin. The font is Mom's Typewriter.
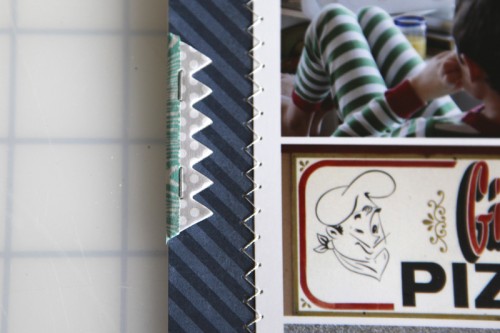
I had to figure out how to attach the vellum to the photo without seeing the adhesive. My solution was to use just a tiny bit of rolling adhesive along the left edge of each strip and then cover it with Hambly Teal Woodgrain Washi Tape. I actually cut that washi tape in half so it ended up being a thinner strip. On purpose I decided to have the washi tape only go part way up the page vs. all the way to the top. To finish it off I did a zig zag stitch right down the middle with my Brother sewing machine.
Echo Park Navy Dots And Stripes. Black paper is from Studio Calico's Daydream Believer kit.
A bit of repetition over on the top left with a piece of the same chipboard strip and some more washi tape wrapped around the edge.
And almost always the addition of some staples from the Tiny Attacher.
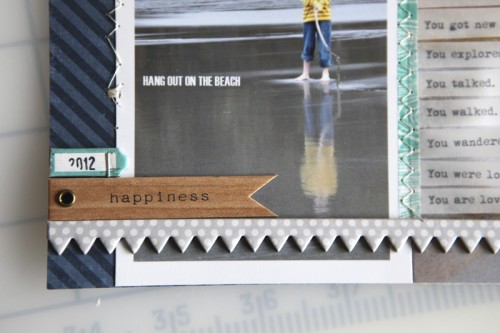
On the bottom left I've got a little group that includes two pieces from the My Mind's Eye Be Amazing Chipboard set and a Happy Days Wood Banner.
Here's a look at the whole page again:
SUPPLIES
Click on the images to link to the products.



Love this, Ali. I just added My Mind's Eye Be Amazing to my cart yesterday, and I love seeing how you've used some elements here. I so, so love your flexible approach, seeing what works and making even those "not quite as expected" outcomes work to your advantage.
Thank you, as always, for the inspiration!
Sign in or sign up to comment.
Hey Ali,
Your layout looks amazing, as usual! Wondering if you can tell me where to purchase some cool fonts? All I have are the ones that come with my MAC and I hate them. I want to use some that you have but not sure how to do it?
Hi - you might want to check out a cool free font site called Dafont. Lots of good ones on there. For paid fonts I like http://www.typography.com/ and veer.com.
Sign in or sign up to comment.
Love this layout, Ali! And, after the great pictures of Simon, your "mistake" is one of my favorite things!
Sign in or sign up to comment.
You know, the first thing I noticed was the flag accents. And I thought, that's cool how she repeated and layered the flag. Now that you tell us it was an accident, I love it even more.
And that brown woodgrain paper looks so cool with your photos. Awesome, awesome layout.
Sign in or sign up to comment.
I long ago decided that there were two kinds of layouts. Bob Ross, "happy accident" ones and Hannibal Smith "love it when a plan comes together" ones.
Love your Bob Ross layout! ;)
Sign in or sign up to comment.
Old School Ali -- how love thee! :) brilliant!
Dang it! I meant how I love thee!
Sign in or sign up to comment.
Thanks for making me grin, Ali! I love the layout but I especially love that you made a mistake work in your layout, AND you outted yourself! Honestly, I would never have known it wasn't intentional.
Sign in or sign up to comment.
What a great layout of Simon, love all the pictures. This l/o looks great, like the little photostrip along with a big one.
I am committing myself to do a l/o each time you do. Last week I did two of them and the start of a third. Hoping to finish that one today and add another one in. Thanks for the motivation.
Have a happy weekend!
Sign in or sign up to comment.
I love it, love it, love it. I love this huge photo.
Sign in or sign up to comment.
I'm so thrilled with your traditional scrapbooking pages. Its how I first fell in love with you and its fun to see more of them again. Just earlier I was thinking about who I would say Ali Edwards is if someone asked me because I don't consider her to be only about scrapbooking for me. It was inspired by the Creative Lifts newsletter and the morning radio show where they talked about who made an impact on your life and doesn't even know it. What Ali is to me??? A writer? An inspiration? A life coach? A philosopher? An artist? So much more than someone whose work I admire.
Sign in or sign up to comment.
Amazing layout Ali! Wow that is a fantastic photo of Simon reaching down into the rock pool. Next time I do that with a chipboard piece I may even leave the remnants behind too :-)
Sign in or sign up to comment.
loving tradtional layouts! thank you for taking the time, so inspiring!
Sign in or sign up to comment.
Good stuff, Ali. :) Have you tried spray adhesives with vellum? I find that to be the easiest way to attach either vellum or transparencies. Creative Imaginations has (had?) a brand called Scrappers Spray that works well.
Carmen.
Sign in or sign up to comment.
I adore using the Tim Holtz tiny stapler to attach the vellum quotes to my project life and other albums. So much simpler than trying to hide adhesives. I love vellum.
Sign in or sign up to comment.
I also love the "mistake" that you decided to keep. I think it looks fabulous! I had no idea that tiny stapler was out there...I may have to stop reading your posts to save some money! LOL
Thank you for your inspiration.......always!
Sign in or sign up to comment.