December Daily® 2019 | Foundation Pages

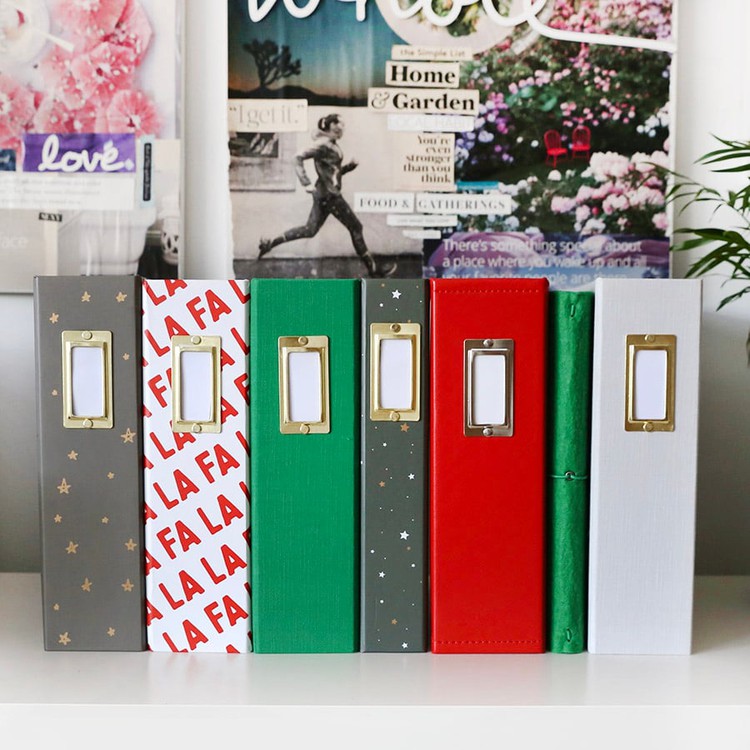
For December Daily® this year I decided to mix things up and go with the smaller sized 4x6 album.
I used that size back in 2012 and felt ready to revisit it again. After working through my foundation pages I am so, so excited to be working with this size. It totally feels just right for what I'm wanting this year.
As you'll see, my album is already full and now just waiting for me to add my photos and stories in December.
Many of the pages I'm sharing below are part of this year's December Daily® Product Play 3 workshop which begins on November 5th. I designed nine specific pages using hexagons, wreaths, and numbers for that class which includes video tutorials and additional information on how I created those pages. That workshop also includes projects from contributors so you can see how other people are playing with the products and a digital package.
Most of the products I'm using this year are from my December Daily® collection. The Main Kit + some albums are still available here if you are just learning about this project or if you decide you'd like to have those to help you get your stories told this holiday season. I've also added a couple things from from other collections as I do every year. I also generally incorporate a variety of random basic supplies which are listed at the bottom of this post.
If you are brand new to December Daily® I highly recommend checking out my Storytelling With December Daily® workshop. It will absolutely help you get to the heart of the matter + the project for yourself and help you get your head and your heart aligned for how you want to approach this project.
General yearly reminders:
- I tell one story per day from December 1 through December 25. Just one. One is more than enough for me. Some days it's something meaningful and other days it's something silly and other days it's just something really random. Remember that the beauty in this project is that it's the sum of all the days coming together vs. any individual story that is most awesome.
- YOU DO YOU. Your stories, your motivation, your enjoyment, your time constraints, your products might be totally different than mine and that is awesome. Don't feel like you have to be something you are not in this project - there's generally enough of those kinds of feelings already in the world. This is a project for you. This is not a competition or an invitation/permission to figure out a way to feel bad about yourself. Make the process and your stories work for you and your own life right now.
In looking at what I did so far it feels like I did even more prep than past years. I'm excited to be able to focus on the words and photos in December.
As always, I will more than likely move some things around. What I love about doing Foundation Pages is that the process gives me a starting place. I've done a bunch of work already which allows me to focus more on the stories and the photos in December itself. I will be sharing my pages daily here on my blog just as I've done in years past.
Let's dive in!

Inside the front cover of my album this year I used two of the large white wooden numbers. On top of those numbers I embossed gold stars using the star stamp from this set + gold embossing powder. I trimmed off some of the top of the two and the bottom of the five and where they meet together under the star. On top of the numbers I added the large red rubber star. I adhered it all down with red line tape adhesive.
At first I considered adding these numbers to the front of the album but ended up preferring it on the inside cover.

To start my pages I selected a gold glitter dot transparency and placed one of the Pleather Circle Embellishments on top. I wanted to make sure I used this one since it includes the year on the embellishment itself.
To punch holes for any of the pages in this album I used a Power Punch.

On the other side I added another one of the Pleather Embellishments. Those were definitely one of my favorite products we offered this year + we hope to make more of this style for future releases.

This year I decided to combine Day 1 and my reason why. It's just what felt right to me. In past years these have been separate pages with much longer writing but this year I felt like being very specific and pairing it with my Day 1 story which will include a yet-to-be-taken family photo (that's what I asked for on my birthday last year and I'm planning on doing that again).

To create this first page I used the white star 3x8 transparency + a red glitter "one" that was cut with my Silhouette Cameo for Day 10 (red glitter paper was purchased at a craft store) + the gold alpha from the Main Kit + a border strip I created that includes my reason why for 2019. I used tape to temporarily adhere the star transparency to my reason why strip and then ran it through my sewing machine to literally stitch the two pieces together.
Along the top and connected to a white piece of cardstock I used some washi tape to create a flip up. The idea here is that the piece that includes the "one" lives outside the page protector and the white 4x6 goes inside the page protector.

On the back side of the flip up I added some pattern paper from the Main Kit. I plan to add our family photo here for Day One.


Details on Day 2 will be found in December Daily® Product Play 3. I used the 6x8 Number Stamp + gold embossing powder + a star transparency.

Day 3 includes one of the 2-pocket page protectors. Inside I've slipped one of the rubber tags from the Main Kit + a white plastic three from the Main Kit + a small Tim Holtz Christmas Token + the "enjoy" card from the Main Kit. I also added some red + white twine through the circle of the tag.

On the back of the rubber tag I added "four" using the Main Kit gold alphabet onto the outside of the page protector.
Details on this hexagon page will be included in the Product Play 3 Workshop (it's an interactive element). Products include a large tag and hexagon embellishment from the Main Kit (tag is trimmed to fit) and ribbon (Prima Peppermint Trim) placed through the hole of the tag.
I'll likely staple the trim down after I add a photo/story to the back of the tag for the following day.

For Day 6 I cut up one of the 6x8, 2 inch pocket page protectors to fit into this album.
Right now I've just added one of the small tags from the Die Cut Bundle and I used the gold alphabet from the Main Kit on top of a small piece of transparency to spell "six."


For Day 7 I cut the half-circle pattern paper from the Die Cut Page Insert pack to fit (trimmed off the top and bottom). I love having that rounded page edge.

For Day 8 I was super excited to add in this wood veneer number. I embossed using the small star on the Merry Everything Stamp Set and gold embossing powder.

It takes a bit of time to do this one stamp at a time but I love the messy pattern result.
To hold the pleather embellishment in place I cut a clear plastic page and adhered the circle on top. My plan is to most likely cut a photo into a circle to add to the back once I establish my story.
I also see that that "eight" could totally be a snowman.

Details on Day 9 are included in the Product Play 3 Workshop. The page is built on a plastic sheet cut to the same size as a page protector and features circle fabric embellishments and a custom number circle.

Chipboard pieces from the Main Kit are included on the back.

Day 10 is also featured in the Product Play 3 Workshop (cut file and "loving" page are included in the class digital package).

Small circle numbers are included on the Main Kit chipboard.

Day 11 currently features a Specialty Journal Card (digital option available here) and a single pocket page protector (I cut off the second pocket). Along the outside edge I've added an Avery Index Tab. Today card is from the Main Kit.

Details on Day 12 are included in Product Play 3.


For Day 13 so far I've added one of the 4x6 journal cards from the Main Kit. I love that I can just punch holes and add them to the album.

Day 14 is included in Product Play 3 and is also built on a sheet of clear plastic using Chipboard Bundle 1 + hexagon punch + pattens from the Main Kit + fabric stars from the Variety Sticker Bundle + gold stars from the Main Kit.


For Day 15 I cut down the 6x8 Star Transparency from the 6x8 Bundle + the gold chipboard numbers + a white plastic number from the Main Kit.

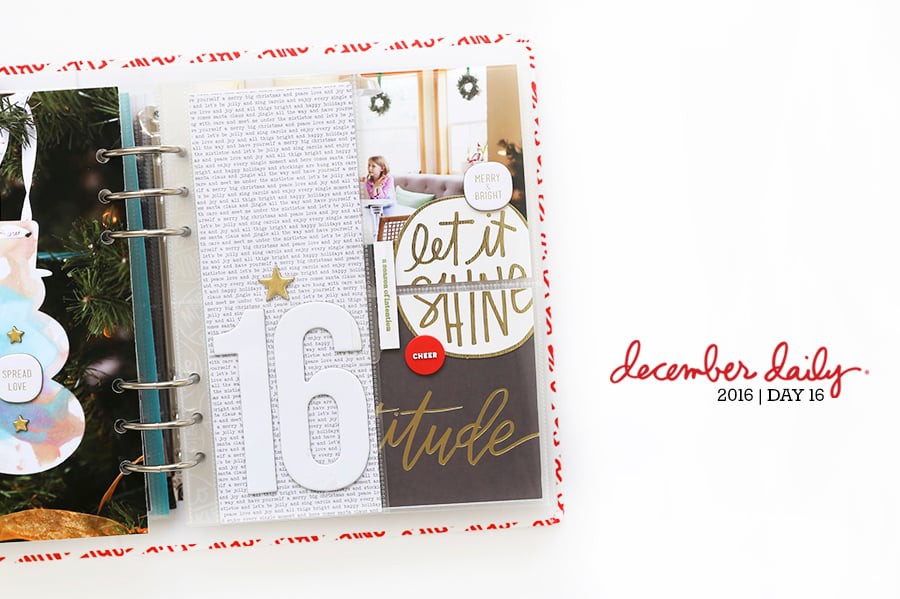
Day 16 features a 3x4 card from the Main Kit + one of the Transparency Phrases.

Day 17 right now just includes the gold alpha letters on top of a clear plastic page (cut down to the size of the page protector).

Day 18 details are included in Product Play 3.

Day 19 currently includes the gold dot transparency + the transparent wreath from the Main Kit + a Tim Holtz Christmas Words Adornment.

I cut another page protector for the following day.

Day 22 features large vellum numbers. Details will be included in Product Play 3.


The Santa transparency is showing up for Day 23. I cut that down from 6x8 to 4x6 and slipped it into the pocket. I also added the white plastic 23 and one of the plastic embellishments from the Main Kit (right now these are just hanging out in there waiting for the story).

Planning to use this shipping tag as either part of the Santa story or on its own.

I slipped another of the rubber tags from the Main Kit into a 3x4 pocket and paired it with the together card.

For either Day 24 or Day 25 I'm going with this multi-page flip out and up page (details are in Product Play 3).

My plan is to add a bunch of photos from either Christmas Eve or Christmas Day.
I'm so excited to add my photos and stories to this album soon!
VIDEO WALKTHROUGH OF FOUNDATION PAGES
SUPPLIES
- December Daily® 2019 Main Kit
- December Daily® 2019 Wood Veneer Numbers
- December Daily® 2019 Large Rubber Shapes
- Red Line Tape Adhesive
- Maggie Holmes Crate Paper Heritage Glitter On Acetate (intro page)
- December Daily® 2019 3x8 Transparency Bundle
- Gold Star Transparency
- Pebbles Merry Little Christmas Washi Tape
- Mini Gold Star Brads (similar to the ones I used)
- December Daily® 2019 Numbers 6x8 Stamp
- Red + White Twine
- Red Glitter Paper (I picked this up at a local craft store)
- Silhouette Cameo
- Prima Peppermint Lane Christmas Trim
- Grafix Clear Craft Plastic
- December Daily® Die Cut Page Inserts
- December Daily® 2019 Fabric Embellishments
- December Daily® 2019 Chipboard Bundle 1
- December Daily® 2019 6x8 Transparency Bundle
- Brother Sewing Machine XL2600i
- Tim Holtz Christmas Tokens
- December Daily® Variety Sticker Bundle
- December Daily® Gold Foil Chipboard Numbers
- Hexagon Punch
- Tim Holtz Christmas Adornments
- December Daily® 2019 4x6 Shipping Tags
- Versamark Embossing Ink
- Tiny Attacher
- Heat Gun
- Ranger Gold Embossing Powder
- Snappy Tray
- Power Punch
- Avery Index Tabs

Registration is now open for our first ever 12 Hours | December Daily® Online Prep Day. Join us for a fun day filled with ideas and inspiration and live video check-ins between 8am and 7pm. Grab all the details here. Videos will be saved for later viewing in case you are unable to participate on this specific day.

Shop This Post

.jpg)
.jpg)

.jpg)


Ali, love your foundation pages! Wondering (hoping) that you will offer ways to do some of those fancy pages without a Sillouette or other machines! Last year was awesome that way! Regardless, I know it will be fun! Thank you!
Sign in or sign up to comment.
So love your foundation pages! And all the reds and golds! Thanks for the inspiration. As always.
Sign in or sign up to comment.
Love the 4 x 6 size and also love the pleather circles - so bummed they sold out so quickly!
Sign in or sign up to comment.
You were totally inspired with the smaller size and is your best foundation pages yet. I usually rely heavily on your layouts but I prefer the 6x8 size so I'm changing it up this year too, by translating some of your great ideas to a larger format and I'm going to challenge myself to create my own original layouts. Exciting and scary at the same time.
Awesome - you've got this!
Sign in or sign up to comment.
Quick question-On Day 19 how did you adhere the wreath to the glitter transparency? If that is covered in the Product Play class I will wait patiently-well not patiently, but I will wait-LOL
Sign in or sign up to comment.
Will you be sharing which numbers you used on your silhouette for the 1 and 0? I love them!
Sign in or sign up to comment.