New favorite photo & newsletter update & miniBOOKS.

Doesn't get much better than this. Love these two so very, very much.
Because of being sick this last weekend I am going to hold off on a new newsletter for this week. I want to give myself a chance to delve a bit deeper into style for the next one. Look for it in your inbox next Monday.
In the comments from yesterday there were a couple really good questions about miniBOOKS - specifically related to the spiral books. There are quite a few manufacturers out there who sell sprial books with chipboard covers. Some come with chipboard insides, some with thick cardstock, some with envelopes, some with tabbed pages - there are tons of options. Two I really like are 7gypsies and Rusty Pickle.


Here's the basics:
1. Remove the spirals. To do this, open to the back page and locate where the spirals meet together. Gently pull apart with your fingers - I think I usually end up using both hands.

2. Remove all the pages and the front and back covers. Normally, I take the entire thing apart - this makes it easier to get at each of the pages and gives me more flexibility in my design. Now when you do this make sure to put the spirals in a safe place so that they don't fall on the floor and you (or one of your family memebers) don't step on them.

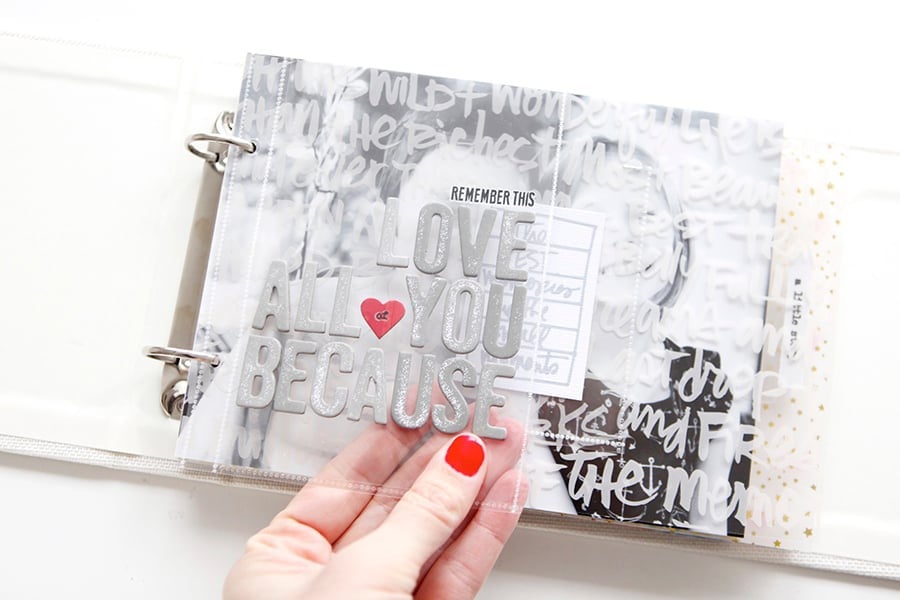
3. To cover the interior pages I tend to do one side at a time and punch the holes after each page is covered. That way when I turn it over I will know where the holes are supposed to go.
Note: Most of the times the holes on these books are rectangle. In the past I have always just used a circle hole punch or my Making Memories setter to punch the hole. 7gypsies has a new border punch coming out that will create those same rectangle holes as the books. Fiskars has a rectangle hand-held punch (like a regular hole punch) that works well. Also, Beary Patch has a system that helps you create those rectangle holes too. Lots of options. It has never bothered me having circles instead of rectangles - usually the circle holes will become more like rectangles as the books relax from opening and closing.
4. These books are made to be touched and loved. I want people to grab them and flip through them. In general I have been using glue sticks on these miniBOOKS. If I notice an edge starting to come up I grab my glue stick and fix it and it goes back into the miniBOOK basket.
5. Sometimes these books come with more pages than I want to use. I have a basket of extras sitting here right now that may get made into something else someday...or may get donated to the schools. Don't feel like you have to fill up a book just because that is the number of pages that were presented to you.
6. Once you have done all your creative decorating it is time to put the book back together. Here is the trick to putting these spiral albums back together: (1) Stack all the pages in the right order with the cover on the top and the back cover on the back - just as if you were going to flip through it. (2) Take the back cover off the back and place it on the top of the stack (with the interior page facing up). (3) Run the spirals back through the holes - this is going to make it so that the spirals meet on the inside of the book (between the last page and the back cover).
Super easy once you get the hang of it. Any more questions on this process? Feel free to post them in the comments section.


Looking forward to your newsletter!
Sign in or sign up to comment.
Bonjour Ali!!!
I's fun you're talking about mini albums as I just finished some handmade sketchbooks in bookbinding class today :
http://twopeasinabucket.kaboose.com/pg.asp?cmd=display&layout_id=1029983
I love it!
{ThE fReNcH tOuCh}
http://prolix.typepad.fr
Sign in or sign up to comment.
howdy ali,
thanks for sharing your process on the miniBOOKS, and i do have one question (i'm not sure if you've already said this or not): what kind of glue stick do you use? i know this is the best way for paper-to-paper, but every glue stick that i've used doesn't hold it long enough for me to even finish preparing the book. i also followed your lead with the thanksgiving miniBOOK and really enjoyed putting it together. (i have a photo of the cover on my blog)
i hope that you, chris, and simon have an awesome thanksgiving!
casey
:)
Sign in or sign up to comment.
love the shot of your guys :) - thanks for the info on the mini books - I'm inspired to make some for gifts this year.
Sign in or sign up to comment.
Great photo! Happy Thanksgiving!
Sign in or sign up to comment.
j'adore cette foto du petit avec sont papa que de la tendresse!!!
ana paris
Sign in or sign up to comment.
Your blog and ezines are such an inspiration, thanks for sharing your outlook and such wonderful examples, hope you are feeling better. I was so excited when i finally got around to making the framed art piece like you shared a couple weeks ago, thrilled with the outcome and the possibilities for gifts in the future. Thanks Ali, heres my take
http://www.love2scrap.ca/gallery/data/560/86DSCF8842-med.JPG
Sign in or sign up to comment.
Happy Thanksgiving to you and yours Ali! I am thankful for your heart to share. So many of us and our families are blessed by all that you share. May those blessings be returned ten times over on this special holiday. ~Kerstin
Sign in or sign up to comment.
Love your blog! Lots of great info. Think I must have your newsletter too!!!
Betty Mae
Sign in or sign up to comment.
thanks so much!
i love your site!
you've awesome son!
kisses
Sign in or sign up to comment.