Week In The Life 2013 | The Photos

Week In The Life is a project that I often complete in stages.
Stage one was documentation. Stage two is dealing with the photos (and sometimes words on the photos). Stage three is getting things into my album and adding journaling and other embellishments.
I finished up stage two last night which included printing out all these 8.5x11 pages. I'm using a Week In The Life layered template set you can pick up from Designer Digitals (now is a great time with the 30% off sale happening). There's also a 12x12 layered template set if that's more your style. Check out my video tutorial on working with these in Photoshop here.
In addition to the layered template set I also used a template called Share Your Story for the photos that will go inside the 9-pocket divided page protector (12x12 version available here).
Read below the images for a bit more about my process and next steps.
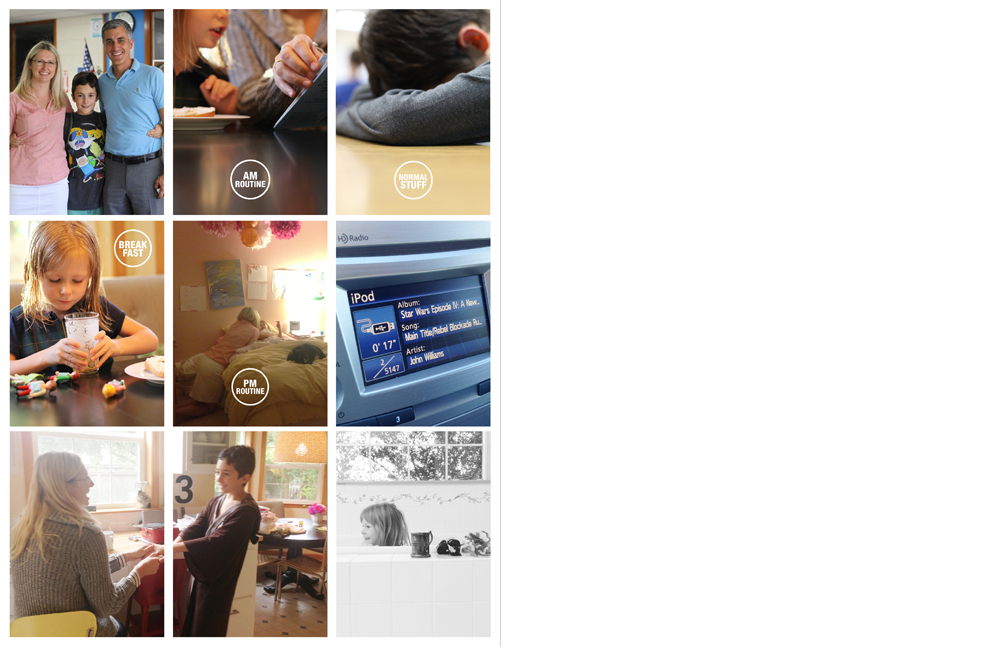
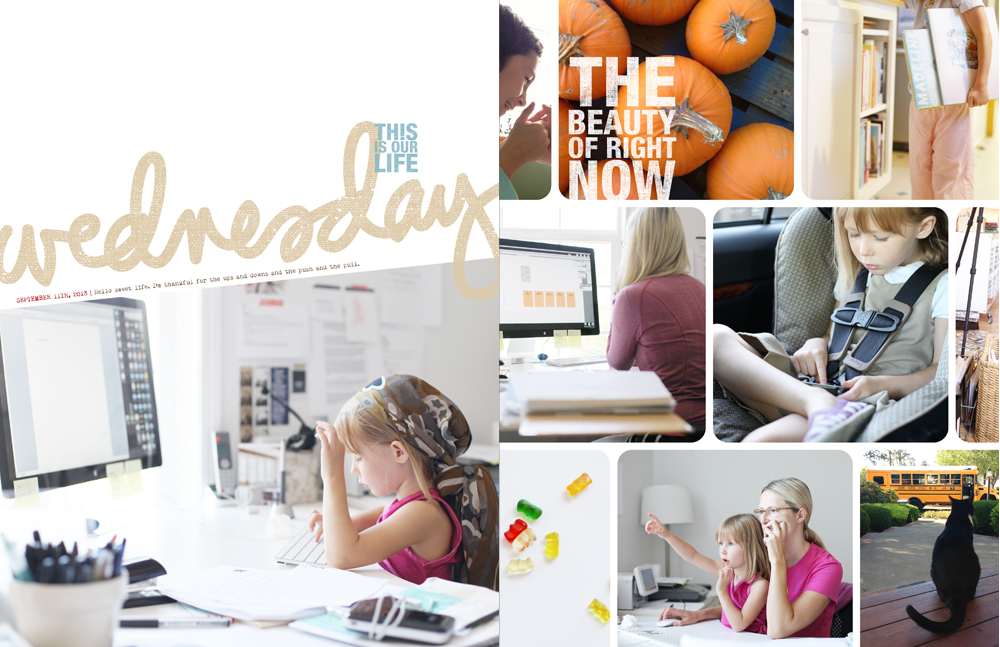
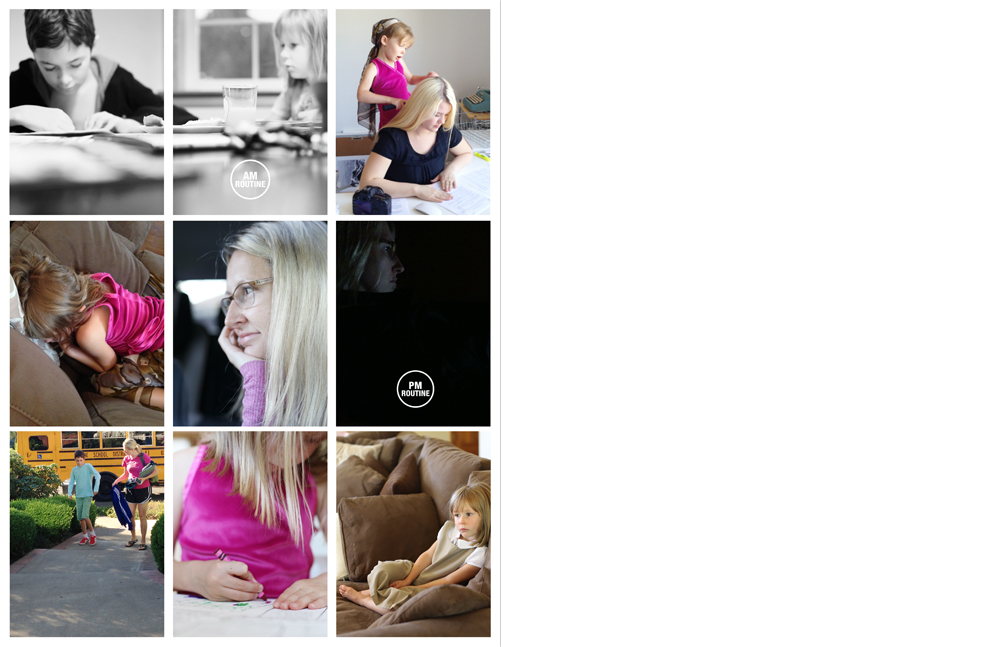
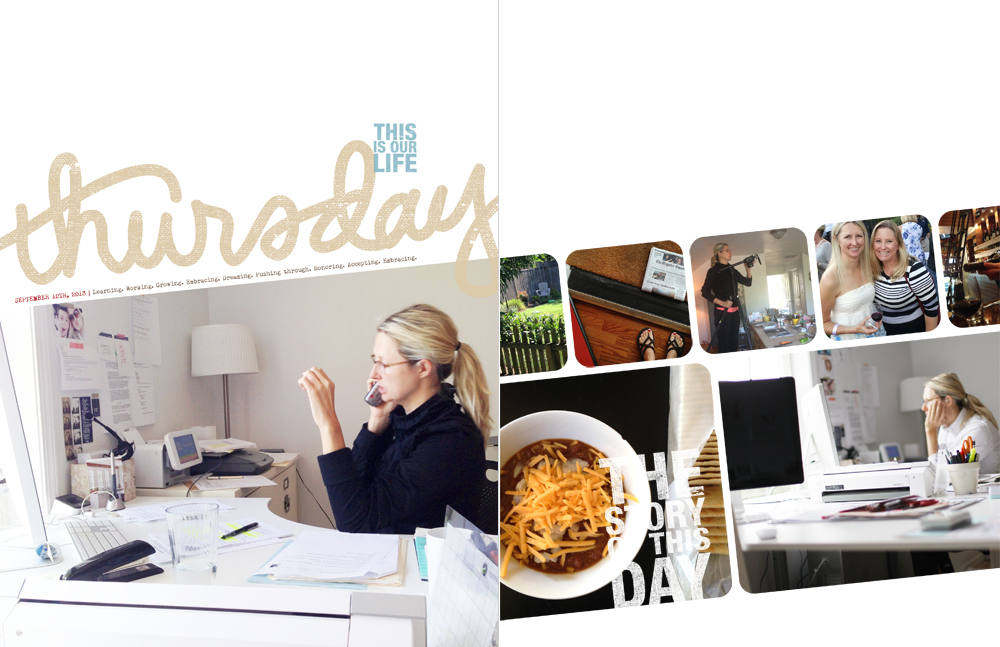
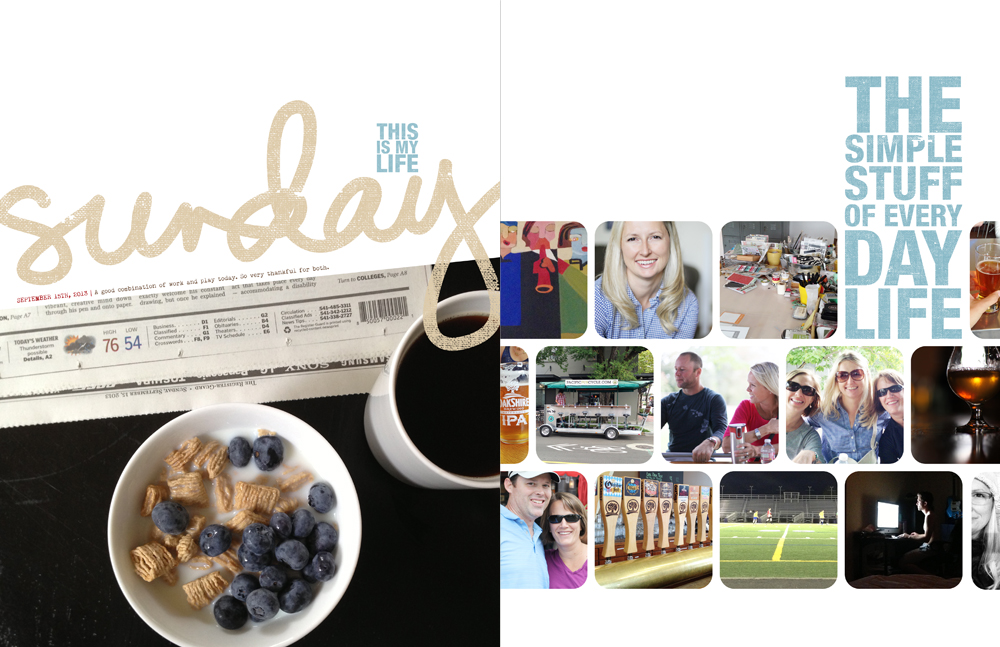
Here's a look at what I printed out last night starting with the title page:
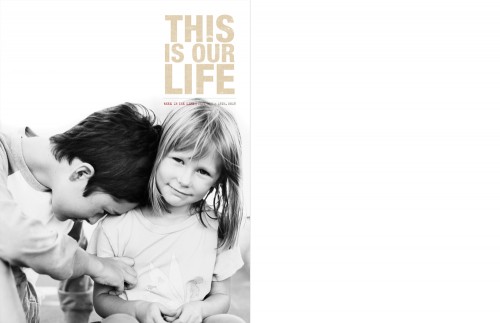
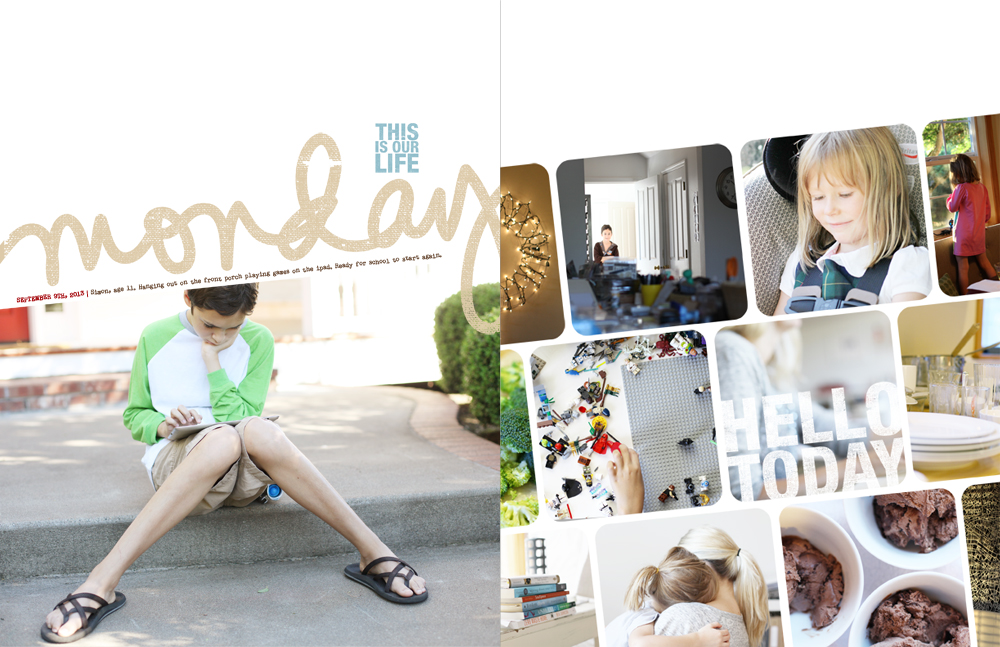
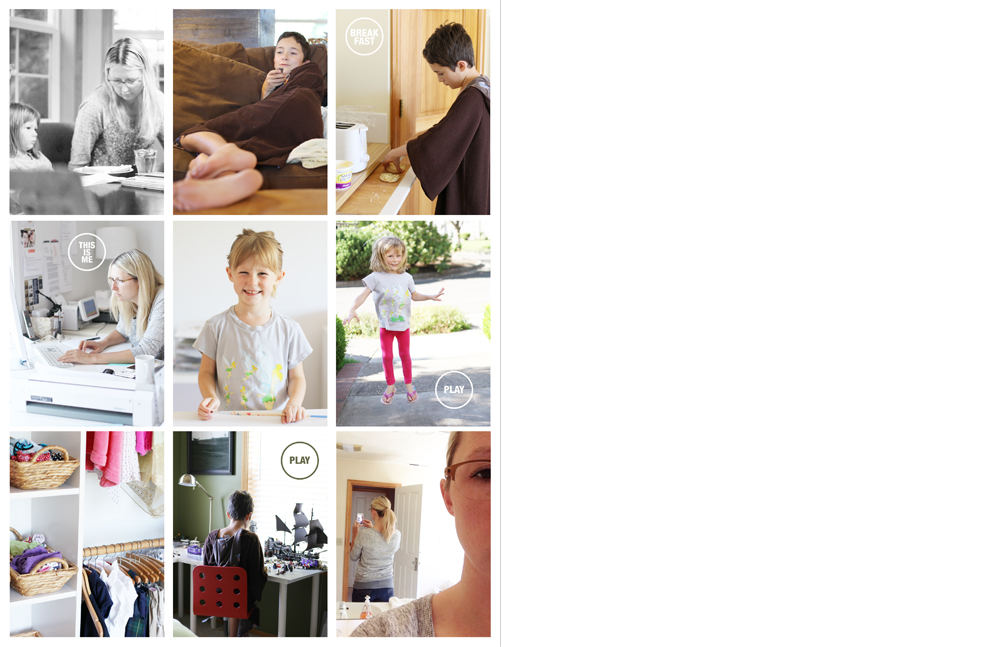
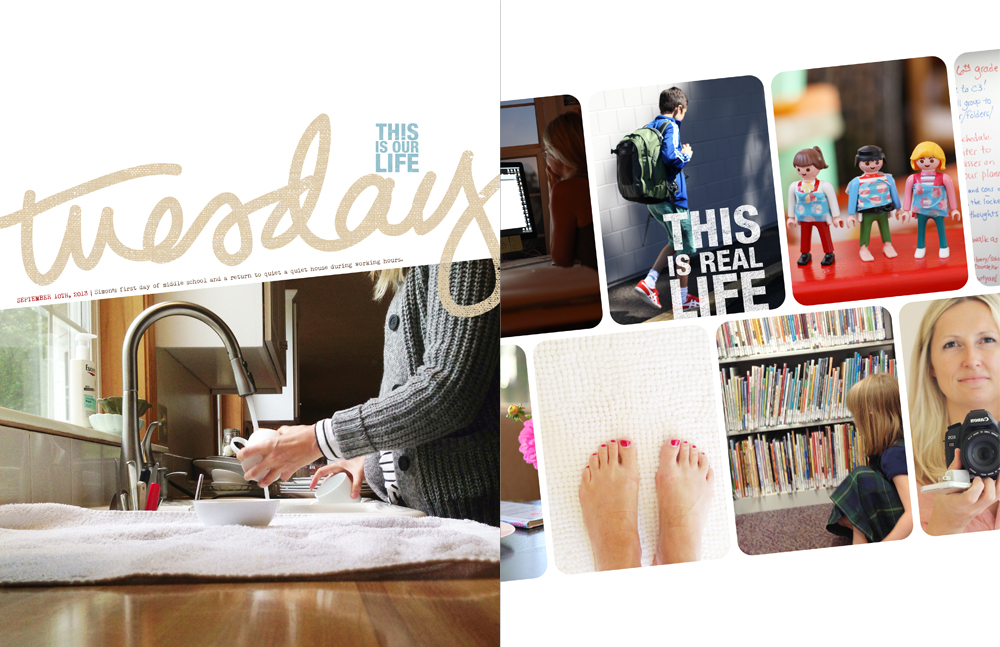
Monday, Tuesday and Wednesday all had enough photos for an insert page (as you'll see below). This is where I used the Share Your Story template and I also added some of the Week In The Life Circles onto the photos before printing. These will be cut up and added to the divided page protector pockets.
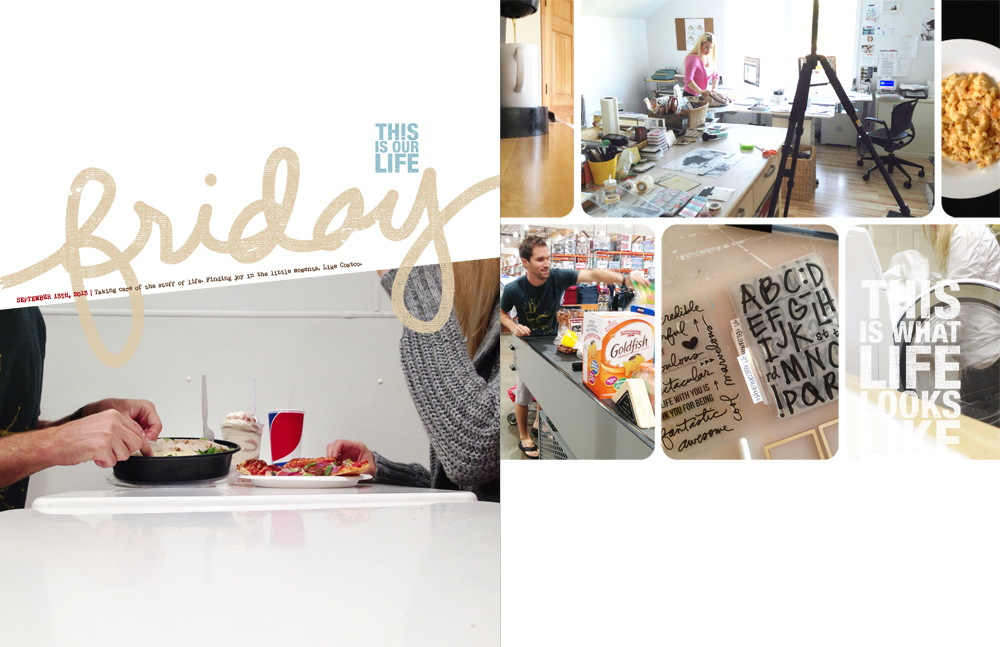
You might notice that for Saturday and Sunday I changed the "our life" to "my life." It was an accident at first but then it seemed to fit my story right now so I went with it.
Here's a look at my process:
- I start with the enlargements for each day and the title page photo.
- Next I do the other template page (the one that comes in the same set) and the insert page at the same time. Some photos work better on one or the other depending on the orientation of the photo and the cropping. Some days I have a lot more I want to use and other days I barely have any more I want to use.
- Most of the photos were edited with RadLab (I use it within Photoshop).
- I decided that I will add words after printing, except for a sentence on the main page for each day.
- I printed these here at home on my Epson R2000 printer.
Next steps:
Cut up the Monday, Tuesday and Wednesday insert page photos to fit inside the divided page protectors. I will still have divided page protectors for the other days but I'll use pattern paper and/or embellishments to go along with my journaling. I'm feeling excited about the challenge of bringing those days together and am considering ways I can add visual interest. I might cut the divided page protectors so that there are two columns vs. three. I might also hand-write on top of these photo pages I just printed out. Lots of fun things to consider.
I'm excited to be underway with bringing this all together. I've got some travel happening this week and Katie's wedding this weekend so I'll likely get back to completing this album in another week or so. I hope you guys are enjoying the process and I'm looking forward to seeing how your albums come together.


Looks amazing and so fun!! I love your pictures for each day, some of my favorites are in there! Still can't get over how much your kids have grown. This didn't happen with my kids, is that weird??
Great process you have too, I rushed mine and wish some of it was different. No redo's just going to keep going and get it done.
Happy almost wedding Katie, how exciting!!
Sign in or sign up to comment.
p.s.
I agree with the word changing for the weekend, it does fit!
Sign in or sign up to comment.
Looks wonderful! Always look forward to seeing how you put the week together - how inspiring! Are you considering making any of the elements from the layered template set available in 3x4 to use through out the year in Project Life? I'd buy those!
Sign in or sign up to comment.
As always Ali, inspirational. I've said for years,. you are my idol: )
Truly my go-to lady. Thanks so much
Sign in or sign up to comment.
Awesome! I've been so looking forward to seeing your album! I've been making myself wait to dig into mine (other than choosing my favorite photos and working on a list of highlights for each day) because I always get such great ideas when I see yours. I'm amazed at your speed in getting these done! I know it's your job, but still - I'm always impressed! :) Can't wait to see what you add to the inserts! Writing on the photo pages sounds intimidating to me but very cool! Have fun at Katie's wedding!
Sign in or sign up to comment.
I have been following along, and have enjoyed your process. I have been looking for the "this is my life" brushes, and cannot seem to find them. Are the text brushes available without the templates? Thanks for any help.
Yes - here you go: http://www.designerdigitals.com/digital-scrapbooking/supplies/product_info.php/products_id/16622
Thank you SO!
Sign in or sign up to comment.
Thanks for sharing, I love to see different peoples' process. I am considering a more digital project life approach for the future, so this helps with that idea. I have a good process for photo printing, but am always challenged by adding digital elements or words to the actual photos. Many times I get all the photos printed, then realize I want something digital and have to go back and reprint. Not a big deal. I am trying to use all my cool apps for adding things to photo ahead of time, but sometimes hard to figure out what you really want to display. Anyhoo, just thinking out loud! I love your Week in the Life!
Sign in or sign up to comment.
Love this beyond words...love your work...LOVE you style...and all the inspiration. Thank you!
Sign in or sign up to comment.
Love seeing how it comes together! Last week I made a 8.5x11 photo collage page digitally for each day (to be printed this week) and I am using a 9-card protector opposite the full page for journaling cards and other tidbits. Each photo collage page has a different one of your What Life Looks Like word brushes, LOVE those!! I didn't blog during that week, but am planning to do a post about how I did mine when it's all done. (still need to copy journaling onto the cards, I filled out my own forms for each day.)
Sign in or sign up to comment.
I have so enjoyed this project again this time around. I will be posting my photo pages on my blog tomorrow. So awesome to see the labour of love come together in a printed format. Thank you again for your inspiration, Ali.
Sign in or sign up to comment.
Thank you for the tip on RadLab! I checked it out and LOVE it! Much appreciated. :-)
Sign in or sign up to comment.
Thanks for sharing these. I've tried starting WITL a couple times before and I didn't make it to the end. This is the first year I'll have something tangible to remember my week by (in the form of a photo book). I finished with stage two today too. I feel like I have to step back, look at my notes/forms for the week, and think long and hard before tackling the journaling. I can't wait to see how you approach journaling this year. Thank you for the inspiration!
Sign in or sign up to comment.
Wonderful to share progress...thank you. Has helped me tackle my photos with renewed vigor...and am totally loving radlab!
Do you have any plans for an end page to finish it off? I'm trying to figure out what to do for the end page of my digi book.
I don't yet but I did just look through my 2010 or 2011 album and I did an end page that was really simple with just a few words right in the middle and one accent on top.
Sign in or sign up to comment.
Gorgeous stuff Ali!!
Loving your process. So simple in the method but explosive on the pages:-)
Sign in or sign up to comment.
Do you print yours off with a border or do you know how to get rid of it? Thanks for the help. So excited that my album is coming together!!
I did print them with a border (that's how the template is set up). I will be cutting out all those smaller rectangle photos.
Sign in or sign up to comment.
Looks fantastic Ali. Can't wait to see what you do with your divided page protectors too. Have a great weekend celebrating Katie's wedding. X
Sign in or sign up to comment.
Any tips on working with the text layers on the collage templates? I have the hardest time changing the wording on them. I know there's an easy way, but I can't seem to find it! Thanks for any info!
Sign in or sign up to comment.
Love the way you break it down into stages. I have things slightly broken down but into photos, deal with photos, and into album. I really need to think more about what I want to do with photos in a separate "deal with photos" stage. That would help me not have to go back so much and reprint and etc...Thanks for the tip!
Sign in or sign up to comment.