Week In The Life™ 2018 | Dealing With The Words
Tags:
One of the ways I have learned to complete Week In The Life™ over the years is by doing the "making" portion of the album in batches.
Yesterday I shared the start of my process where I created daily title pages, an opening page, and a reason why page. The next part in my process usually involves dealing with the journaling.
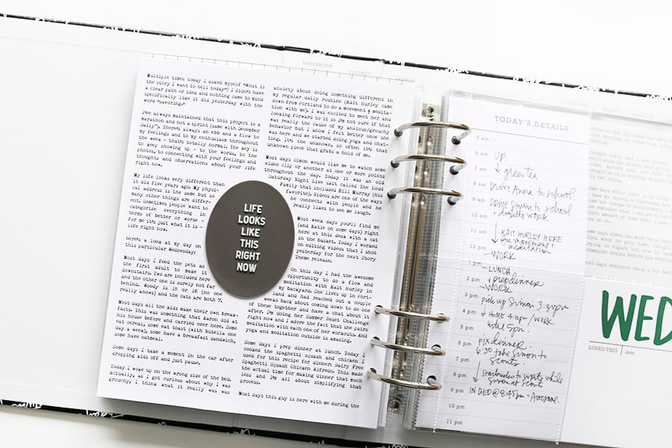
As you saw during the documenting week, I spend time at the end of each day typing up my journaling and posting it here to my blog. Now that it's time to get those words into my album I follow a simple process of copying and pasting my text into Illustrator (you could do this in Photoshop or Word ) where I format it based on the page size in my album. For this year's project I decided to "text wrap" my words around embellishments. This means that I measured the size of the embellishments I wanted to use, drew those shapes in Illustrator, and used the "text wrap" function (Object/Text Wrap) to have my words flow around that space on the page.
To learn how to do a text wrap in Photoshop go here and in Word go here.
I went back and forth between the rubber ovals from the Main Kit and the Thankful For This Day Circle Stamp as you'll see in the video below:
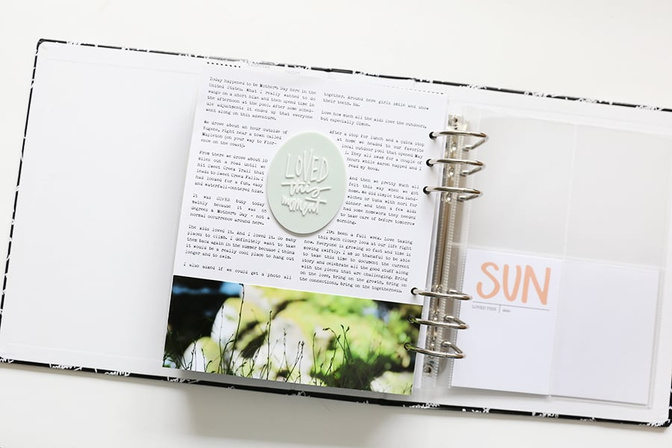
Here's a look at each of the journal pages so far in my album:
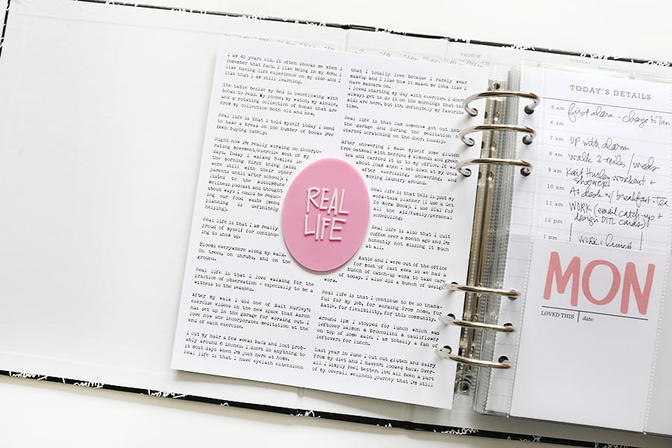
Monday had two additional journaling pages that I put into the full page 6x8 page protector.
Here's the second page:
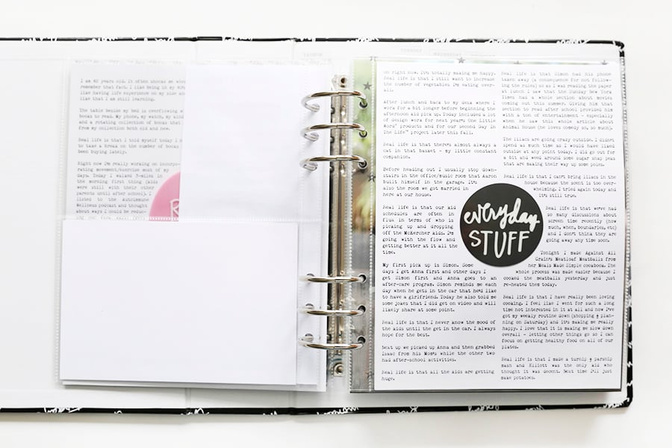
The "everyday stuff" plastic circle is from the Week In The Life™ Die Cut Bundle.
And the third page for Monday:
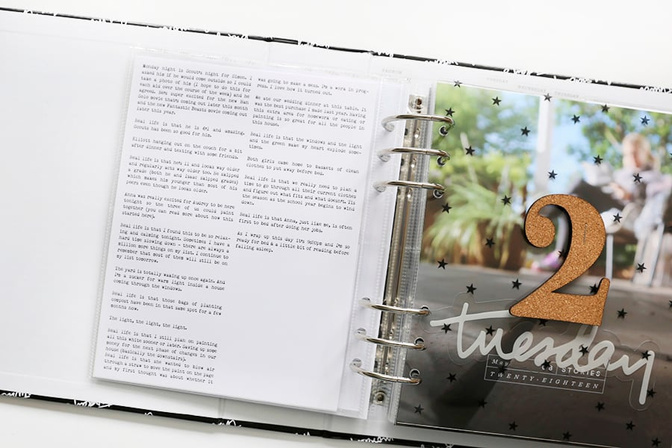
Here's Tuesday (Tuesday also has a second page that I'll share when I finish it up):
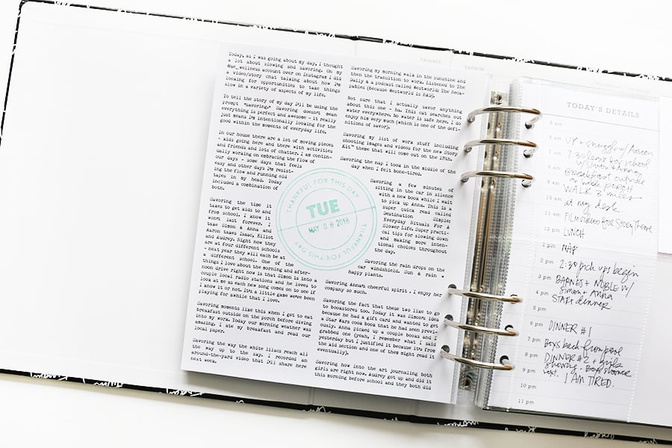
Here's Wednesday (also has a second page that I'll share later):
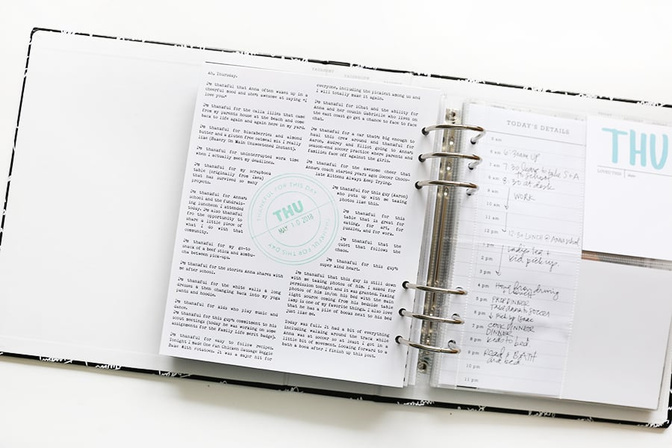
Here's Thursday:
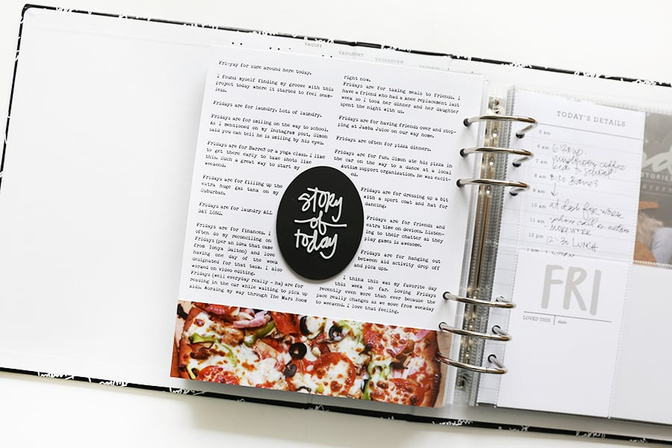
Here's Friday:
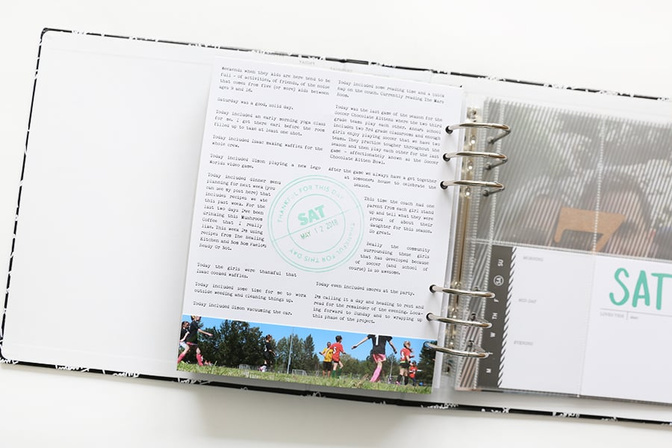
Here's Saturday:
Here's Sunday:
Next up I will finish adding photos to some of the second pages of journaling and print out the additional full page 6x8 photos.


Comments
Sign in or sign up to comment.
10 comments
I love how you added the photo at the bottom of your journaling.
Replies to christyj
That's just what I was thinking!
Sign in or sign up to reply.
Wow, love the look of this. I won't have quite as much journaling as you do but I really love how this is included, I especially love how the embellishments look next to the words. I usually just blurb about each photo kind of like I do in my Project Life weekly spreads.
Replies to LynnseyJo
Sign in or sign up to reply.
I love the videos that show each step of your process. It motivates me to tackle and complete the project. I struggle with the words but I keep trying. Thanks Ali.
Replies to Untiedt
Sign in or sign up to reply.
I always include lots (and lots) of words in my WITL projects and love your ideas here. I have a few things I do to break up the words, but will definitely try your idea of using the two columns and including an embellishment in the center. Great ideas!
Replies to Kristin409
Sign in or sign up to reply.
Does anyone know of a tutorial to wrap text that uses Photoshop Elements vs. CC? Thanks!
Replies to 180lab
Ali goes through it in her hybrid workshop.
Sign in or sign up to reply.
Thank you so much Ali for including a link to 'Word' instructions. I don't have Photoshop so any Word tips and hints are always welcome.
Replies to snapnscrap
Sign in or sign up to reply.
I'd like to text wrap around the stamp also but I can't seem to make it work (I'm using Photoshop Elements 15 and it doesn't appear that I can make separate pathways). Do I need full version Photoshop to apply the functions used in the video you've linked to this page?
Replies to mumemade
Sign in or sign up to reply.
I just love this journaling idea so I am blatantly scraplifting. I did word courses about 16 years ago and am so surprised with how much I've remembered! So loving putting my album together.
Replies to CarolineMcD
Sign in or sign up to reply.