Day In The Life™ 2019 | February 2019 Project Process

Big thanks to everyone who played along earlier this week with the first Day In The Life™ documenting day for 2019.
A few things I loved about the approach for this project this time around:
- I liked knowing approximately how many photos I was going to use for each section. That helped me narrow down the photos I took during the day.
- I like having the lens of morning, afternoon, and evening to break up the stories from the day. Bring on the story structures!
- I liked having the foundation design + lens already decided for me within the album itself. Sometimes I like to start with a blank slate for full creativity, but I also totally appreciate having a roadmap in place so I can focus on the words and photos.
- I liked using Instagram as the holding place for my words + photos. It was so easy to just copy and paste my words from Instagram and paste them for printing and adding into my album.
Here's how I bought this project together:

I'm using a 3x8 album + dividers to document my stories for this project this year.
I started my album with one of the 3x8 printed pages from the kit and used a small rolling date stamp to add "2019" along with the "just this" heart chipboard (see top image). I used just "2019" on this page because this album will contain two different days.

Behind the Intro Page I added an image with the February 26th word art on top to designate the actual date of documentation. I added the "here + now" chipboard from the kit on top of the page protector.
Download the February 26th word art here.
MORNING

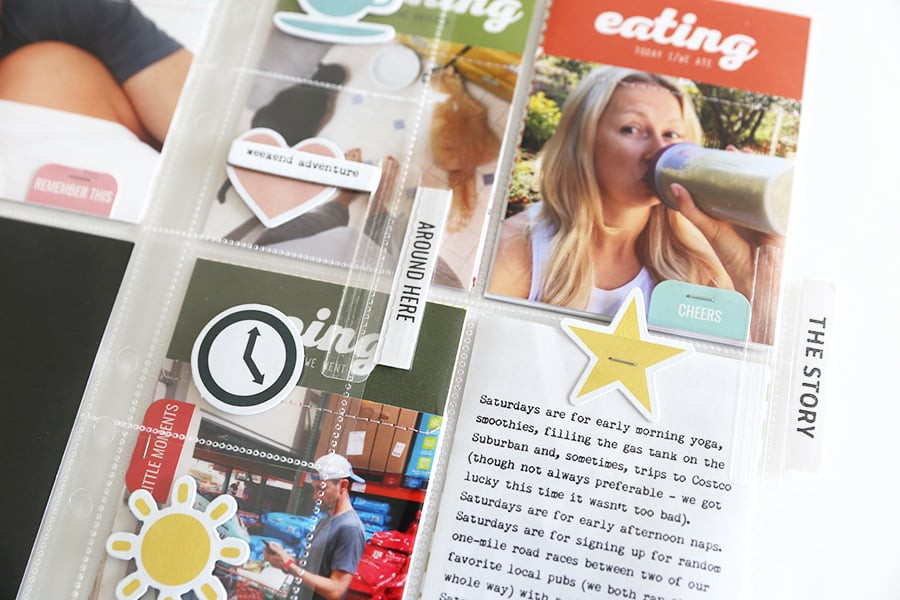
For this day I printed my photos either 3x4 or 3x8. I use my Epson PictureMate PM400 printer for the 3x4 and my Canon MG7720 Pixma printer for the 3x8 images (the images are actually larger than 3x8 because I sized them the same size as the page protector to add them in as a page).
Because my journaling for each section was longer (and tied to each photo) I decided to add a photo onto the "morning" card and print all my journaling out on a page that is the size of the page protector.
On top of each photo I used the number stamps from the kit + StazOn ink to add the time of the photo.

Along with the stamped times I added one of the black + white phrase stickers from the kit.

Behind the longer printed out journaling is where I added a larger photo + the stamped time + a chipboard heart.
AFTERNOON

And then I repeated those same design treatments for the rest of the project.
Repetition for the win.

Because I had extra space along the bottom of my journaling page I added this pattern paper + one of the chipboard pieces.

EVENING

For the last section I had only two photos so I decided to print out my journaling and add it to the "evening" card from the kit.

And to finish up this day I filled out the "gratitudes" card with some handwritten thoughts.
Also, here's a look at how I used the stamps to add 2019 to the spine of my album:

PROCESS VIDEO
Here's a video overview of my process:
SUPPLIES
- Day In The Life™ 2019 Kit (using for both documenting days + includes the stamp)
- Day In The Life™ 2019 3x8 Album Kit + Dividers
- Amy Tangerine Up Pattern Paper
- StazOn
- Time Roller Stamp (I didn't use this one this time but you could use it as an option for this project)
- Epson PictureMate PM400 Printer
- Canon Pixma MG7720
The next documenting day will be sometime this Fall. I'll post the date once we get a little more into the year. I'll be using the same kit of supplies that is currently available here and will use an hourly lens to tell the story of my day.


Always love your albums. Your pictures are always so light and bright! Mine seem dull and dark(er). I have the Epson Picturemate (the previous model) and a Canon Pixma MX922. Do you do a lot of editing or maybe it’s just because you are an awesome photographer. Either way, I have photo envy. :)
I generally make my photos fairly light on my computer before printing - knowing that the printers generally print darker. In this case there was also a light of light in my house from the snow outside.
Sign in or sign up to comment.
Hi Ali. For your first photo with word art on it how did you make the photo have a darker look to it. Did you use a special layer or just darken the photo? Thank you!
Hi! I added a black box and then adjusted the opacity to about 50%.
Sign in or sign up to comment.
I love your philosophy on story telling and have adapted that to fit my life. I am an empty nester and struggle to see the stories of my now simple life. However, I am learning to see those simple stories as important too. I have two questions for you. First, how do you remember to take pics? Do you set times or have you been doing this so long that you just remember? The second question is that you do not clean your stamps but how do you keep from getting ink all over your hands/workspace? Thank you for sharing your gifts with us.
Sign in or sign up to comment.
Loved this!!
Sign in or sign up to comment.
I always love seeing how you approach these projects! Thank you for sharing so much!
Sign in or sign up to comment.
Thanks so much for sharing Ali! Would you ever be willing to share a before/after of your pictures since you said you brighten them? I have a real problem with mine looking dark and dreary.
Sign in or sign up to comment.