December Daily 2010 | Creating A Foundation
Hello December Daily 2010.
I know many of you out there are thinking, "how can you even be thinking about Christmas?" I totally get it. Completely. I'm really all about my pumpkins and planning a Halloween party right now. But here's the deal: I also know, from a few years of experience, that planning ahead is really the key to enjoying the process of daily documentation during December.
If this is your first time embarking on the December Daily project or if you'd like a general refresher I recommend checking out my December Daily compilation page for many more details and ideas (and to see how its evolved from year to year with a complete listing of all the posts). You can also check out my past December Daily projects in a portfolio format here: 2008, 2009.
If you're here for round two or three or four, welcome back.
Today is the beginning of a series of posts about creating a December Daily album. The basic idea behind this project is to create an album that will hold your 2010 December stories. My album runs from December 1 through December 25th - some people choose to go through the end of the month but I've found that by the time Christmas hits I'm ready to move on to the next thing.
There are so many different ways to approach this project:
- Some people make it a game to use what they have on hand (all those years of stocking up on holiday products and then making one layout is paying off). If this is you, your goal over the next week is to get all your stuff in one place.
- Some people mix old products with new products (this is me).
- Some people do all digital albums.
- Some people do a mixture of digital and paper (this is me too).
- Some people do big albums and some people do really small ones.
Today's post will be an overview of my 2010 album. Next week I'll post step-by-steps for a couple pages, go into more details about the cover options with step-by-step images, and include a couple video tutorials on how to work with the printable elements I'm using in my album.
After next week you won't hear much about this album again until it gets much closer to December. Beginning on the 1st or 2nd of December I'll post my completed page and include information on my process, the story, supplies, etc.
DIGITAL ALBUM: Wondering about a full digital album? I've got a new set of products in the works that should be in the shop next weekend. Look for another post on that coming soon.
APPROACH + PROCESS
Each year when I start thinking about my December Daily album I like to do things a bit different - usually nothing drastic but enough of a change to keep it interesting. This year the biggest change you'll notice is that I've keep all the pages the same size. If you take a look at my past albums (2008 or 2009) you'll see that the pages are a mixture of sizes. This year I decided to keep them all 6 inches x 8 inches.
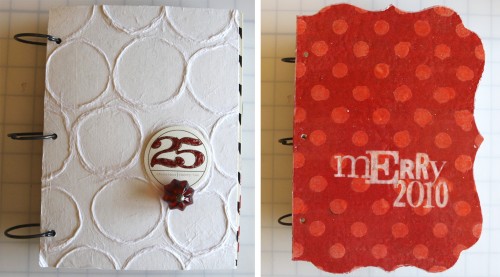
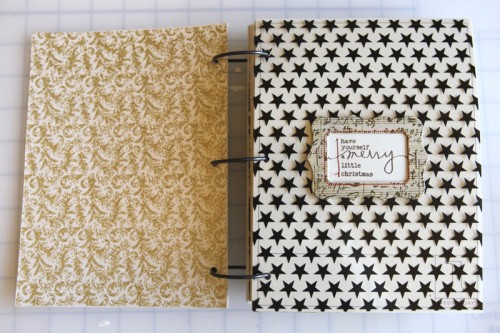
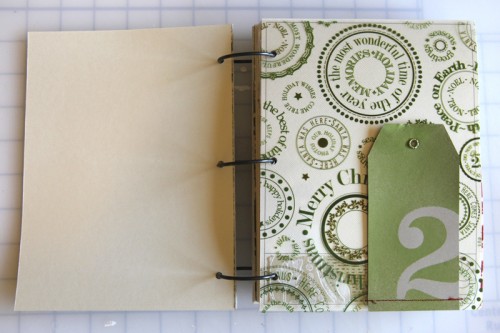
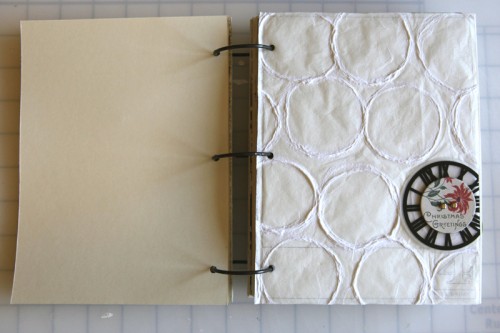
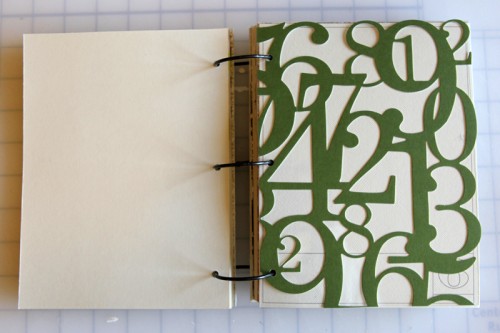
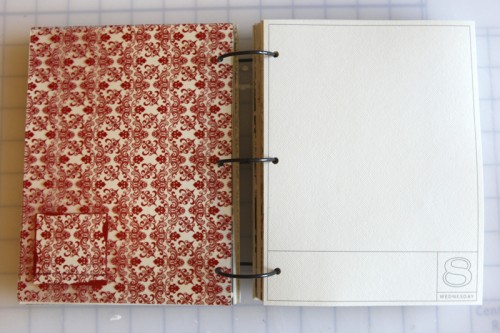
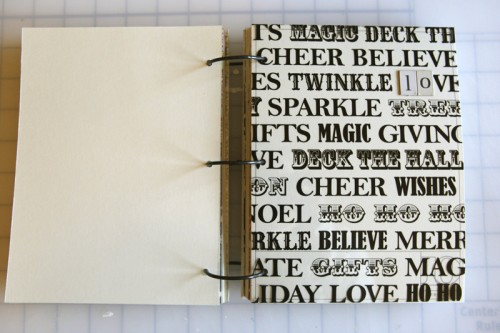
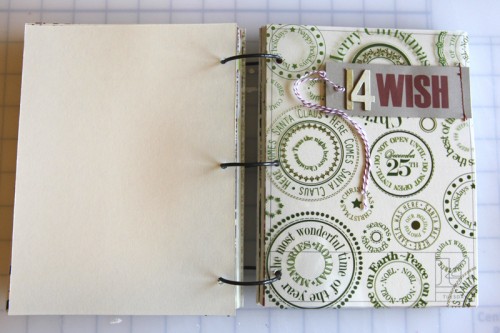
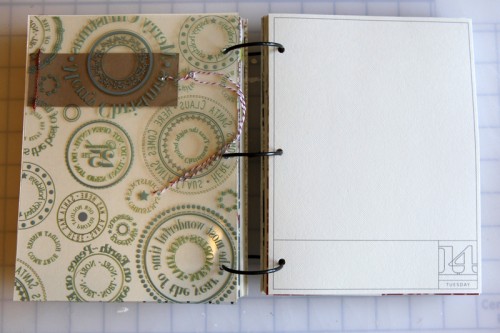
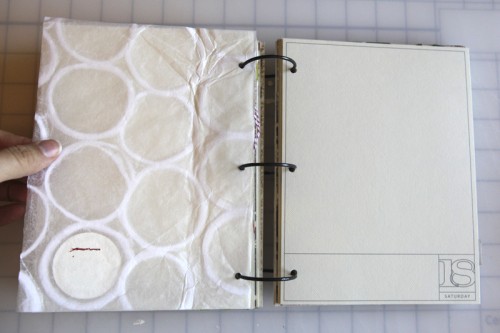
Another change? I made two different album covers this year: one using the Teresa Collins Bracket Shape Covers and a second one using recycled chipboard. The Teresa Collins Bracket Shape Covers were covered with sticky back canvas, painted, misted, and embossed - I'll show the full step-by-step next week. The second option, the one with the white circles, uses a sheet of specialty paper (working on a source) adhered on top of a piece of recycled chipboard trimmed to 6x8. I'm still not sure which one I'm going to use but I'm leaning towards the white one.
In terms of the process for putting this album together, my biggest suggestion is to break it down into small tasks and tackle one thing at a time. One project is cutting the transparencies to size. One project is pulling out numbers to add to the transparencies. One project is printing + cutting out the hybrid pages. One project is punching holes. Get the idea? Are you seeing why I like to work on this part in advance?
INSIDE PAGES | THE FORMULA
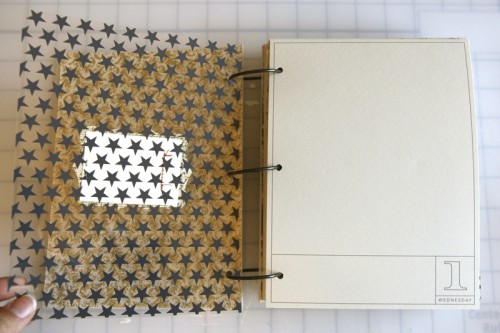
The formula for my 2010 album is very simple: a printed transparent page with a date and/or embellishment + a . Repeat. Repeat. Repeat.
Each and every page is 6 inches x 8 inches.
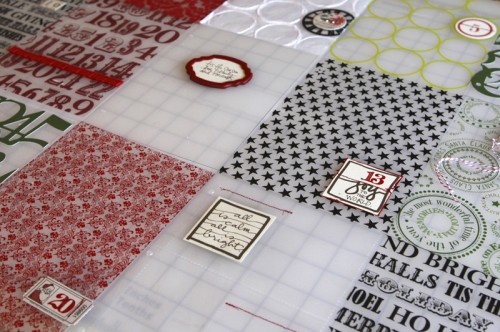
Here's a look at all the transparent pages laid out on my table:
If you're interested in making one similar to my 2010 book here's the basics of what you'll need:
- 13, 12x12 transparent sheets (see below for a supply list of the ones I used) that will be cut so you get 2, 6x8 inch pieces from each sheet.
- My 2010 December Daily 6x8 overlay package from Designer Digitals for the photo and/or journaling pages. The package includes a PDF file for simple printing if you're not familiar with Adobe Photoshop. The PDF file includes days 1 through 31. Look for a video tutorial on working with this package to come next week.
- A front and back cover.
- A variety of numbers, holiday papers and embellishments.
- A willingness to document the month of December and not stress about making it perfect or capturing every last detail.
- A commitment to enjoying your holiday season and being present with your family and friends. I continue to find that the process of participating in this album actually grounds me to the here & now and helps me be more conscious of how I live my holiday season.
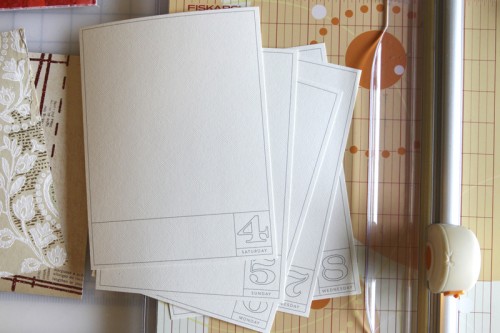
Here's a look at the 2010 December Daily overlays when printed on Bazzill Basics Cream Puff (Scrapbook.com 12x12 | 8.5x11) which is what I used throughout my album. You can also view these foundation images via my portfolio (click on an image and then click the arrows to go forward or backward throughout the portfolio).
You could easily wait to print these out until December and add your journaling right onto the PNG file + print as you go. These could also be placed on top of photos in Photoshop before printing (along with your journaling).
OPTION: One way to adapt this album to your own working style or family stories would be to do all transparencies and skip the printable portion. Your photos could be added in as the additional pages. Or maybe you're more interested in focusing on the words + photos. If that's the case maybe only use the printables and skip the transparent pages. Lots of options. If this is your first time I suggest playing along with me and being open to adapting as you go.
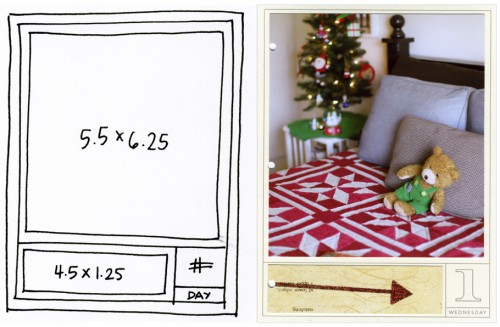
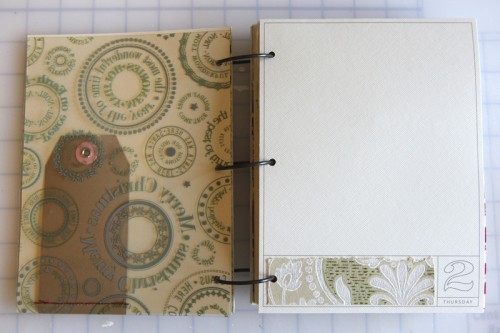
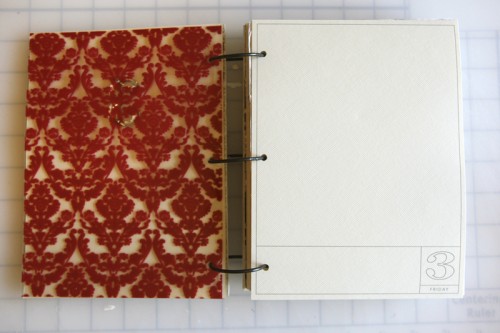
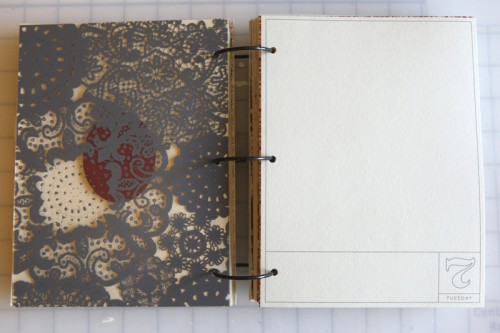
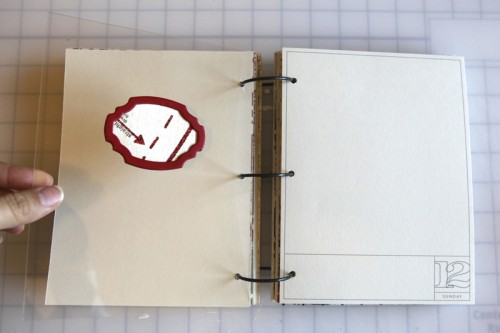
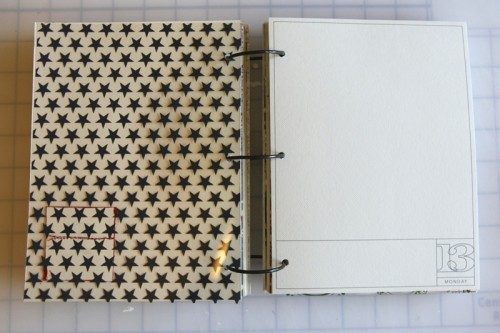
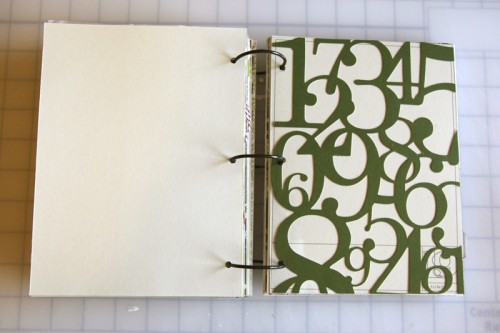
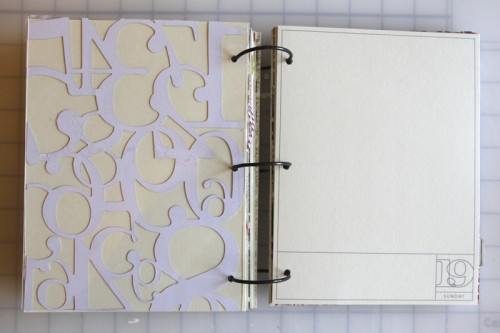
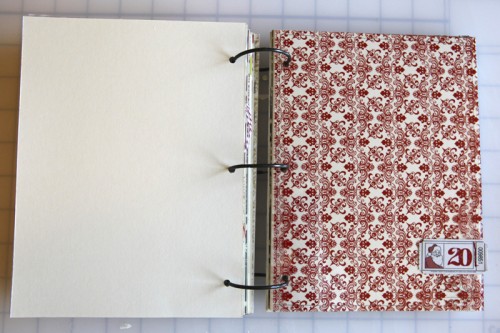
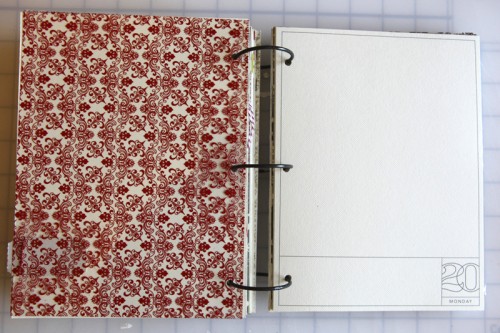
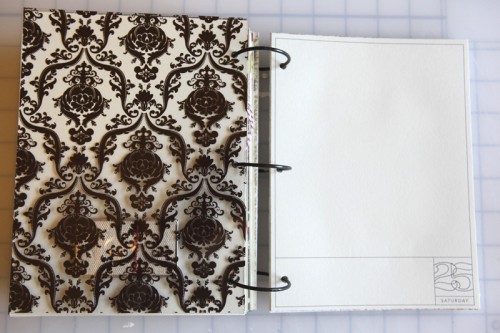
MY CURRENT PLAN WITH THE PRINTABLE PAGES: Above is a look at a sketch of the printable page and a completed page (using a photo from 2009 as a sample). My plan is that those two blocks of space will be used as a home for a photo (or a collage of photos), and/or journaling, and/or pattern paper.
I like that I'm creating a specific foundation for myself that has a bit of structure but will also be flexible when it comes to documenting each day. On some days I envision using that large block of space exclusively for journaling. On those days I might use the small block for a photo that captures the essence of something - a piece of the whole. On other days I might fill the large space with a photo and use the back of the cardstock for my journaling.
NOTE: Two 4x6 inch photos would fit perfectly on the back for those of you that don't print at home and find it easier to use a photo developer to add your photos once a week or at the end of the month.
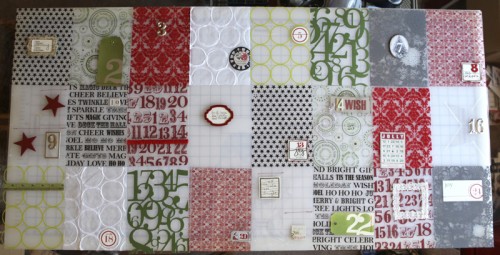
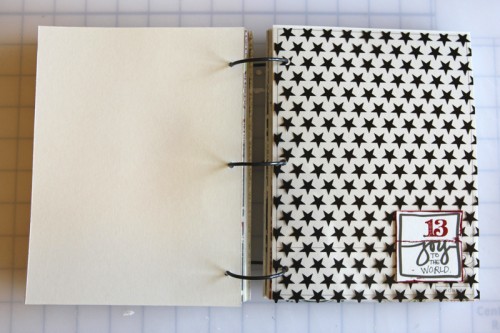
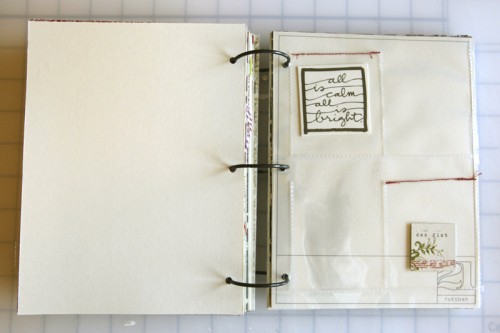
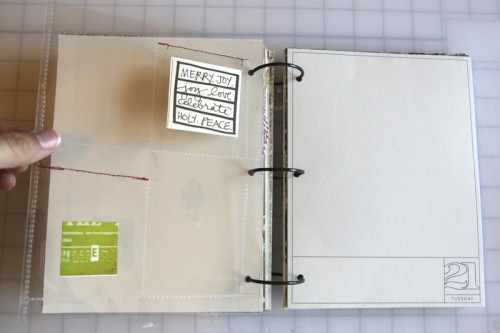
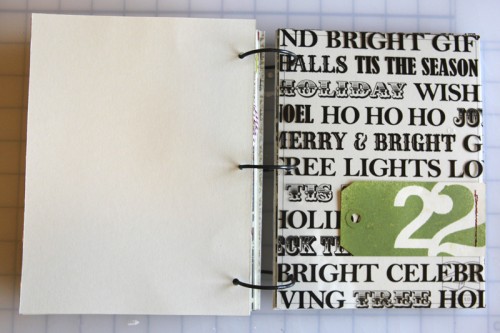
My goal with these foundation pages was to keep it simple. One or two accents and a number on top of each transparency. There's nothing earth-shattering here. It's a matter of picking out a few things and sticking them down (or stitching them as the case may be) and creating a home for your December content. A couple days don't have numbers (all the printable pages have both the number and the specific day of the week for 2010). Little bits of red machine stitching is the main way I attached elements to the transparencies - staples are always another good option.
You can do this.
Here's a look at the entire foundation:
DAY ONE
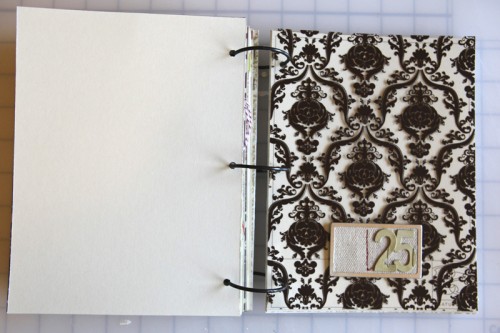
Anna Griffin Georgette Holiday Collection Double-Sided Cardstock Pack (inside cover)
Teresa Collins Star Transparency
AE for Technique Tuesday Good Cheer Stamps
Red Stitching
DAY TWO
Art Warehouse Hollyberry Transparency (green is sold out but here's a red one on clearance at scrapbook.com)
Studio Calico Mister Huey Apple Jack Color Mist
Making Memories Number Stickers
Vintage Wallpaper
Shipping Tag
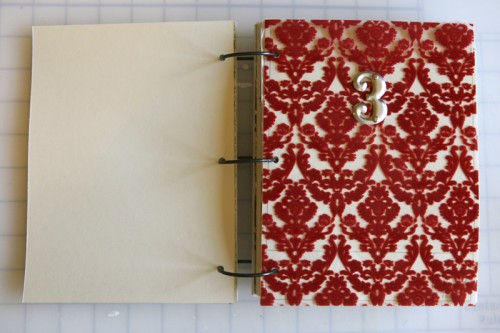
Fancy Pants Tradition Flocked Transparency
Tim Holtz Silver Numerals: Two Peas | Scrapbook.com
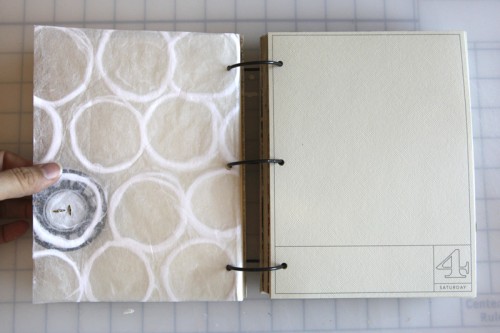
DAY FOUR
White Circle Paper
Maya Road Sheer Clocks
Jenni Bowlin Vintage Christmas Chipboard Buttons: Two Peas | Scrapbook.com
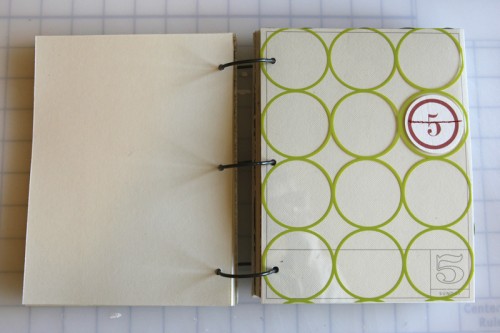
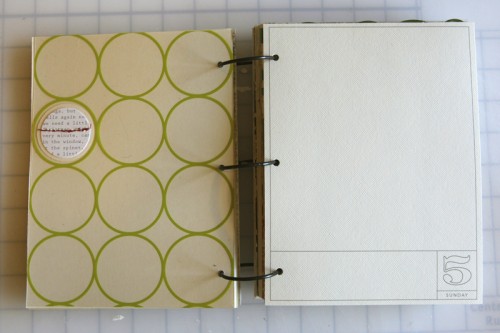
DAY FIVE
Every Jot & Tittle Red Number Tags
Hambly Chic Circles Transparent Overlay
Ormolu Christmas Tag (circle-punched)
KI Memories Lace Cardstock Numbers
Hambly Clearly Heavy Overlay
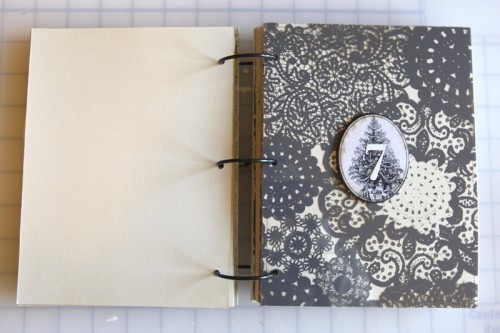
DAY SEVEN
Hambly Grey Doily Decor Overlay: Two Peas | Scrapbook.com
Making Memories Number Stickers
(I think the oval with the tree is from a K&Company chipbox from 2009)
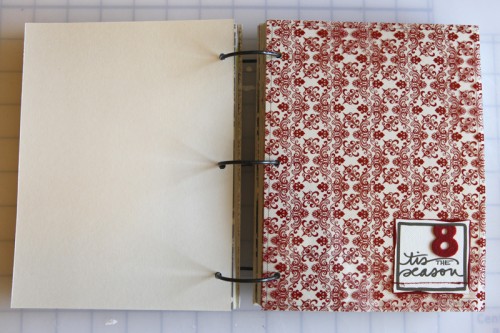
DAY EIGHT
Hamby Red Vintage Plaid (looks like there's no more red, but other colors are available)
AE Christmas Boxes from Designer Digitals
American Crafts Playroom Thickers (in green here)
Claudine Hellmuth Studio Paint Dash of Red: Two Peas | Scrapbook.com
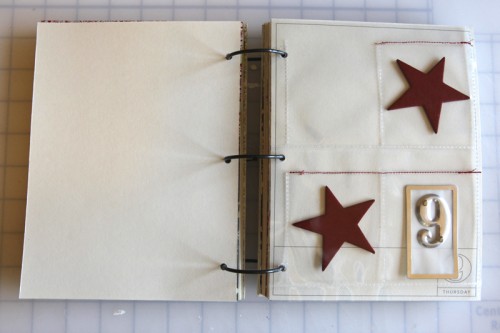
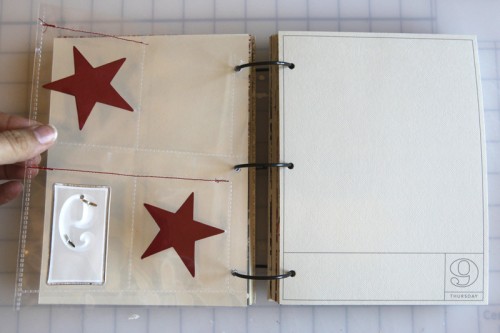
DAY NINE
8.5x11 Baseball Card Page Protectors
Bazzill Basics Star Chips (painted red)
Making Memories Metal Rimmed Tags
Tim Holtz Silver Numerals: Two Peas | Scrapbook.com
Claudine Hellmuth Studio Paint Dash of Red: Two Peas | Scrapbook.com
DAY TEN
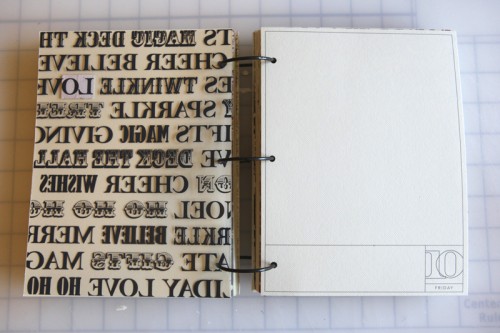
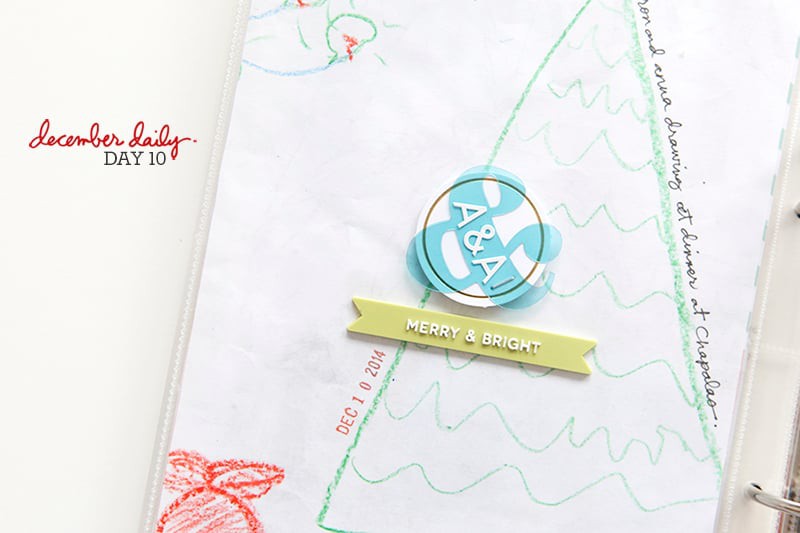
Teresa Collins Noel Collection Christmas Transparency
The Girls Paperie Eclectic Chipboard Alphabet: Two Peas | Scrapbook.com
DAY ELEVEN
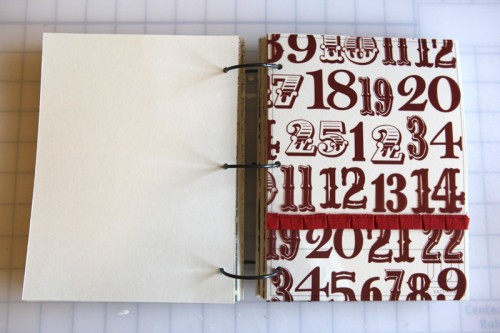
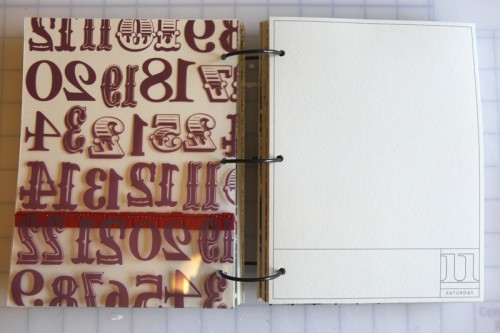
Teresa Collins Red Number Transparency
Maya Road Grosgrain Pleat Ribbon: Two Peas | Scrapbook.com
DAY TWELVE
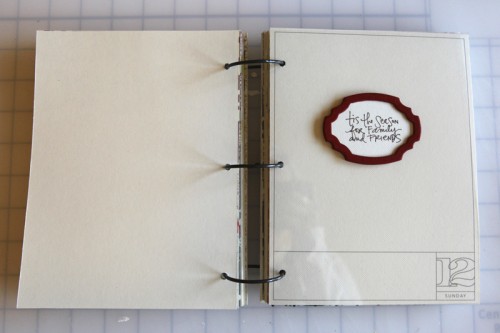
Maya Road Scroll Frames Chipboard
AE for Technique Tuesday Good Cheer Stamps
Claudine Hellmuth Studio Paint Dash of Red: Two Peas | Scrapbook.com
My Mind's Eye Lost & Found Union Square Moments Seamstress Paper: Two Peas | Scrapbook.com
Hambly Clearly Heavy Overlay
DAY THIRTEEN
Teresa Collins Star Transparency
AE Christmas Boxes from Designer Digitals
Jenni Bowlin Red Kindergarten Alphabet Rub Ons
Claudine Hellmuth Studio Paint Dash of Red: Two Peas | Scrapbook.com
DAY FOURTEEN
Art Warehouse Hollyberry Transparency (green is sold out but here's a red one on clearance at scrapbook.com)
The Girls Paperie Eclectic Chipboard Alphabet: Two Peas | Scrapbook.com
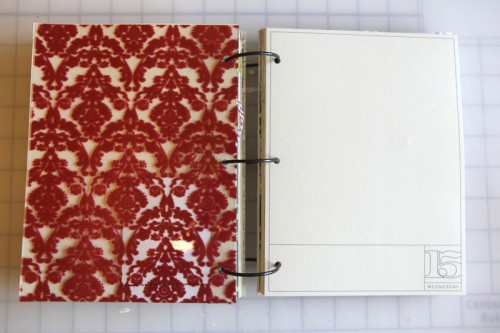
DAY FIFTEEN
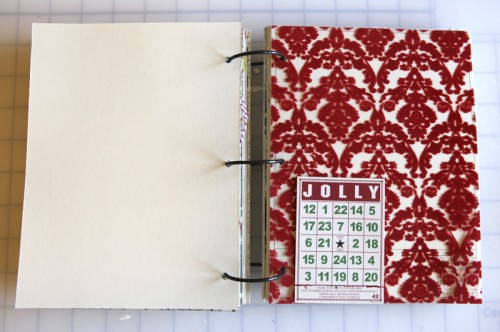
Fancy Pants Tradition Flocked Transparency
Jenni Bowlin Mini Bingo Cards Christmas
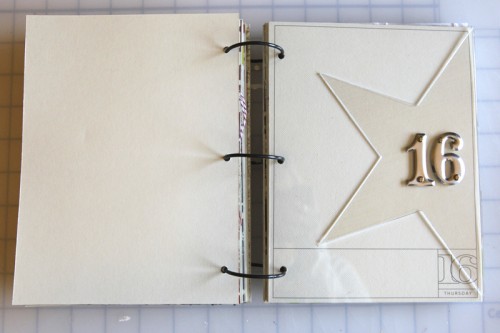
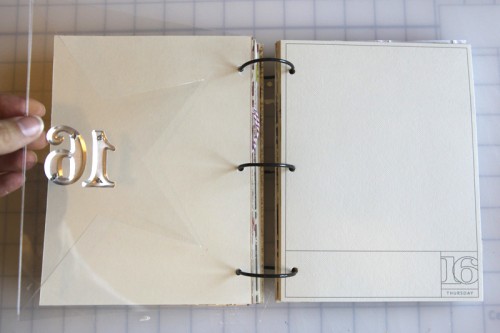
DAY SIXTEEN
Tim Holtz Silver Numerals: Two Peas | Scrapbook.com
Picture It Pageframe Large 8 inch Acrylic Star
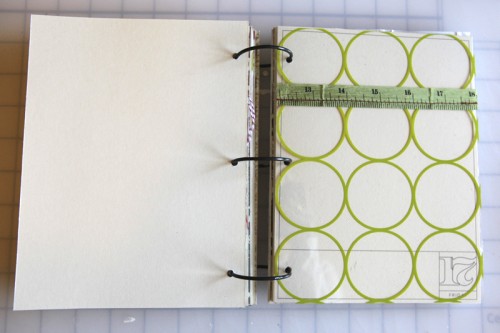
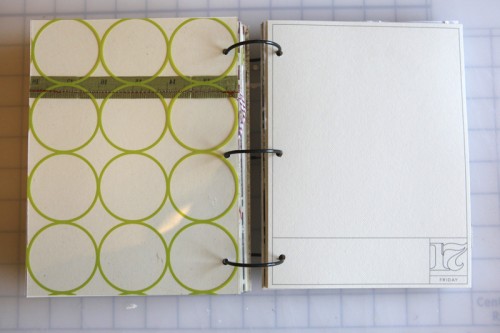
DAY SEVENTEEN
Hambly Chic Circles Transparent Overlay
The Girls Paperie Christmas Ribbon Trims
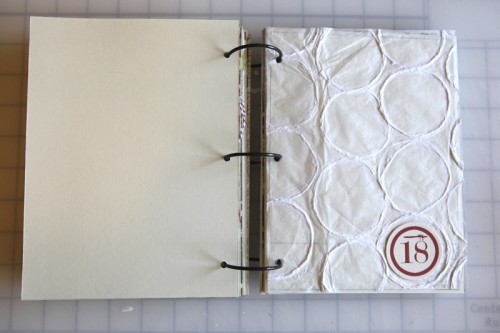
DAY EIGHTEEN
White Circle Paper
Every Jot & Tittle Red Number Tags
DAY NINETEEN
KI Memories Lace Cardstock Numbers
DAY TWENTY
Jenni Bowlin Christmas Printed Tickets
Hamby Red Vintage Plaid (looks like there's no more red, but other colors are available)
Jenni Bowlin Red Kindergarten Alphabet Rub Ons
DAY TWENTY-ONE
8.5x11 Baseball Card Page Protectors
The Girls Paperie Tinsel & Twig Christmas Sticker Pad
AE Christmas Boxes from Designer Digitals (available on Saturday)
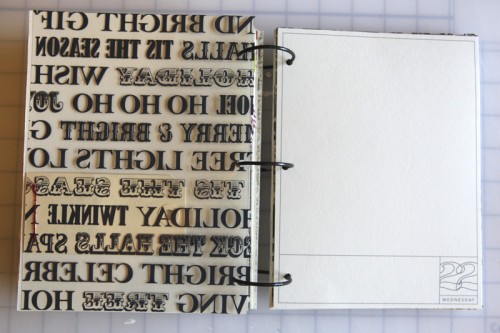
DAY TWENTY-TWO
Teresa Collins Noel Collection Christmas Transparency
Studio Calico Mister Huey Apple Jack Color Mist
Making Memories Number Stickers
Shipping Tag
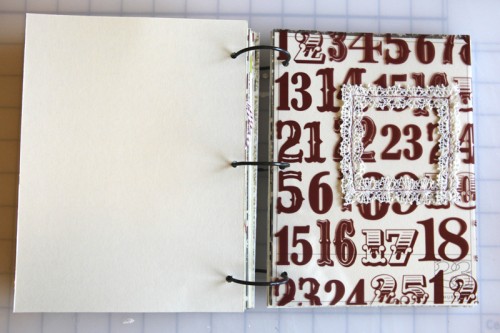
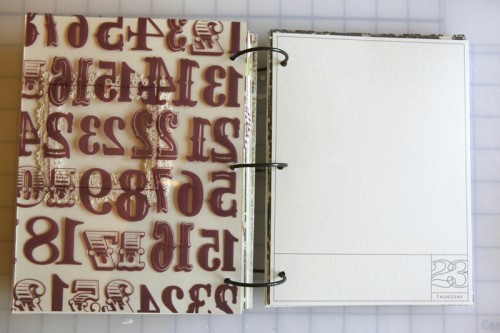
DAY TWENTY-THREE
Teresa Collins Red Number Transparency
K&Company Handmade Collection Fabric Art Lace Frames
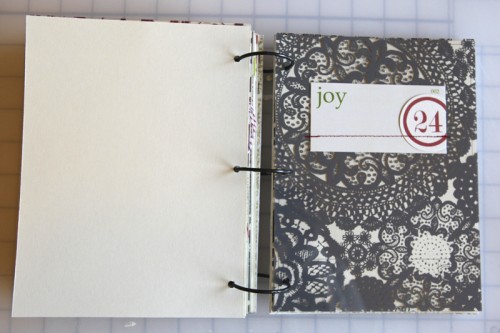
DAY TWENTY-FOUR
Hambly Grey Doily Decor Overlay: Two Peas | Scrapbook.com
Elle's Studio Vintage Christmas Flash Cards
Every Jot & Tittle Red Number Tags
DAY TWENTY-FIVE
Making Memories Metal Rimmed Canvas Tag
The Girls Paperie Eclectic Chipboard Alphabet: Two Peas | Scrapbook.com
Anna Griffin Georgette Holiday Collection Double-Sided Cardstock Pack
And there you have it.
You can do this.
Start now. Start simple. One task at a time.
Whenever possible, don't make it more complicated than it needs to be. Adapt it for your family, your lifestyle, your situation. The real joy comes from getting yourself to a point where you are ready to record the little moments in December - those little bits of life that happen so fast but that build on each other year after year. This album is a place for those memories.
Don't worry if you don't do something holiday related everyday in December. The stories and photos you include don't have to be holiday related - all of my previous albums contain non-holiday entries that document simple daily stories. I include what I feel like including from one day to the next.
Again, be sure to check out previous December Daily project posts on the compilation page. Feel free to include your questions here in the comments section.
Again, you can do this.
SHARE THE LOVE | DECEMBER DAILY BANNER, FLICKR, TWITTER
You're also invited to share and communicate with others about this project. Here's some links to get you started:
FLICKR GROUP: 2010 December Daily (view past galleries here: 2008, 2009)
TWITTER HASHTAG: #decdaily
BANNER: Last year there were some requests for a blog banner. Feel free to add this to your site (the code is listed below):
DAILY SPONSORSHIP
This year I'm offering daily sponsorship spots throughout the month of December on December Daily posts. Please email sponsors@aliedwards.com for more information.
For a full list of December Daily posts go here.

Elle’s Studio has just released their new designs for the holiday season. They have the perfect tags for your December Daily projects, advent calendars, scrapbook pages and more!




Love it!
Sign in or sign up to comment.
Fabulous! I have to say that even though I did mine last year with all the mixed up pages and loved every minute of working on it, this seems more doable and not as intimidating. I'm trying to figure out why I didn't get mine done and how I can keep up with it better this year. One problem is I don't have a good printer at home for my pics. I might try to buy one by then because I think this project is easier when you can print your pics daily.
I think I agree with the printing comment. There's definitely a sense of accomplishment + confidence that comes with being able to add your photos each day before moving on to the next.
Sign in or sign up to comment.
I think I'm going to add this to my list of "I want to do that!" I am a digital and paper scrapper, but think I'm going to stick with digital because we will be traveling half of December! I think it's realistic for me to get the pages done before and add to them in hotel rooms, etc. Thanks for guiding us through all of this Ali!
Sign in or sign up to comment.
Hi Ali, Last year was my first year doing a December Daily and I can't wait to get started on this years, in December everyday I look forward to checking your blog and Tim Holtz's(12 tags of Christmas) it is one of my daily traditions and thank you for including a list of the supplies you use it is so hopeful. And may everyone's holidays be blessed!
Sign in or sign up to comment.
Thanks for the inspiration Ali. I've been a sideliner for years admiring other's people work and last year i finally started the DD along with your group but unfortunately i never finished it. My goal is to finish it since i have all the pictures and stuff i collected last year in the month of December and start one for this year as well since i'am going to have all the Christmas goodies out.
Sign in or sign up to comment.
Your December Daily Album always cheers me up and gets me into the holiday spirit. I wish I had DD albums from my sons' childhood, they are both adults now. I follow along every year, but this year I am committed to joining in and completing my own. Thank you for sharing your ideas, inspiration, resources and how to techniques from your albums.
Cool Susi - your own December journey is an important story to tell :). It would be cool to even include things that bring up memories of past holidays with your boys.
Yes--I so agree with Ali. Our only son is now in law school and I have only watched December Daily from the sidelines the last two years. This year I have begun. One of my ideas is to include a few stories and/or photos from years past as well as to just delight in the joy of each day.
Sign in or sign up to comment.
I've watched you do the last few years, and I think I may join in this year. We have started an activity based advent calendar with our kids and I think this would be an ideal way to document it. Thanks so much for all the creative inspiration you provide!
Sign in or sign up to comment.
wow! i love this. i ordered an album last week from CTMH that i think i'm going to use. this is getting me feeling motivated. thanks for always sharing your ideas.
Sign in or sign up to comment.
I'm really considering taking part in this, I even blogged about it. You make everything look so gorgeous!!
Cool Rachel - and I bet you have more to document than you think you do. I totally wish I had an album like this from when I was in my 20's to look back on now.
Sign in or sign up to comment.
Wow, Ali! In years past I've always been so overwhelmed by the December Daily, but this year, you've made it look very simple & attainable. Thank you!
Awesome. That's what I was hoping for ;). Take it in small bits, one thing at a time, and it will all come together.
Sign in or sign up to comment.
Hi Ali--I first became aware of your Daily December albums while reading Heather Nichols and Mish Woodersons blogs. So, this will be my first attempt at making my own album, and I can't thank you enough for all of your information and guidance in your post today! And, if ever there was a December to try this; this is it. Our daughter turns 16 on December 16th, and we're going to Disney World over Christmas to celebrate. She wants her picture taken with Tigger while she's wearing a "Sweet 16" crown.
Sign in or sign up to comment.
Thank you, thank you, thank you for showing us how to keep it simple this year. I really love this project, but last year I think I got overwhelmed by trying to incorporate all the different papers, embellishments, techniques, page-sizes...and it became stressful and not fun. And the joy kind of got sucked out of the process. This year, I'm keeping the design very simple, and reminding myself that the journaling and photos are the stars of the show. (I actually wrote that on a post-it and stuck it on my monitor. I should really staple one to my forehead as well.)
Cool. That's really what I'm going for this year.
Sign in or sign up to comment.
This is great! I think I might attempt my own variation this year. Last year I did a December Daily Photo and I'd like to step it up with journaling. :-)
Sign in or sign up to comment.
I think your foundation is my favorite so far. Can't wait to see what all you have created for digi!
Sign in or sign up to comment.
This is my third year doing DD with you, Ali. Every year I look forward to seeing how you will format your book. That is always the springboard for what I decide to do. I am liking the simple, consistent format of your album this year. As much as I have always loved the variety of pages you had in previous albums, it always took me a long time to decide what size, color, shape, etc. I would do for my pages. So, simplicity is speaking to me this year. However, I was happy to still see that you included 2 baseball card pages! That I can manage. Thanks again for the inspiration.
Sign in or sign up to comment.
Ali, if you get a free moment, I was wondering...Where did you find black loose-leaf rings and what size are they? 2 inches? Also did you reinforce the holes that were punched? Did you use some sort of template to make sure all of the holes were in the right place on each page? Thanks!
Hi Stacy - those rings came with the Teresa Collins bracket covers. They are 1.5 inches and fit right now. My guess, from previous experience, is that I'm going to need bigger ones even though I don't plan to add more pages. When I add my photos to the printed cards (and likely some printed journaling) it's going to get bigger. I'm ordering some 2 inch and 2.5 inch rings from Amazon to have on hand.
Sign in or sign up to comment.
This is beautiful... this I am drawn to for the simplicity. Just wondering when you refer to transparencies... are these really transparencies, like you would us in an old overhead projector? Or are these more thin like a vellum so to speak?
Thank you for showing all your steps... I always enjoy reading about your daily decembers but never done one myself... this year I might actually try it. Thank you!
Hi Kim - they are definitely thicker than overhead transparencies you would pick up at an office supply store. They are thick enough to hold up on their own as a page. If you are ordering some for the first time I really recommend the ones from Hambly - they are great quality.
Closer to acrylic ;).
Sign in or sign up to comment.
Hi Ali - I love this layout! I was wondering if you could give a few tips on sewing on elements. A friend gave me her old sewing machine, and I would like to give it a try, but I'm kind of worried about starting. Any tips would be great, Thanks.
I wish I had some more specific tips for you Samantha. I'm really just sticking the papers/elements in there and pushing them through. There's definitely a bit of experimentation involved. Try starting with just a straight stitch and adjusting the tension if needed - I'd start with just two pieces of paper and see what happens. It will be an adventure!
Sign in or sign up to comment.
Thanks for sharing this challenge again this year. I finally participated in last year's and LOVED it! I don't have the time to create my own album (this is what stopped me in the past) so last year, I purchased a mini album from every jot and tittle. It was a breeze to personalize and I was able to complete the entire album on schedule (even took it on vacation to Kauai for ten days!). I just purchased this year's version and I'm ready to go!
Sign in or sign up to comment.
Wow!! I love your book! I'm going to have to get started on this..maybe this weekend!
Sign in or sign up to comment.
Thank you so much for this post Ali. I'm ever so grateful that you've done it early. It gives me time to think and prepare my album without running out and buying things that wont work for me and my style. And of course I love that you introduce me to to some great products I didn't know about.
There sure are a lot of families out there that can thank you for the documentation of their Christmases past!
Loved reading what you wrote on your blog before reading here Brooke :).
Sign in or sign up to comment.
Ali,
Will you be selling a December Daily kit on Cocoa Daisy this year?
Hi Lisa - no kit this year.
Sign in or sign up to comment.
Well this just gave me the much needed kick in the pants to finish up last year's December Daily! Love your 2010 album. So it is 50 pages and 2 covers thick? What size rings are you using? 3 inches?
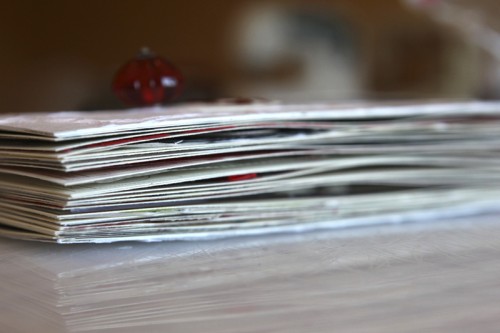
Right now I've got 1.5 inch on there...just ordered some 2 and some 2.5 inch from amazon. Once the photos are added it will definitely be thicker.
Sign in or sign up to comment.
Thanks for sharing this Ali, I have decided to give myself permission to do a december daily this year, I know that sounds a bit silly, but I am jewish, and felt kinda awkard about doing a daily holidays album about something that is not "mine", as i have a big family get together but don't celebrate christmas in the tradition sense. Looking at your album, though I realised that this is like a week in the life, it is a different way of documenting life, my life, my kids life, it is not every minute of each day for a week, but each day something small for a month. December is the end of the year, the final days before we hit new years and celebrate another year turning. That is important, and different for everyone, so I am going to try to let go the feeling that I am somehow an imposter doing a "holidays" album, and embrace the memory keeping in all its fun and joy. I just wanted to say thanks for your ongoing and infectious attitude that "it is ok". Thanks Ali.
I love your attitude Ruth. It's all about celebrating life :).
Sign in or sign up to comment.
Thank-you! I started mine last week as well, and this gives me so much inspiration! You rock!
Sign in or sign up to comment.